37 C
Dubai
Saturday, May 3, 2025
Home Blog Page 76

Create a Custom root Folder for all the Mailboxes (Bulk) in Office365

Creating Custom Root folders in all the mailboxes in office365

image

Download and install Exchange Web services 2.2 from the machine you are going to execute it.(Am doing it from my windows 8 desktop)

http://www.microsoft.com/en-in/download/confirmation.aspx?id=42951

Open Powershell in your Local machine (Run as administrator)

$UserCredential = Get-Credential

image

$Session = New-PSSession -ConfigurationName Microsoft.Exchange -ConnectionUri https://outlook.office365.com/powershell-liveid/ -Credential $UserCredential -Authentication Basic -AllowRedirection
Import-PSSession $Session

Now verified am into Office365 powershell successfully.

image

Add impersonation permission for the user who is going to execute it –

New-managementroleassignment –Role “ApplicationImpersonation” –user sathesh@careexchange.onmicrosoft.com

Close and Reopen Powershell and connect back to office365 powershell

So that permission gets refreshed.

=================

Download Script –

CustomRootFolder.ps1

=================

Do the Edits Required in the Script –

****

msgfolderroot denotes the Root of the Mailbox , If you specify inbox for example it creates the folder below the inbox

****

Change your

User name – Password in the script

****

$a = get-mailbox

denotes all the mailbox

To Run for a single mailbox (use the alias)

$a = get-mailbox  “User1”

Save it a Notepad and Rename it to .ps1 file

Locate the script. being in the office 365 powershell session

.\create.ps1 for example

image

Great !!

You learnt how to create Custom root folders for all the mailboxes in Office365

Download Script –

CustomRootFolder.ps1

Quick Tip – Import-RecipientDataProperty – Exchange 2013

image

Exchange 2013 has a Cmdlet to Import Mailbox/Contact display Picture.

Import-RecipientDataProperty -Identity Cloud@careexchange.in -Picture -FileData ([Byte[]]$(Get-Content -Path “C:\Users\photo\Cloudteam.jpg” -Encoding Byte -ReadCount 0))

Note – The picture must be a JPEG file and shouldn’t be larger than 10 kilobytes (KB)

You can pipe Mail Contacts and Mailbox from Exchange Management Shell.

Other Cmdlet can be used

Set-UserPhoto “Cloud@careexchange.in” -PictureData ([System.IO.File]::ReadAllBytes(“C:\Users\photo\Cloudteam.jpg”))

Active Sync Phones (Android) asking PIN after configuring Exchange 2013 Mailbox

Here is the Situation –

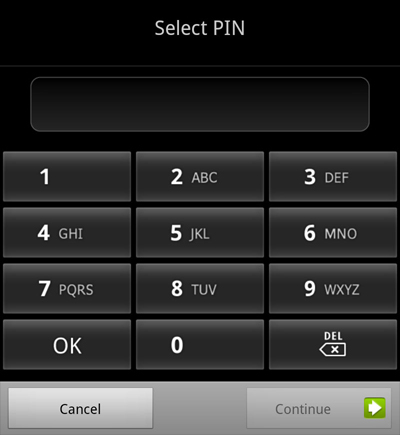
Android phone is not Configured with a PIN .

It means . When you unlock the phone . you directly go inside the phone . without any authentication PIN

Now after Configuring a Exchange 2013 Mailbox  . you are forced to set a PIN when your mobile device policies is configured in such a way.

So that when you unlock the phone. you are forced to enter a PIN every time.


Now how to disable this on Exchange 2013 Server ?

Login to Exchange Control Panel (ECP) –> Mobile –> Mobile Device Mailbox Policies

Double Click on the default Policy –> Uncheck “Require a password”

Note: By Default its unchecked.


image

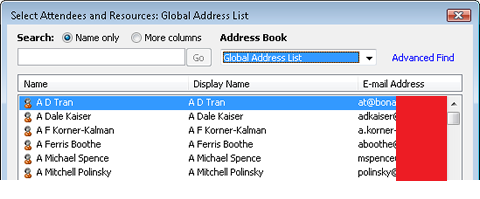
How to do a manual Gal sync from Exchange 2010 to Exchange 2013

Here is the Scenario –

Exchange 2010 Users/Contacts/Distribution groups  to show up in their Exchange 2013 forest as Mail Contacts.

Lets see how to export from Exchange 2010 forest and Import them In Exchange 2013 forest as Mail Contacts


Step 1 –

Taking a Manual Dump of Mailboxes,Mail Contacts,Distribution Groups

Open Exchange Management Shell in Exchange 2010


Run

Get-Mailbox -ResultSize Unlimited | Select-Object * | Export-csv C:\Mailboxes.csv
Get-MailContact -ResultSize Unlimited | Select-Object * | Export-Csv C:\MailContacts.csv


Get-DistributionGroup -ResultSize Unlimited | Select-Object * | Export-Csv C:\DistributionGroups.csv

image


Step 2 –

Move the Mailboxes.csv,MailContacts.csv,DistributionGroups.csv to the Exchange 2013 Server root C Drive.


Step 3 –

Start the transcript in Exchange 2013 Shell So that you can save all the happening in this session

Start-Transcript C:\log.txt

image


Step 4 –

Create a new Root OU “Contacts” and import them

–Change Appropriate Domain Name in OrganizationalUnit Paramter.

Run

Import-Csv "C:\Mailboxes.csv" | Foreach{new-mailcontact -name $_.displayname -ExternalEmailAddress $_.Primarysmtpaddress -OrganizationalUnit "domain.com/Contacts"}
Import-Csv "C:\Mailcontacts.csv" | Foreach{new-mailcontact -name $_.displayname -ExternalEmailAddress $_.Primarysmtpaddress -OrganizationalUnit "domain.com/Contacts"}
Import-Csv "C:\distributionGroups.csv" | Foreach{new-mailcontact -name $_.displayname -ExternalEmailAddress $_.Primarysmtpaddress -OrganizationalUnit "domain.com/Contacts"}


Step 5-

Update your Global Address list and Offline Address book .

Note – GAL takes effect instantly in Outlook Web Access, Address book in Outlook Takes at least 24 hours to update.

Get-GlobalAddressList | Update-GlobalAddressList
Get-OfflineAddressBook | Update-OfflineAddressBook

image

Step 6-

Stop-Transcript

image

Exchange 3rd Party Migration Tools Comparison Chart

Have Compared three Exchange Migration Tools which can be used for Cross forest Exchange migrations .

This review is completely based on my thoughts.

Exchange Migration Tools Binary Tree Quest MigrationWiz
Migration
Infrastructure
Need to build
migration
infrastructure
Need to build
migration
infrastructure
Complete
web based migration
Cost per
Mailbox
High(worth it) Medium Low
Hardware
Requirements
Physical/VM
are required.
Physical/VM are
required.
No Physical/VM are required
Time
Duration
Depends on
Migration
Server
Performance
Depends on
Migration
Server Performance
Approx
2 hours
for migrating 1 GB mailbox
Source
Environment
Configuration
The tool will act
as integrator
from
the Source
Environment
The tool will act
as integrator
from the Source
Environment
Service account
requires permissions.
Post
Migration
Action
Outlook
re-configures
automatically
using auto-discover
Outlook
re-configures
automatically
using auto-discover
Outlook
Re-Configuration
needs to be
done manually
Rollback Plan
in case of
failures
Available Available Available
Co-existence
Tool
Available Available Not available
Support Available Available Available
Migration
Performance
High performance Low compared
to Binary Tree
Medium
Back-end
Tasks
Naming
conversion,
folder
formatting
happens
automatically.
Naming
conversion,
folder formatting
happens
automatically.
Naming conversion,
folder formatting happens automatically.
Throttling
Policy
Can migrate 1 mailbox per server at a time Can migrate upto 8 mailboxes per server at a time No limit
Preservation
of Existing
OST file for
Outlook
Available Not available Not available
Directory Synchronization
Tool
Available Available Not available
Public Folder
Migration
Support
Available Available Available
Supported
Source
Platforms
Exchange
2003 – 2019
Exchange
2003 – 2019
Exchange
2003-2019
Additional
Source
Platforms
None None Office 365
Google Apps
Gmail
Groupwise
LotusNotes
Zimbra
IMAP/POP
Destination
Platform (Skipped
legacy Platforms)
Exchange
2010-2013
Exchange
2010-2013
Exchange
2010-2013
Additional Destination Platforms Not available
in this product
Not available
in this product
Office 365/Google Apps/Gmail

Overall Review –

Binary Tree –

Cross forest Exchange to Exchange migrations happens with Ease .
OST Preservation is Unique.
It can provide rich Co-existence. (Note: This review covers only E2E (Exchange to Exchange Migration product from binary tree)

Quest –

It can does the job perfectly for Exchange to Exchange migrations.
Lacks in user friendly interface but fits within the criteria for migration.

Migrationwiz –

Can be used only for data migration.
Pre and Post migration activities needs to be taken care manually.
Best Suitable solution for Service Providers and Small/medium businesses who can do a Cutover Migration
(Same tool can be used for many platforms)

How to Configure Cross forest connectors (Mail flow) Exchange 2010 to Exchange 2013


Source Domain – CareExchange.in

Target Domain – TargetExchange.in


Lets say CareExchange.in is migrating mailboxes across forest to TargetExchange.in

For Exchange TestUser@CareExchange.in  is migrated from CareExchange.in to TargetExchange.in

But still the administrator looks for a solution that TestUser has to receive email of “CareExchange.in” , Until the migration gets over completely. (As Mx Record will be changed only in the end of the migration)

Its kind of setting up cross forest coexistence mail flow between Exchange 2010 and Exchange 2013 Forest.


This process only should be done . when the migration is going to happen for a short period of time . Cause the domain CareExchange.in will be set to internal relay in both the forests . The disadvantage of this process is , if some one sends a email where user doesn’t exist – User wont get a NDR.

If you wish to over come it . We need to introduce an another domain. and set forwarder in the source and internal relay is set only on the target domain . Am not going to go deep about it  , in this post.


Configuring Accepted Domains  –

First Make Sure – The Domain is Set to Internal Relay (In Source Domain – CareExchange.in)

Organization Configuration – Hub Transport – Accepted Domains – Right Click Properties

image

And Login to Target Domain – TargetExchange.in

Organization Configuration – Hub Transport – Accepted Domains – Right Click New Accepted Domain

Create a Internal-Relay domain

image

Configuring Send Connector on the Source Domain (CareExchange.in) –

Note : (CareExchange.in) Email Hits the Source Server . Searches for the user ,

When User Exists , Email is delivered

When user does not exist , Send the email to the target domain .

When User does not exist on source and destination domain , there is NO NDR Gets generated

So try to Have this solution for a short period of time.

Login to Exchange 2010 Server – (Domain – CareExchange.in)

Organization Configuration – Hub Transport – Connectors – New Send Connector

Name  – Cross Forest Connector

Intented Use – Custom

image

Address – CareExchange.in (SourceDomain)

Cost – 1

(If you already have a connector with Cost 1 – No problem , Please continue)

image

Choose – Route Email Through the following smart hosts

Enter the  Destination Exchange Server 2013 IP address.

Make Sure IP is pinging and reachable

image


Choose Authentication is None

If you wish to use TLS , Follow the below link

http://technet.microsoft.com/en-us/library/bb123546%28v=exchg.141%29.aspx


image

Now Send Connector is Configured on the source Domain,


Note – If you have SPF Records you should add it as SPAM filter may block while you send from Target domain to source domain

Do add your_domain.com, TXT, “v=spf1 MX:your_smtp_server_name ip4:192.168.0.1/16 ~all”

OR

Create a Send Connector from Target 2013 to Source as we did in Exchange 2010

× How can I help you?