
I hope you now had completed testing this scenario IMAP and CEM migration using Part 2 & Part 3 of this Blog Series, let us now move on to next part for Hybrid migration(Exchange 2010).
Hybrid Migration (Exchange 2010)
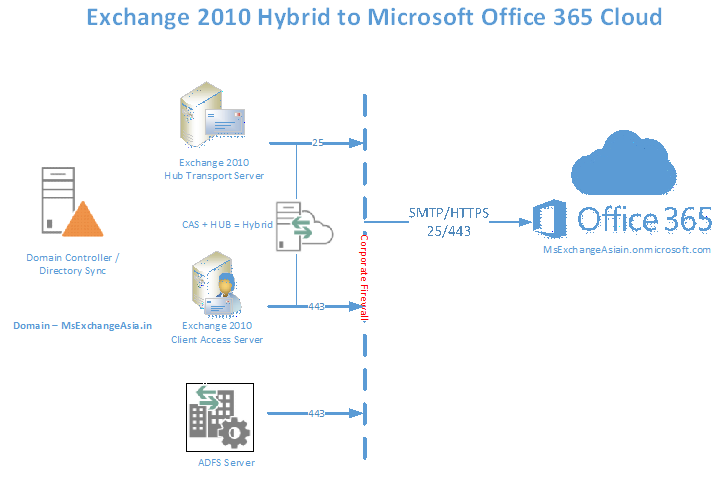
If you have a long term goal to maintain mailboxes in your on premise (having Exchange 2010) as well as cloud or have an existing Exchange 2003 or 2007 you must have minimal Exchange 2010 on premise installed and setup to enable Hybrid Deployment.
Having this Hybrid setup configured due to the Exchange Federation and Org. relationship setup with MS Office 365 there are no two separate Exchange organization and we can take the advantage of the below features.
-
Cloud Based Email Archiving
-
Secure Mail Routing between on premise / online
-
Unified Global Address List
-
Centralized mail flow – Outbound
-
Single Outlook WebApp URL for Online / on Premise
-
Move Mailbox on Premise to Online
-
Centralized Management Console
-
Message Tracking / Mail Tips / Multi-Mailbox Search
Let us have the LAB ready and setup in place.
1. Virtual Machine – In my lab I have configured in below steps.
-
Created a Virtual machines on Windows Azure trial subscription under Virtual Network 192.168.0.0 network address range with cloud services as follow. The VM configuration consist of 2 Core, 3.5 GB RAM
-
Exchange 2010(Windows 2008 R2) – mitpe2k10.cloudapp.net
-
ADFS (Server 2012 R2) – mitpadfs.cloudapp.net
-
ADS & DirSync (Server 2012 R2) – mitpadfs.cloudapp.net

-
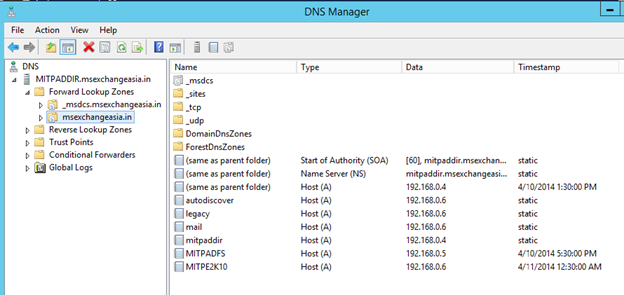
Installed Domain Controller services with msexchangeasia.in having DNS AD integrated & reverse lookup zone for the subnet 192.168.0.0 and made sure the records are populated for DC.
-
Installing and Configuring Exchange 2010 SP3
-
Downloaded the Exchange 2010 SP3 from the Microsoft Download Center and extracted the setup in C:\Exchange 2010 folder
-
Installed prerequisites like dot net framework 3.5 using windows features
-
The Organization preparation will be done during the Exchange 2010(SP3) Installation setup.
-
Run through the Exchange 2010 setup installation, provided the organization name as MSExchangeAsia, Post Exchange 2010 Installation rebooted the server.
-
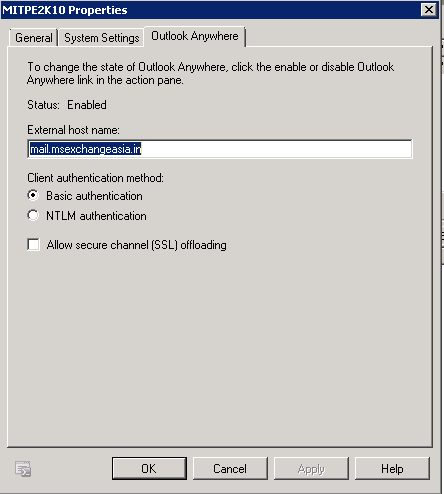
Enabled Outlook Anywhere with the FQDN – mail.msexchangeasia.in
-
-
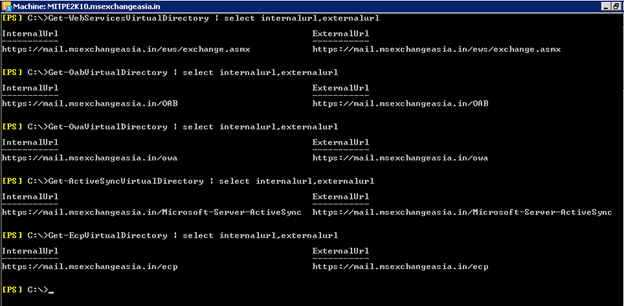
Configured the Exchange Virtual Directories – AutodiscoverServiceInternalURI / Web-Services / OAB / OWA / EAS Virtual Directories

-
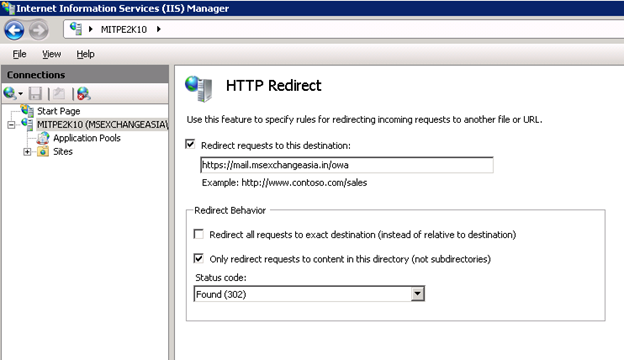
Configured OWA virtual directory for OWA redirection
-
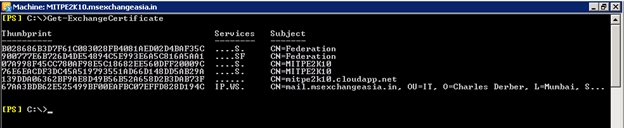
Imported SAN certificate using power shell and enabled Exchange service like IIS on to the certificate. (Certificate should have minimum 3 records mail/autodiscover/sts – for ADFS)
-
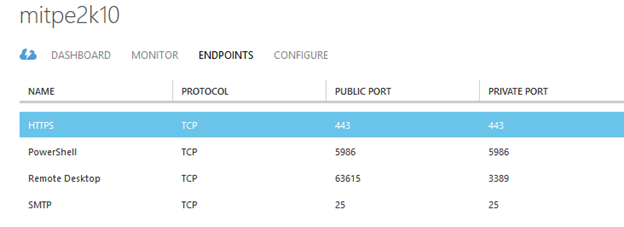
Create an endpoint rules for SMTP (25) and SSL (443) services so that Exchange 2010 can send / receive emails and connect using autodiscover service externally on internet
-
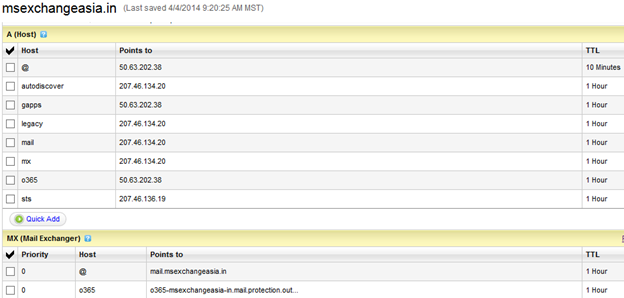
Create internet / intranet DNS record like webmail.msexchangeasia.in / autodiscover.msexchangeasia.in / sts.msexchangeasia.in / mx.msexchangeasia.in
-
Test the Exchange 2010 Outlook anywhere functionality @ https://testexchangeconnectivity.com and verify the test is successful.
-
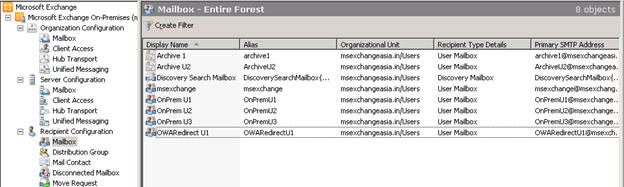
Let us create some test mailboxes, groups and contacts at on premise Exchange organization so that we can test the successful migration.
-
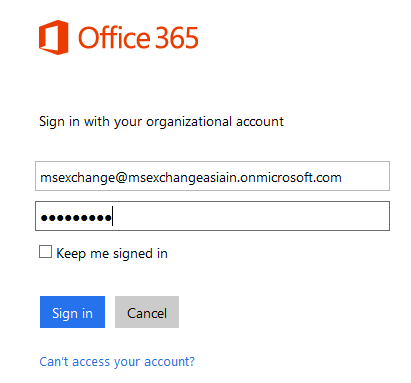
I have created an Office 365 trial subscription tenant msexchangeasiain.onmicrosoft.com and will login to the portal.microsoftonline.com
-
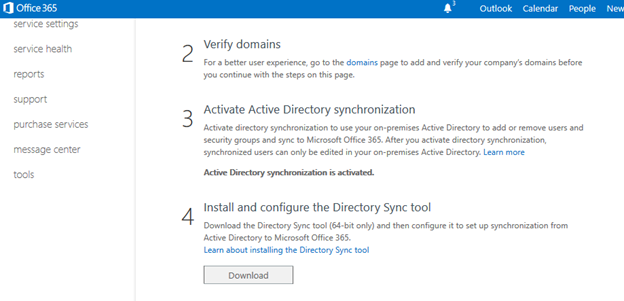
Verify the domain is added and verified as mentioned below.

-
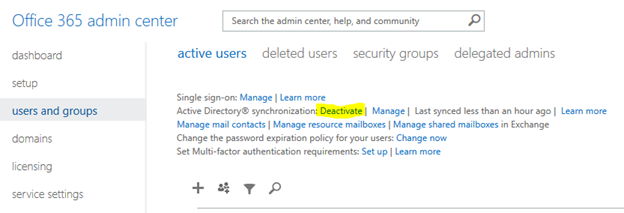
Next step to enable Active Directory Synchronization, in my case I have already activated and hence it’s showing as deactivated.
-
Click on Manage next to DIRSync to down the setup file and install on domain controller
-
Prior to running the setup the OS must meet the prerequisite on OS 2012 to have dot net framework 3.5 & 4.0. Post meeting the pre-requisites just install the DirSync tool. Directory Sync Configuration Icon will be available on the desktop and you can double click to further pending configuration.
-
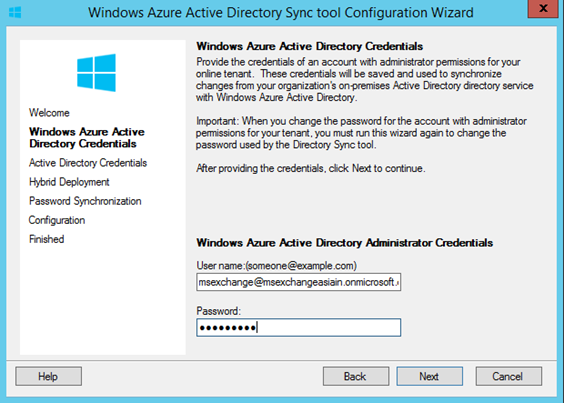
Enter the Office 365 tenant admin credentials and in my case msexchange@msexchangeasiain.onmicrosoft.com
-
Enter the on premise admin credentials who is member of enterprise and domain admin groups.

-
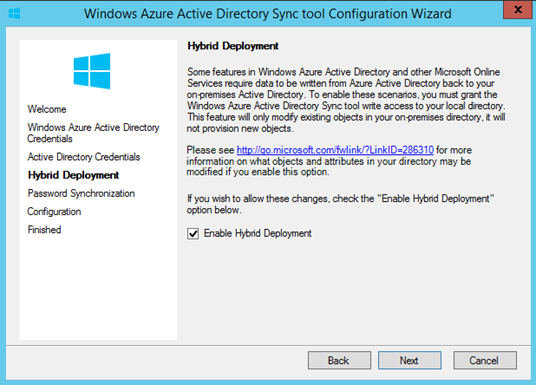
Select enable Hybrid Deployment to give access DirSync tool to allow certain attributes write back from cloud to on premise.
-
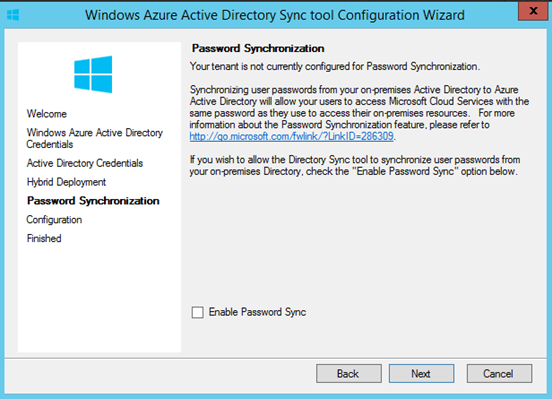
Do not enable password Sync as for single sign we will be using ADFS for this LAB
-
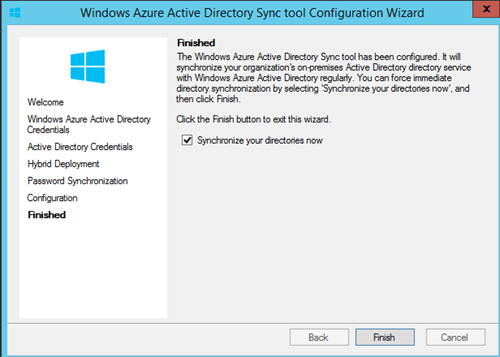
Click on next to complete the configuration

-
You can select the option synchronize your directories now which forces tool to start synchronizing the objects on cloud
-
You could also run manually via PowerShell shortcut which is available in the setup installed path on DirSync server which I have created as shortcut on desktop.

-
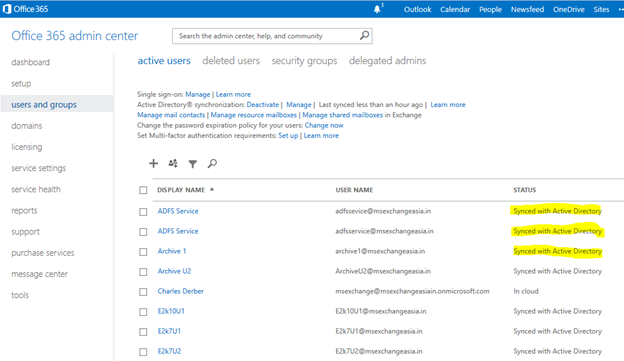
Now verify on Office 365 portal if the users are successful synchronized to cloud as mentioned below.
Hope this have been informative and stay tuned for our last part of LAB scenario on Hybrid (Exchange 2010) migration which will cover the prerequisites and setups to configure ADFS / Hybrid and some features testing.

.)
Good one charles
Thanks
Thanks for sharing your thoughts on reviews. Regards