31 C
Dubai
Sunday, May 11, 2025
Home Blog Page 91

How to Load balance Client access Server in Exchange Server 2013 – High Availability


Unlike Exchange 2010 , You need not to have a Create Client Access Array .

Just have a Hardware Load Balancer like CISCO ACE , KEMP , F5  , Have the Exchange Servers in the farm , Exchange server can start serving requests to the clients .

Its quite simple and easy.

image

The above diagram is a Good Design for minimum cost . With High Availability Configured


We will need two VIP’s to Configure Mail flow and Client access ,

In my Scenario , Have used Cisco ACE to Load balance the Client Access and Mailflow.


Create Two Server Farms –

1.CASArray

2.MailFlow

image

Assigned One Virtual IP to CASArray Server Farm

image

Assigned One Virtual IP to Mailflow Server Farm

image

No Extra Configuration required on the Client Access Servers.

It will start serving the Requests.

Make sure your Predictor is Round Robin basis. So that Both the servers will be functional . with better performance.

Note:

For Mailbox Server High Availability –> You need to Create a Database Availability Group (DAG)

https://www.azure365pro.com/how-to-create-a-database-availability-group-in-exchange-2013/


Smile

How to Configure Website Panel 2.1 for Exchange Server 2013

Once

Website Panel Portal is Ready

Website Panel Enterprise Server is Ready

Website Panel Server is Ready


If not – Follow the below link

How to Install Website Panel 2.1 Windows Server 2012

https://www.azure365pro.com/how-to-install-website-panel-2-1-windows-server-2012/


Login to Website Panel Portal –

Login : ServerAdmin

Password : ******

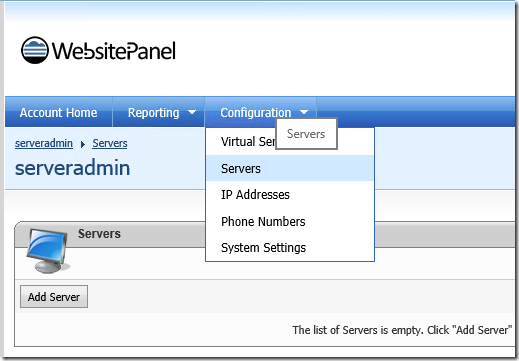
Choose Configuration – Servers – Choose ADD server
image

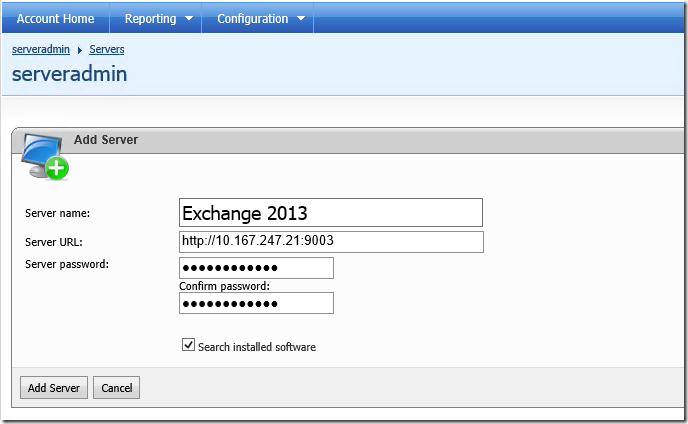
Enter the Server Name – Friendly Name

Server URL : The Server URL you configured website panel Server

Enter the Server Password
image

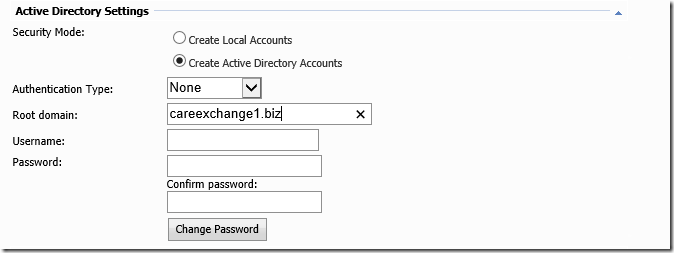
Now Choose Active Directory Settings

Choose –

Create Active Directory accounts

Authentication Type – None

Root domain – CareExchange1.biz

Leave the other things empty
image

Now Click On Hosted Exchange – Click add

image


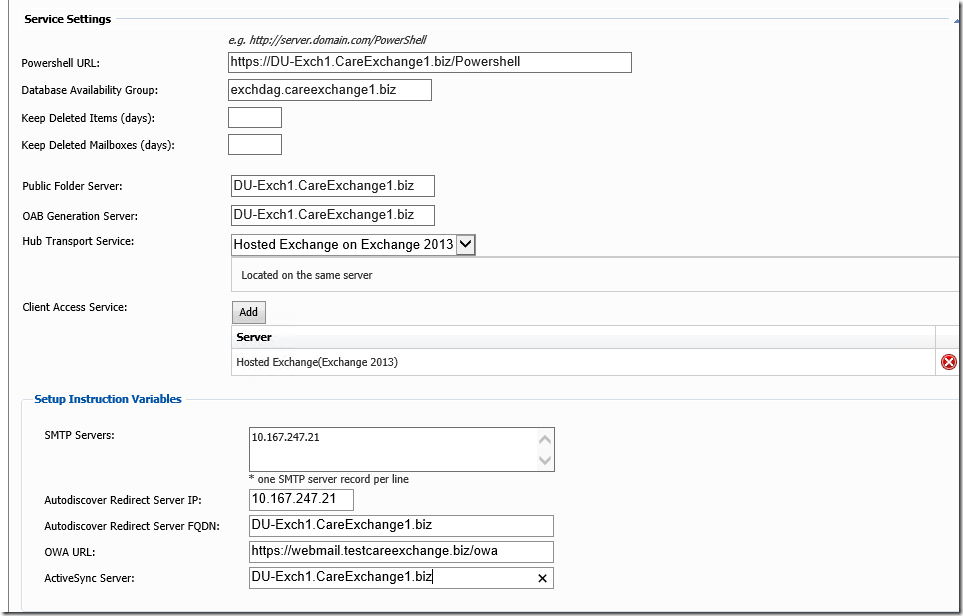
Enter PowerShell URL – Make Sure you enter HTTPS URL

Note – If website panel server and Websitepanel Portal and Website panel Enterprise server on exchange 2013 Server – Enter Powershell URL as https://127.0.0.1/powershell

Note : To find your PowerShell URL  – Open Exchange management Shell – Get-PowershellVirtualDirectory | FL Name,*URL*

Database Availability Group : If available fill it . if DAG is not configured . leave it empty

Enter Public Folder Server

Enter OAB Generation Server

Leave the HUB Role

Add the Client Access server you are configuring

SMTP Server choose the Exchange Server  IP

Enter Auto discover Details
image


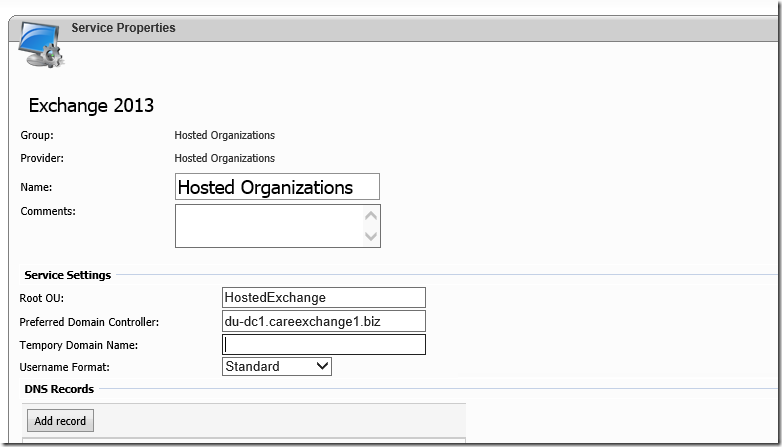
Now Choose Hosted Organizations

Enter the Root OU

Enter the Preferred Domain Controller
image


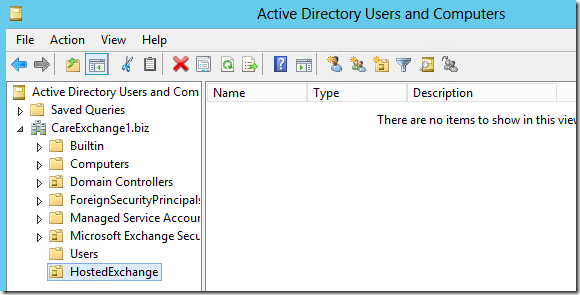
Make Sure the OU you are entering is available in ADUC – If not please Create it
image

Now Configuration part is done.

Add a hosting plan for a Customer – am just creating a test hosting plan

Serveradmin – Hosting Plans – Create Hosting plan
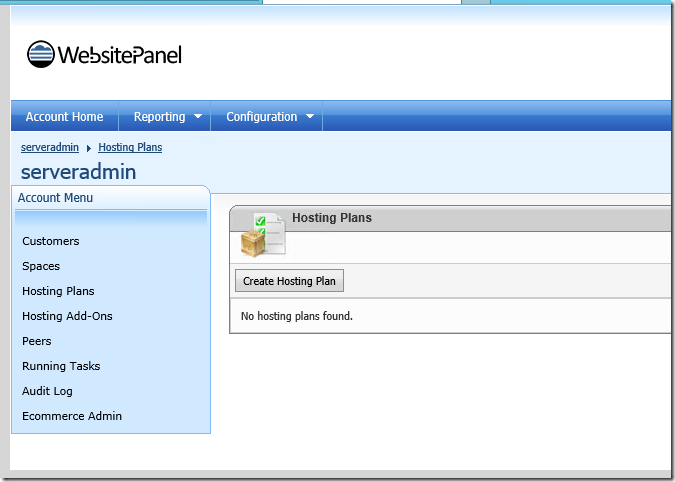
image

Choose the Exchange 2013 Server as the Target server

Make Sure Domain is set to unlimited or a Value

So that you can create a Organization
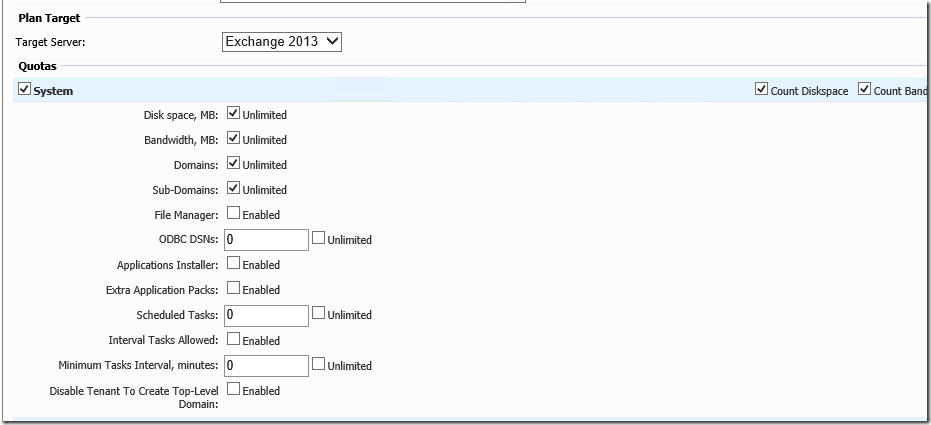
image

Choose hosted Exchange

As its just for testing . am placing things on Unlimited
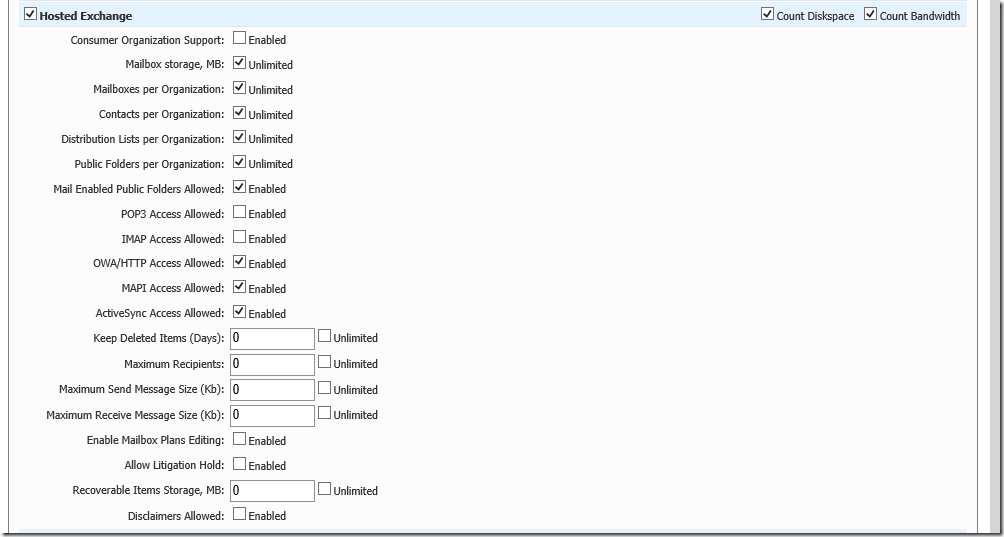
image

Now Choose Hosted Organizations

do the same

image

Go the end – Choose SAVE

now a hosting plan is ready

image


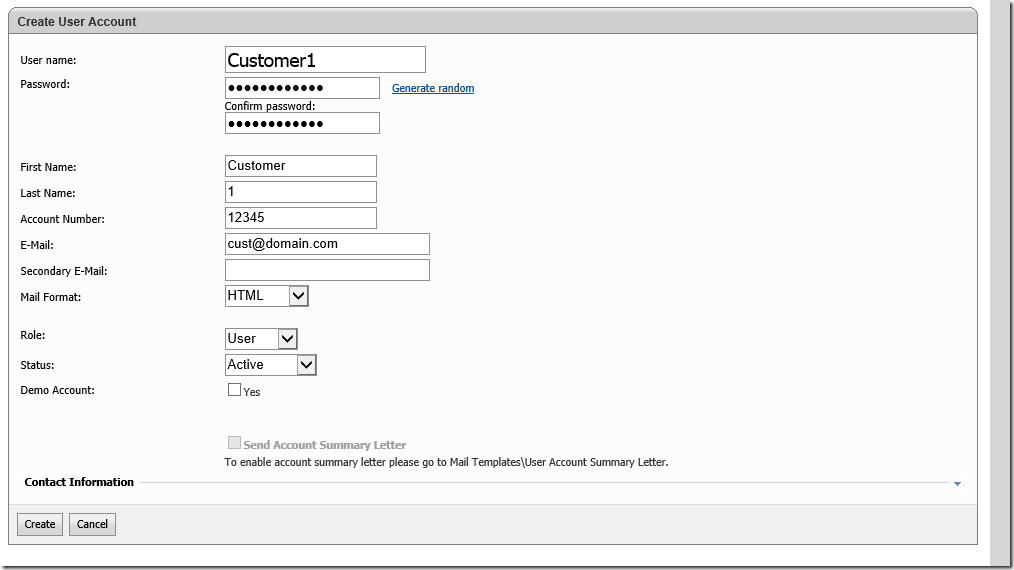
Now Create a Customer

image

Now Click on Create hosting space

image


Now Assign the hosting space we created to the customer

Add the domain of the Customer
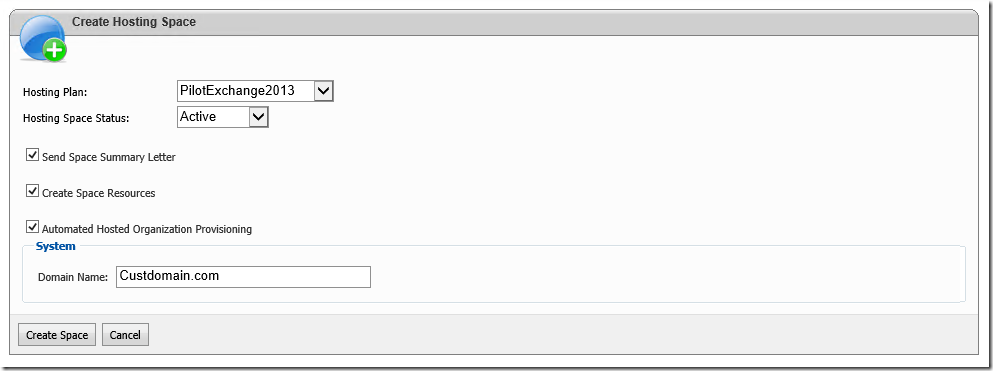
image

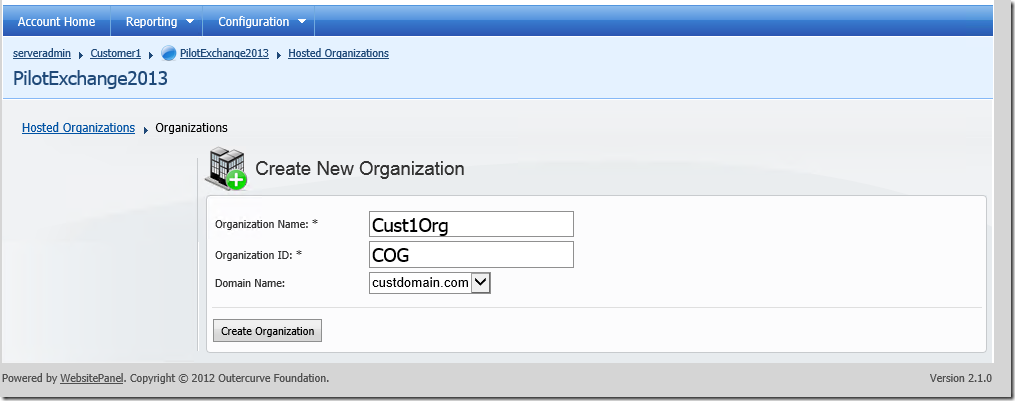
Now Click on Customer – Hosting Organizations – Hosted Organization

Create new organization
image

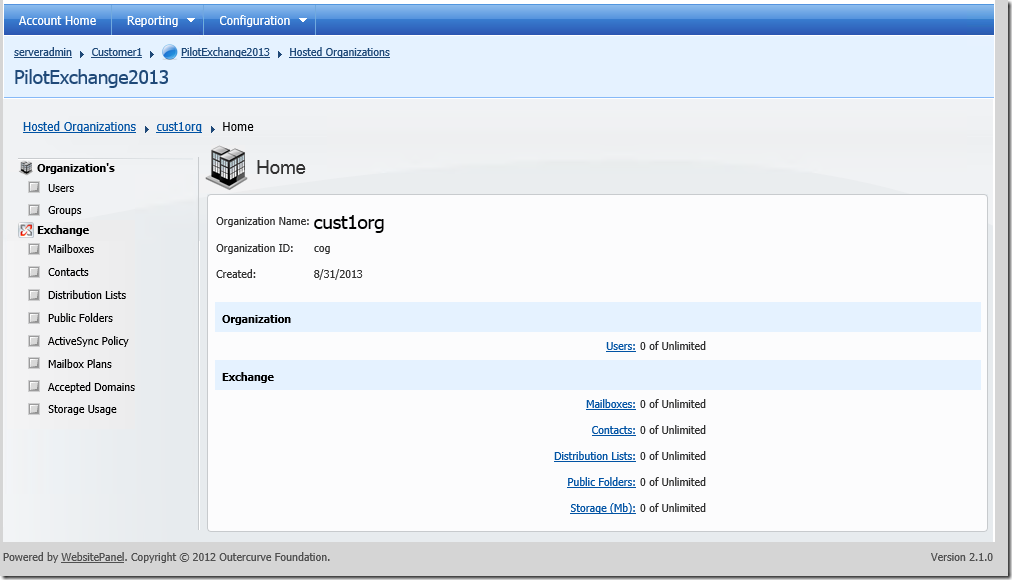
Once the Organization is Ready

Click on the Organization

So that we can test creating a mailbox
 

image

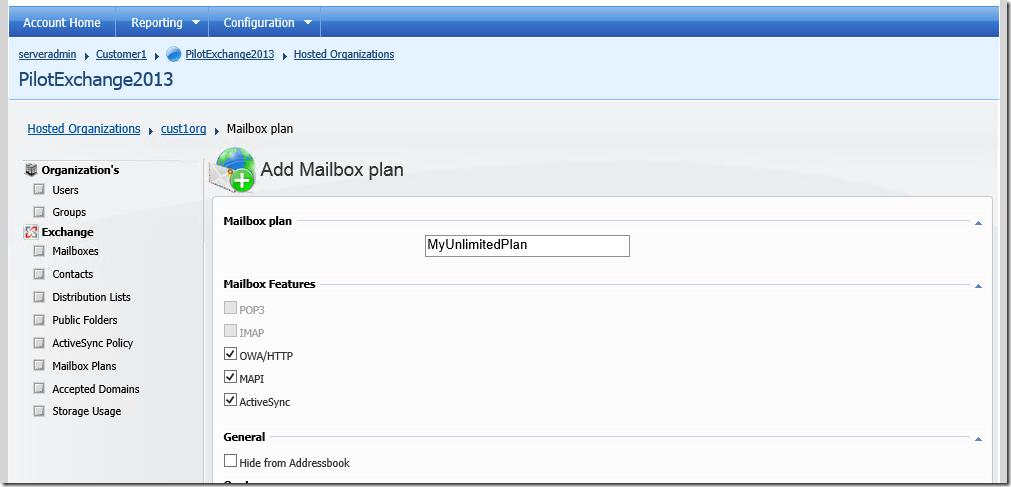
For Creating a mailbox – you will need a mailbox plan

Choose mailbox plans – am just creating a unlimited mailbox plan
image

Now Mailbox plan is ready

image

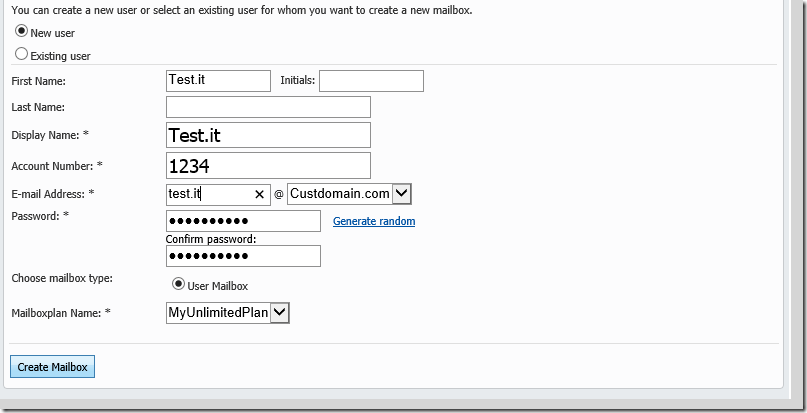
Now Choose mailboxes Create a new mailbox
 

image

Now Mailbox have been created successfully
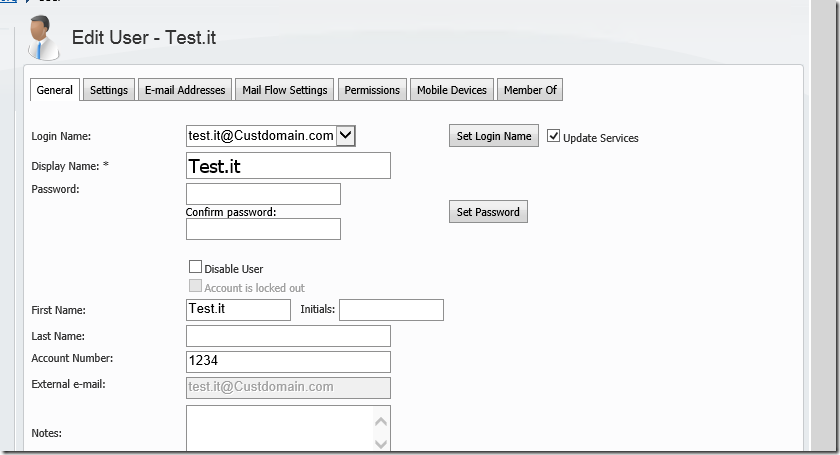
image


if you go to ADUC , you could see it has created user accounts in the right space we defined
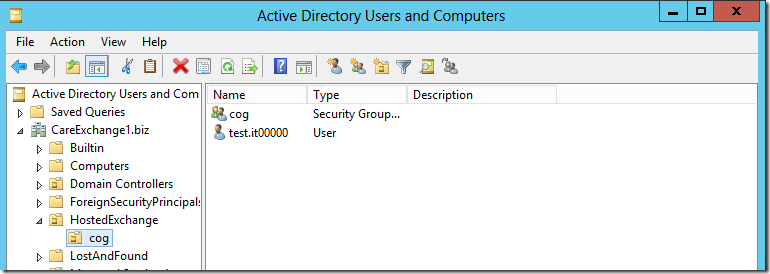
 

image


Now Running “Get-mailbox” Making sure mailbox is created

image


Seeing address book policy is created for its own tenant


image


Great Smile

Hope this article will help you in Installing configuring Website Panel.

I made the documentation as good I can


Thank you

How to Install Website Panel 2.1 Windows Server 2012

Get the Website Panel Setup from the below link – Note : you will need to sign up

http://www.websitepanel.net/downloads/

Website Panel is a Multi-Tenant, Enterprise Hosting Automation Tool

A good thing about it is  – It is Open Source

Install the Prerequisites before you can install .

Required Window Features & SQL Database

How to Install Website Panel 2.1 Prerequisites in Window Server 2012

https://www.azure365pro.com/how-to-install-website-panel-2-1-prerequisites-in-window-server-2012/

How to Install SQL 2012 Express on Windows Server 2012

https://www.azure365pro.com/how-to-install-sql-2012-express-on-windows-server-2012/

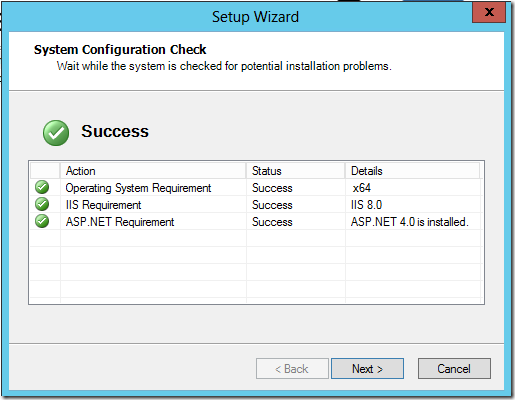
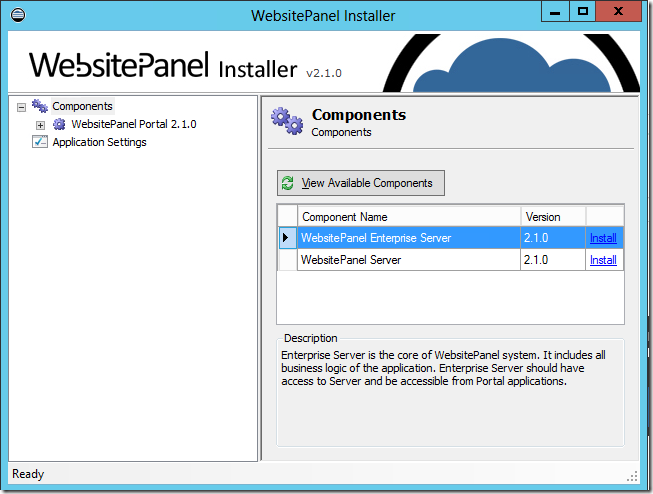
Once Windows Features and SQL Database is ready Run the Website Panel Installer

image

image

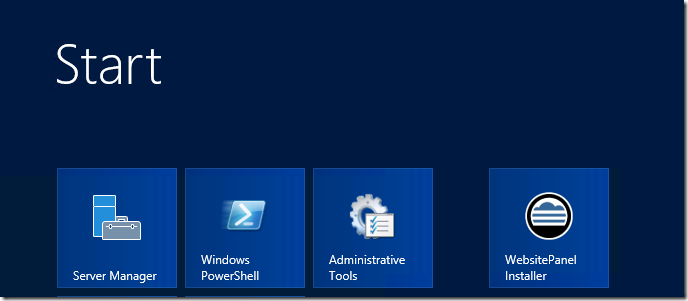
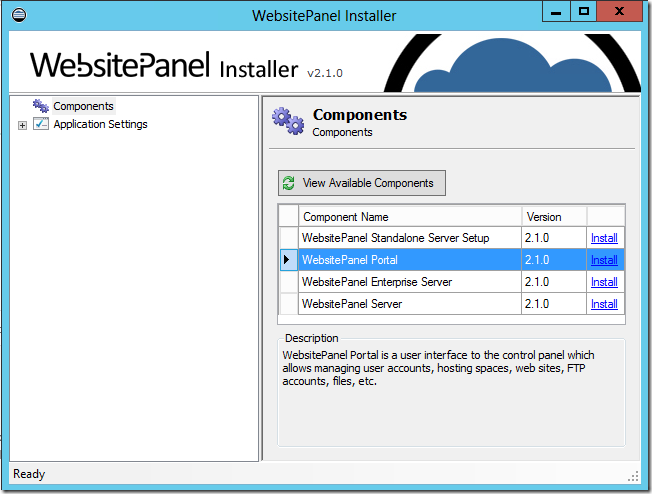
Once the website Panel is Installer is installed – Start – Click on Website Panel Installer

image

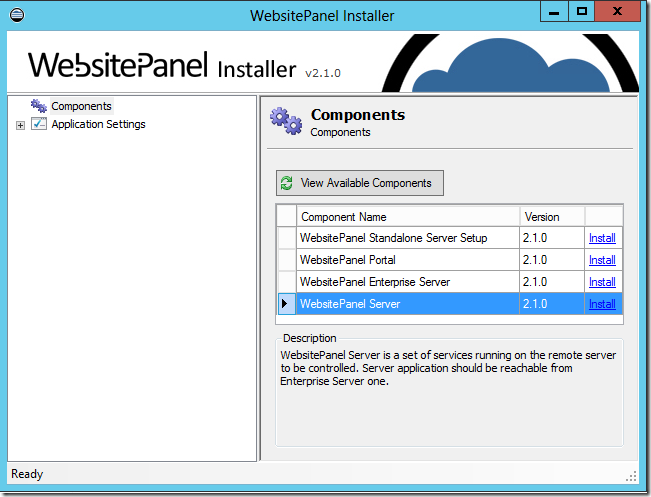
Now will quickly explain the Website Panel Architecture

Website Panel Portal – Its the Hosting Portal which will be hosted in IIS to Publish to internet

Website Panel Enterprise Server – Its the server which contains the SQL database which have all the information

Website Panel Server – Its the agent like we install to manage the servers from the Website Panel Portal

Please Install the Components one by one , So that you can have less confusion and less problems

In my case am going to install –

Website Panel Portal + Website Panel Enterprise Server  = In a Dedicated Server

Website Panel Server in my Exchange 2013 Server

Installing Website Panel Portal –

Choose Install

image

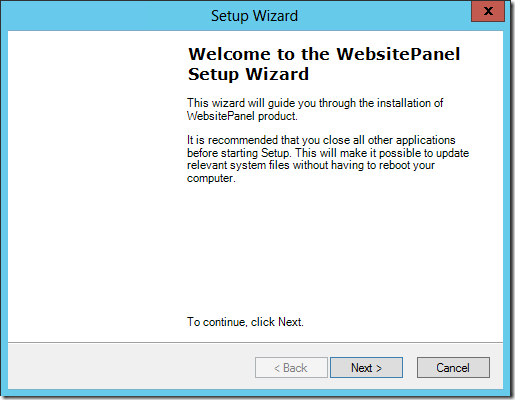
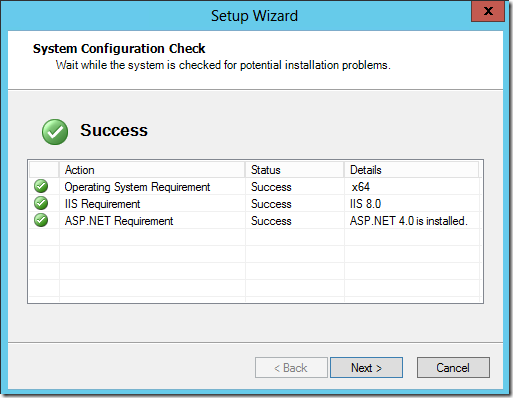
Choose Next

image

Choose next

image

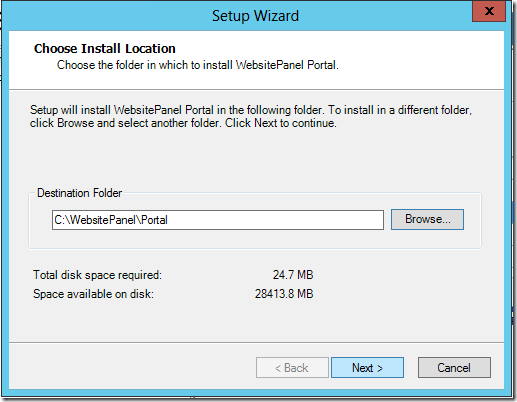
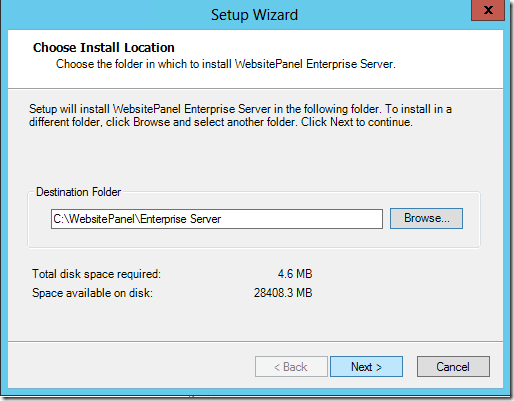
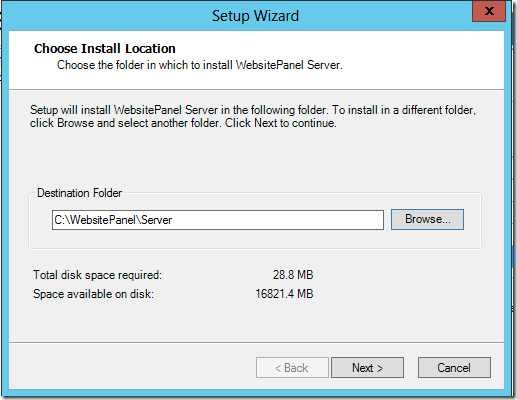
Choose Installation Location

image

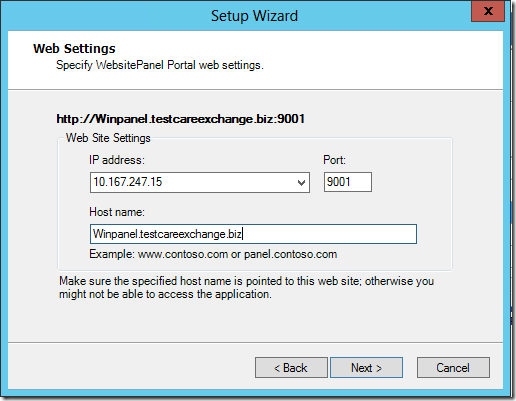
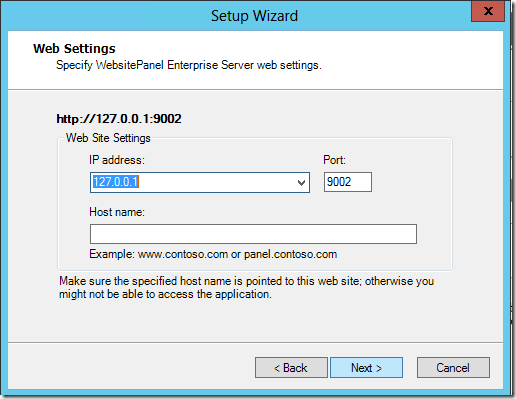
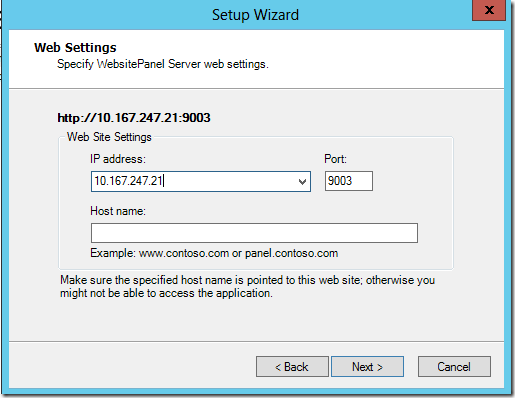
Choose the local IP and Host Name can be entered even after installing .

So Its absolutely your wish

image

Choose

Create Active Directory Account

Enter the domain name

image

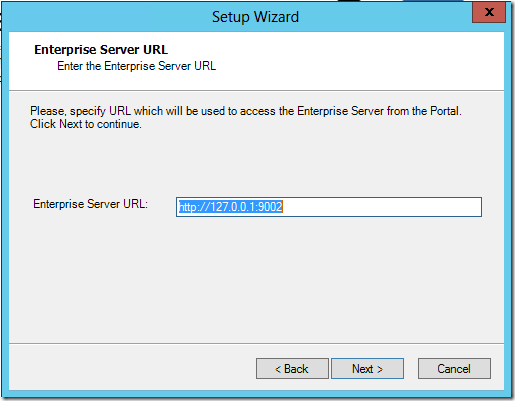
As the Enterprise server is going to be the same server

leave as it is

image

Choose Next and Complete the Setup of Website Panel Portal.

Installing Website Panel Enterprise Server :

Choose install

image

Choose Next

image

Choose Installation Location

image

Choose the loopback address as its going to be the same server

image

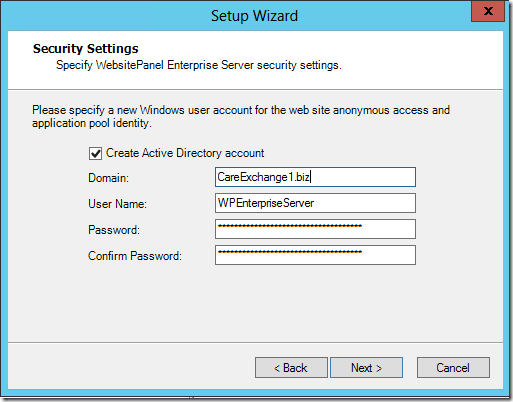
Choose Create Active Directory Account

image

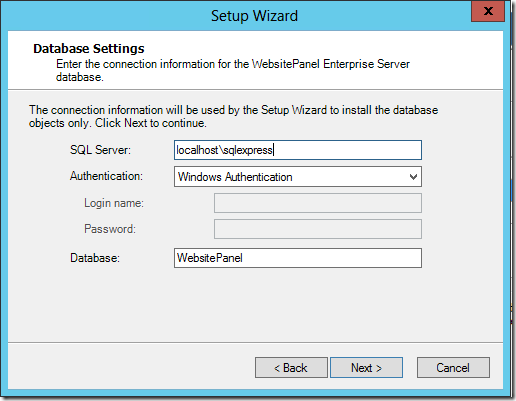
Choose Local host\Sqlexpress

Choose the database

As the sql Server is installed on the same Server,

image

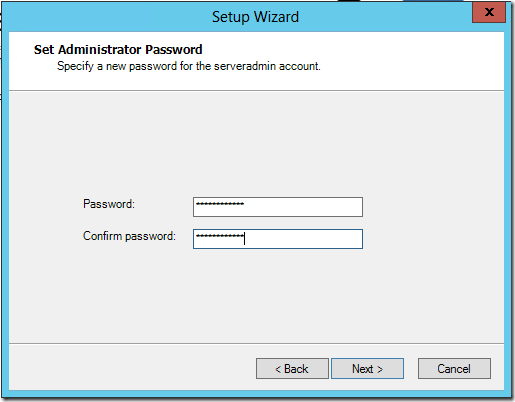
Choose Password –

image

Installing Website Panel Server :  ( Am installing this on my Exchange Client Access Server )
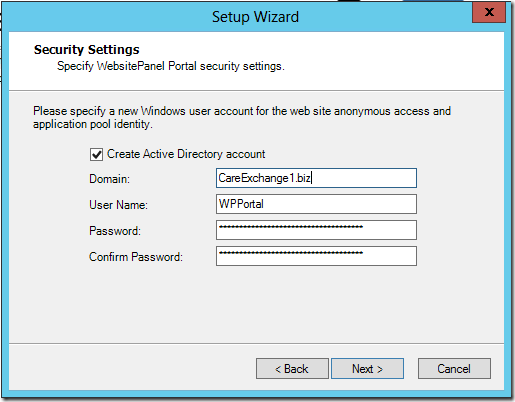
image

Choose installation location

image

Choose the local IP of the Exchange server

image

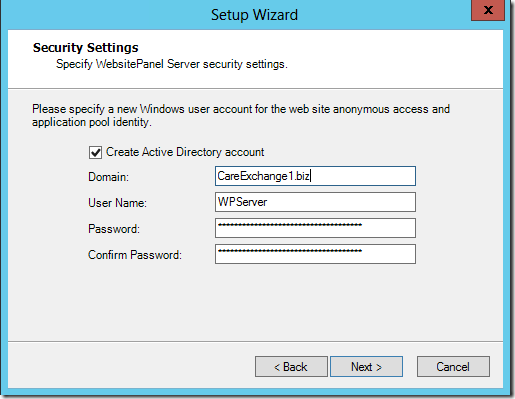
Choose the Active Directory Account

image

Enter Credentials – Choose Next

image

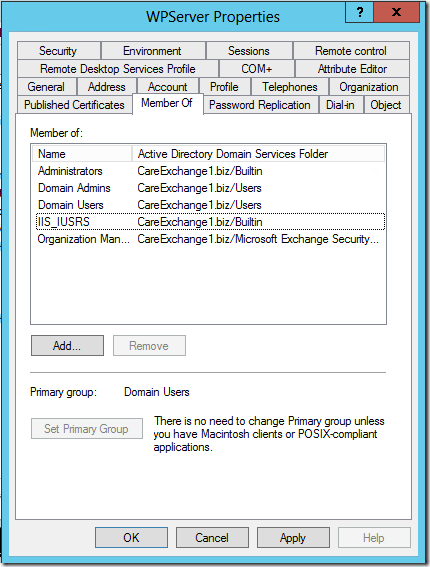
Now Make Sure “WPServer” account is a member of

Administrators

Domain Admins

Organization Management

IIS_IUSRS

image63_thumb

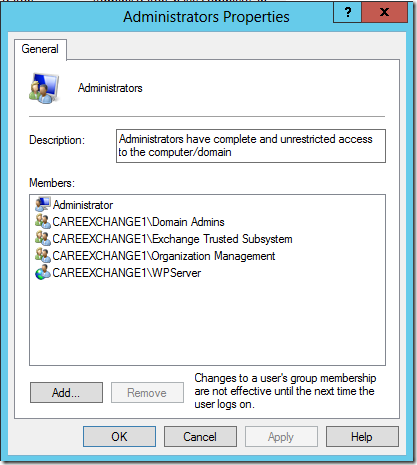
Also Make sure – WPServer account is a member of local administrators groups

Start – Run – Lusrmgr.msc

image69_thumb

Now Open Exchange management Shell

Enable “Windows Authentication” For PowerShell virtual directory

So that Website Panel Server will start service remote requests from Website panel Enterprise Server

Get-PowerShellVirtualDirectory | Set-PowerShellVirtualDirectory -WindowsAuthentication $True

image72_thumb

Now

Website Panel Portal + Website Panel Enterprise Server  = In a Dedicated Server is Successful

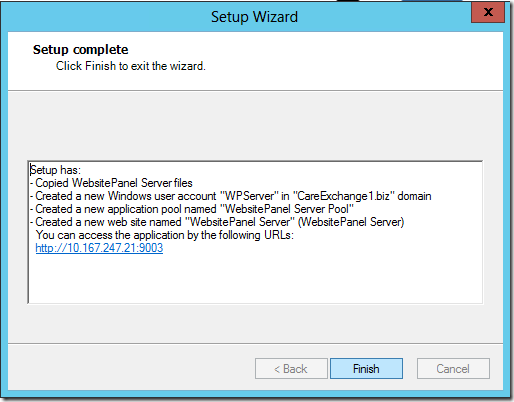
Website Panel Server in my Exchange 2013 Server = Installation is successful

Smile

How to Install SQL 2012 Express on Windows Server 2012

Will See how to install SQL 2012 and SQL management Studio

Had to Install SQL for Installing Website Panel

Download Link :

http://www.microsoft.com/en-us/download/details.aspx?id=29062

Download

SQLEXPR_x64_ENU

SQLManagementStudio_x64

image

Run

SQLEXPR_x64_ENU

image

Choose “New SQL Server Stand-Alone Installation”

image

Choose Next

image

Choose Next

image

image

Choose Next

image

Choose Mixed Mode – As like Applications like WebsitePanel , Will require Mixed Mode Authentication

You can switch over at any point of time by accessing SQL management Studio

image

image

SQL Express installed successfully

Now we can Install SQL Management Studio

image

Choose Next

image

Choose Next

image

image

SQL Management Studio Installed Successfully .

How to Install Website Panel 2.1 Prerequisites in Window Server 2012

Website Panel is a Multi-Tenant, Enterprise Hosting Automation Tool

A good thing about it is  – It is Open Source

Lets look how to Install Prerequisites.

Open Server Manager

Add Roles and Features

image

Choose

Role – Based or Feature-based Installation

image

Choose the Server from the server Pool

image

Choose Web Server

image

Choose

.Net 3.5

Asp.net 4.5

image

image

Expand

Choose Application Development

ASP.NET 3.5

ASP.NET 4.5

image

image

Now Prerequisites have been Configured Successfully For Website Panel 2.1

How to Configure Cross forest connectors (Mail flow) Exchange 2010 to Exchange 2010


Source Domain – CareExchange.in

Target Domain – TargetExchange.in


Lets say CareExchange.in is migrating mailboxes across forest to TargetExchange.in

For Exchange TestUser@CareExchange.in  is migrated from CareExchange.in to TargetExchange.in

But still the administrator looks for a solution that TestUser has to receive email of “CareExchange.in” , Until the migration gets over completely. (As Mx Record will be changed only in the end of the migration)

Its kind of setting up cross forest coexistence mail flow between Two Exchange 2010 Forests.


Configuring Accepted Domains  –


First Make Sure – The Domain is Set to Internal Relay (In Source Domain – CareExchange.in)

Organization Configuration – Hub Transport – Accepted Domains – Right Click Properties

image

And Login to Target Domain – TargetExchange.in

Organization Configuration – Hub Transport – Accepted Domains – Right Click New Accepted Domain

image


Configuring Send Connector on the Source Domain (CareExchange.in) –

Note : (CareExchange.in) Email Hits the Source Server . Searches for the user ,

When User Exists , Email is delivered

When user does not exist , Send the email to the target domain .

When User does not exist on source and destination domain , there is a possibility where NO NDR Gets generated

So try to Have this solution for a short period of time.


Login to Exchange 2010 Server – (Domain – CareExchange.in)

Organization Configuration – Hub Transport – Connectors – New Send Connector

Name  – Cross Forest Connector

Intented Use – Custom

image

Address – CareExchange.in (SourceDomain)

Cost – 1

(If you already have a connector with Cost 1 – No problem , Please continue)

image


Choose – Route Email Through the following smart hosts

Enter the  Destination Exchange Server IP address.

Make Sure IP is pinging and reachable

image


Choose Authentication is None

If you wish to use TLS , Follow the below link

http://technet.microsoft.com/en-us/library/bb123546%28v=exchg.141%29.aspx


image

Now Send Connector is Configured on the source Domain


Configuring Receive Connector on the Target Domain (TargetExchange.in) –

Login to Exchange 2010 Server – (Domain – TargetExchange.in)

Server Configuration – Hub Transport – Default Connector – Right Click Properties

image


Click on ADD  – Receive Mail from Remote Servers that have these IP Addresses

Enter the Source Domain Exchange Server (CareExchange.in) IP Address

If you have Mutiple HUB Servers configured on the Send connector

Make sure you add all the HUB Transport Servers IP address

image

Add the IP – Apply – Ok

image


Hope I made it clear

Smile

× How can I help you?