31 C
Dubai
Saturday, May 3, 2025
Home Blog Page 46

Installing Exchange 2016 on Windows Server 2012 R2

Installing exchange 2016 step by step on Windows Server 2012 R2.

Before Exchange 2016 Install  – Go through the Minimum system requirements below – Note Preview versions are not Production ready.

Minimum System Requirements and Forest Functional Level for Exchange Server 2016

You can Download the Exchange Server 2016 CU2 Setup using the below Link

Download Microsoft Exchange Server 2016

Step 1:

To Prepare Active Directory using the same machine.

Install the Below Feature

Open Windows PowerShell.

Install-WindowsFeature RSAT-ADDS

image

Step 2:

Am Going to Install all roles in the Scenario

Open Windows PowerShell

Install-WindowsFeature AS-HTTP-Activation, Desktop-Experience, NET-Framework-45-Features, RPC-over-HTTP-proxy, RSAT-Clustering, RSAT-Clustering-CmdInterface, RSAT-Clustering-Mgmt, RSAT-Clustering-PowerShell, Web-Mgmt-Console, WAS-Process-Model, Web-Asp-Net45, Web-Basic-Auth, Web-Client-Auth, Web-Digest-Auth, Web-Dir-Browsing, Web-Dyn-Compression, Web-Http-Errors, Web-Http-Logging, Web-Http-Redirect, Web-Http-Tracing, Web-ISAPI-Ext, Web-ISAPI-Filter, Web-Lgcy-Mgmt-Console, Web-Metabase, Web-Mgmt-Console, Web-Mgmt-Service, Web-Net-Ext45, Web-Request-Monitor, Web-Server, Web-Stat-Compression, Web-Static-Content, Web-Windows-Auth, Web-WMI, Windows-Identity-Foundation

image

# Run Restart-Computer to Reboot the Server

Step 2.1:

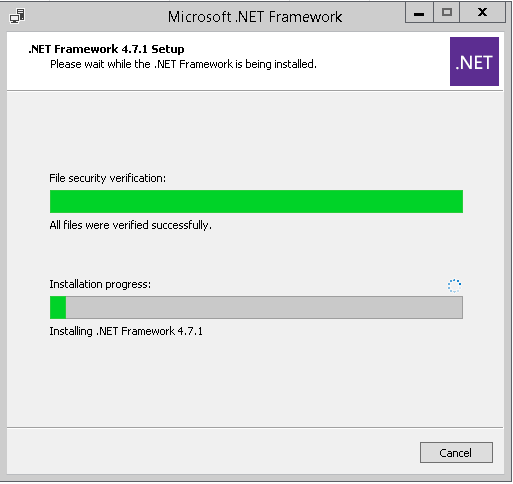
Download and Install Microsoft .NET Framework 4.7.1 (Offline Installer)

https://www.microsoft.com/en-us/download/details.aspx?id=42642

Restart the Computer

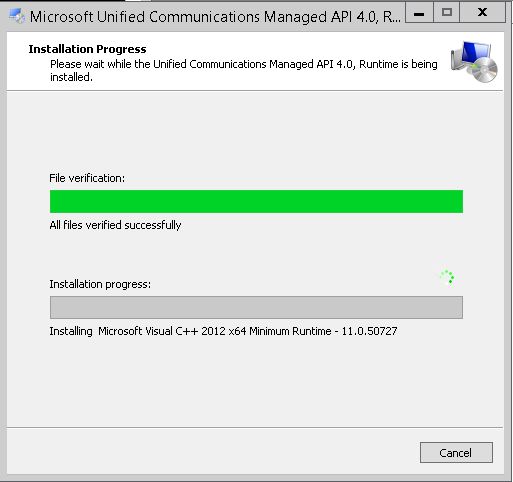
Step 3: Download and Install Unified Communications Managed API 4.0 Runtime

http://www.microsoft.com/en-us/download/details.aspx?id=34992

Step 4:

Preparing Schema Open Windows PowerShell Browse to Setup Location Run as administrator.

.\setup /PrepareSchema /IAcceptExchangeServerLicenseTerms

image

Step 5:

Preparing Active Directory

Open Windows PowerShell

Browse to Setup Location

Run as administrator.

.\setup /Preparead /IAcceptExchangeServerLicenseTerms /OrganizationName:"Enter Exchange Org Name"

Note : If you are already in a Exchange Organization – Remove /OrganizationName Parameter

image

Step 6:

Preparing Domain

Open Windows PowerShell

Browse to Setup Location

Run as administrator.

.\setup /Preparedomain /IAcceptExchangeServerLicenseTerms

image

Note :

If you are in a Child domain Scenario

Run

.\setup /Preparealldomains /IAcceptExchangeServerLicenseTerms

Step 7:

Run the setup.exe

Choose Next,Accept the agreement.

image

Step 8:

Choose the Roles.

Choose Next

Note :”Edge Transport Role” Which can be installed in DMZ.

image

Step 9:

Choose Next

image

Step 10:

Choose Next

If you already Did “Step 4” you won’t see a option to create organization. As Already Exchange Org is already created

Else Enter a Org Name.

Step 11:

Choose  “No” for Malware Scanning

&

Choose Next

Step 10:

Choose Install

image

Step 11:


image

Microsoft  Exchange Server 2016 Build 225.17 – Setup Completed.

Get-ExchangeServer | FT Name,Admin*

image

iPhone keep sending plain text emails

iPhone keep sending plain text emails losing my HTML email signature which is a server side email signature software. there is a quick fix for it.

Make your Signature to Bold letters . Then it will start generating a HTML email when you send my default.

Settings – Mail

image

Signature –

image

Make the signature to Bold –

image

SQL 2008 R2 In place Upgrade to SQL 2014

I have a SCCM Database server running Windows Server 2012 R2 with SQL 2008 R2 . Which doesn’t allow SCCM upgrades any more . Unless the SQL Server is 2014 SP2 or later.

Checking the edition . It was SQL 2008 R2 Standard in the existing server. Have Download SQL 2014 Standard setup and SQL 2014 SP2 setup separately. Note that we can download SQL 2014 Server with SP2 rather than doing it separately . but I haven’t tested myself.

First. Take Full SQL backup of the existing databases for recovery purposes.

image

Stop below services and set to Manual

  • SMS Agent Host
  • SMS_Executive
  • SMS_SITE_SQL_BACKUP_SERVERNAME

image

In my Case I have taken a snapshot as its on VMware. and Turned of my SCCM server so that no database activity in place.

  • Uninstalled SQL Server 2012 Native Client from Add/remove programs.

image


Now Run SQL Upgrade from 2008 R2 to SQL 2014

image

Next | Next | Next with all Default Options upgrading the SQL Instance.

image

Rebooted the server

Ran SQL Server 2014 Service Pack 2

image

Rebooted the server

Now go to Add or remove programs remove SQL 2008 R2 Server

image

Reboot the server.

Now start the services  and set to Automatic.

image

Start your SCCM Server . Console works Good. All services came back to normal.

Now Upgraded SCCM to 1702. It upgraded successfully.

image

Migrate DHCP Server from 2008 R2 to 2012 R2

I have two DHCP servers. Primary and Secondary . Both are independent running Primary and Split Scope Scenario. As they are independent followed the same procedure on both the servers.

Login to 2008 R2 DHCP server. Take a Backup. Place it on a location.

image

It got Exported Successfully.Copied the data. Backed up to my file server

image

As it wanted to Retain same name and IP. I have unauthorized the DHCP server.

Shutdown the server.

image

Say yes.

Removing Authorization this Server from the directory will cause the DHCP server to stop responding to client requests.

image

Built a new 2012 R2 Server. with Same Name and IP,

Installed DHCP Server Role.

image

Once installation is completed. Complete DHCP Configuration.

image

Skip AD Authorization.

image

Choose Commit. Creating Security Groups is done.

image

Right Click Restore . On the DHCP Console. Choose Restore

image

Say yes.

The Specified folder may not have sufficient permissions for the DHCP service to proceed with the restore operation. Would you like to automatically try connecting to problem and retry the restore operation.

image

Say Yes.

image

image

Now Verify all scopes are imported.

Right click on the server on the DHCP console . Now Authorize the server.

Make sure its listed in Authorized Servers list. Click on Manage Authorized Servers.

image

Exchange Datacenter Switchover

I had to do a Exchange Datacenter Switchover Procedure on a 3 Node Dag. Two on primary site and one on Secondary site.

Primary datacenter needs maintenance and both primary nodes have to go offline. so we had to do a datacenter switchover prior to the primary datacenter maintenance . The procedure is simple if you plan it properly. lets see the aspects we checked. Before the maintenance of the primary datacenter.

  • Made Outbound Mail flow to go via the secondary site.
  • Made MX Records / Inbound Mail flow to come via the secondary site.
  • Public DNS Records changed to the secondary site.

We made sure DAC mode is Enabled with Value DagOnly.It will avoid the split  brain syndrome across these nodes.

Get-DatabaseAvailabilityGroup -Identity DAGNAME | Fl Name,DatacenterActivationMode

image

To Enable DAC – you can set it with

Set-DatabaseAvailabilityGroup -Identity DAGNAME -DatacenterActivationMode DagOnly

Make sure witness server and Alternate witness server is specified

image

Make sure no activation block is set on any mailbox servers

To Check

Get-MailboxServer | fl name,DatabaseCopy*

image

All Activation block has been removed

Get-MailboxServer | Set-MailboxServer –DatabaseCopyAutoActivationPolicy "Unrestricted"

image

Check where the quorum and move to secondary site

Get-ClusterGroup "Cluster Group"

Its showing my primary site server.

image

So we moved it to the secondary site

Get-ClusterGroup “Cluster Group” | Move-ClusterGroup –Node SECONDARYSERVERNAME –Verbose

image

Moved all the active databases to Secondary Server

Get-Mailboxdatabase | Move-ActiveMailboxDatabase –ActivateOnserver SECONDARYSERVERNAME

image

Now

Stop-DatabaseAvailabilityGroup –Identity DAGNAME  –ActiveDirectorySite "Default-First-Site-Name"

To check your site name

nltest /dsgetsite

To check on Completion

Get-DatabaseAvailabilityGroup –Status

Stopped Dag nodes will be removed from Operational server list.

image

Now go to your secondary site server – Run

Stop-Service clussvc

image

Ran below on Secondary site

Restore-DatabaseAvailabilityGroup DAGNAME –ActiveDirectorySite "SECONDARYSITENAME"

Now Alternate witness become active and it formed a single node cluster without the primary site servers and databases stayed active on secondary site as we moved prior.

image

Opening Failover cluster to verify the same.

image

Now Primary servers can be safely turned off

Once Maintenance is over in the primary datacenter. Run below

Start-DatabaseAvailabilityGroup DAGNAME –ActiveDirectorySite "Default-First-Site-Name"

image

Failover Cluster is Back to Normal

If you see witness is not changing back to normal . you can run

Set-DatabaseAvailabilityGroup DAGNAME

Note :

Odd Nodes – no witness server works on node majority

Even Nodes – works with a witness server to act as a node.

image

Make sure Quorum is moved back to primary site

Get-ClusterGroup "Cluster Group"
Get-ClusterGroup "Cluster Group" | Move-ClusterGroup –Node PRIMARYSERVERNAME –Verbose

Now make sure all copies are healthy or you can update it with

Update-mailboxdatabaseCopy "Databasename\server" –DeleteExistingFiles

image

Make sure Mail flow and Public DNS changes is done via the primary site.

Datacenter Switch-over process has been successfully completed.

An IIS directory Couldn’t be created . The Error Message is Access is denied

If you have two Exchange servers and try to retrieve virtual directory from other server. you may get below error

An IIS directory entry couldn’t be created . The Server message is Access is denied.

HResult – 2147024891 IISGeneralCOMException

image

Symptoms-

  • OAB (Offline Address Book) may not download properly to users.
  • Outlook Credential Prompt.


Solution –

Add missing groups in local administrators in the problematic Exchange server.

  • Exchange Trusted Subsystems
  • Organization Management

image

× How can I help you?