
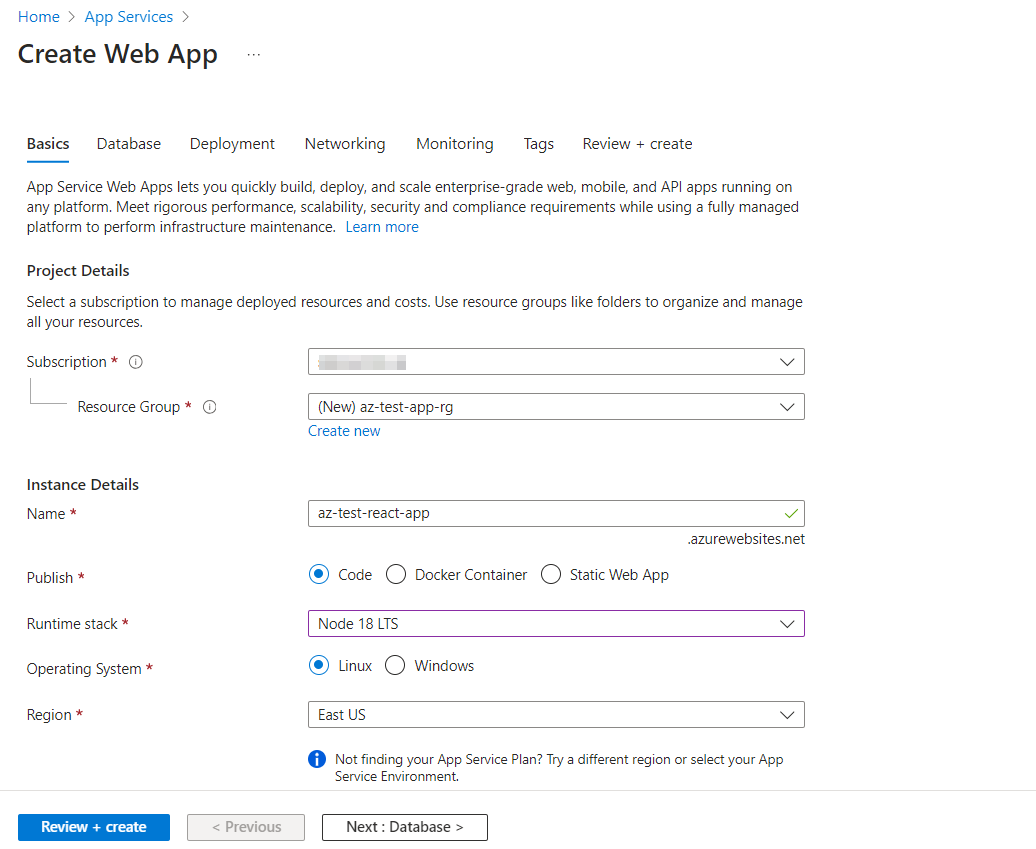
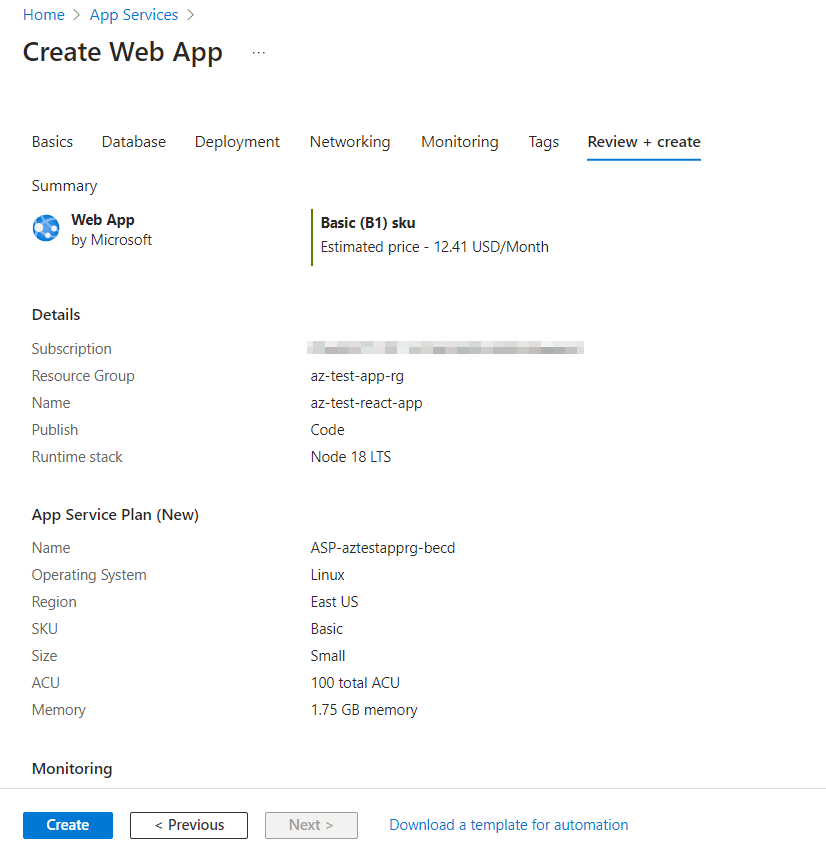
Step 1: Create an Azure App Service and select Node.js 18 as the runtime stack to host your React application. This provides the necessary infrastructure for deploying and running your app on Azure’s platform.
Step 2: Once your web app is deployed, go to configurations and add the startup command “pm2 serve /home/site/wwwroot/build –no-daemon –spa“. This command ensures proper serving of your React app using PM2, making it suitable for single page applications (SPAs) on Azure Web App.

pm2 serve /home/site/wwwroot/build –no-daemon –spa
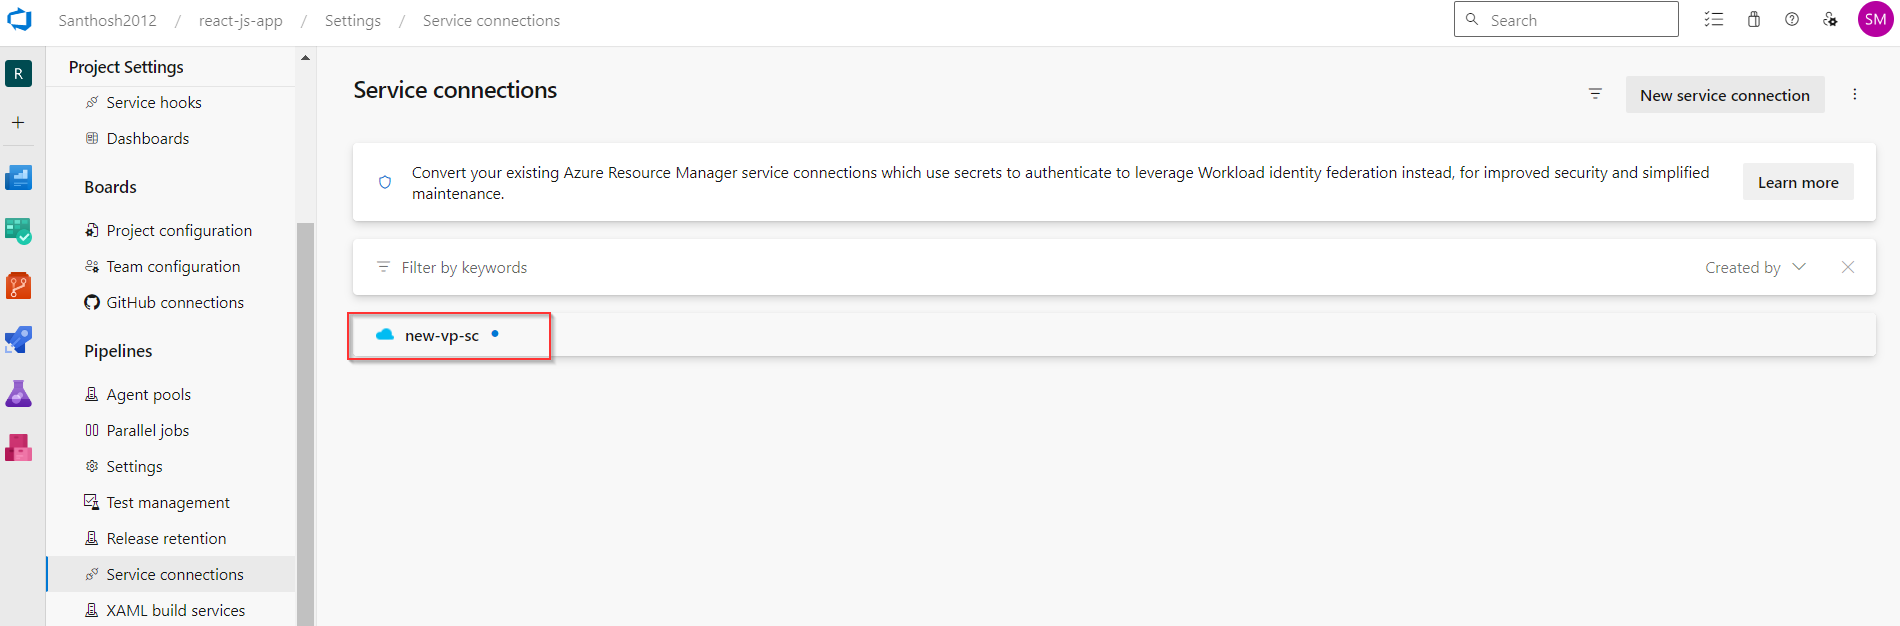
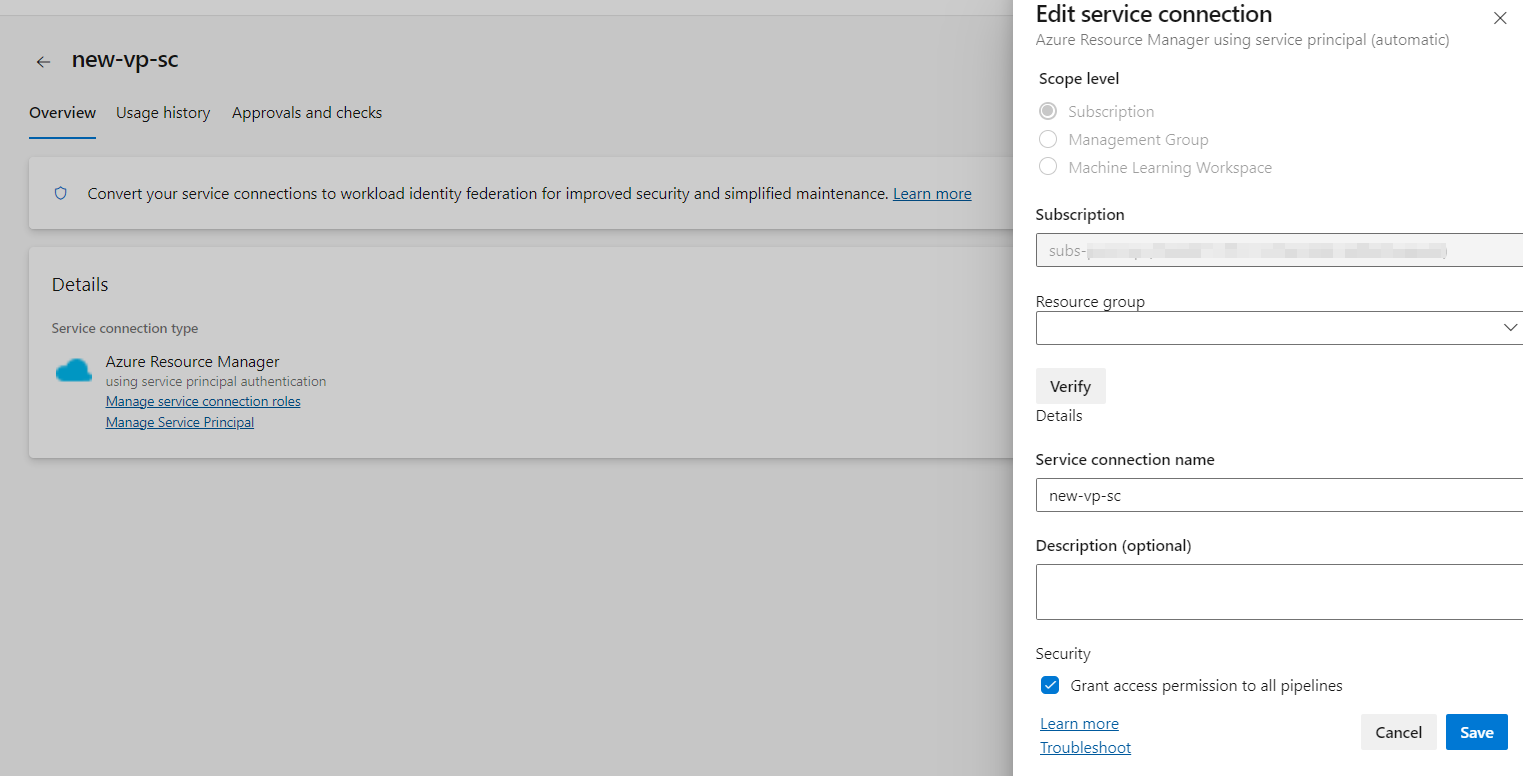
Step 3: Establish a service connection in Azure DevOps. This connection allows your Azure DevOps pipeline to interact securely with your Azure resources, enabling seamless deployment of your React app to Azure Web App.
Step 4: Begin creating your Azure DevOps pipeline. This involves defining the stages, tasks, and configurations necessary to automate the deployment process of your React app from source control to Azure Web App.
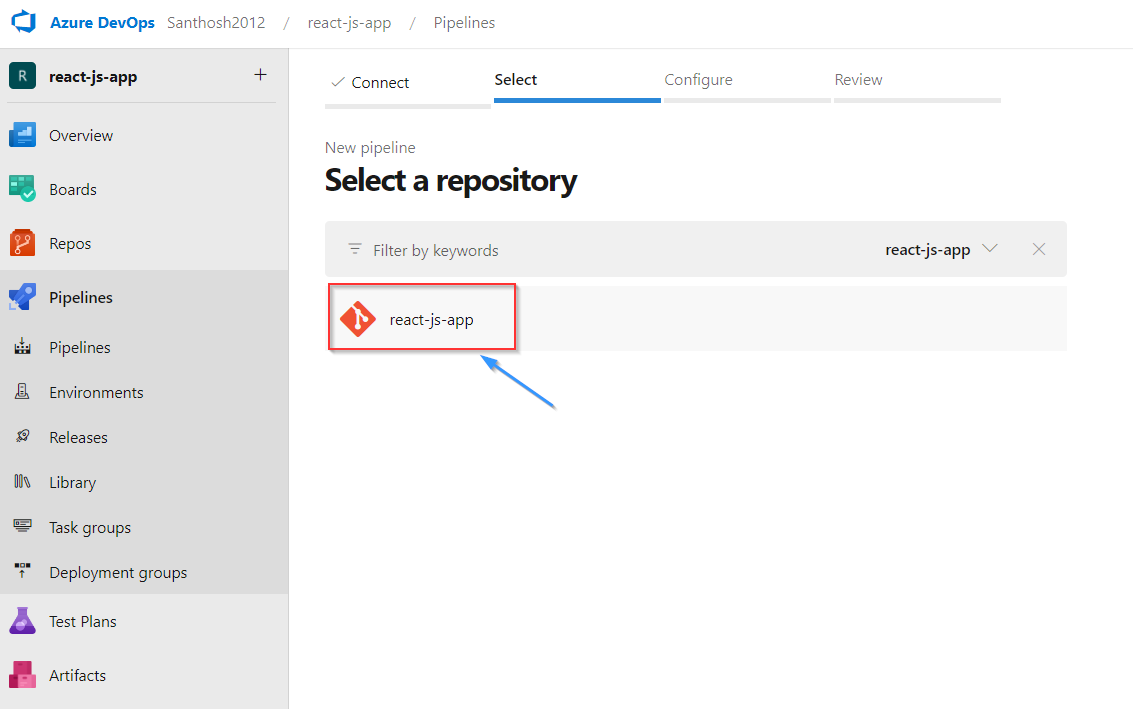
Step 5: Access the pipelines section in Azure DevOps, then initiate the creation of a new pipeline. Choose the repository where your React application resides, setting the foundation for automating deployment workflows directly from your source control.
Select Existing YAML file.
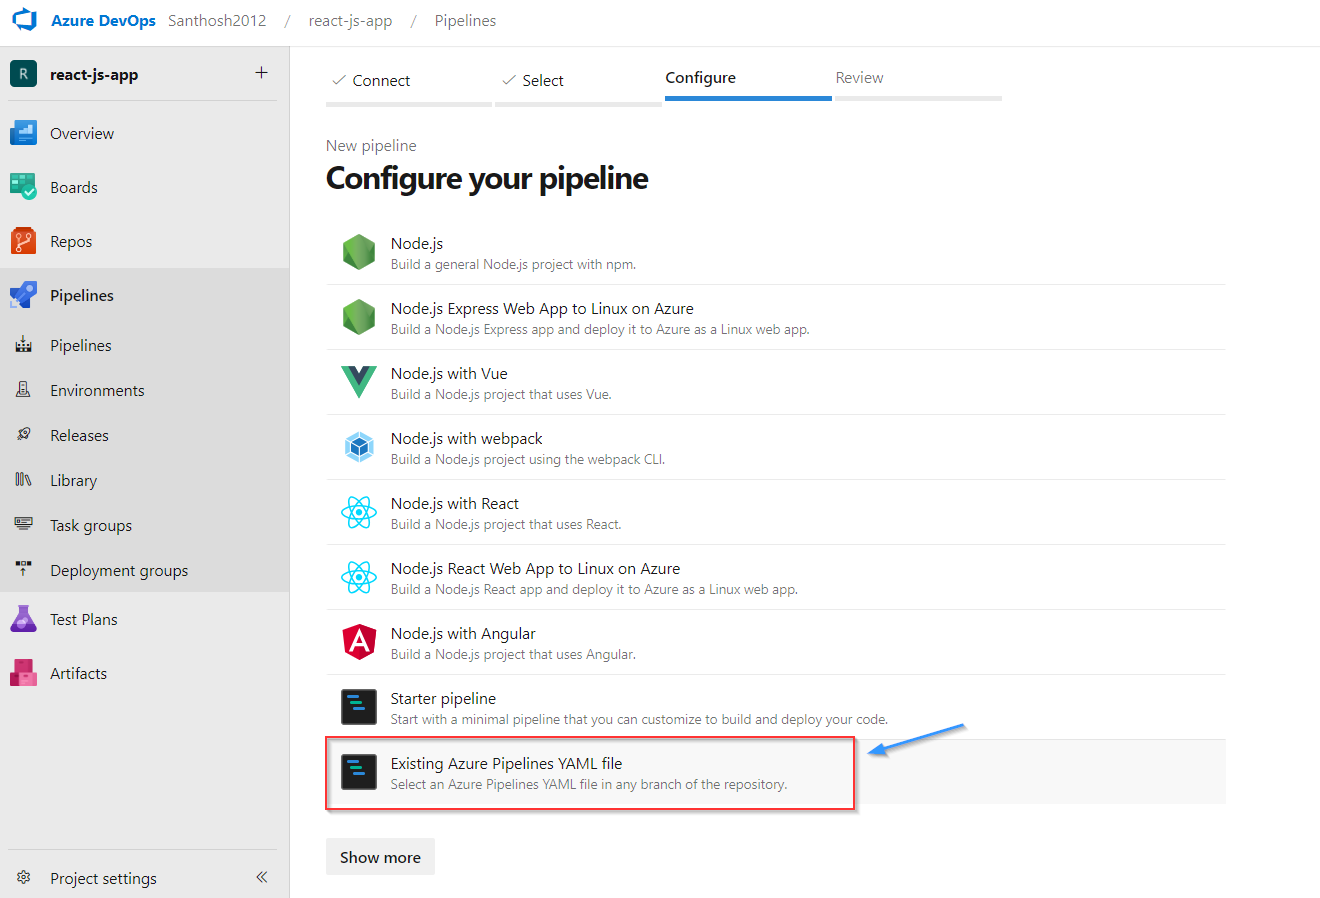
Select the YAML file in the Repository.

Once the YAML file is setup click on save and run the Pipeline.
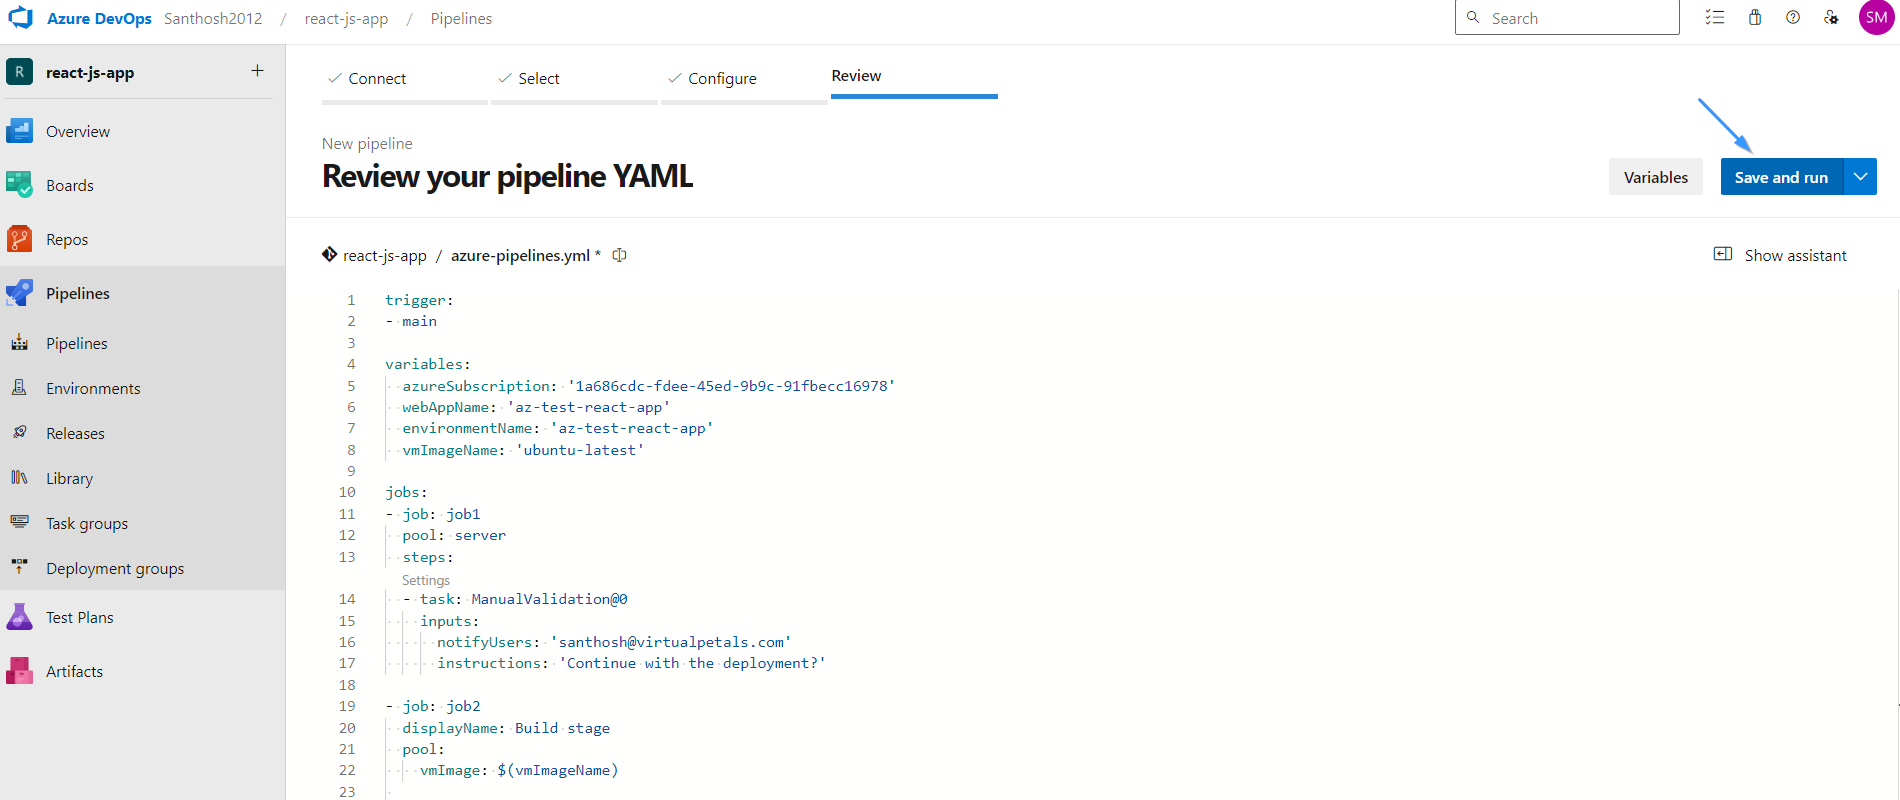
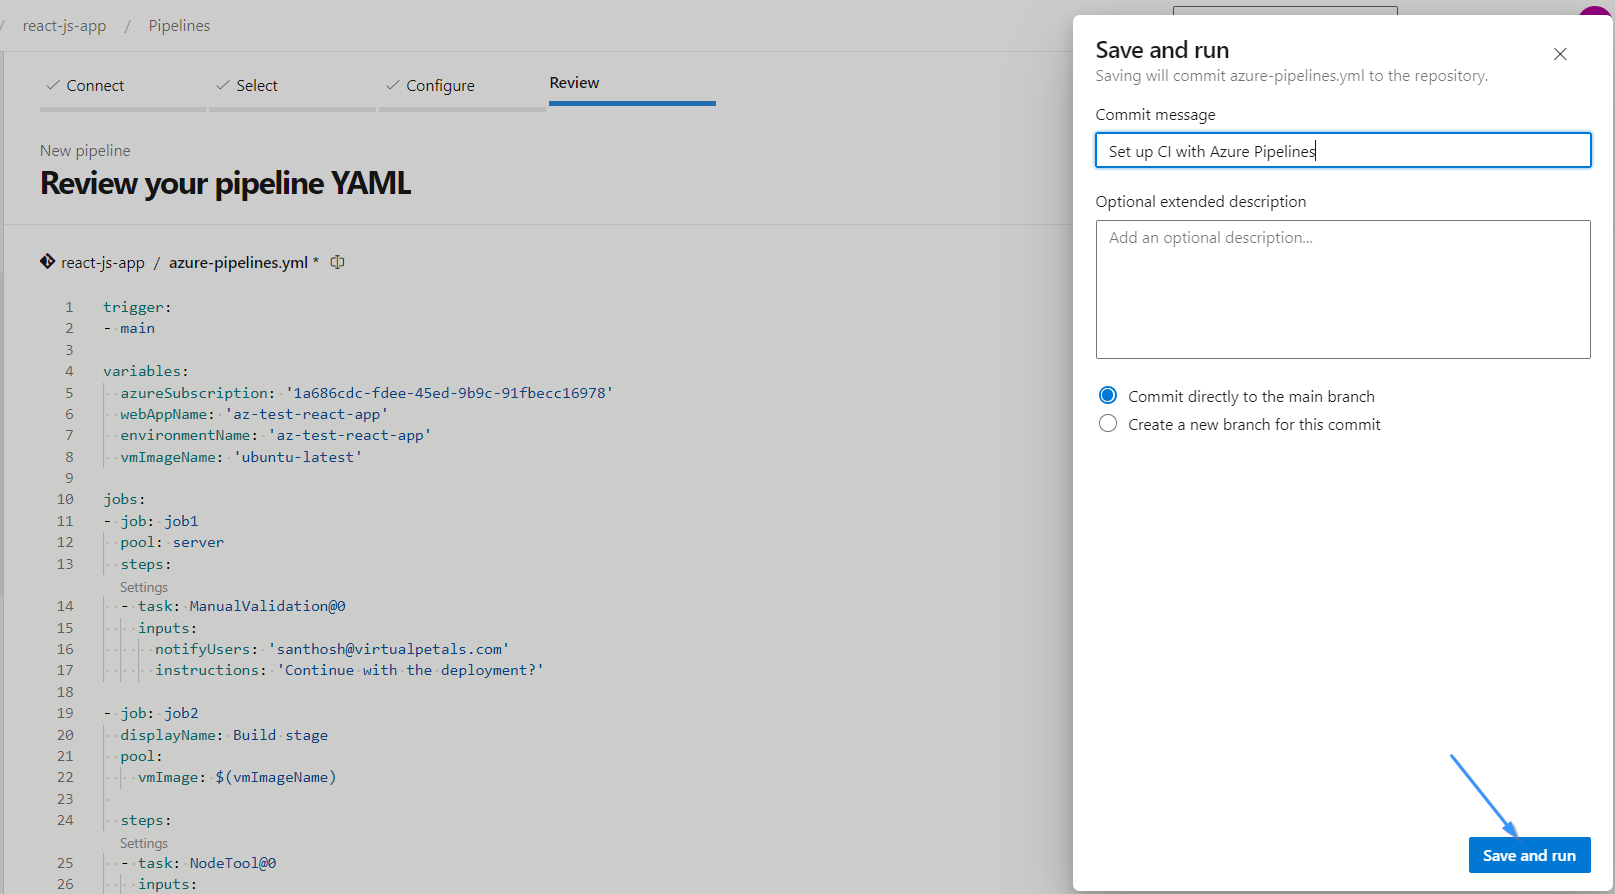
Step 6: Below is the YAML configuration for implementing validation approval within the Release Pipeline:
trigger:
- main

variables:
  azureSubscription: '1a686cdc-fdee-45ed-9b9c-91fbecc16978'
  webAppName: 'az-test-react-app'
  environmentName: 'az-test-react-app'
  vmImageName: 'ubuntu-latest'

jobs:
- job: job1
  pool: server
  steps:
  - task: ManualValidation@0
    inputs:
      notifyUsers: 'santhosh@abcd.com'
      instructions: 'Continue with the deployment?'

- job: job2
  displayName: Build stage
  pool:
    vmImage: $(vmImageName)

  steps:
  - task: NodeTool@0
    inputs:
      versionSpec: '18.x'
    displayName: 'Install Node.js'

  - script: |
      npm install
      npm run build --if-present
    displayName: 'npm install, build'

  - task: ArchiveFiles@2
    displayName: 'Archive files'
    inputs:
      rootFolderOrFile: '$(System.DefaultWorkingDirectory)'
      includeRootFolder: false
      archiveType: zip
      archiveFile: $(Build.ArtifactStagingDirectory)/$(Build.BuildId).zip
      replaceExistingArchive: true

  - publish: $(Build.ArtifactStagingDirectory)/$(Build.BuildId).zip
    artifact: drop

- job: job3
  displayName: Deploy stage
  dependsOn: job1
  condition: succeeded()
  pool:
    vmImage: $(vmImageName)
  steps:
  - download: current
    artifact: drop

  - task: AzureWebApp@1
    displayName: 'Azure Web App Deploy: xxxxx'
    inputs:
      azureSubscription: 'new-vp-sc'
      appType: 'webAppLinux'
      appName: 'az-test-react-app'
      package: '$(Pipeline.Workspace)/drop/$(Build.BuildId).zip'
      runtimeStack: 'NODE|18-lts'
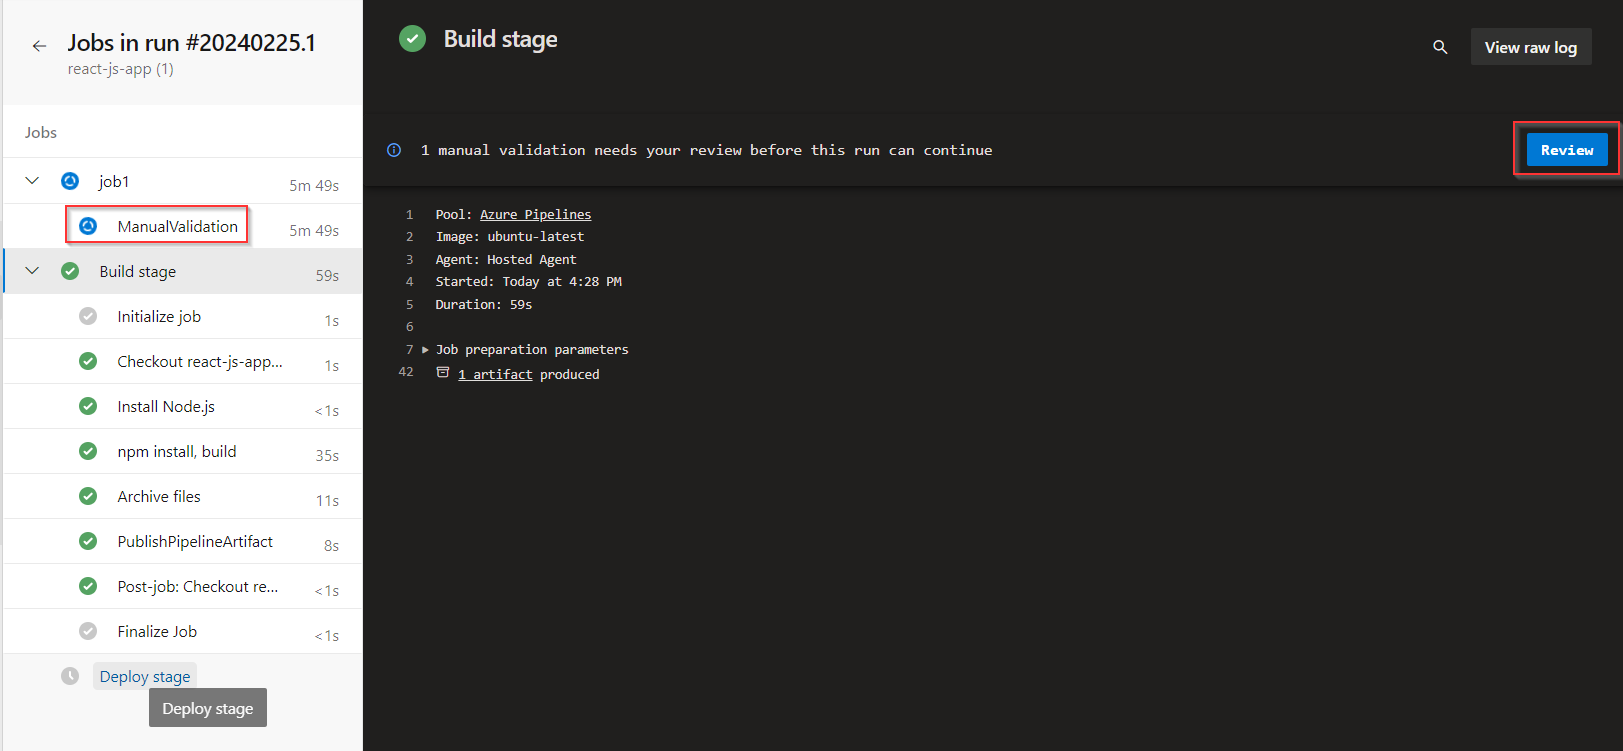
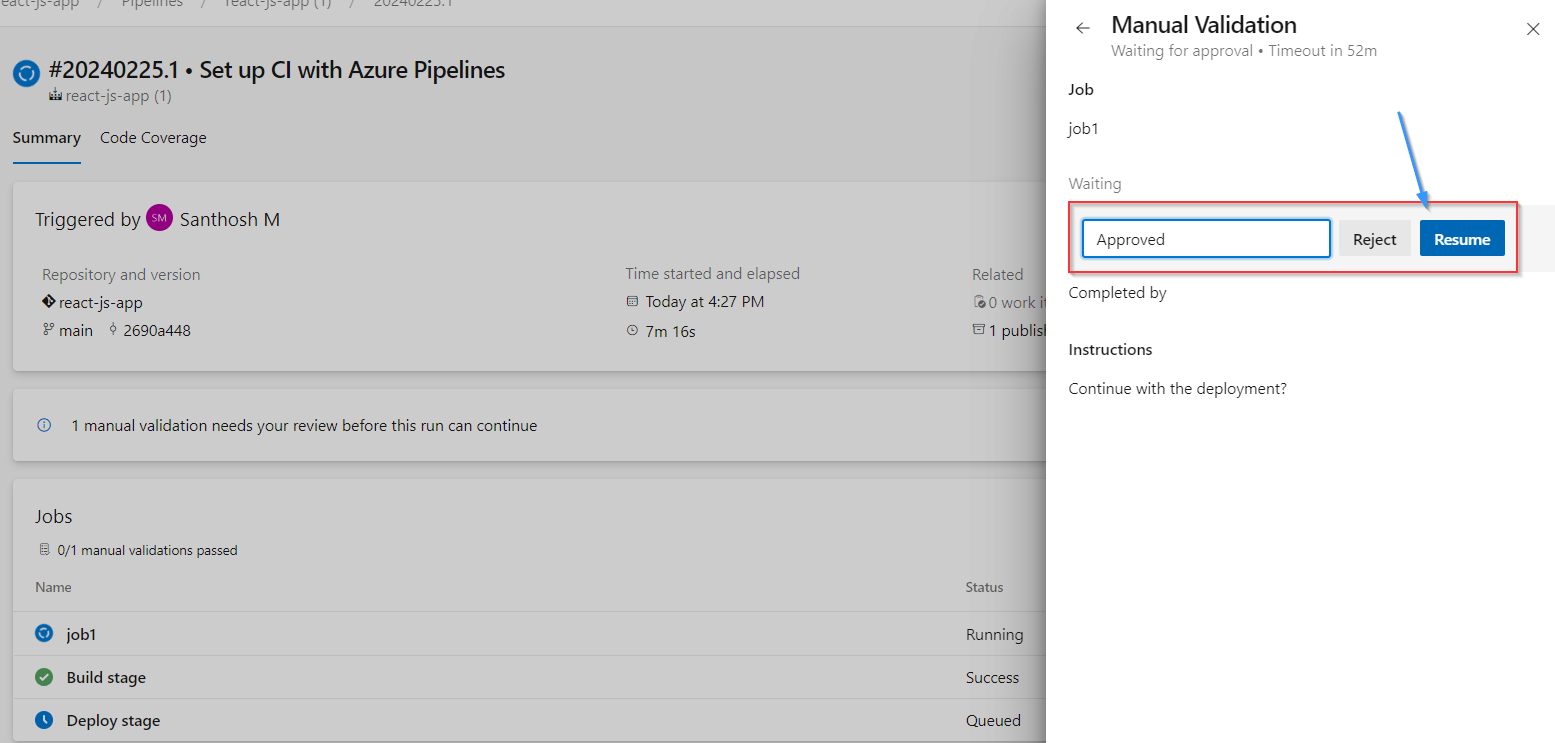
Now we could see the only the Build Stage is successful and the Deploy Stage is waiting for the ManualValidation Approval form the Mail ID that we have provided in the YAML file.
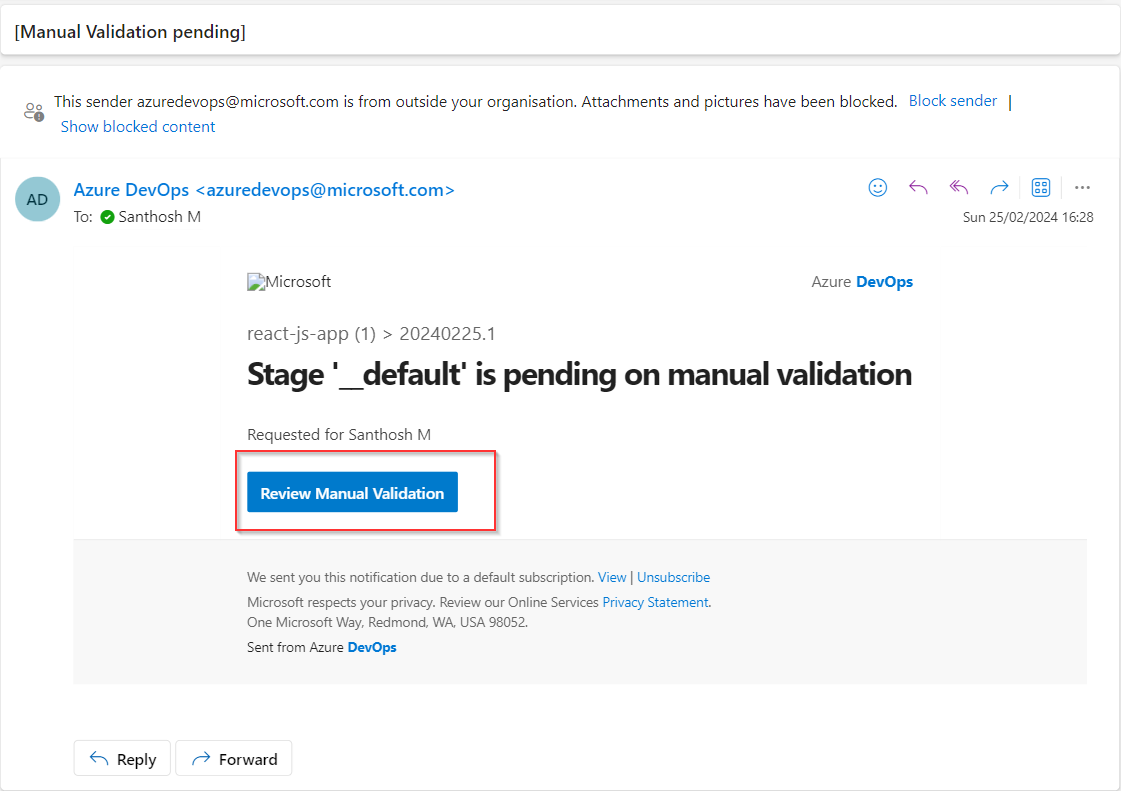
Step 7: Once the Validator receives the email and approves the deployment, the Release Pipeline automatically initiates the deployment process. This triggers the deployment tasks defined in the pipeline, enabling the seamless transition of your React application from staging to production environment on Azure Web App.
Step 8: Navigate to the Release Pipeline, then click on “Review” and select “Resume” to proceed with starting the deployment process.
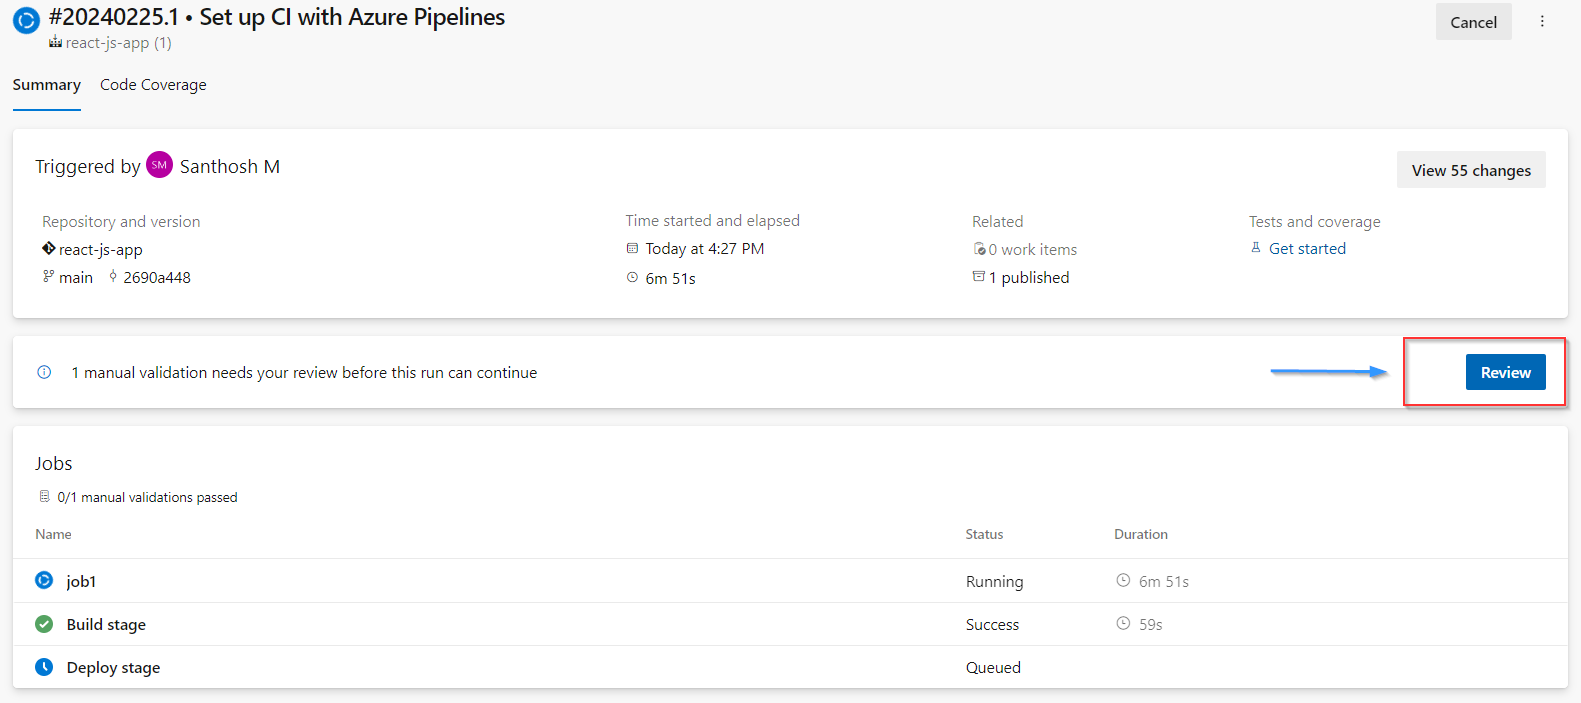
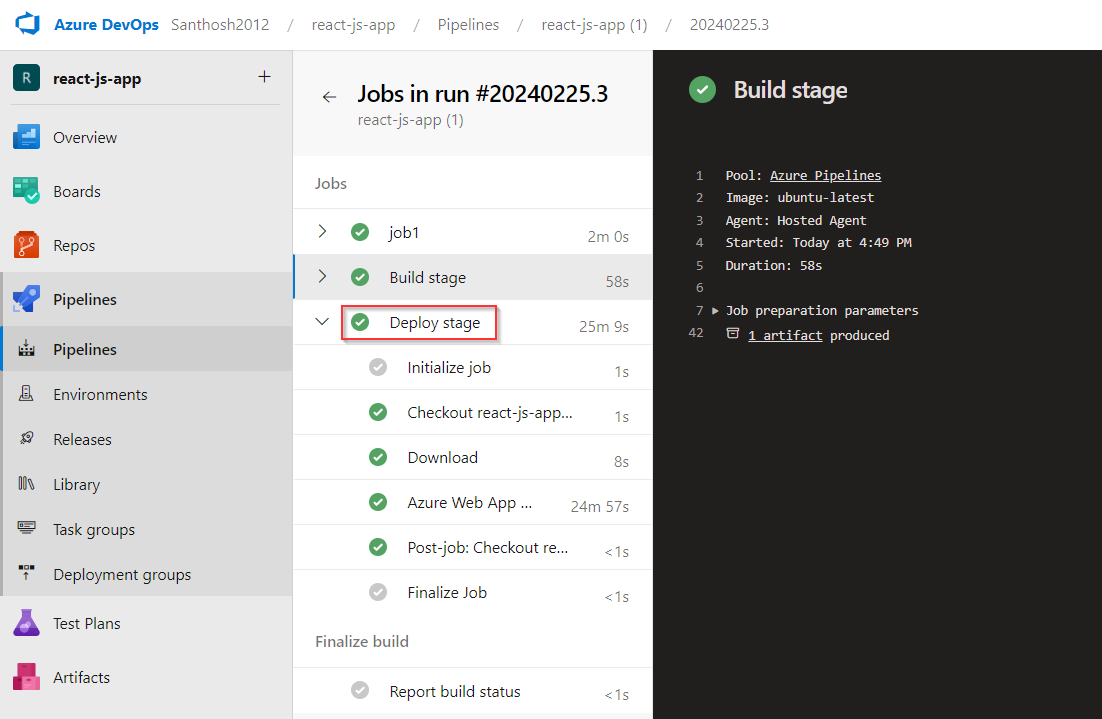
Now both the Build and Deploy Stage is successfully completed.
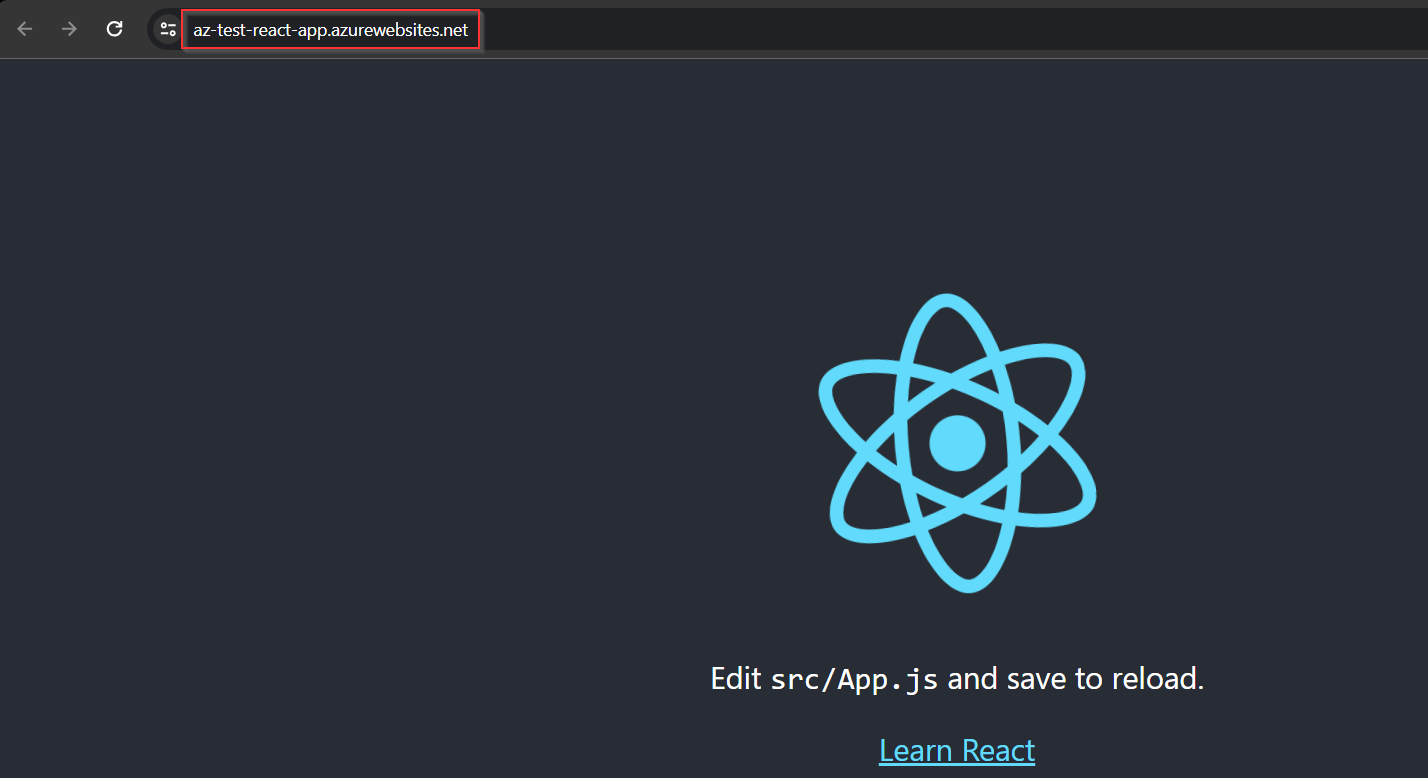
Step 9: Verify the success of the deployment by opening a new tab and accessing the Azure Web App service URL. If the React application loads without errors, it indicates a successful deployment. This confirms that your React app is now live and accessible through the provided URL.
