
Azure SQL Database Auto-Failover Group is a feature designed to enhance the availability and resilience of databases in Azure SQL Database. It enables automatic failover of a group of databases from a primary server to a secondary server in the event of a planned or unplanned outage, ensuring minimal downtime and data loss. This feature provides high availability and disaster recovery capabilities by synchronously replicating databases between primary and secondary servers within the same region or across different regions.
Advantages:
- Continuous data synchronization: Ensures that data changes are replicated in real-time between primary and secondary servers, minimizing the risk of data loss.
- Automatic failover with minimal downtime: Enables automatic failover to the secondary server in the event of a primary server failure, ensuring business continuity with minimal disruption to operations.
- Support for manual failover: Allows administrators to initiate manual failover for planned maintenance or testing purposes, providing flexibility and control over the failover process.
- Simplified management: Offers an intuitive interface through the Azure portal or PowerShell commands for easy configuration, monitoring, and management of failover groups.
- Regional and cross-regional replication: Supports replication between primary and secondary servers within the same region or across different regions, enabling robust disaster recovery strategies for geographically distributed applications.
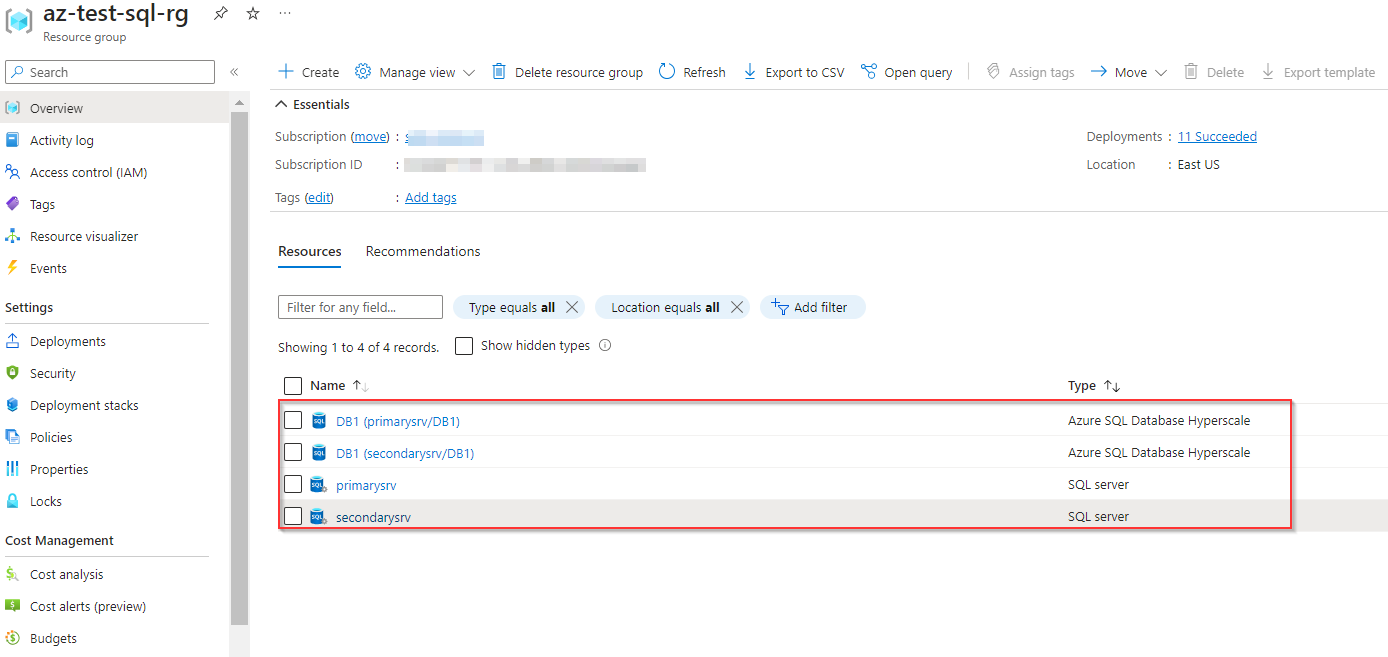
Step 1: Begin by setting up an Azure SQL database and server. This is the foundation for testing the Auto-Failover Group for Disaster Recovery. In Azure, you can easily create these resources through the Azure Portal or by using Azure CLI commands. Ensure that you choose appropriate configurations and settings to match your testing requirements.
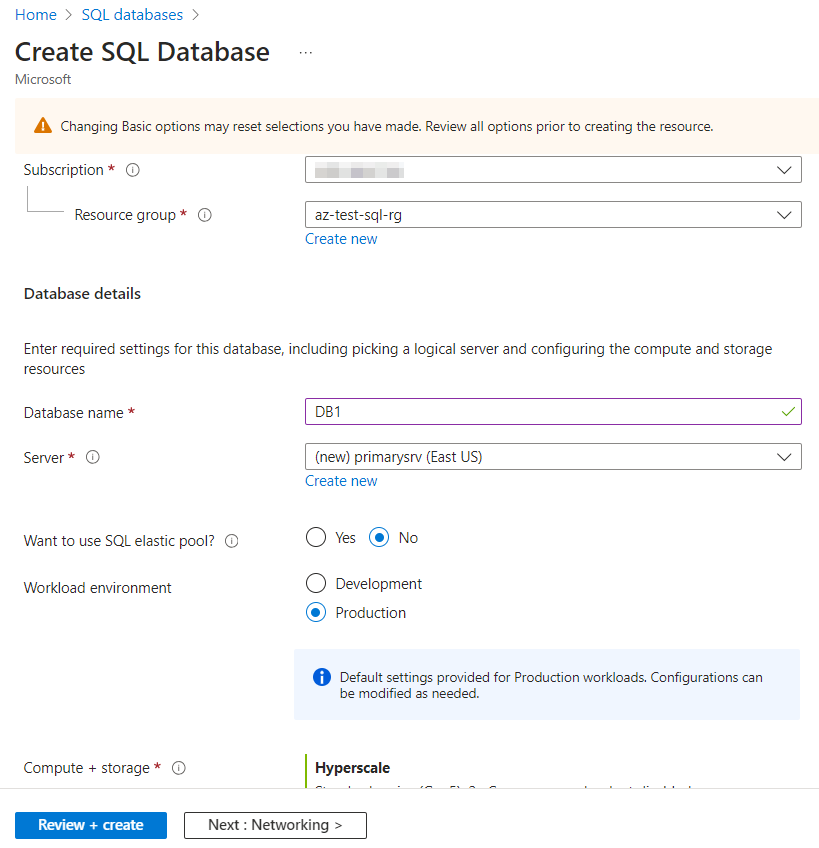
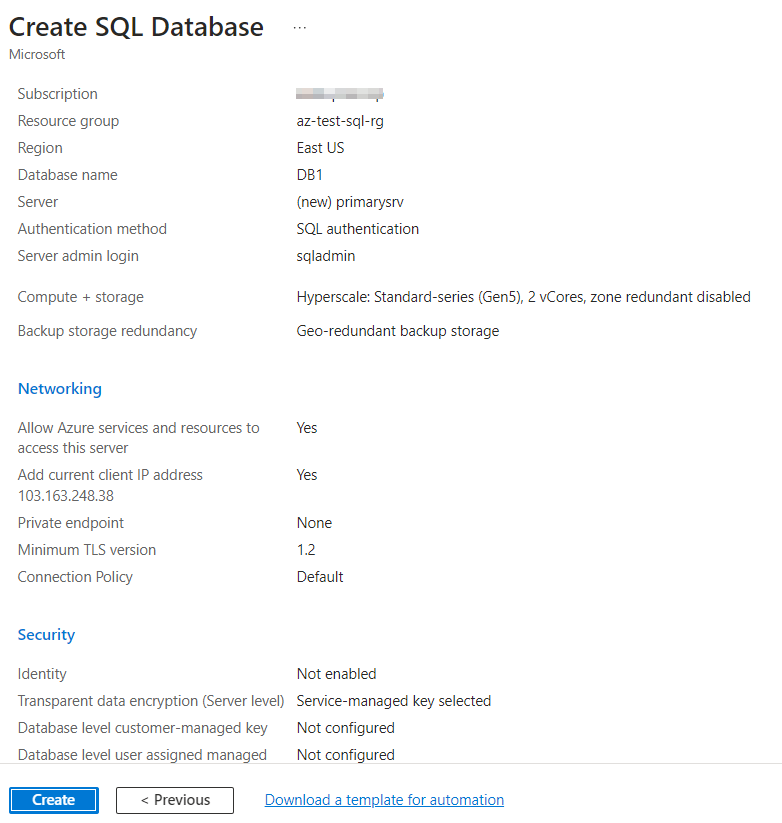
Check the configurations and click on create.
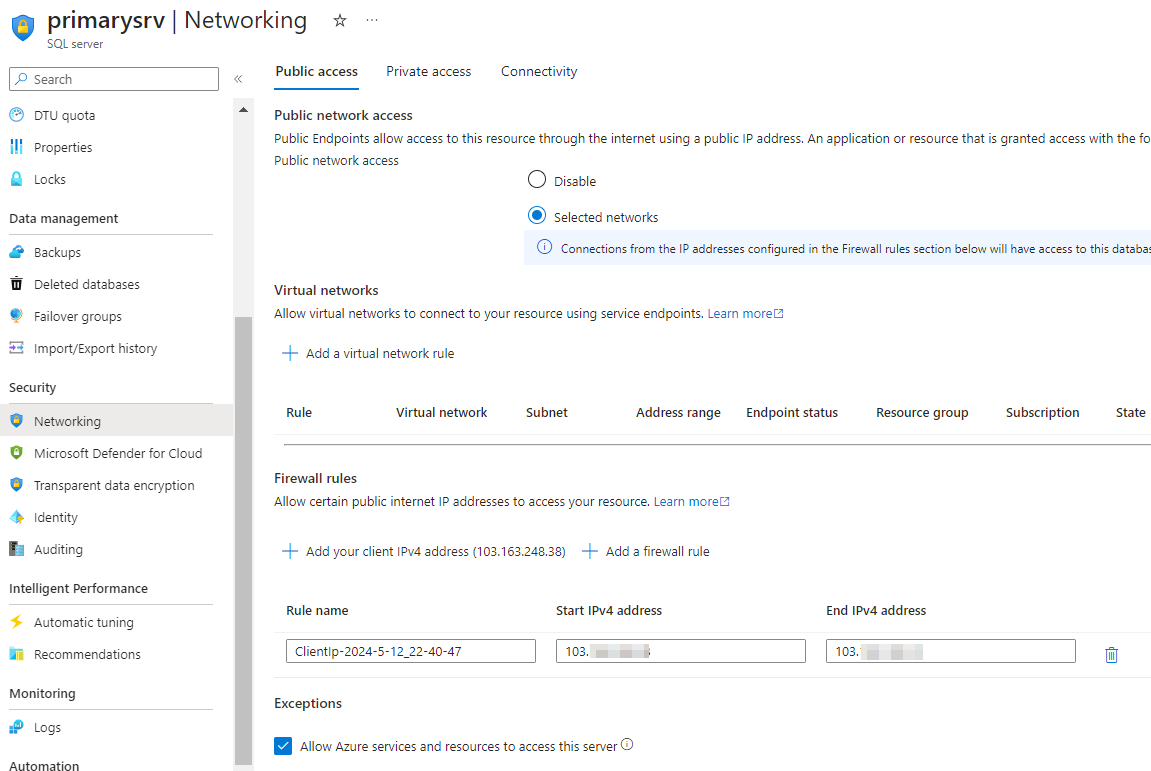
Step 2: Navigate to the networking section of your Azure SQL Primary server configuration. Here, you’ll want to add your public IP address to allow access to the server. By doing this, you ensure that your IP is authorized to interact with the SQL server.
Step 3: Within the primary server’s Data Management settings, locate and click on “Failover Groups.” Then, proceed to click on “Add Group.” This action initiates the setup process for creating a Failover Group.

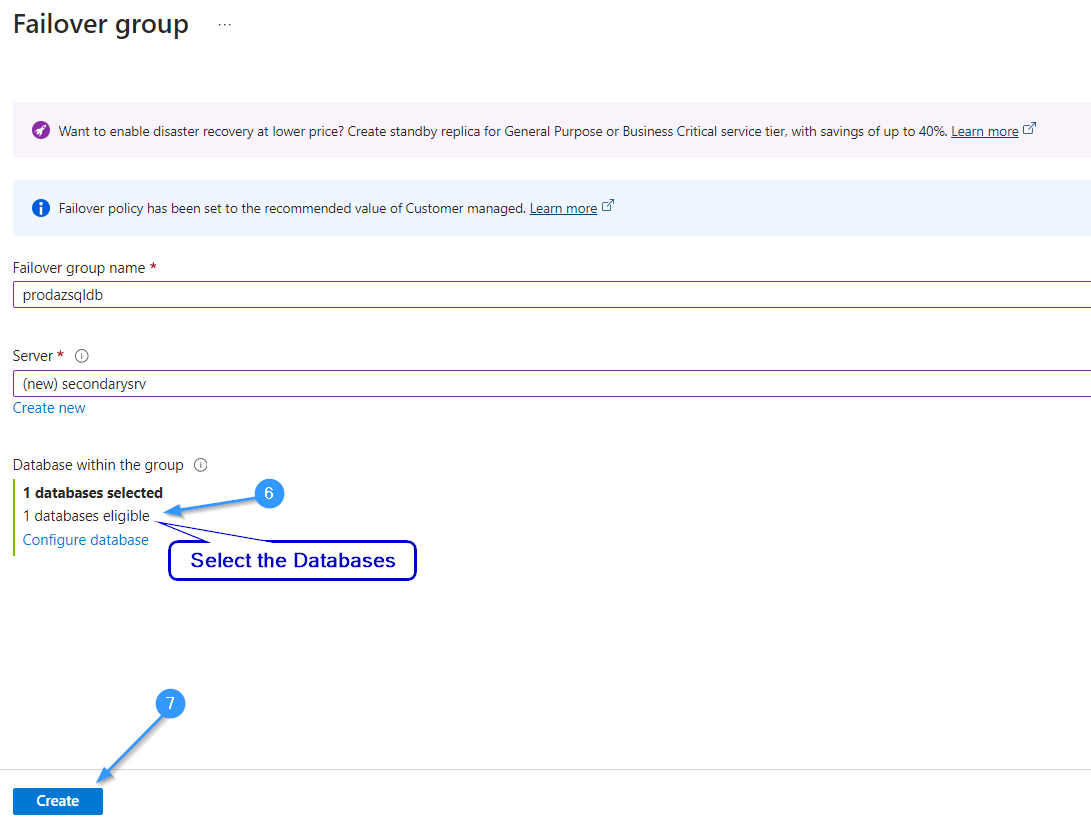
Step 4: Assign a descriptive name to your Failover Group. This identifier will serve as a common server ID for accessing all servers associated with this Failover Group. Choosing a clear and intuitive name will streamline management and facilitate navigation within your Azure environment
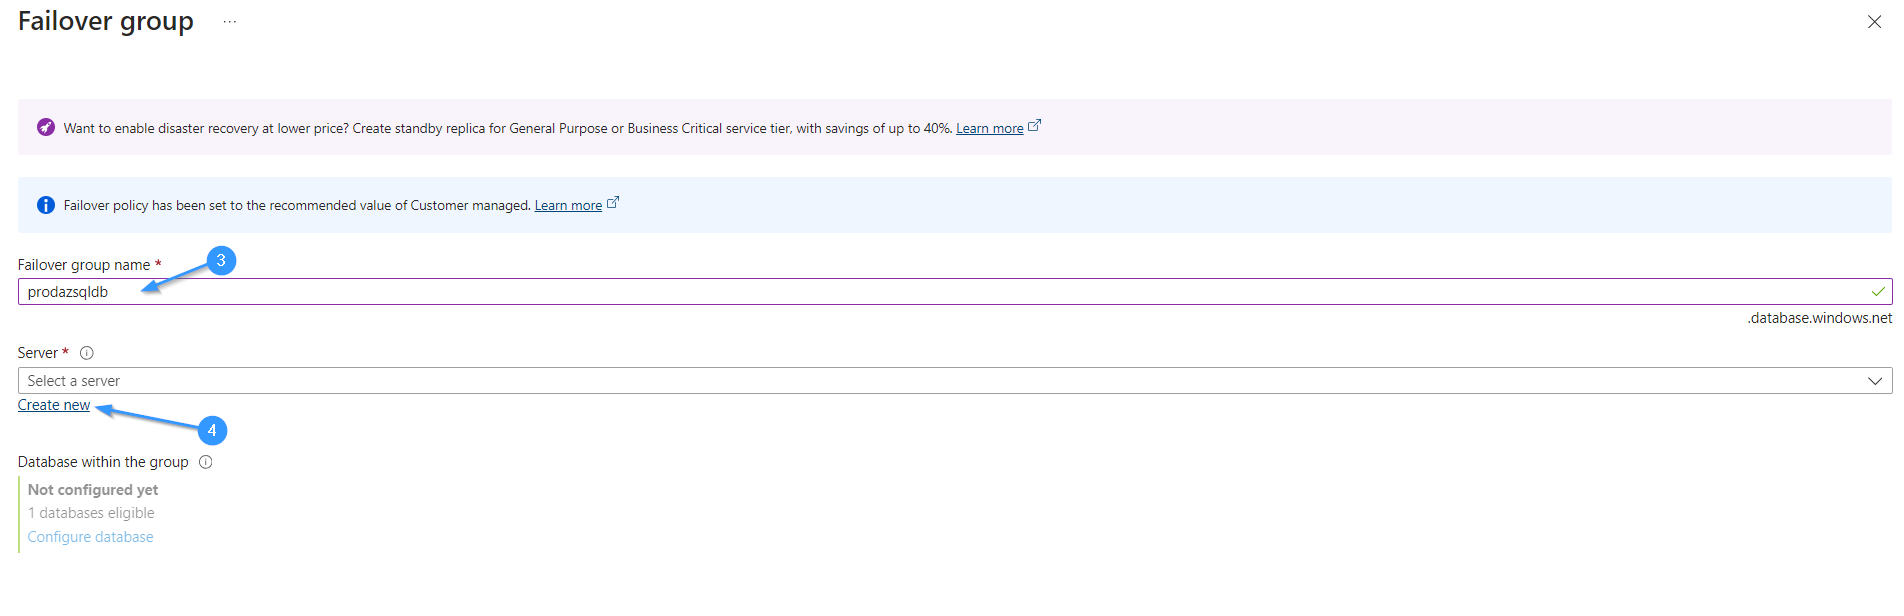
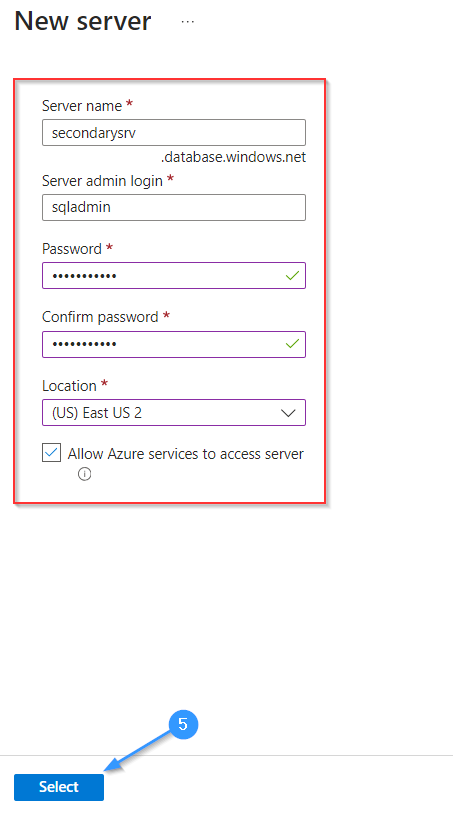
Step 5: Proceed to create a Secondary server, ensuring it’s located in a distinct geographical location from the primary server. This geographical diversity is crucial for robust disaster recovery planning. By syncing the Secondary server with the primary, you establish a failover mechanism, ensuring data accessibility even in the event of Primary server failure.
Select the required databases that need to be synced with the Secondary Server.
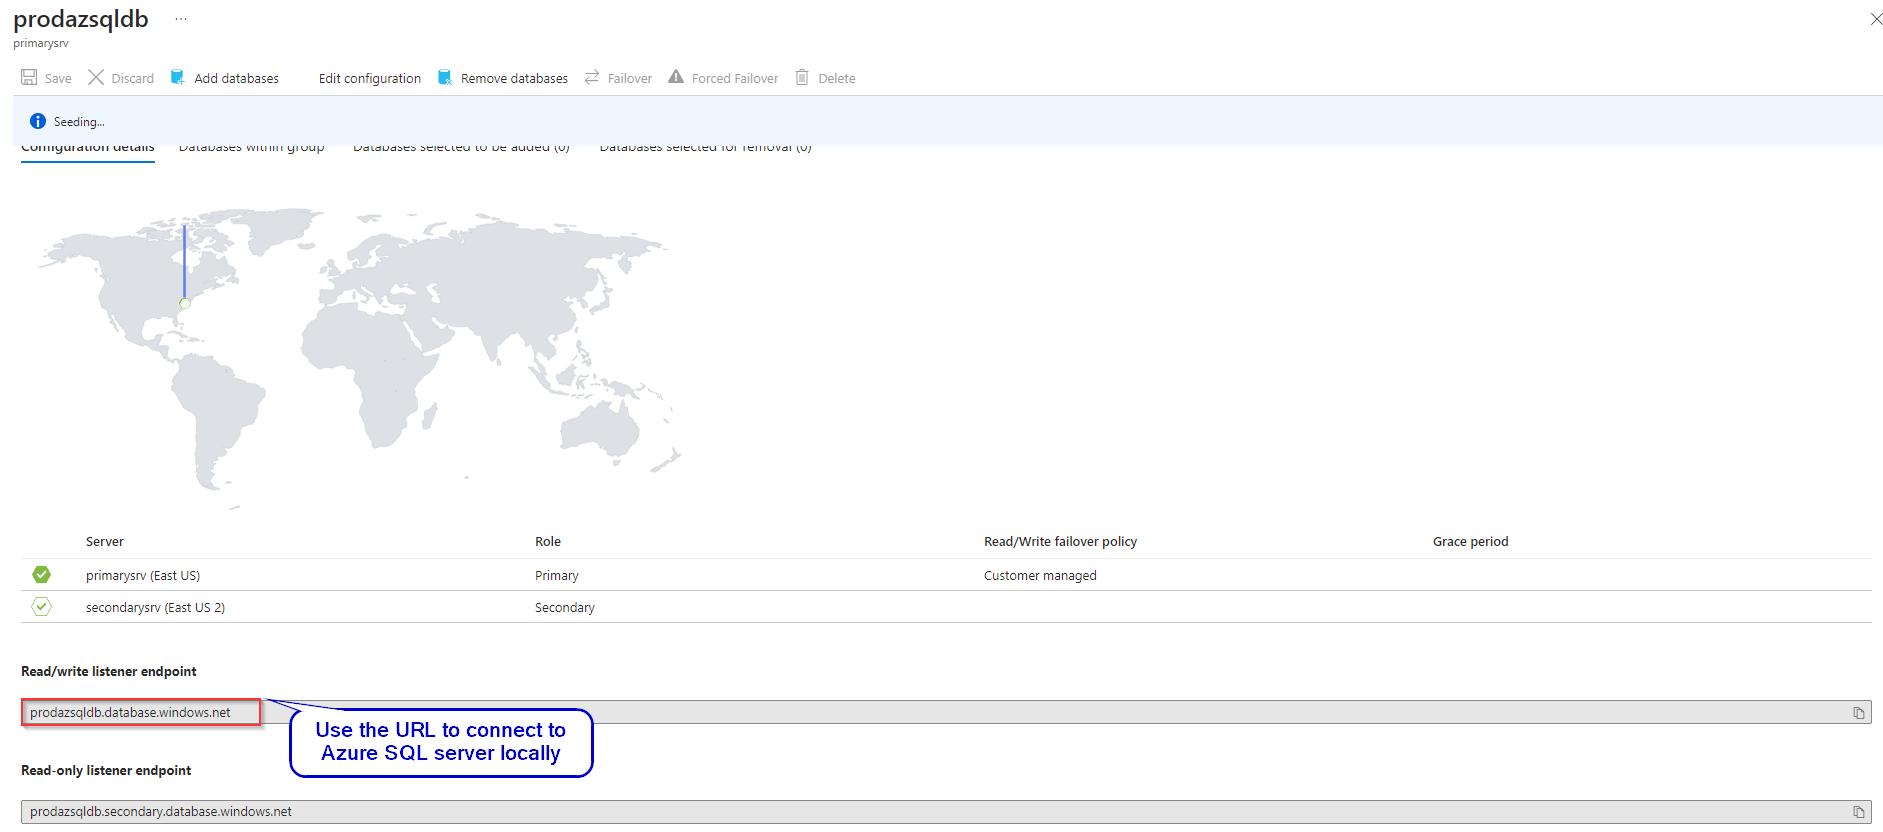
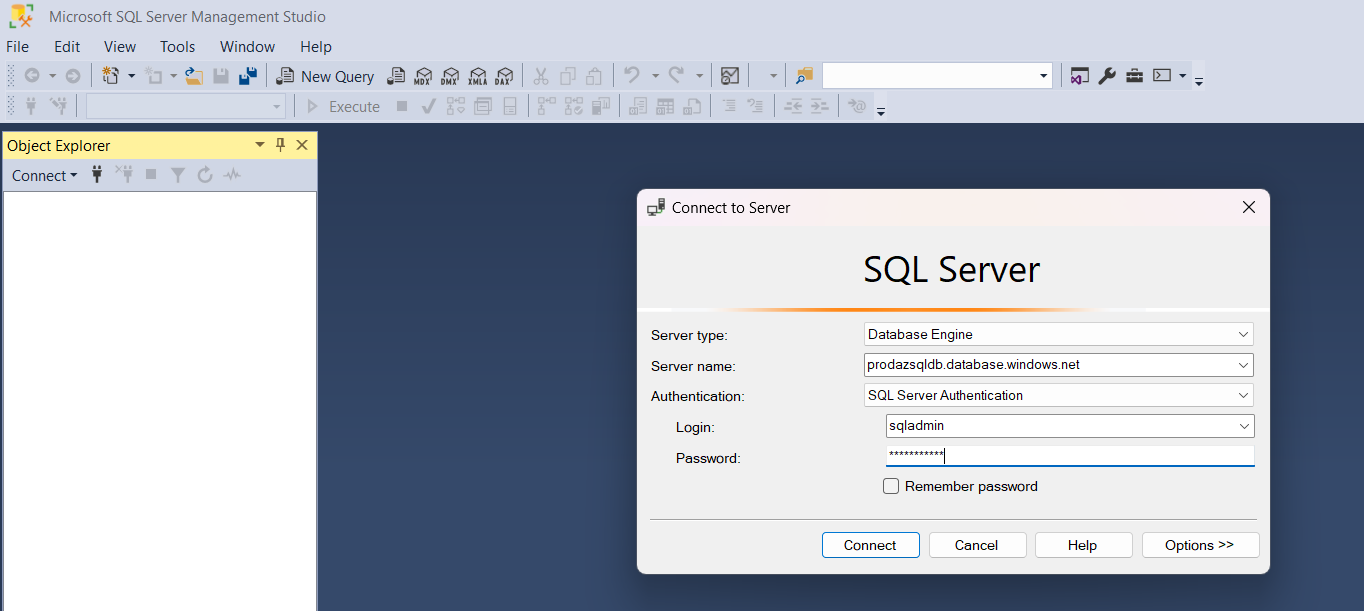
Step 6: Utilize Azure SQL Management Studio to establish a local connection to the database. When prompted for connection details, input the Failover Group ID to seamlessly access the database resources.
Provide the Login Credentials and connect to the SQL Server.
Step 7: Enhance your database management by adding queries to ascertain from which server the database is being accessed. This step aids in monitoring and troubleshooting, providing valuable insights into the source of database requests. Currently its connected to the Primary Server.

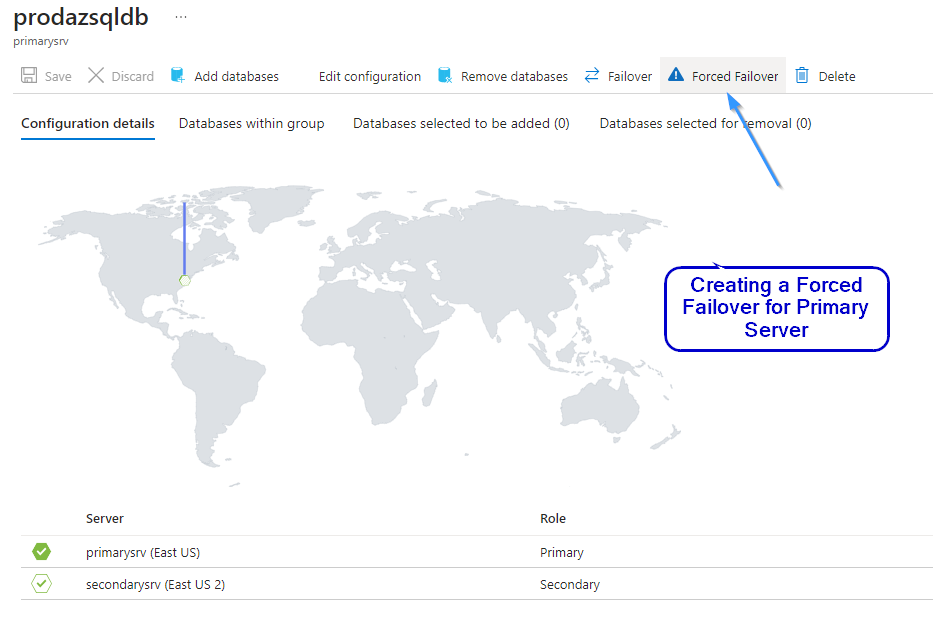
Step 8: Within the Failover Groups section, locate and select “Forced Failover” to simulate a server-level failure for the primary server. This action triggers the failover process, directing database operations to the secondary server as per the configured failover settings.
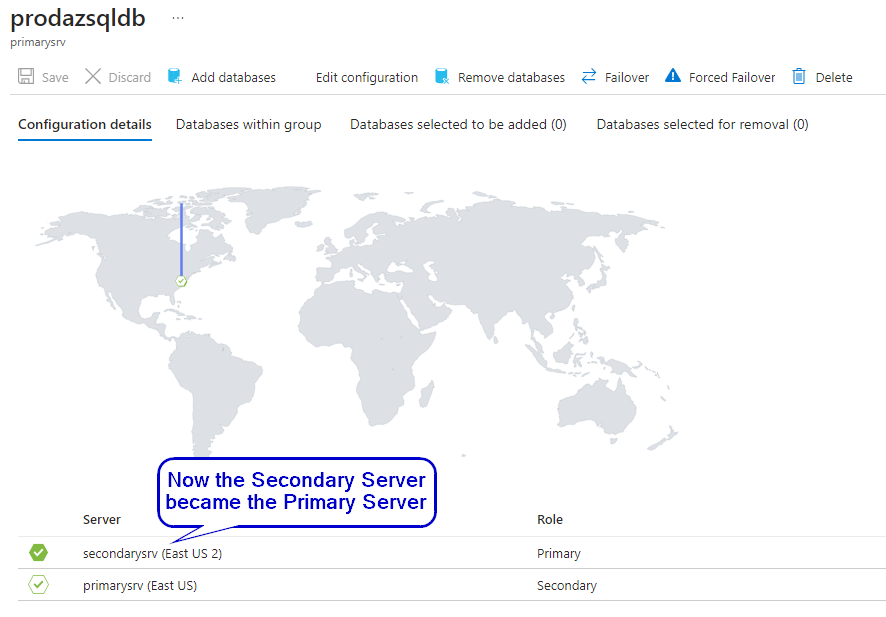
Following the forced failover, the secondary server assumes the role of the primary server, while the original primary server transitions to become the secondary server. This exchange ensures continuity of database operations, with the former secondary server now serving as the primary point of access for data retrieval and management.
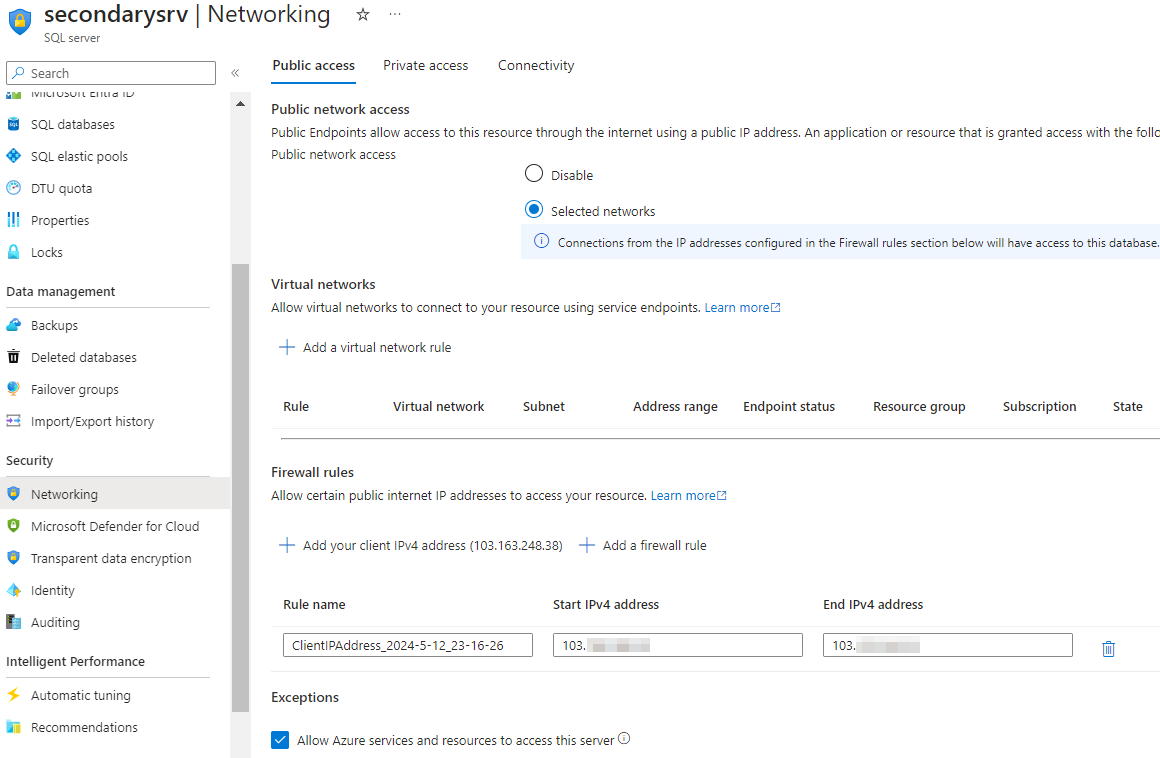
Step 9: In the networking settings of the newly promoted primary server (formerly the secondary server), add your public IP address. This action mirrors the configuration performed earlier on the original primary server, ensuring that your IP remains authorized to interact with the server.
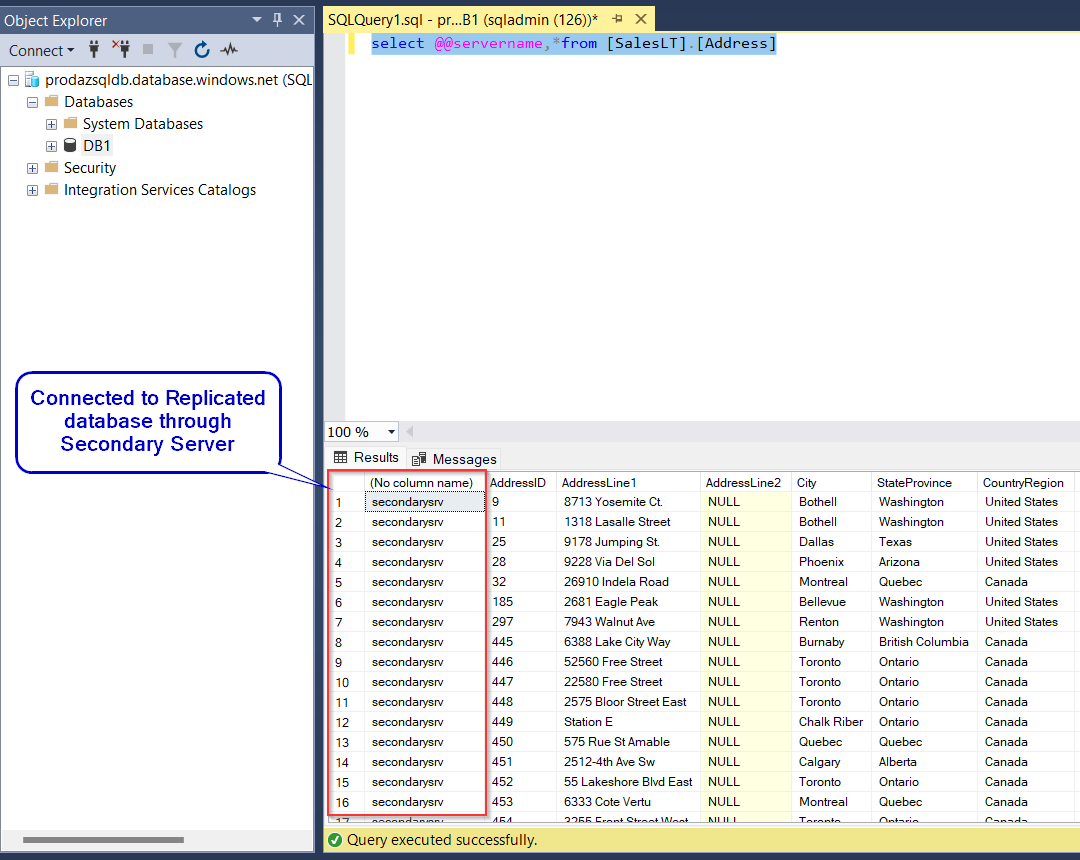
Step 10: Deploy queries within your database environment to ascertain the source of data retrieval requests. Specifically, craft queries to confirm that data access originates from the newly promoted primary server, which was formerly the secondary server. This verification step confirms the successful failover process, demonstrating that database operations are now being conducted from the secondary server, which has assumed the role of the primary server following the failover event.
