
Step 1: Establish an Azure Container Registry (ACR) as a central repository to store and manage your Dockerized application images efficiently and securely.
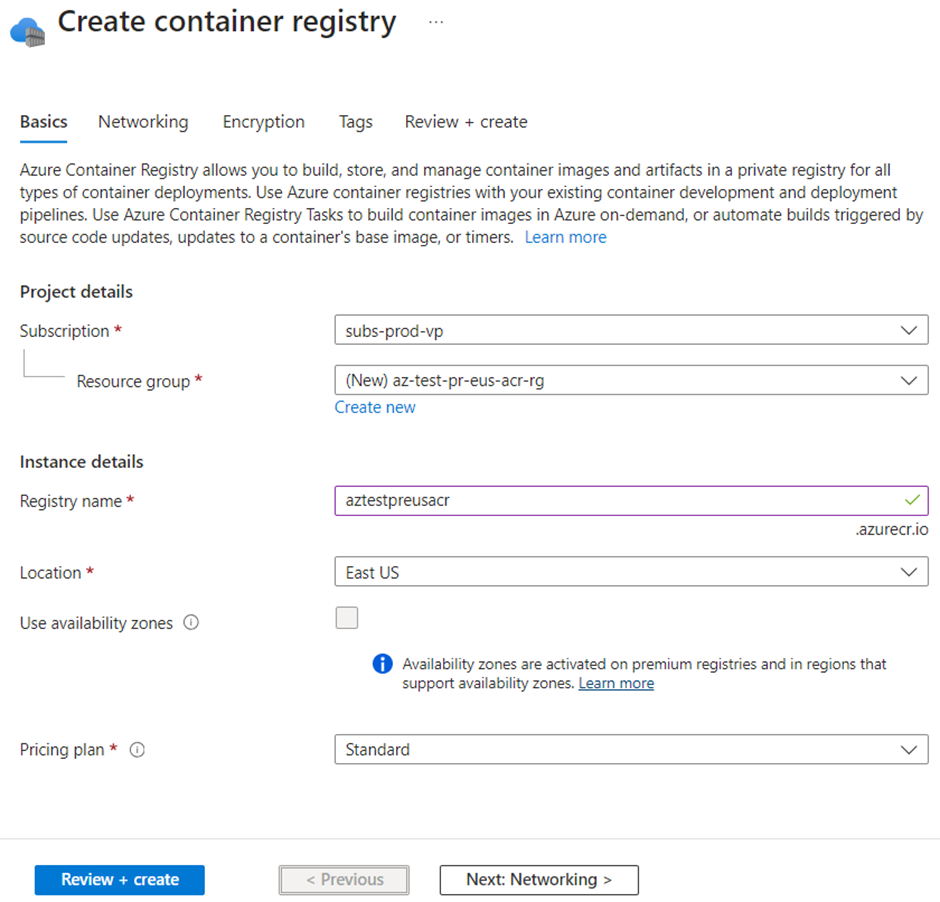
Check the Configurations and click on create.

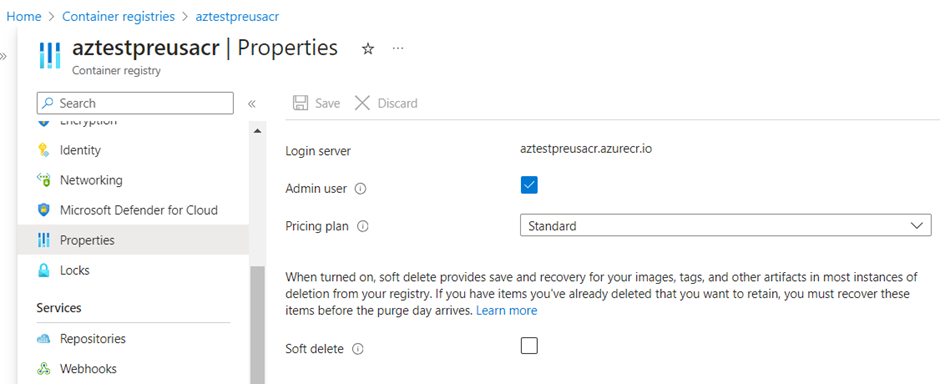
In Azure Container Registry fill the checkbox Admin Users and save it.
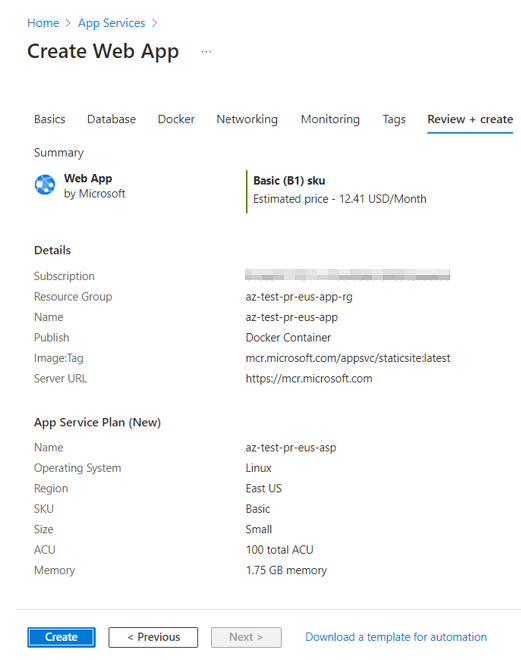
Step 2: Begin by creating an App Service in Azure, specifying a name for the Web App, choosing Docker Container as the hosting option, and selecting your preferred location for deployment. This sets up the infrastructure required to host your Dockerized application on Azure Web App Service.
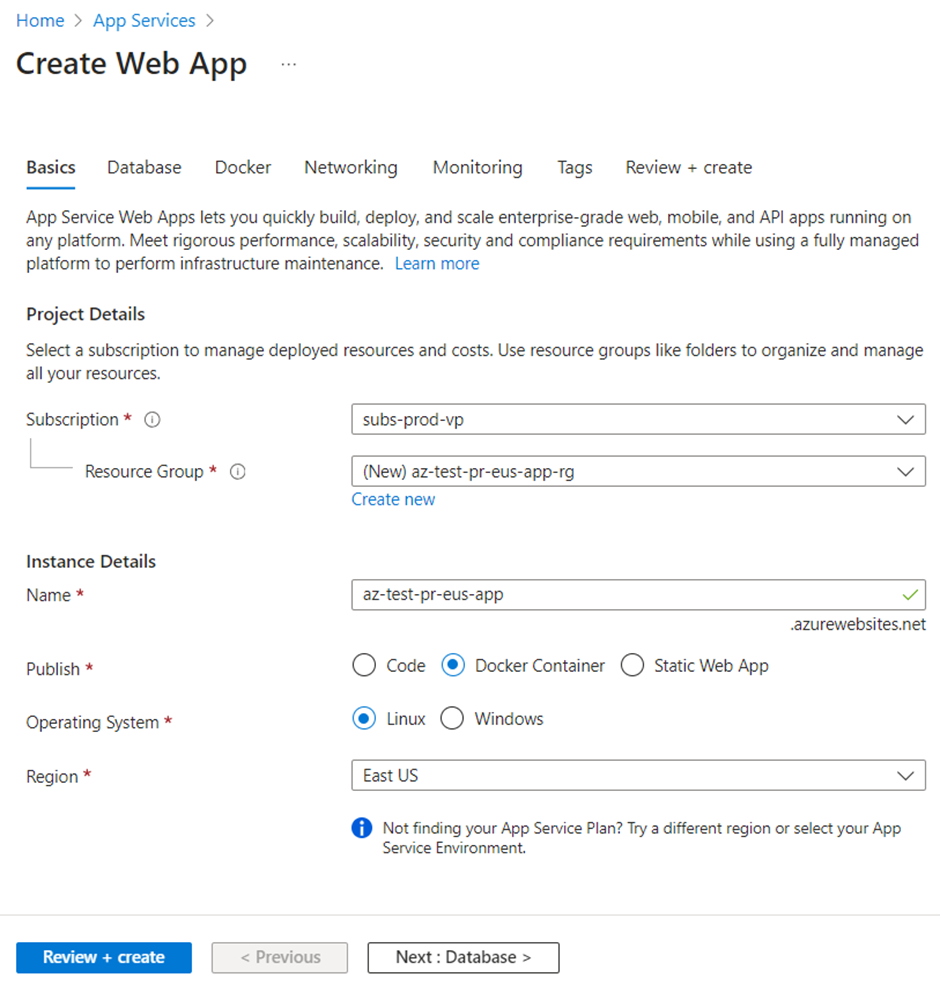
Check the configurations and Click on create.
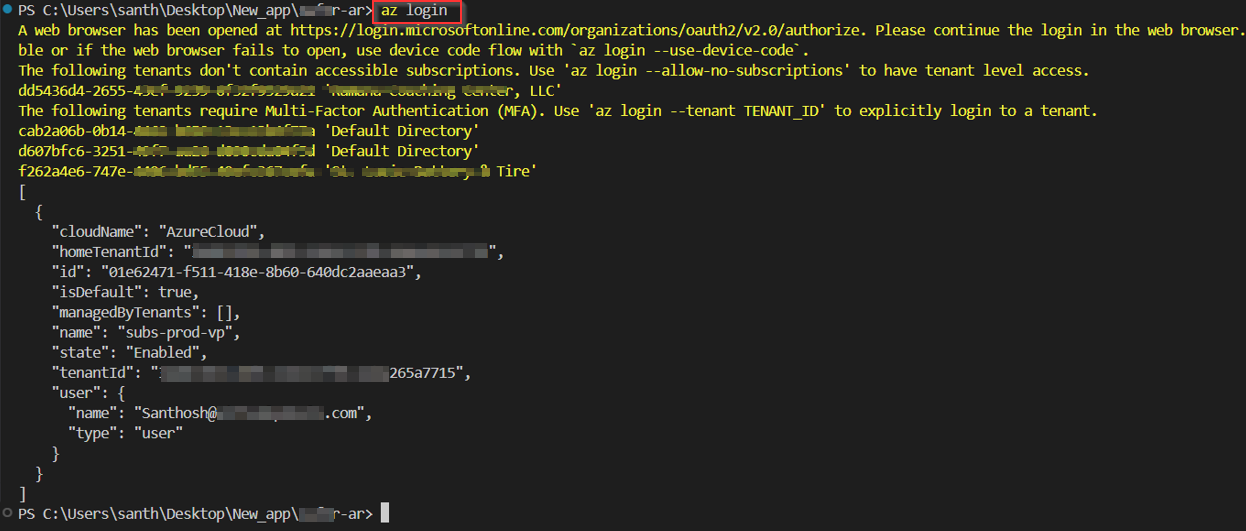
Step 3: Use the ‘az login’ command to authenticate and log in to your Azure subscription, granting access to manage Azure resources such as Azure Container Registry (ACR) and Azure Web App.
Step 4: Authenticate with your Azure Container Registry (ACR) using the ‘az acr login’ command followed by the name of your ACR instance, ensuring access to push and pull Docker images to and from the registry.
az acr login --name acrname

Step 5: Build your image using the Docker Build command.
docker build -t docker-image-name .
Step 6: Add a tag to the Docker image.
docker tag image_name acr-name.azurecr.io/image_name:latest
Step 7: Execute the ‘docker push’ command, specifying the tag of your local Docker image and the fully qualified name of your Azure Container Registry (ACR), to upload the image from your local repository to the ACR, making it available for deployment to Azure services like Azure Web App.
docker push acr-name.azurecr.io/image-name:latest

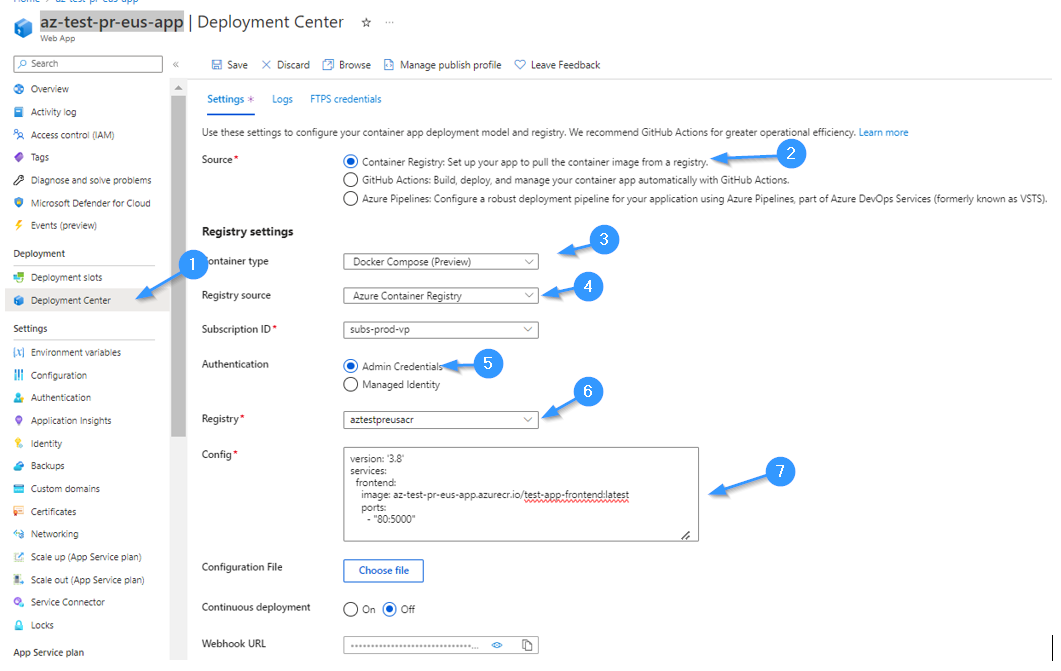
Step 8: Access the Web App and proceed to the Deployment Center. Choose Docker Compose as the deployment option, then select Azure Container Registry. Pick the appropriate Azure Container Registry and configure the port as 80. Enable Continuous Deployment to automate the deployment process.
- Select Docker Compose
- Select Azure Container Registry
- Select the Required Azure Container Registry
- In Config Provide Port 80
- Set Continuous Deployment – On
Step 9: Verify the hosting of your Docker image by accessing your Azure Web App URL in a web browser to view the app’s details, confirming successful deployment and hosting of the image on Azure Web App.


 & host it via Azure Web App)