I cannot stress how important is to plan you’re networking which is one of the most critical part of the infrastructure piece.
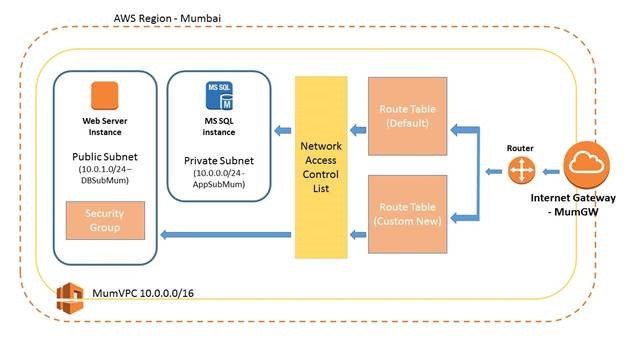
Amazon Virtual Private Cloud provides an isolated network environment where you can launch AWS services. You can manage and have complete control over the networking environment including the configuration of IP address range, subnets, route tables and network gateway. Access to EC2 instances can be secured using network access control list & security groups.
In this article series we will take a scenario of setting up a web and application server given an AWS platform. The objective of this article series is to understand and plan the network infrastructure so that you can access your website which is hosted on application server (public network) and connect to database server (private network)) back-end.
Let’s run through the important areas to understand what is and how the AWS VPC components are created and configured.
AWS Region – Mumbai
One of the important part is to select on which location you are going to create a VPC and usually you select the region where you got most of your end users located to connect fast and easily the website hosted on AWS. In my case I will be using Asia Pacific – Mumbai as most of the users who accesses the website belongs to this region.
Virtual Private Cloud
Think of a logical datacenter, you will be creating an isolated network by specifying an IP address range as a Classless Inter-Domain Routing (CIDR) block. You cannot use CIDR block larger than /16. i.e. 10.0.0.0/8 and even if you enter it won’t allow you to create. AWS recommends you to use below IPv4 address ranges as specified in RFC 1918.
· 10.0.0.0 – 10.255.255.255 (10/8 prefix)
· 172.16.0.0 – 172.31.255.255 (172.16/12 prefix)
· 192.168.0.0 – 192.168.255.255 (192.168/16 prefix)
Amazon also lets you provide IPv6 CIDR block using VPC. We will be using IPv4 as per our scenario having maximum 10.0.0.0/16 range. You need to plan in advance the address range e.g. if you create one range not having maximum and later thinking to add more you cannot do it rather you have to delete the existing VPC and recreate the whole thing again.
MumVPC is the name of my VPC and the address range 10.0.0.0/16 with no IPv6 having tenancy option default. You need to select dedicated option If you do not want your VPC hardware to be shared with other tenant, selecting this option will spike the cost you will be billed so in our case lets select default option and continue. You notice when you create VPC it also creates route table, network ACLs and security group.
A new route table has been created for MumVPC which is required for instances to connect to internet and using route table we can define custom routing between the subnets too.
New Security group has been created for MumVPC
New Network ACL has been created for MumVPC
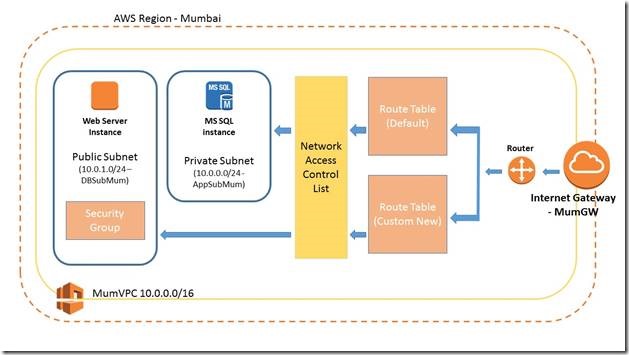
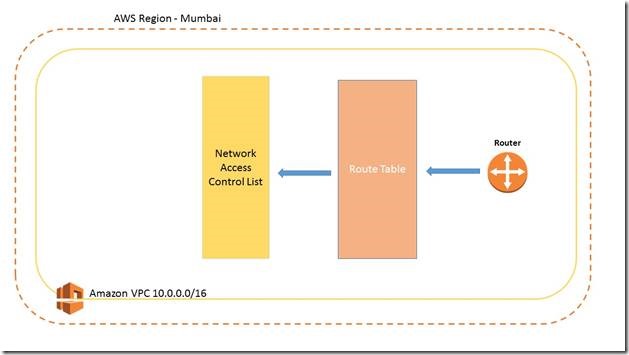
At high level below is what it looks like when you create a VPV.
Subnet
Without subnet we cannot create an instance and assign IP, so let’s create a subnet and in our scenario we will be creating two subnets for each instances. One of database and another for application network.
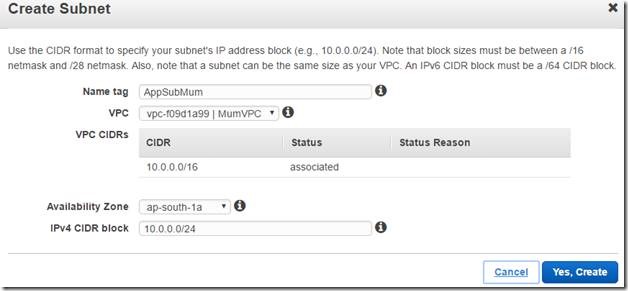
Creating a subnet called AppSubMum to create app web server instance and all the instances under this subnet will get an IP range under 10.0.0.0 network which is linked to VPC MumVPC
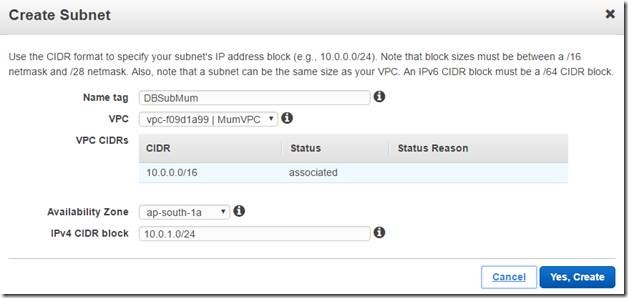
Creating another subnet called DBSubMum to create DB server instance and all the instances under this subnet will get an IP range under 10.0.1.0 network which is linked to VPC MumVPC. You can now see how many IPs are available are in each subnet and how many are reserved by default.
Both the subnets are now created and status is available
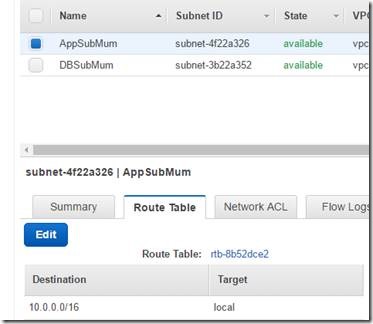
AppSubMum belongs to route table 10.0.0.0/16
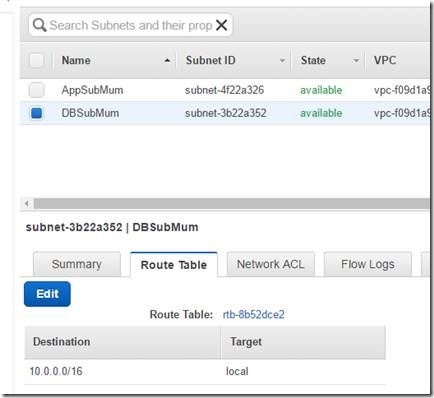
AppSubMum belongs to route table 10.0.0.0/16
If you notice both the subnets are under the same route table 10.0.0.0/16 means instance created on either subnets can talk or connect to each other but since the target is local, instances on this both subnet will not be able to connect to the internet. We will see later in the article series how to configure subnet so that instances can connect to internet.
Internet Gateway
Internet gateway is required for instances to connect to internet on a specified subnet and it is associated single Virtual Private Cloud, you cannot attach two Internet gateway to the same VPC. Internet gateway are highly resilience and there is no single point of failure.
By default internet gateways are not created for security reason and it has to be created manually and associate with VPC.
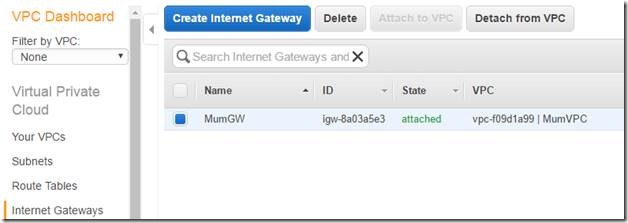
Let’s create an Internet Gateway called MumGW
We must attach to a VPC as by default it is not attached
Select the MumVPC and click on Yes, Attach
Now the internet gateway is attached to MumVPC
Stay tuned as we will further create instances on respective subnets and configure application subnet in such a way that the instance which are created on it can connect to internet (on app server subnet) and we can access the website which is hosted on it.

