31 C
Dubai
Friday, May 2, 2025
Home Blog Page 98

How to Recover Public Folder Items in Exchange 2013

As Public Folders are stored in Public Folder Mailboxes.Deleting Items from Public Folders are stored in the Dumspter.

Public Folder Dumpster remains for 14 days by Default. and then its get deleted


To Check the Settings –

Get-Mailbox –PublicFolder | FT Name,RetainDeletedItemsFor -AutoSize

image


The Best way to Access the dumpster is using Outlook.


Lets say am going to Delete an Item from Public Folders


image


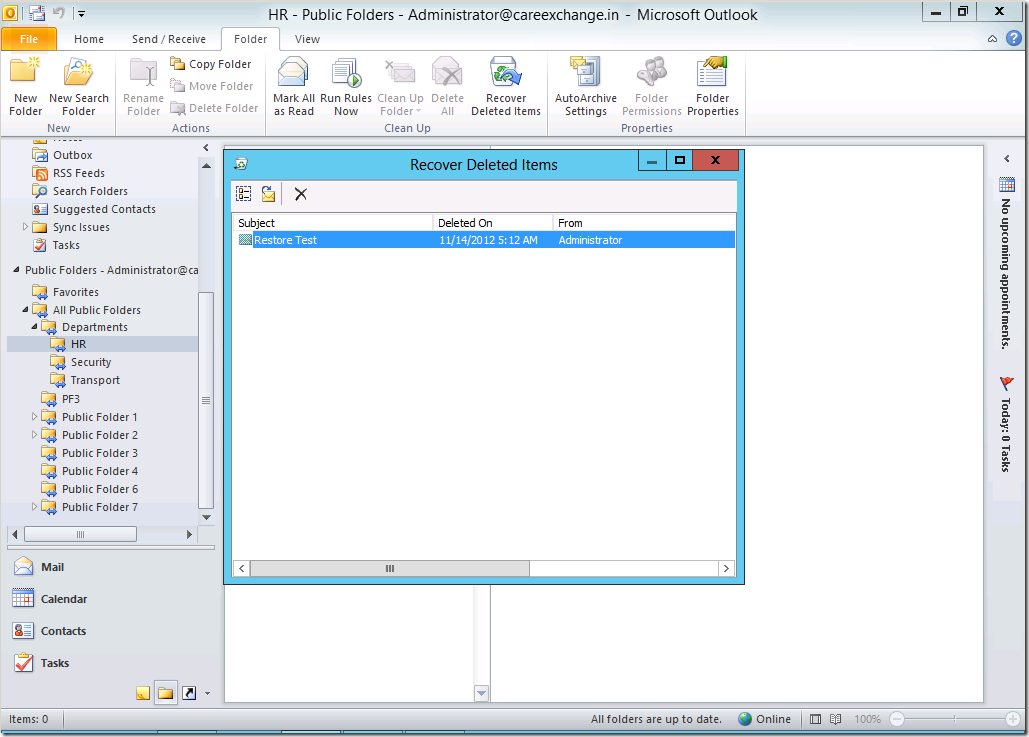
Choose the PF Folder –

Folder – Recover Deleted Items

image

Choose the Item To recover


Restore Process will be added in the future.

Exchange 2013 – Public Folders – Features -Part 3

Mail Enabling a Public Folder in Exchange 2013

Choose Enable on the Right pane :

image

Click on Yes

image


Using Exchange Management Shell

image

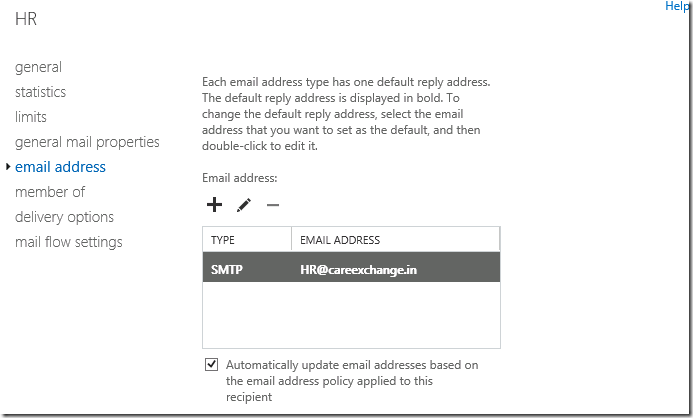
Choose Edit

image

image

It has options to Send as & Send on behalf

image

You can configure Mail flow settings

image


Blog Will be Continued when Exchange 2010 Sp3 Releases ..


Where we can start the trickiest migration …!!


In the Next Parts we would explore more

Exchange 2013 – Public Folders – Architecture -Part 1

Exchange 2013 – Public Folders – Creating and Managing -Part 2

Exchange 2013 – Public Folders – Creating and Managing -Part 2

For Better Understanding

Exchange 2013 – Public Folders – Architecture -Part 1


Creating Public Folder Mailbox using Exchange Admin Center

Step1 :

Login to Exchange Admin Center (EAC)

Step 2:

Click on the “+” Sign

image

Choose Save

image

Using Exchange Management Shell

Creating Public Folder Mailbox

New-Mailbox “PF Mbx5” -PublicFolder

image


Removing Public Folder Mailbox

Remove-Mailbox “PF Mbx6” -PublicFolder

image


List all Public Folder Mailboxes

Get-Mailbox –PublicFolder

image


Creating Public Folder using Exchange Admin Center

Step1 :

Login to Exchange Admin Center (EAC)

Step 2:

Click on the “+” Sign

image

Choose Save

image

Click on the Folder to Create SubFolders

Note : By Default “Exchange Admin Center” Won’t allow you to Choose the Public Folder Mailbox


Use Exchange Management Shell to store Public Folders in different Mailboxes

New-PublicFolder “PF Folder Name” –Mailbox “PF Mailbox Name”

image

To Create a SubFolder in Public Folder and Defining a Different Mailbox

New-PublicFolder “PF Folder Name” –Mailbox “PF Mailbox Name” –Path “\Root Folder Name”

image

To Identify Which Public Folders are stored in which Public Folder Mailboxes

Get-PublicFolder –Recurse | FT Name,ContentMailboxName,ParentPath

image


In the Next Parts we would explore more

Exchange 2013 – Public Folders – Architecture -Part 1

Exchange 2013 – Public Folders – Features -Part 3

Exchange 2013 – Public Folders – Architecture -Part 1

Let us the Discuss the architecture changes and improvements made to Public Folders.


For Starters – Mostly Public Folders are used to have a common place for Employees to share their Critical Data.

Like- Sales info,Pay Slip generation, Common Documents etc..


Improvements Made to Public Folders in Exchange 2013 :

1.Moving Public Folders to Mailboxes (No More Public Folder Databases)

2.Introducing high availability for Public Folders (Public Folders will be a part of DAG)

3.Flexibility of Moving Public Folder Mailboxes to Different Databases

4.Public Folders Can be managed through ECP – (Exchange Control Panel) or Called as EAC (Exchange Admin Center)

5.Every Public Folder can be hosted in a different Mailbox (Improving more high availability for sensitive Data)

6.Enhancing office 365  with Public Folders.

7.More Flexibility of Public Folders Restoration

8.Future Migration will be more simpler.(It won’t be time consuming as like Previous Versions”)


“No more waiting for Public Folder replication”


and more.


Note : Users Cannot Access or Manage Public Folders using OWA or Office 2013 Yet


Architecture Change :


image

Firstly ,Public Folders will be stored in Public Folder Mailboxes.All the Public Folder Mailboxes will have a Copy the Hierarchy and not all the content

All Clients Connects to their own Public Folder mailboxes. improving scalability and performance sharing can be done between servers.All the Contents of the Public Folders are stored in their respective Mailboxes. So Exchange administrators have to Plan their Public Folder mailbox Size and start splitting the content so that they can Manage well.

First Public Folder mailbox which is created will be the “Primary Hierarchy” which be the Root Public Folder Mailbox

There is only one Writeable Copy when it comes to Create Public Folders in Mailboxes. So that no Conflicts will occur with other pubic Folder mailboxes.

If the Writeable Copy fails . it will look for the passive copy of it (When its a member of DAG.)


To identify the Public Folder Mailbox which is owning the “Primary Hierarchy” – using PowerShell – IsrootPublicFolderMailbox will be True


Get-Mailbox –PublicFolder | Where-Object {$_.IsRootPublicFolderMailbox –eq “True”}

image

image

Like Creating a Public Folder Mailbox for Every Team. And its totally Depends on your Environment.

Every Public Folder Mailbox Creates a Disabled Active Directory Account – So If you are planning to Create More Public Folder Mailboxes. I would suggest you to Create a Dedicated Organizational Unit . So that you can avoid Deletion by Admins. Even Restoring becomes bit easier


image


As you could see it lists all the Public Folders – Where it denotes Which Mailbox it Belongs to


image


You can understand the Flexibility, Where you have a Root Mailbox hosted in a Public Folder mailbox and have the Subfolder hosted in dedicated mailboxes


In my Example.

Where Departements is a Root Folder.


Where its SubFolders HR,Transport,Security Can be hosted in different Public Folder Mailboxes.


image

image


In the Next Parts we would explore more

Exchange 2013 – Public Folders – Creating and Managing -Part 2

Exchange 2013 – Public Folders – Features -Part 3

How to find the history of Exchange Powershell Commands ran in Exchange 2013

Its always been a big hassle on finding the Power shell commands and finding the history on what has really happened in the past .

Every administrator always wanted to save the the task he did on the Exchange Server. or Even in the Need of investigation we always needed on the succeeded commands


Exchange 2013 has the right solution in the Event Viewer.

It has all the information about the Power shell commands succeeded and failed and more !!

lets us have a look at it.


Event Viewer – Application and Service Logs – “MsExchange Management”

image


Event ID 1 , Speaks about Commands Succeeded


Example-

image


Event ID 6 , Speaks about Commands Failed


Example –

image

How to Install Exchange 2013 on Windows Server 2012

Let us see how to install Exchange 2013 on Windows server 2012

You can Download the Exchange Setup from the Below Link

http://technet.microsoft.com/en-US/evalcenter/hh973395

For Prerequisites

http://technet.microsoft.com/en-us/library/bb691354(EXCHG.150).aspx

Step 1:

To Prepare Active Directory

Install the Below Feature

Open Windows PowerShell.

Install-WindowsFeature RSAT-ADDS

image

Step 2:

Am Going to Install all roles in the Scenario

Open Windows PowerShell

Run

Import-Module ServerManager

image

Install-WindowsFeature AS-HTTP-Activation, Desktop-Experience, NET-Framework-45-Features, RPC-over-HTTP-proxy, RSAT-Clustering, RSAT-Clustering-CmdInterface, Web-Mgmt-Console, WAS-Process-Model, Web-Asp-Net45, Web-Basic-Auth, Web-Client-Auth, Web-Digest-Auth, Web-Dir-Browsing, Web-Dyn-Compression, Web-Http-Errors, Web-Http-Logging, Web-Http-Redirect, Web-Http-Tracing, Web-ISAPI-Ext, Web-ISAPI-Filter, Web-Lgcy-Mgmt-Console, Web-Metabase, Web-Mgmt-Console, Web-Mgmt-Service, Web-Net-Ext45, Web-Request-Monitor, Web-Server, Web-Stat-Compression, Web-Static-Content, Web-Windows-Auth, Web-WMI, Windows-Identity-Foundation

image

# Run Restart-Computer to Reboot the Server

Note :

For single Role. Prerequisite command differs .

Refer below link for Prerequisites

http://technet.microsoft.com/en-us/library/bb691354(EXCHG.150).aspx

Step 3:

Now Download and install the Prerequisites

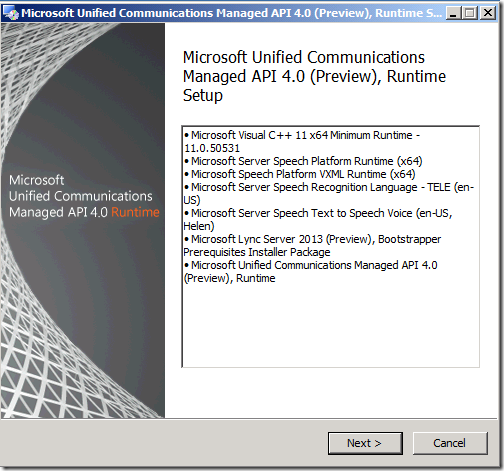
1. Microsoft Unified Communications Managed API 4.0, Core Runtime 64-bit

image

2. Microsoft Office 2010 Filter Pack 64 bit

image

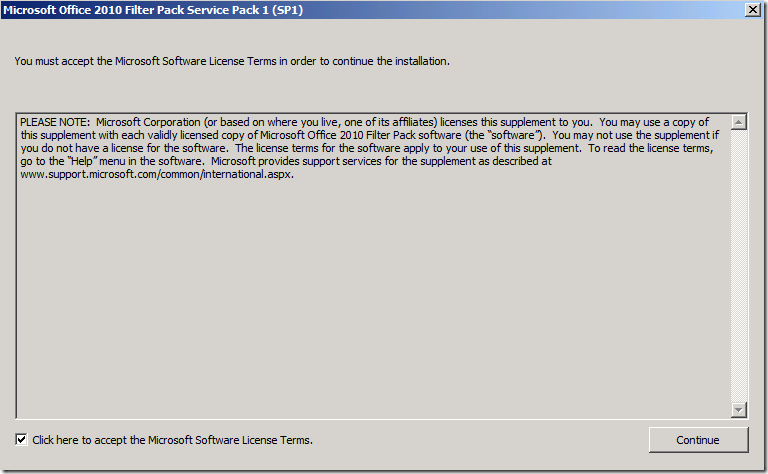
3. Microsoft Office 2010 Filter Pack SP1 64 bit

image

Step 4:

Preparing Active Directory

Open Windows PowerShell

Browse to Setup Location

Run .

.\setup /Preparead /IAcceptExchangeServerLicenseTerms /OrganizationName:”Enter Exchange Org Name”

Note : If you are already in a Exchange Organization – Remove /OrganizationName Parameter

image

Step 5:

Preparing Schema

Open Windows PowerShell

Browse to Setup Location

Run .

.\setup /PrepareSchema /IAcceptExchangeServerLicenseTerms

image

Step 6:

Preparing Domain

Open Windows PowerShell

Browse to Setup Location

Run .

.\setup /Preparedomain /IAcceptExchangeServerLicenseTerms

image

Note :

If you are in a Child domain Scenario

Run

.\setup /Preparealldomains /IAcceptExchangeServerLicenseTerms

Step 7:

Choose Next

image

Step 7:

Choose Next


image

Step 8:

Choose the Roles

Choose Next

image

Step 9:

Choose Next

image

Step 10:

Choose Next

If you already Did “Step 4” you won’t see this Page. As Already Exchange Org is created


image

Step 11:

Choose No

&

Choose Next

image

Step 10:

Choose Install

image

Step 11:

Choose Next


image

image

Exchange 2013 Installed Successfully !!

× How can I help you?