Will start this from scratch. Long process . be patient . Go slowly Step by step . you will succeed . lol
Step 1 :
Get a Windows 2012 Server , Run Windows Updates , Join in the domain I assume Exchange 2013 is installed in the domain
Step 2 :
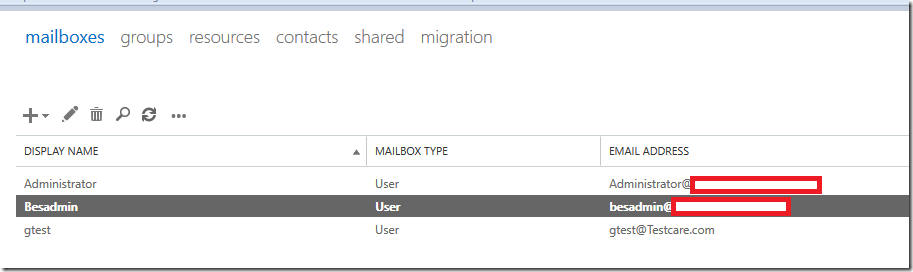
Create a mailbox for Besadmin
Step3 :
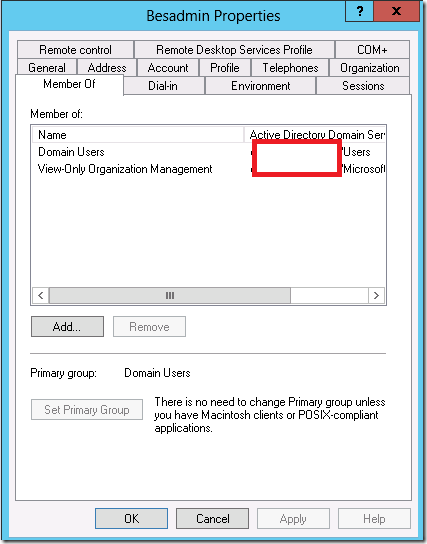
Give Besadmin ViewOnly Organizaion Management Permission using ADUC or Shell
Through Exchange management shell – Run below command
Add-RoleGroupMember "View-Only Organization Management" -Member BesAdmin or Open ADUC Open Active Directory Users and Computers – Add – View-Only Organization Management
Step 4:
Assign Receive As permission on BesAdmin account
Get-MailboxDatabase | Add-ADPermission -User BesAdmin -AccessRights ExtendedRight -ExtendedRights Receive-As, ms-Exch-Store-Admin Step 5: Now Assign Send-AS permission on a OU where users are going to be Run this to Get your OU distinguish Name - Get-OrganizationalUnit | fl Dis* Add-ADPermission -InheritedObjectType User -InheritanceType Descendents -ExtendedRights Send-As -User BesAdmin -Identity "CN=Users,DC=Domain,DC=com"
If you Access Denied – Check below article - https://www.azure365pro.com/assigning-send-as-permission-on-a-ou-in-exchange-2013-access-is-denied-insuff_access_rights/ Step 6: Add impersonation access for EWS New-ManagementRoleAssignment -Name BesAdmin -Role:ApplicationImpersonation -User BesAdmin Step 7: Enable mailboxes you require to process External meeting Requests . Below Command Enables for all mailboxes Get-Mailbox -ResultSize Unlimited -Filter {RecipientTypeDetails -eq 'UserMailbox'}| Set-CalendarProcessing -ProcessExternalMeetingMessages $true ================== Also Create a Throttling policy and add to the bes mailbox New-ThrottlingPolicy BESPolicy -RCAMaxConcurrency Unlimited -EWSMaxConcurrency Unlimited Set-Mailbox "BESAdmin" -ThrottlingPolicy BESPolicy Step 8: Open IIS manager of the Client access server – Right click on EWS – Edit Permissions Add – Besadmin – Make sure “Read&Execute,List Folder Contents,Read” are checked Apply Ok Step 9: Now Login to BES server as Administrator - Start – Run – Lusrmgr.msc
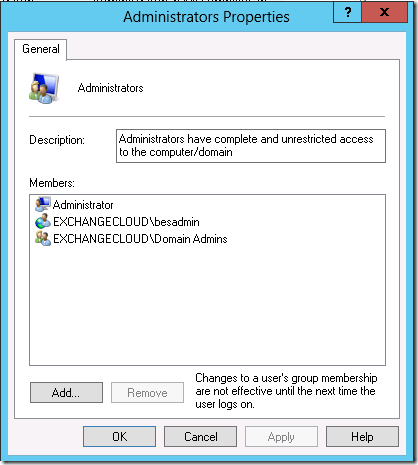
Local users and Groups – Groups – Administrators Group – Add Besadmin as local administrator
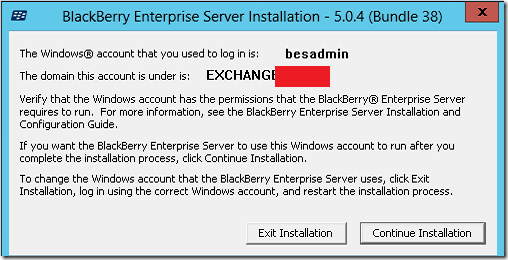
From Now . you do anything on Blackberry Server . Login as DomainName\BESadmin . so that your can over come all permission issues
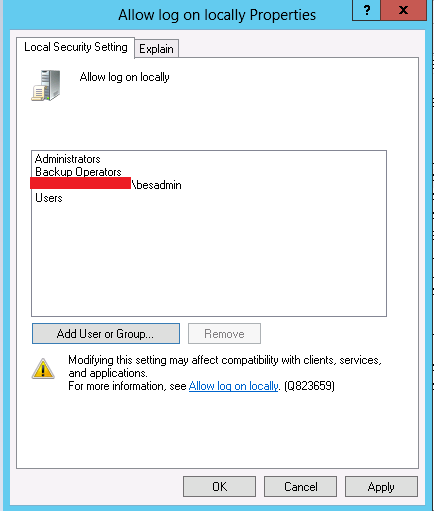
Step 10:
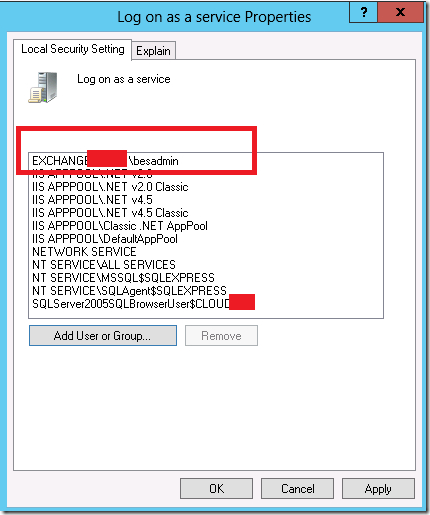
Login as Besadmin
Start – Local Security Policy
Security Settings – User Rights Assignment – Log on As a Service
Add Besadmin
Add – Allow Log on locally
Step 11:
Login as Domain\Besadmin in BES server
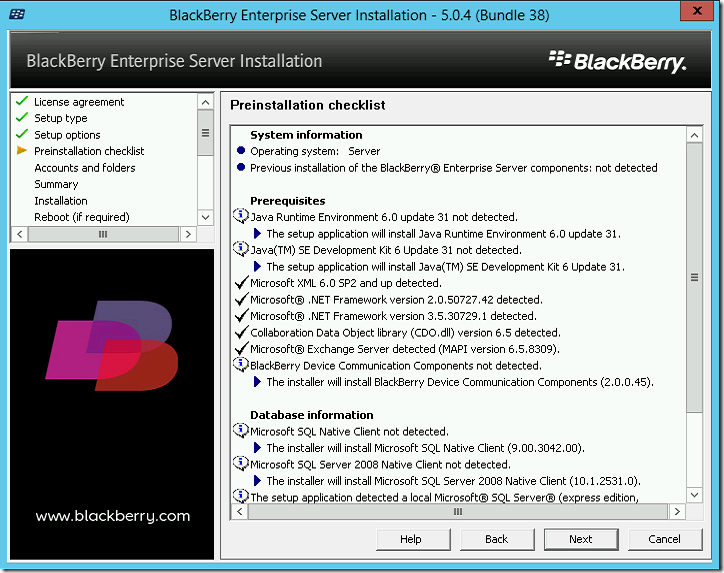
Check this article on how to install it
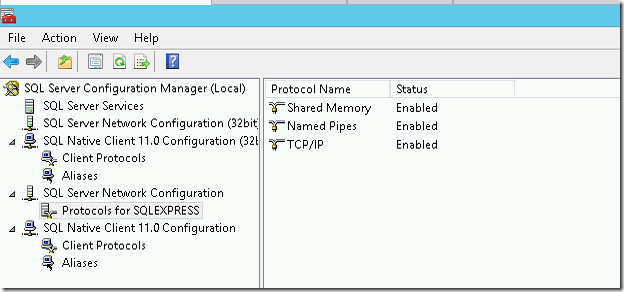
Now Install SQL 2012 Express
https://www.azure365pro.com/how-to-install-sql-2012-express-on-windows-server-2012/
After installation open SQL Configuration Manager from start – Enable – Named Pipes / TCP/IP – IN SQL Server Network Configuration
Now Open Services.msc – Open SQL Server browser Service – Set to automatic
Now Start SQL Server Browser Service
Now Reboot or Restart SQL Services for changes to take effect.
Step 12:
Login as Domain\Besadmin .
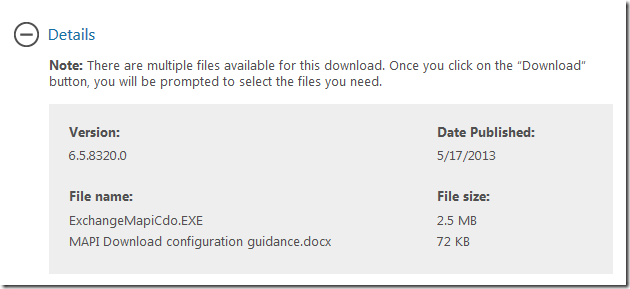
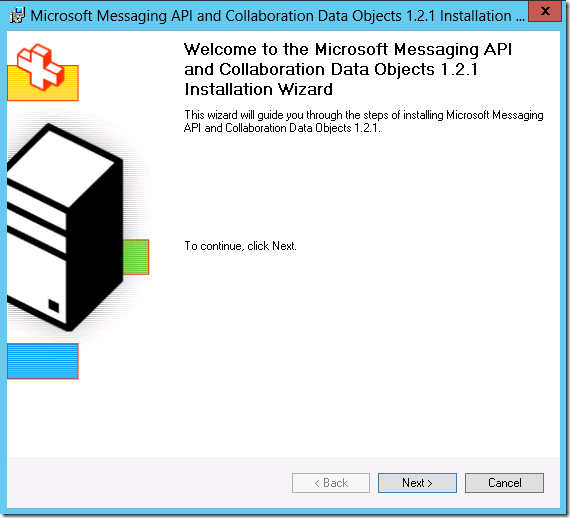
Download MAPI CDO and Install it . Next- Install – and Finish
http://www.microsoft.com/en-us/download/details.aspx?id=39045
please verify you are downloading the latest version .
version 6.5.8289.0 or later
Step 13:
Login as Domain\Besadmin
Now download Blackberry Enterprise Server Trial version from the below link
https://www.blackberry.com/eBES/trialOrder.do?id=15\
Download – Extract
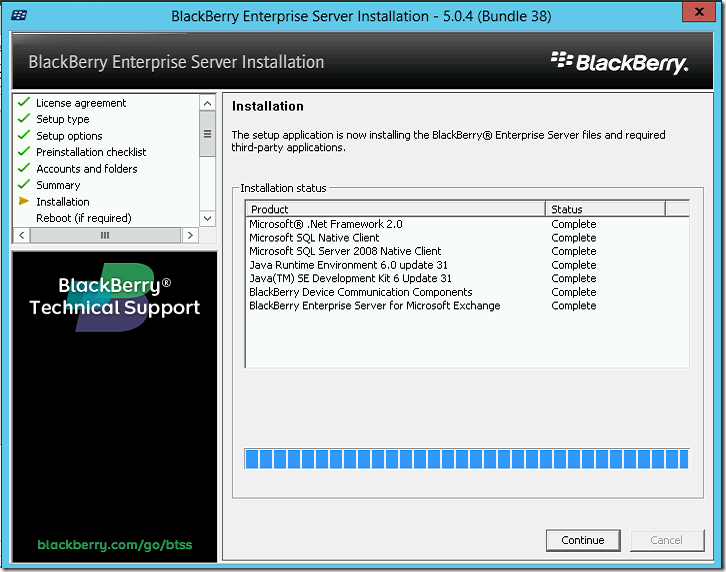
Continue Installation
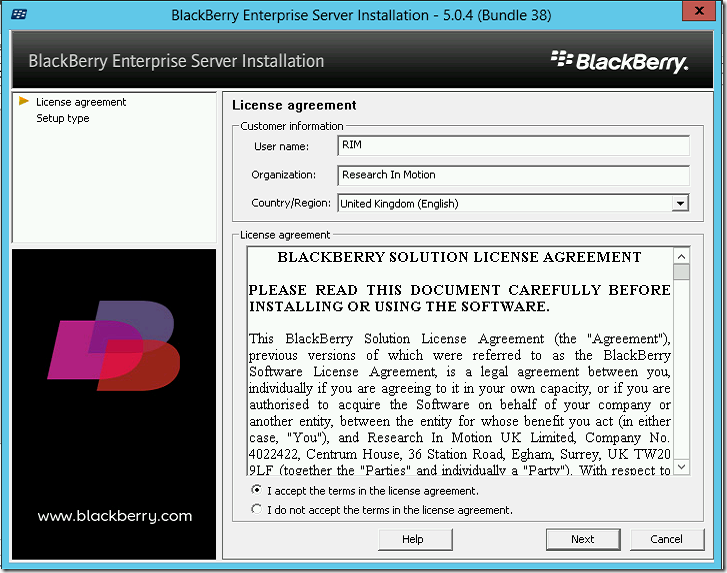
Accept
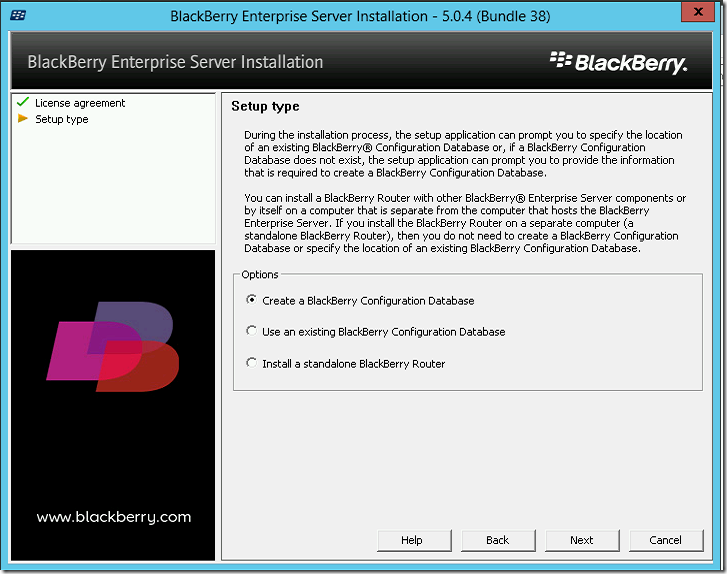
Choose Next
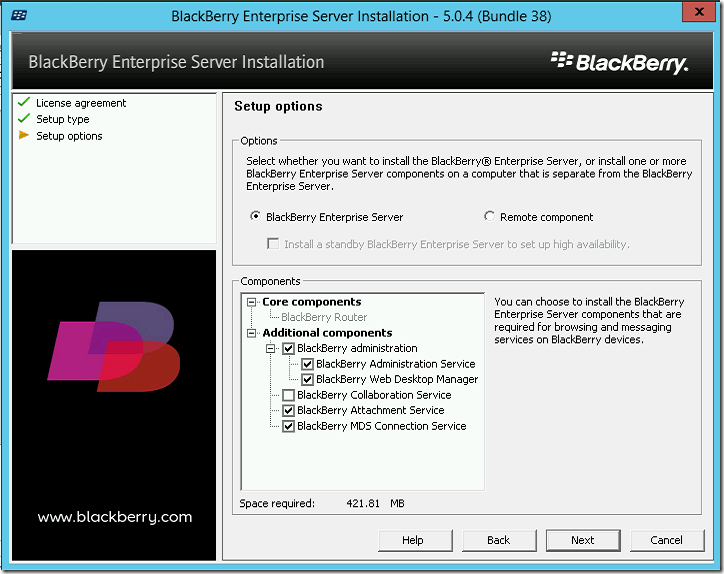
Choose next
Chose Next
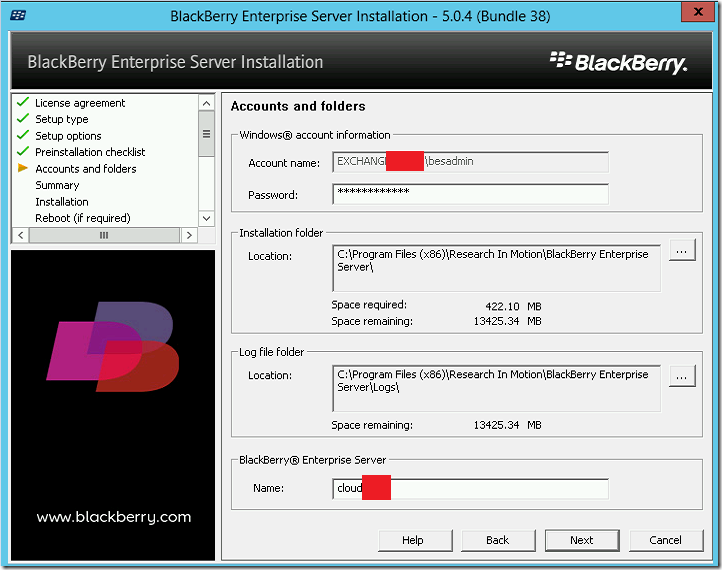
Choose BES server name , Have the Same as host name . so that you don’t go confused
Choose Continue
Choose Next
Choose next
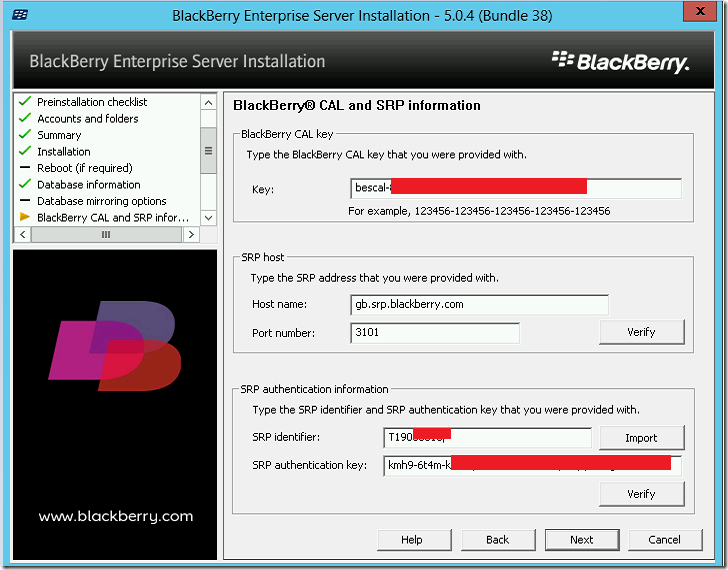
SRP Lookup by Country
https://www.blackberry.com/SRPAddressLookup/index.do
—
Step 14 :
Now
Open Registry
Log in to the server to which the BlackBerry Enterprise Server software is to be installed using the service account (BESAdmin ). Open the Registry Editor: Click Start > Run , type regedit and click OK . Navigate to HKEY_CURRENT_USER\Software\Microsoft\Windows NT\CurrentVersion\Windows Messaging Subsystem. On the left hand side, right-click on Windows Messaging Subsystem , expand New , and select String Value . Enter RPCHTTPProxyMap_BES in the Name field. Double-click the RPCHTTPProxyMap_BES registry value. Type *=https://<FrontEndPoolFQDN> in the value field. Click OK , and then close the Registry Editor.
Open MMC – Add Certificated Snap in – Add the Cert to Trusted Root Container , so that when it query the CAS server , it wont give a Cert Error
Reference link :
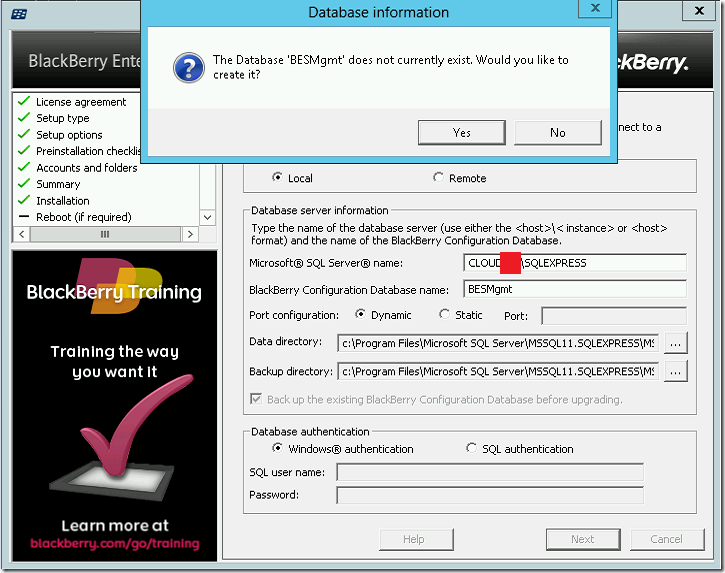
Step 15 :
A small bug in this step – Enter the DC name – if exchange Server Name Fails. Don’t Check name , Just Click Next
Reference :
http://supportforums.blackberry.com/t5/BlackBerry-Enterprise-Service-10/BES-5-03-Setup-0x80040115-on-MAPI-config/td-p/1868435
If the BES setup asks you for the Exchange server and the Exchange account to be used you should not do as requested as it does not work.
Instead you should enter the GC-server instead of the Exchange server and you should not press the check name button. Then it works even if I don’t have a clue why.
Step 16 :
Choose Next
Now Click On start Services –
Now Will see Upgrading to Latest Version and Testing it in the next Part.