Exchange Online PowerShell allows you to Exchange Online settings using a command line. You can manage all bulk changes using scripts and with a variety of commands using pipeline methods.
Let’s see how to Connect Exchange Online PowerShell
Set-ExecutionPolicy RemoteSigned
Install-Module PowershellGet -Force
Install-Module -Name ExchangeOnlineManagement
Connect-ExchangeOnline
Sample Command to make sure it’s connected.
You can explore the commands available using
get-command
it supports wildcards
Connecting to Office 365 PowerShell
Mostly to manage azure active directory users
Microsoft Azure Active Directory Module for Windows PowerShell (cmdlets include MSol in their name)
Install-Module MSOnline
Connect-MsolService
Sample Command to make sure its connected.
Get-MsolUser -UserPrincipalName user@domain.com
Azure Active Directory PowerShell for Graph (cmdlets include AzureAD in their name)
Install-Module -Name AzureAD
Connect-AzureAD
Get-AzureADDomain -Name azure365pro.com
To Get Virtual Machine settings using Powershell and AzureRM commandlets
Install-Module AzureRM
Connect-AzurermAccount
Sample Command to make sure it’s connected.
Get-AzureRmVM
Please note that if you don’t kill your session. You may need to wait until the power shell session expires if you reconnect multiple times.
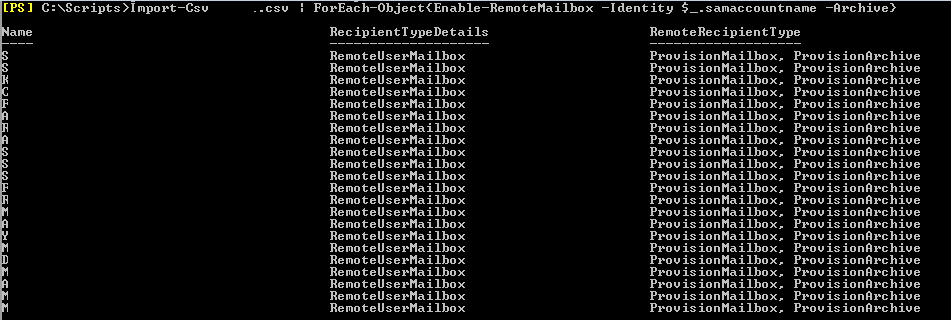
Take CSV and replace user principal name with remote routing address. if you wish to populate remote mailboxes for a specific Organizational Unit. Make sure you replace it with your appropriate remote routing address specific to your Office 365 tenant.
Always specify remote routing address while enabling remote mailboxes otherwise powershell will throw up the below error.
The error – for the purposes of people searching for it is The Address @tenantname.mail.onmicrosoft.com is invalid: “@tenantname.mail.onmicrosoft.com” isn’t a valid SMTP address.
The domain name can’t contain spaces and it has to have a prefix and a suffix, such as example.com.
FullyQualifiedErrorID : F0109C5E,Microsoft.Exchange.Management.Recipient.Tasks.EnableRemoteMailbox.
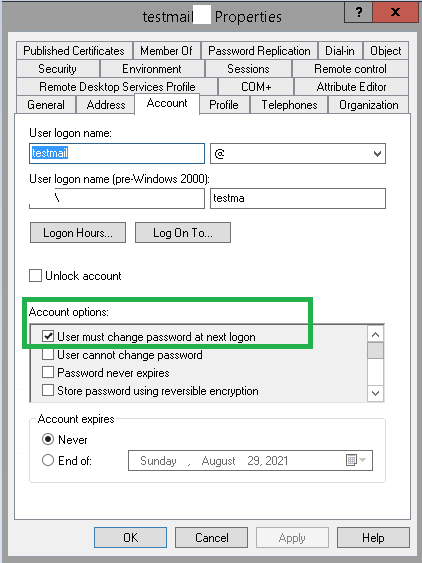
Azure AD Connect does not synchronize the “User must change password at next logon” attribute from your on-premise Active Directory by default forcing users to update their new passwords through Azure Active Directory.
To enable this your directory you have some basic requirements of enabling Password Writeback in your Azure AD Connect Settings. which allows your news password set on Azure AD to sync back to your on-premises Active Directory. As you know enabling Self Service Password Reset (SSPR) will allow the user to reset the password on their own.
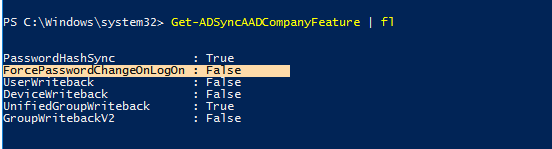
On the Azure AD Connect Server, Open PowerShell and run Get-ADSyncAADCompanyFeature to check if the ForcePasswordChangeOnLogOn has been set.
There was a flaw in this configuration which is fixed from Azure AD Connect 2.03
“Passwords will now be reevaluated when an expired password is “unexpired”, regardless of whether the password itself is changed. If for a user the password is set to “Must change password at next logon”, and this flag is cleared (thus “unexpiring” the password) then the “unexpired” status and the password hash are synced to Azure AD, and when the user attempts to sign in in Azure AD they can use the unexpired password.”
As you see if you set this flag (change password at next logon ) and un-set this flag. The unexpired password will not be synced to Azure Active Directory before. which is not the case from Azure AD Connect 2.0.3. When you uncheck, the same password is synced and retained in Azure Active Directory. As you know Azure AD Connect 2.0.3 requires Windows Server 2016 or above. you can follow Upgrading Azure AD Connect to the latest version if you are running an older version.
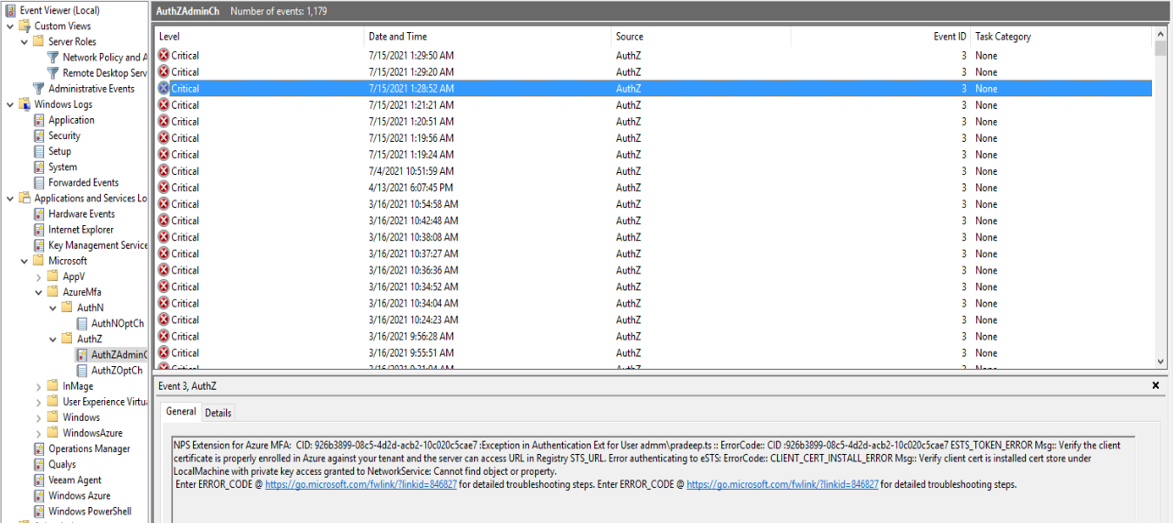
Users are not able to authenticate to VPN using Azure Multi-Factor Authentication while working outside the office. We found certificate provided for automatic NPS by Azure MFA Extension requires re-registration from azure active directory tenant.
Technology: Azure AD Multi-Factor Authentication
Servers Involved: NPS, Active Directory, Certificate Authority
Activity Followed to diagnose and provide a solution for the case is described below:
Analyzed the NPS event logs for Authentication, Identified the issues for user rejection on Azure MFA
Found the certificate from the azure tenant is not renewed automatically.
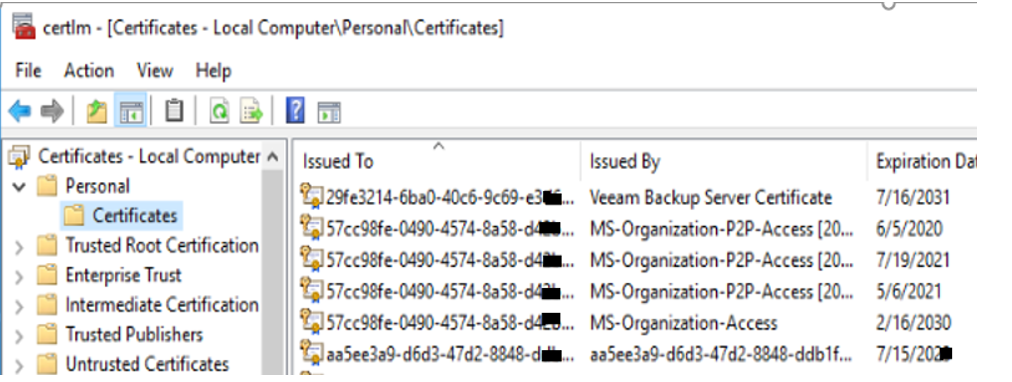
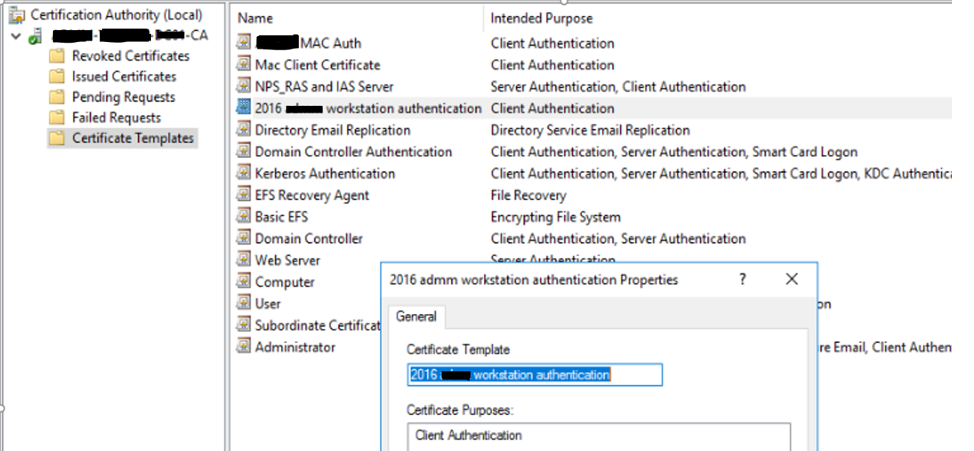
Removed the Azure AD Tenant certificate from NPS manually and created a new client certificate template from CA for regeneration of client certificate where Azure tenant can check the activity of the client.
Reinstalled the MFA extension on the NPS server
After Reinstalling the NPS Azure MFA extension, Installed all the required Repository for PowerShell modules which can lead us t register the NPS server again with azure active directory tenant
PS C:\Program Files\Microsoft\AzureMfa\Config> .\AzureMfaNpsExtnConfigSetup.ps1
VERBOSE: Using the provider 'PowerShellGet' for searching packages.
VERBOSE: The -Repository parameter was not specified.  PowerShellGet will use all of the registered repositories.
VERBOSE: Getting the provider object for the PackageManagement Provider 'NuGet'.
VERBOSE: The specified Location is 'https://www.powershellgallery.com/api/v2/' and PackageManagementProvider is 'NuGet'.
VERBOSE: Searching repository 'https://www.powershellgallery.com/api/v2/FindPackagesById()?id='MSOnline'' for ''.
VERBOSE: Total package yield:'1' for the specified package 'MSOnline'.
VERBOSE: Performing the operation "Install-Module" on target "Version '1.1.183.57' of module 'MSOnline'".
VERBOSE: The installation scope is specified to be 'AllUsers'.
VERBOSE: The specified module will be installed in 'C:\Program Files\WindowsPowerShell\Modules'.
WARNING: Version '1.1.183.17' of module 'MSOnline' is already installed at
'C:\Program Files\WindowsPowerShell\Modules\MSOnline\1.1.183.17'. To install version '1.1.183.57', run Install-Module and add the -Force parameter, this command will install version '1.1.183.57' in side-by-side with version '1.1.183.17'.
Connecting to Microsoft Azure.  Please sign on as a tenant administrator.
Starting Azure MFA NPS Extension Configuration Script
Tenant ID currently registered with Azure MFA NPS Extension is: aa5e***9-d6d3-47d2-8848-*****
Enter new Tenant ID to change or press Enter to keep the current value:
Generating client certificate

Thumbprint                        Subject
----------                                -------
6F0E906DE97D71FBBCCB0DFEE9937A400F4B27CA  CN= aa5e***9-d6d3-47d2-8848-*****, OU=Microsoft NPS Extension
Client Certificate successfully generated
Client Certificate associated with Service Principal: 98**6a1-7f43-403b-*****
Starting registry updates
Completed registry updates
Client certificate : CN= aa5e***9-d6d3-47d2-8848-*****, OU=Microsoft NPS Extension successfully associated with Azure MFA NPS Extension for Tenant ID aa5e***9-d6d3-47d2-8848-*****
Granting certificate private key access to NETWORK SERVICE
Successfully granted to NETWORK SERVICE
Restarting Network Policy Server (ias) service
WARNING: Waiting for service 'Network Policy Server (ias)' to stop...
WARNING: Waiting for service 'Network Policy Server (ias)' to stop...
Configuration complete.  Press Enter to continue...:
you can see the Client Certificate successfully generated.
Client Certificate successfully generated
Client Certificate associated with Service Principal: 98**6a1-7f43-403b-*****
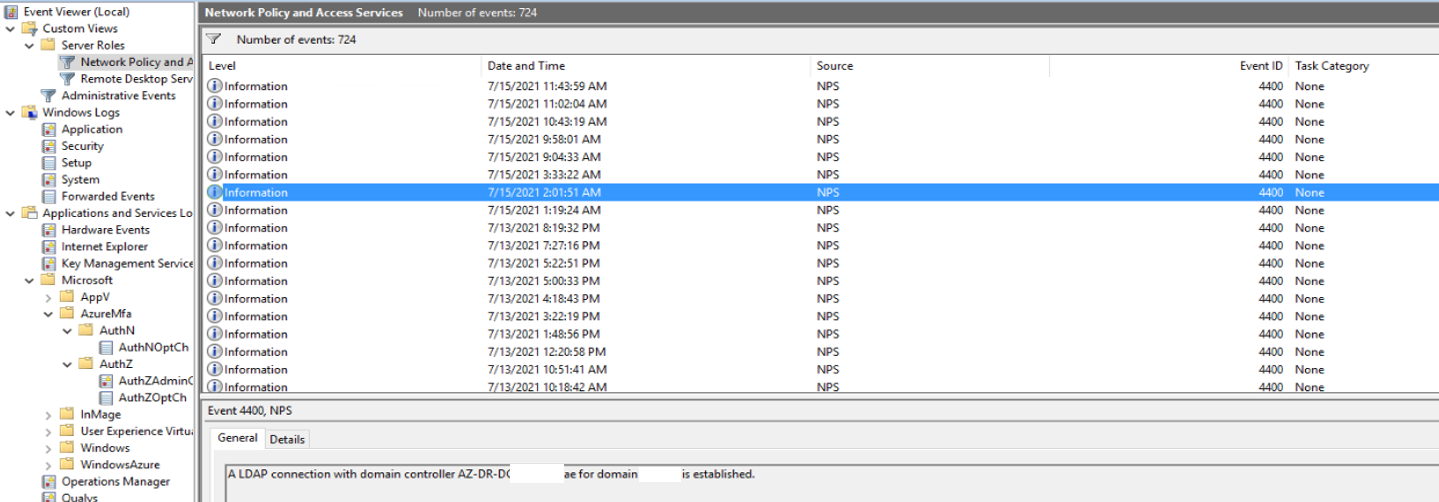
Re-registered the NPS server for a connection establishment with DC where the new establishment is connected successfully and obtained with active directory registration
New azure MFA Tenant certificate generated successfully and registered with Azure AD Tenant.
Users started receiving Azure Multi-Factor Authentication Prompts.
SQL Libraries updated from 2012 to SQL Server 2019 LocalDB
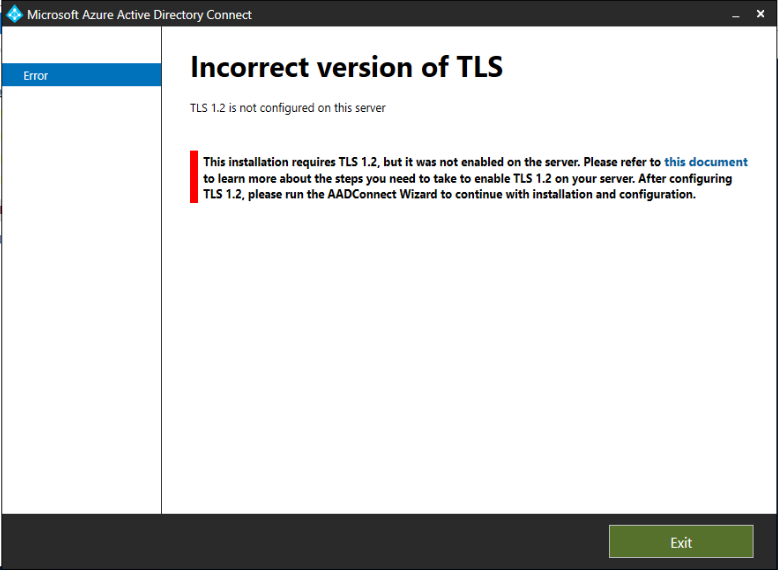
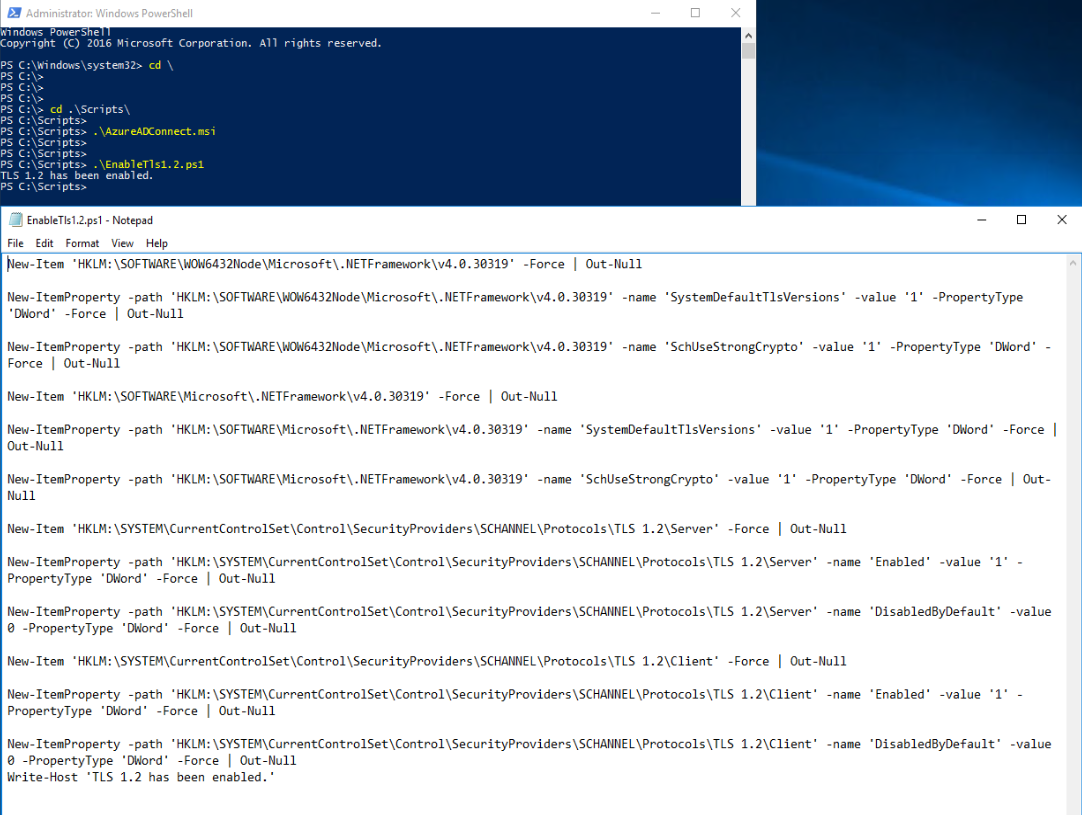
if TLS 1.2 is not enabled, let’s enable it using the below script and reboot the server.
Enable TLS 1.2 by saving below to ps1 fine and open the PowerShell as administrator and run it as below. Make sure you have a backup or a snapshot before you do these changes.
Reboot the server. Re-run the setup to detect TLS 1.2 and Upgrade.
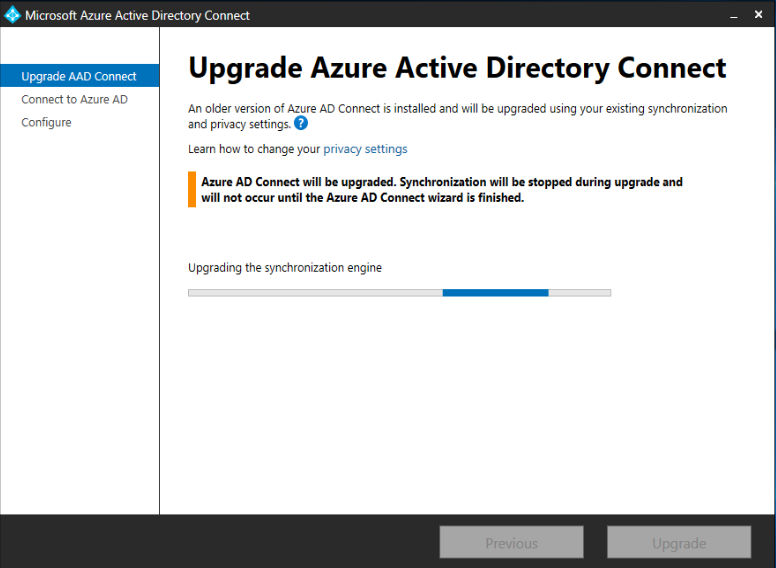
Upgrading the synchronization engine
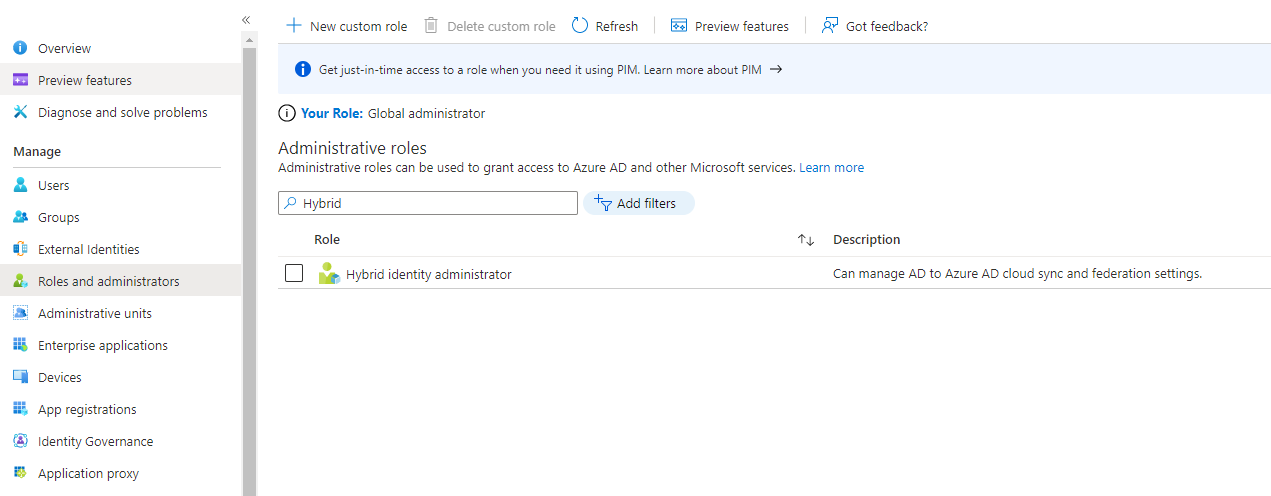
You don’t need a global administrator anymore where a new role is introduced (Hybrid Identity Administrator) which can be used for delegation.
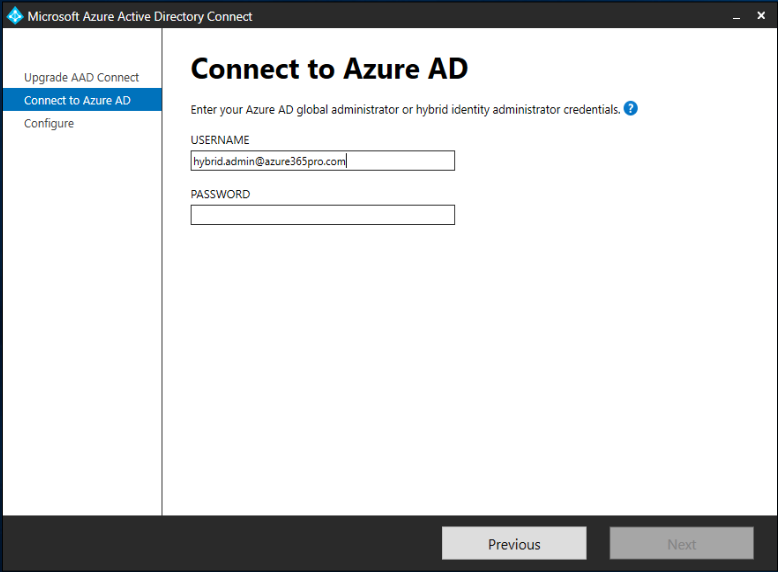
use your global administrator or Hybrid Identity Administrator
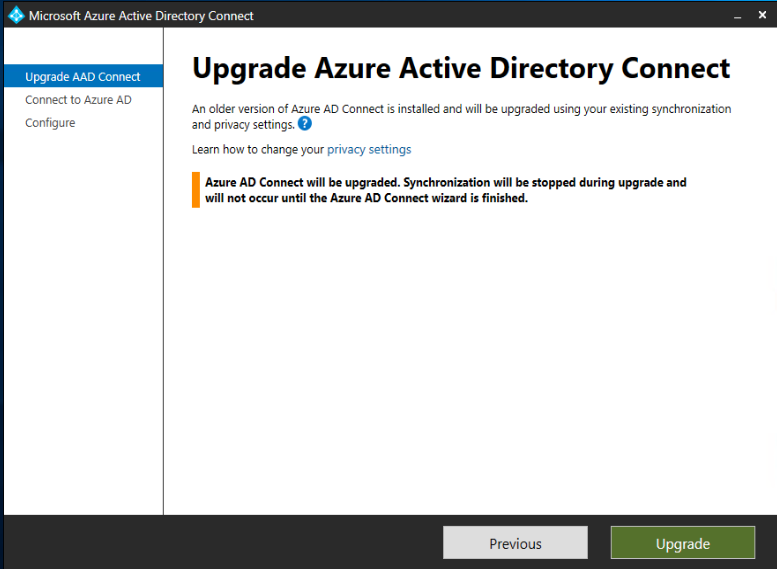
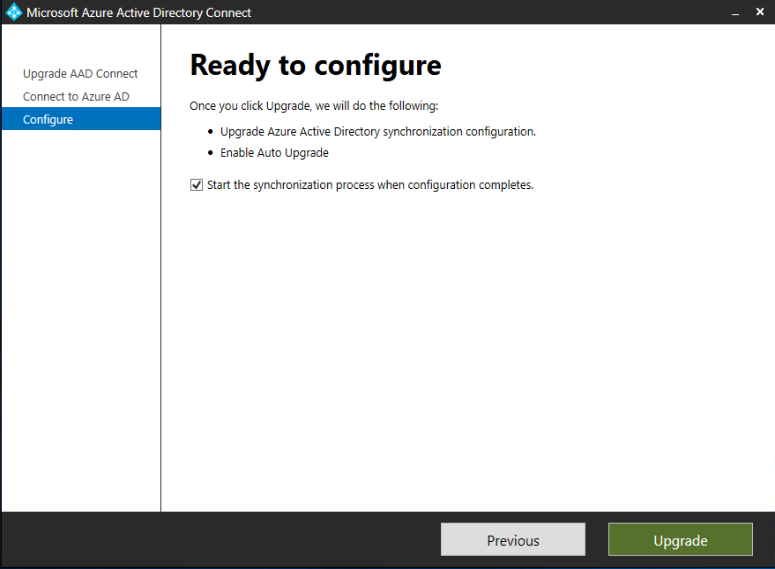
Click Upgrade.
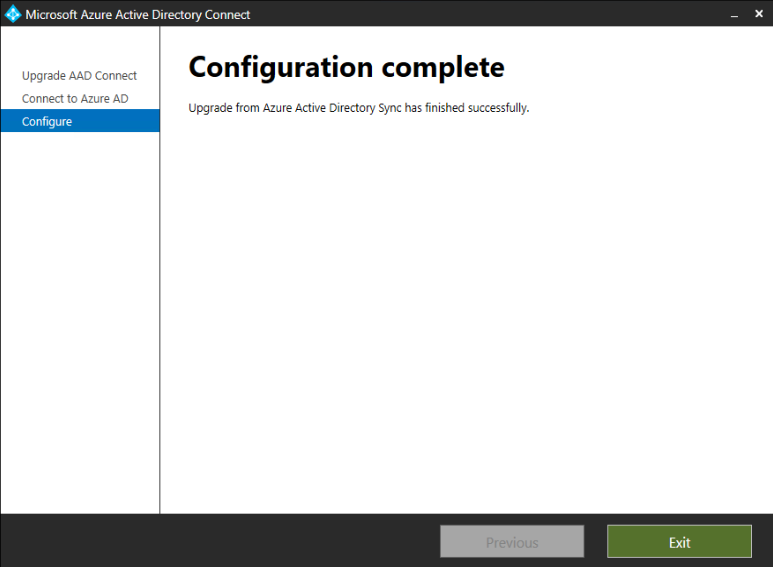
Configuration is complete.
There was a flaw where the password at the next logon is unchecked it doesn’t sync the unexpired password which is fixed from Azure AD Connect 2.03 “Passwords will now be reevaluated when an expired password is “unexpired”, regardless of whether the password itself is changed. If for a user the password is set to “Must change password at next logon”, and this flag is cleared (thus “unexpired” the password) then the “unexpired” status and the password hash are synced to Azure AD, and when the user attempts to sign in in Azure AD they can use the unexpired password.” if you wish to Synchronizing User must change the password at the next logon flag to Azure AD