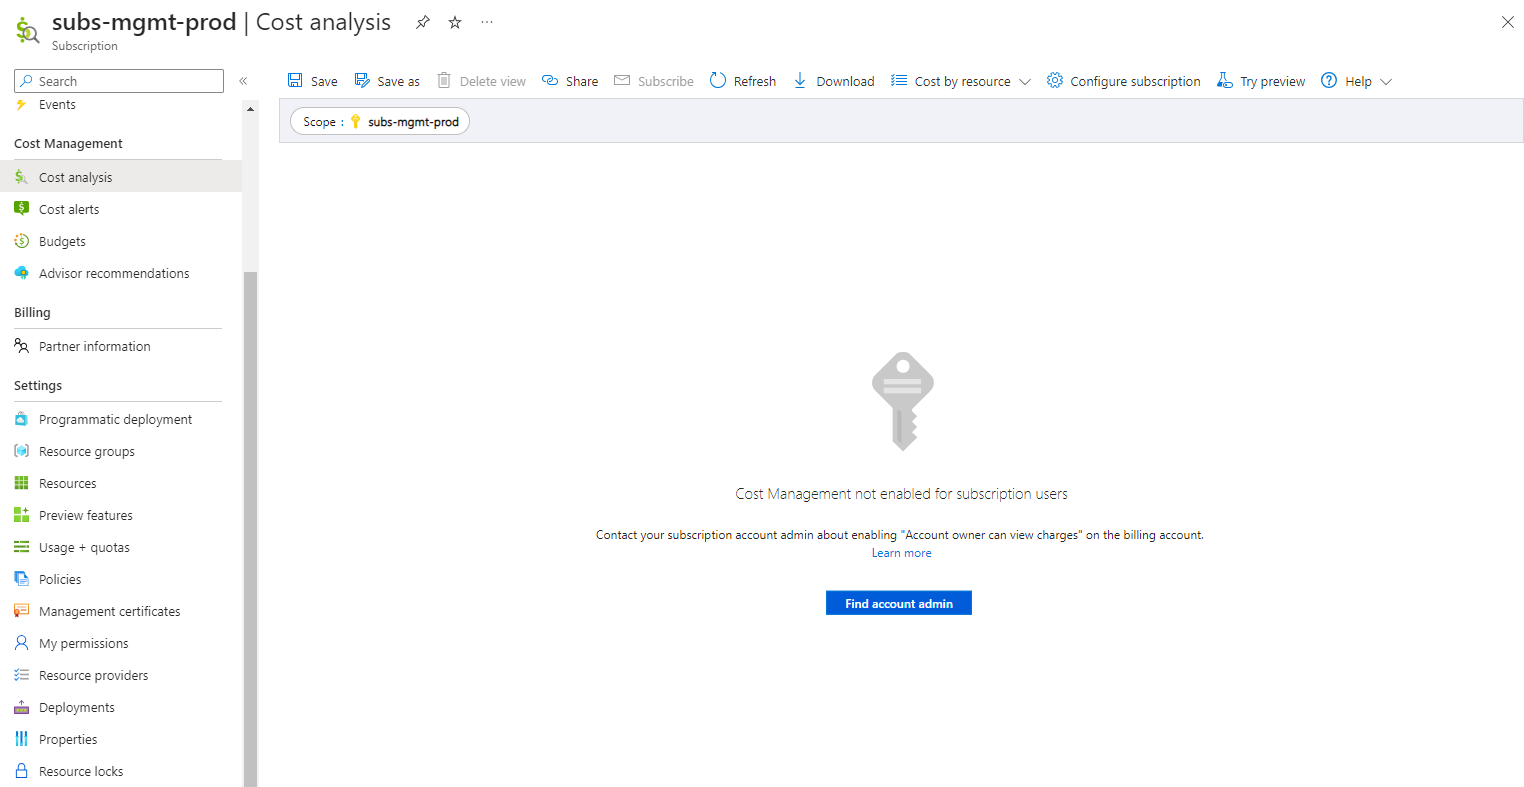
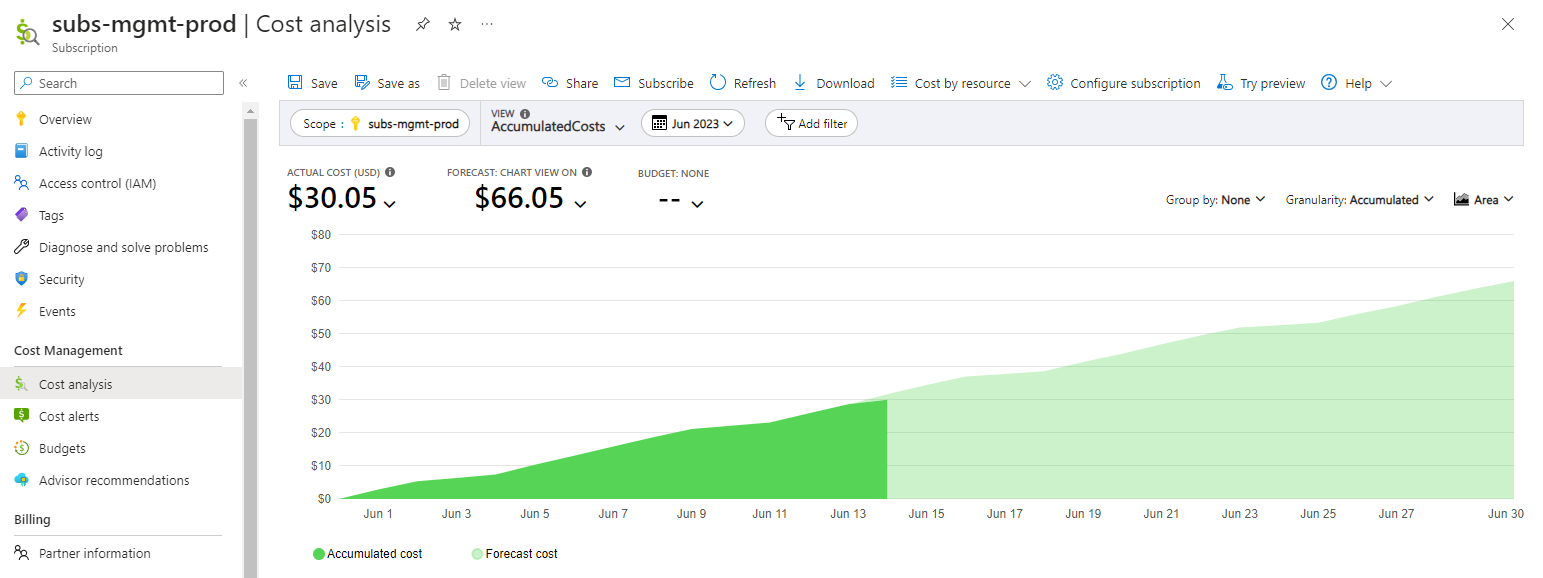
Cost Management is not enabled for subscription users. Contact your subscription account admin about enabling “Account owner can view charges” on the billing account.
.
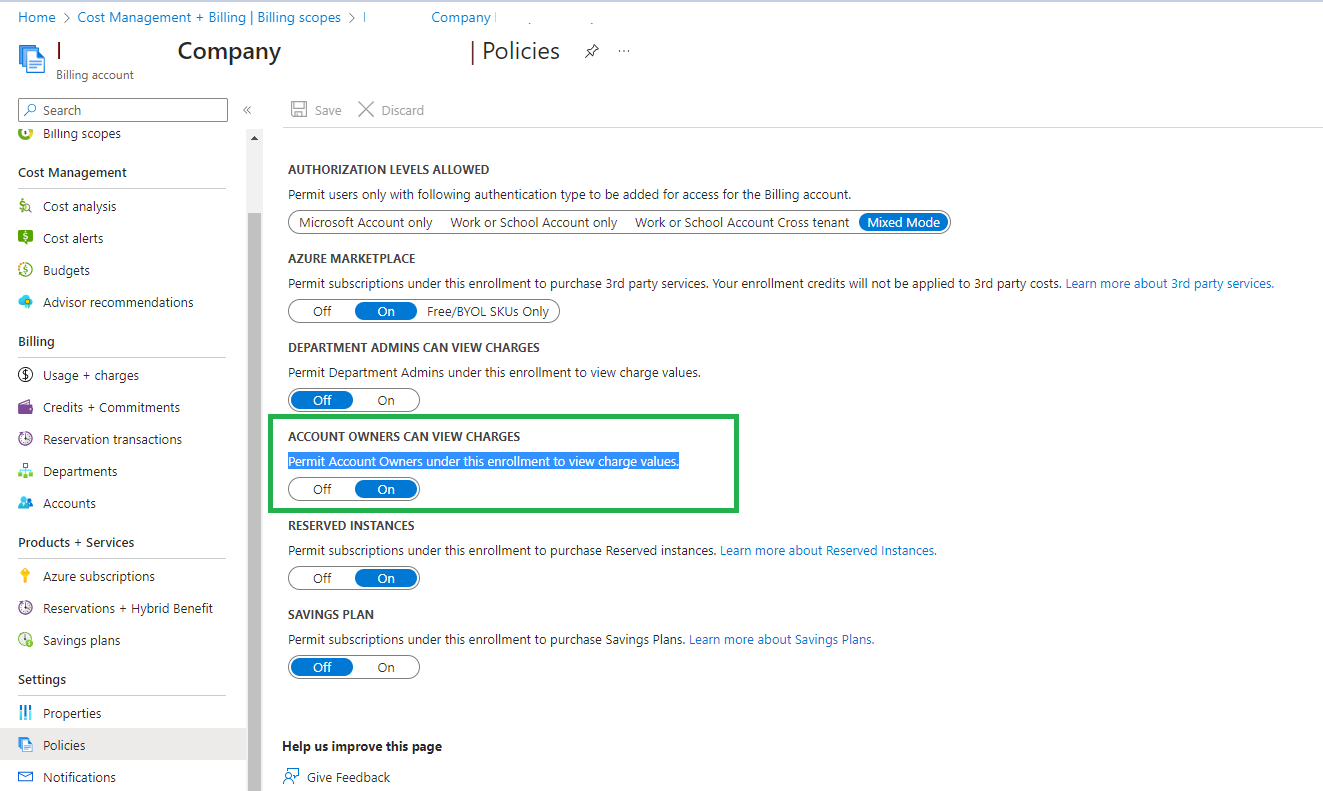
Go to billing account – Enable Account Owner can view charges
A Step-by-Step Guide to Creating an Amazon EC2 Instance with Key Pair
Amazon Elastic Compute Cloud (EC2) is a powerful cloud computing service that allows you to create and manage virtual servers, known as instances, on the Amazon Web Services (AWS) platform. One important aspect of securing your EC2 instances is by using key pairs, which provide secure access to your instances. In this blog post, we will walk you through the process of creating an EC2 instance with a key pair, ensuring a robust security setup for your cloud infrastructure.
Step 1: Log in to the AWS Management Console To get started, log in to the AWS Management Console using your AWS account credentials. If you don’t have an account, you can sign up for one on the AWS website.
Step 2: Navigate to the EC2 Dashboard Once you’re logged in, navigate to the EC2 Dashboard. You can find the EC2 service by searching for it in the AWS Management Console’s search bar.
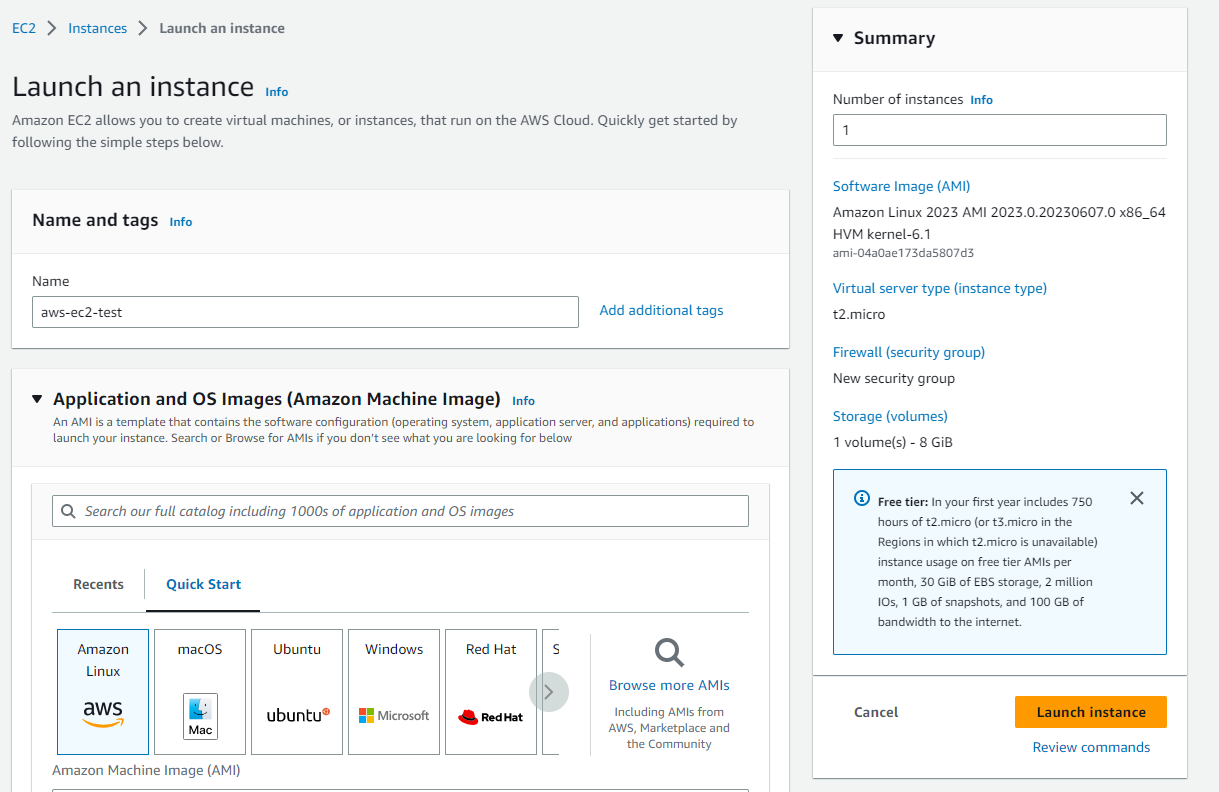
Step 3: Launch an Instance On the EC2 Dashboard, click on the “Launch Instance” button to start the instance creation process. This will launch the EC2 instance wizard, which will guide you through the configuration steps.
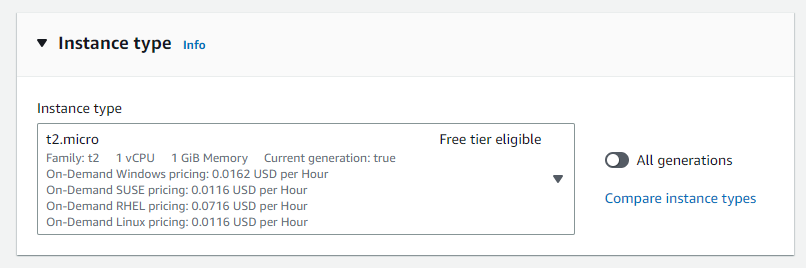
Step 4: Choose an Amazon Machine Image (AMI) Select the AMI that best suits your requirements. An AMI is a pre-configured template that contains the operating system and other software for your instance.
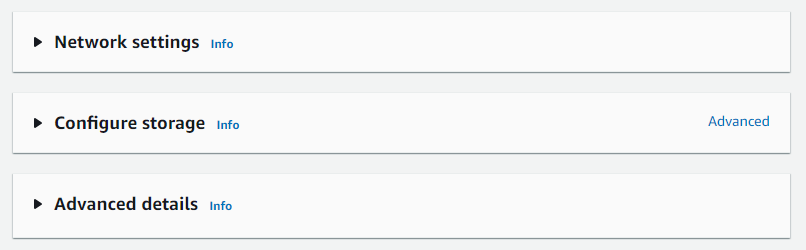
Step 7: Add Storage Specify the storage requirements for your instance. You can choose between Amazon Elastic Block Store (EBS) volumes and instance store volumes based on your needs.
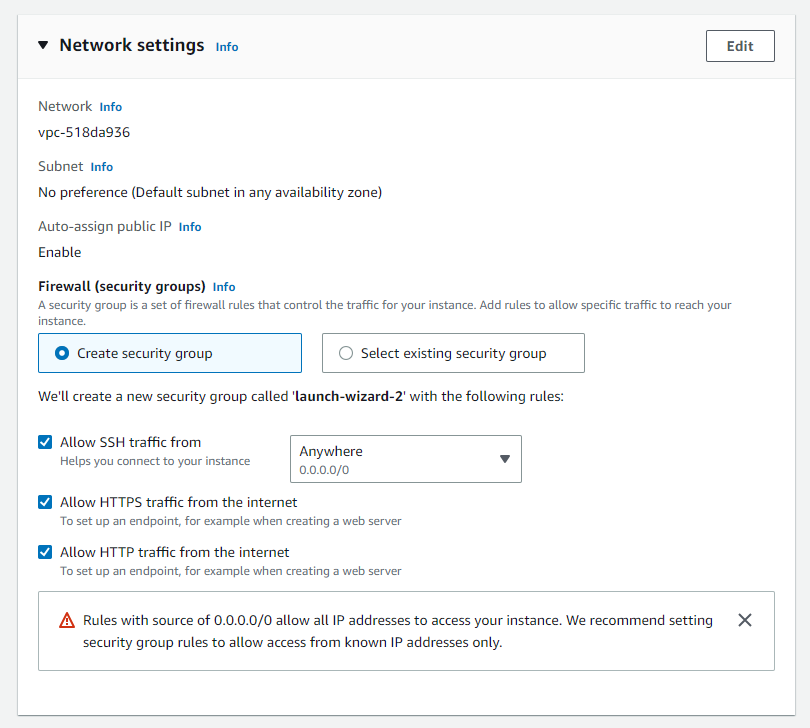
Step 8: Configure Security Groups Security groups act as virtual firewalls for your instances, controlling inbound and outbound traffic. Configure the security groups to allow access to the necessary ports and protocols.
Step 9: Review and Launch Review all the instance details you have configured so far. Once you are satisfied, click on the “Launch” button to proceed.
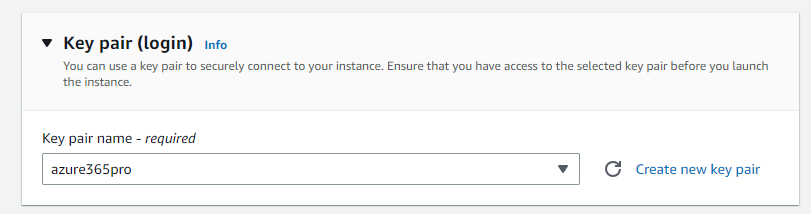
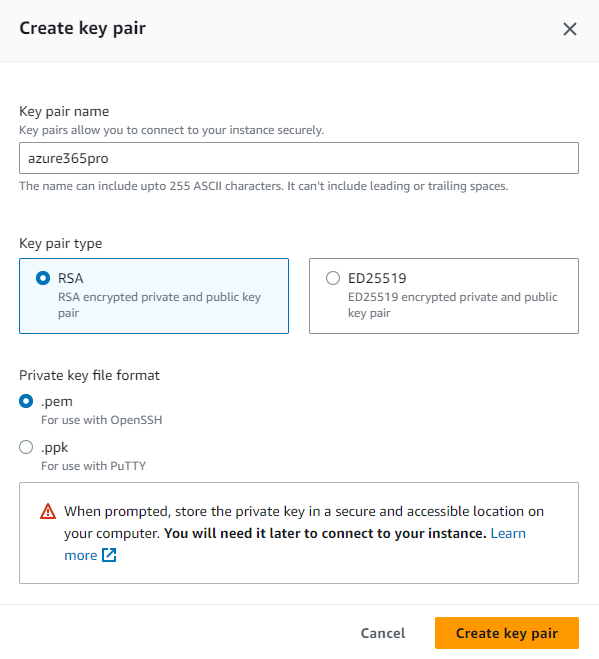
Step 10: Create a Key Pair In the “Launch Instance” wizard, you will be prompted to create a new key pair or choose an existing one. Select the “Create a new key pair” option and provide a name for your key pair.
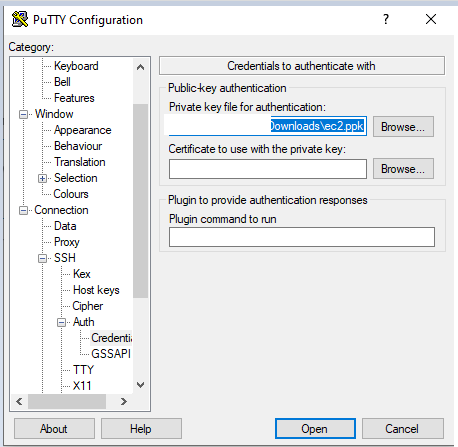
Choose .ppk – if you are planning to use putty to connect.
.
Step 11: Download the Key Pair After creating the key pair, AWS will generate a private key file and allow you to download it. Make sure to store this file in a secure location, as it will be needed to access your instance.
.
Leaving everything default for testing
..
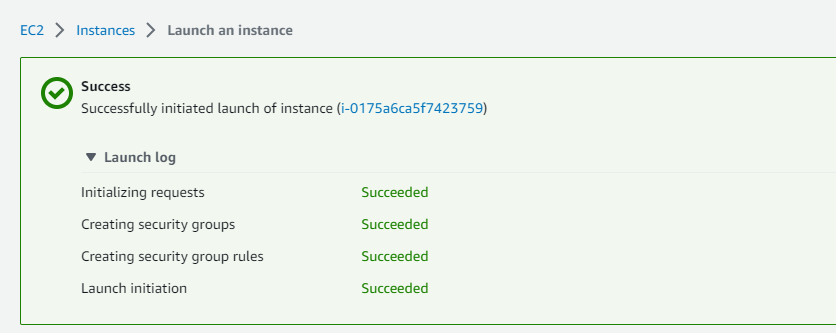
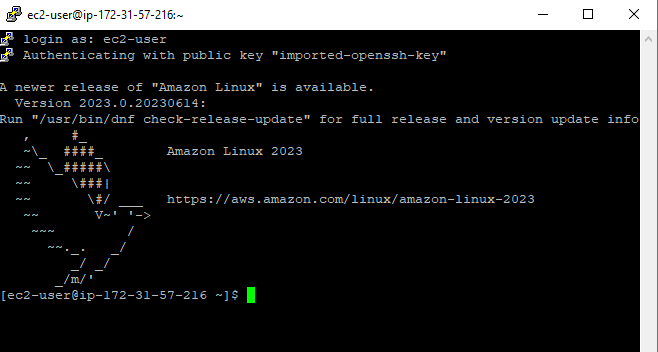
Instances is running
.
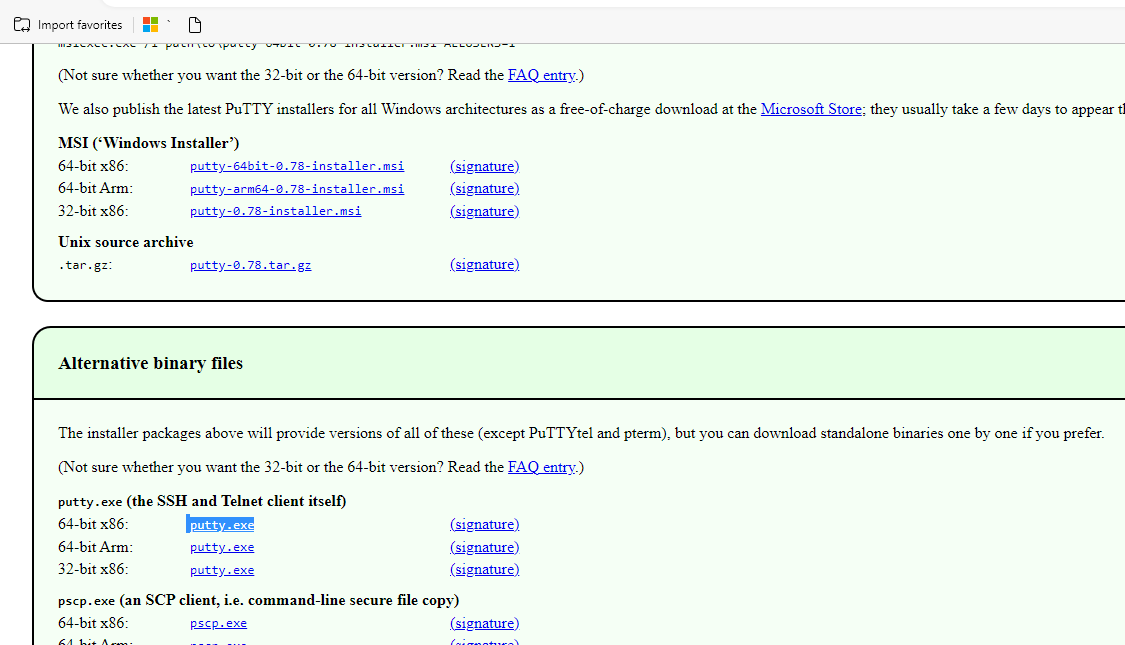
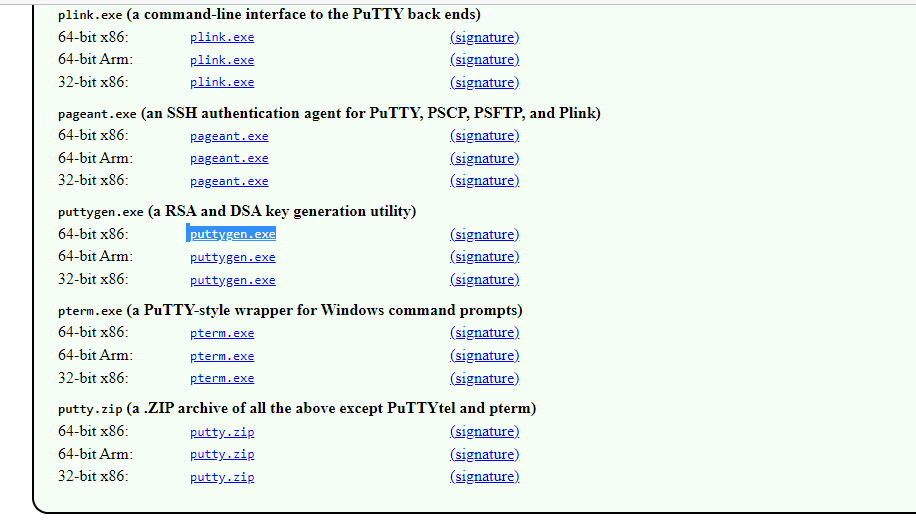
Download Putty
.
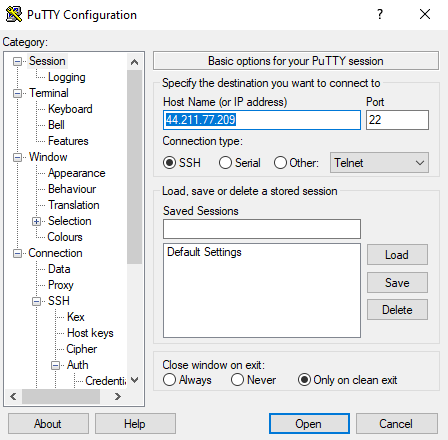
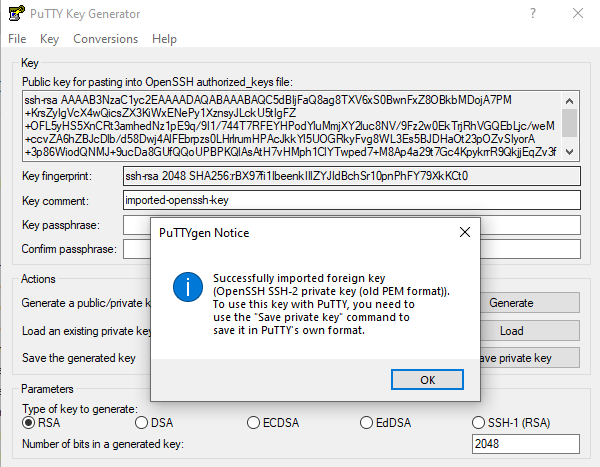
Load the pem file
Accept
Load PEM – By choosing all files
.
Save Private Key
....
Step 12: Launch the Instance Once you have downloaded the key pair, click on the “Launch Instances” button to start the EC2 instance. AWS will now provision your instance using the selected configuration options.
Conclusion: Creating an Amazon EC2 instance with a key pair is an essential step towards securing your cloud infrastructure. By following the step-by-step guide outlined in this blog post, you can confidently launch EC2 instances while ensuring that only authorized users have access. Key pairs provide a secure method of authentication and play a crucial role in safeguarding your valuable data and resources in the AWS cloud environment. Start using key pairs today and enhance the security posture of your EC2 instances on Amazon Web Services.
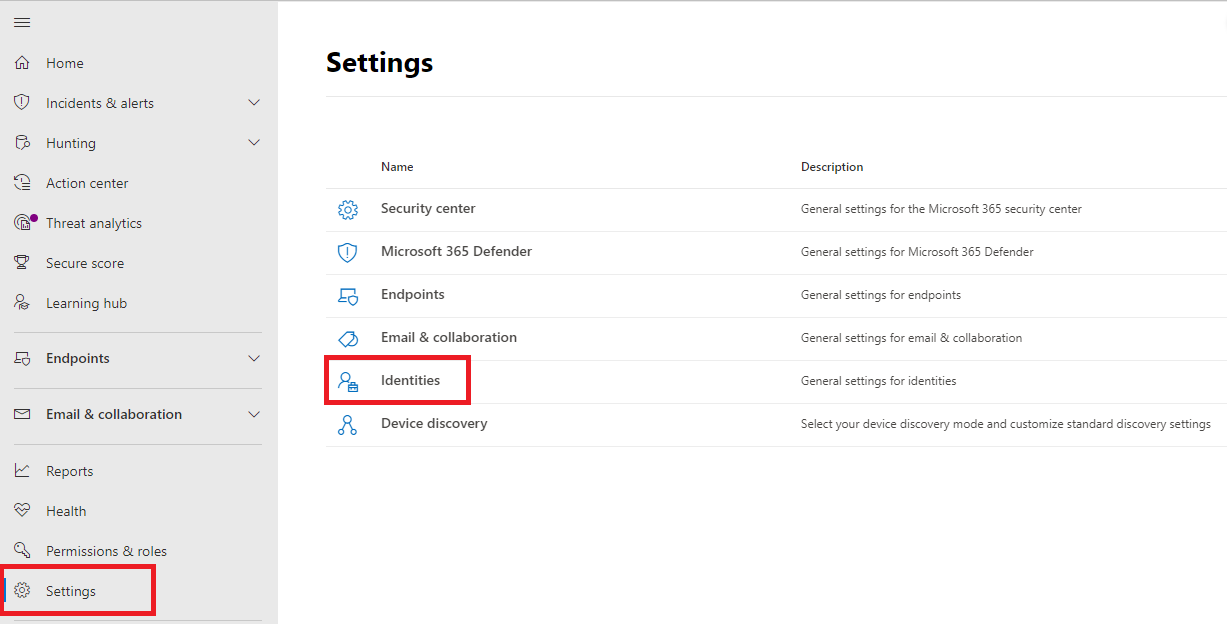
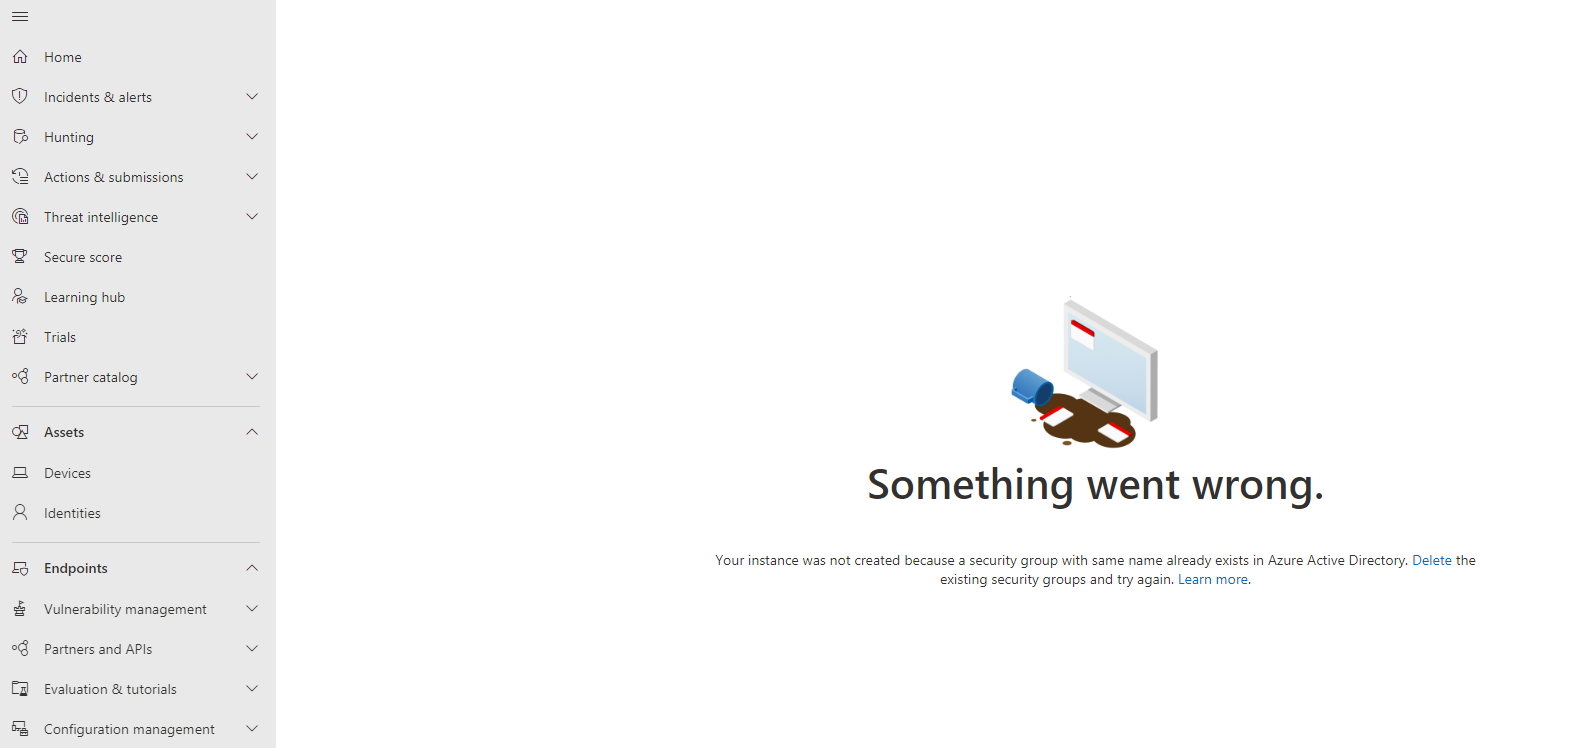
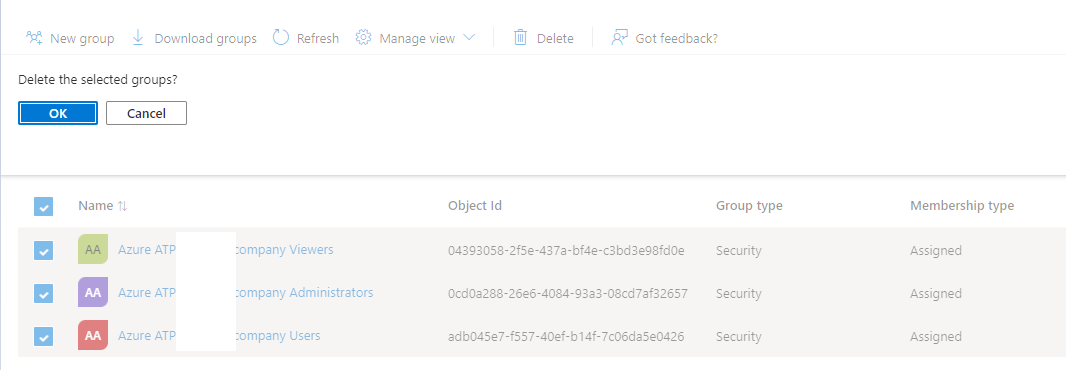
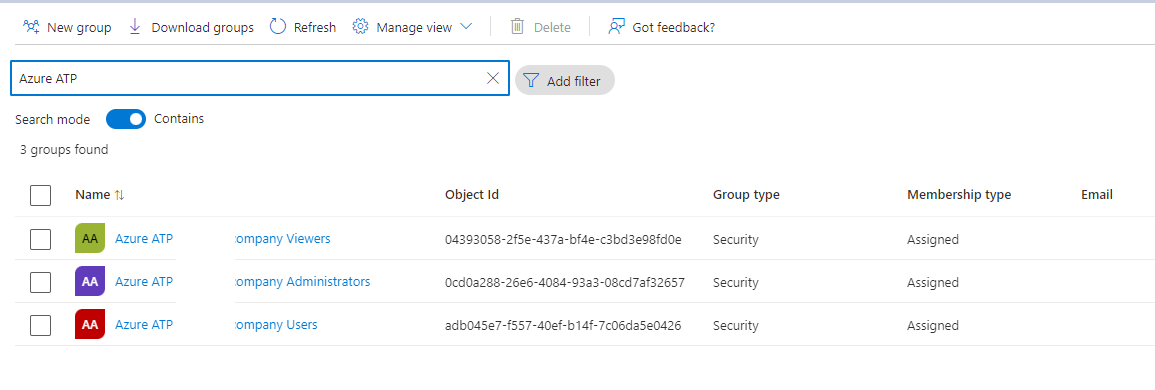
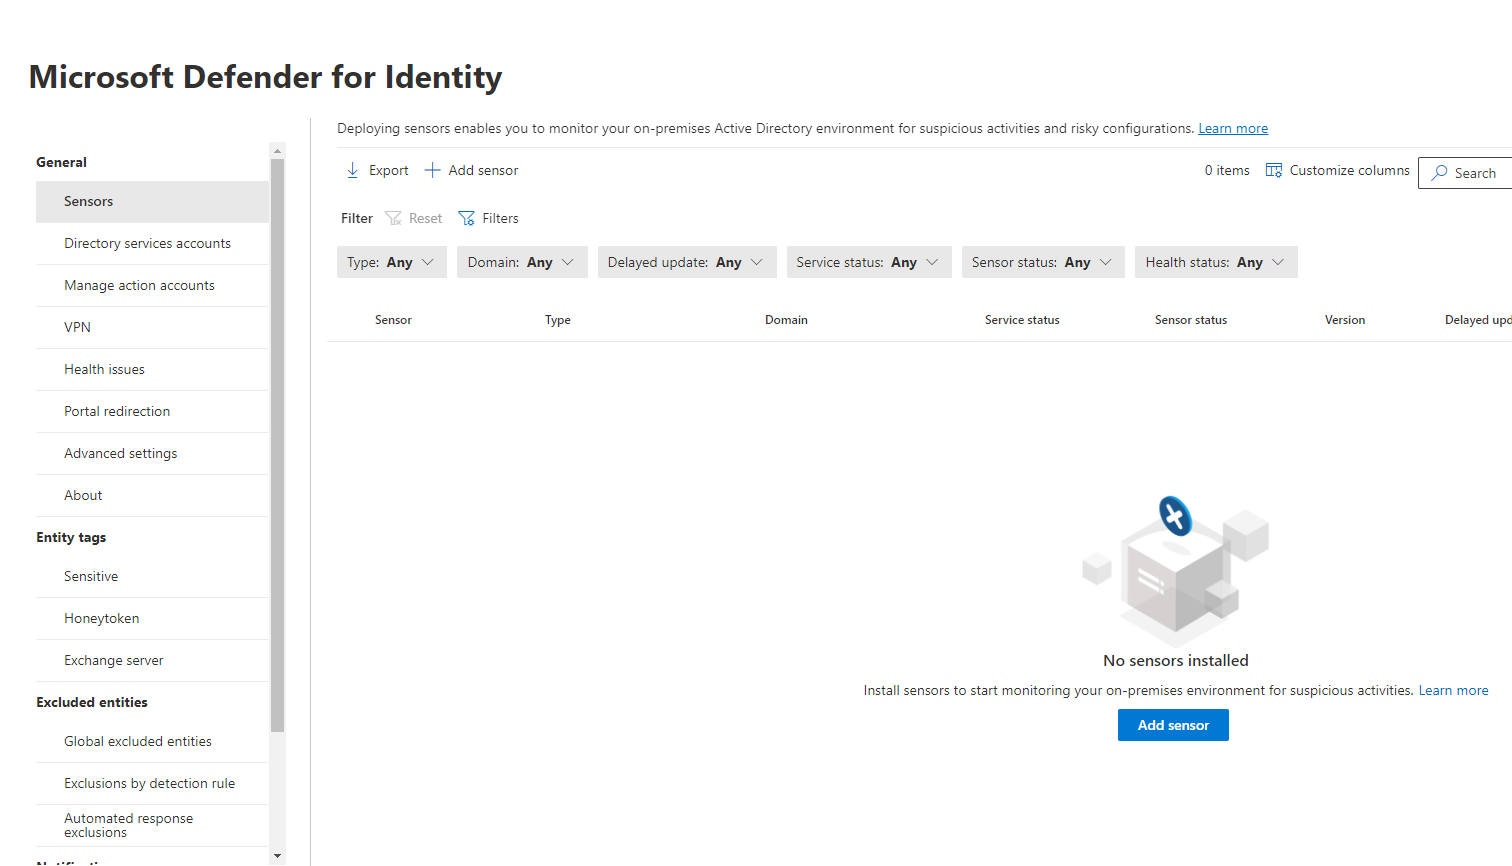
Delete Old ATP Groups if the instance is not getting created. The defender for the Identity instance is not getting created with this error. Something Went Wrong, Your instance was not created because a security group with the same name already exists in the azure active directory. Delete the existing security groups and try again.
Keep your account secure – Your Organization requires you to set up the following methods of proving who you are :
Additional Authentication is required to complete this Sign-in
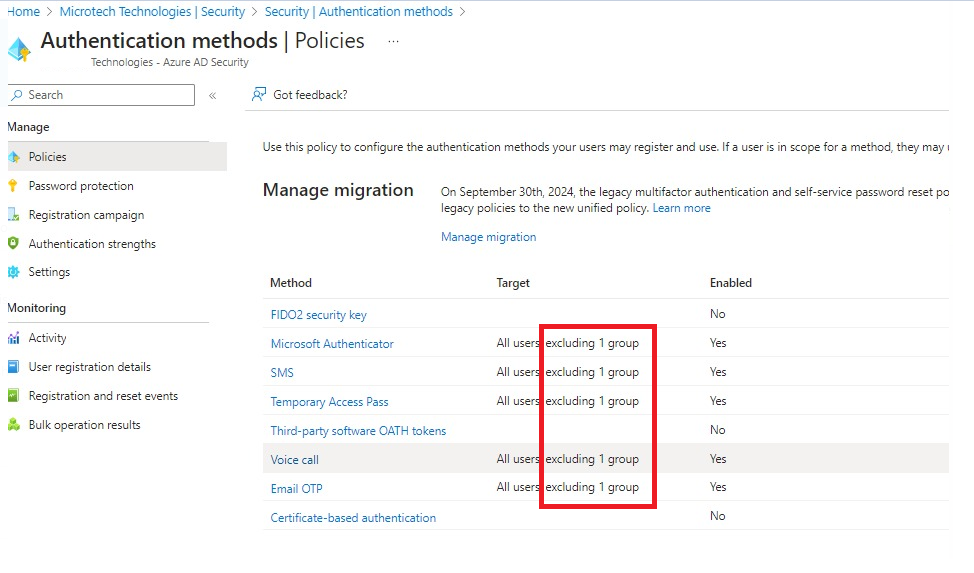
In an Authentication Methods Policy, the term “exclude” refers to the ability to restrict or prevent users from registering specific authentication methods. This exclusion does not apply to multi-factor authentication (MFA) itself. Instead, it is focused on allowing users to choose which particular methods they do not wish to register or use.
The Authentication Methods Policy does not exclude users from MFA entirely. It simply allows users to exclude certain specific methods from their authentication choices. For example, if users do not wish to register their mobile phone number for MFA, they can exclude that method. However, they would still be required to use other registered methods when MFA is enforced.
It’s important to note that the exclusion of access methods, such as determining which authentication methods are available in specific scenarios, is typically handled through Conditional Access policies. These policies allow administrators to define specific conditions, such as user location or device type, to determine the appropriate authentication methods.
The Authentication Methods Policy primarily focuses on giving users control over their authentication options and allowing them to exclude specific methods they do not wish to use. At the same time, Conditional Access policies govern the overall access and authentication requirements based on various conditions.
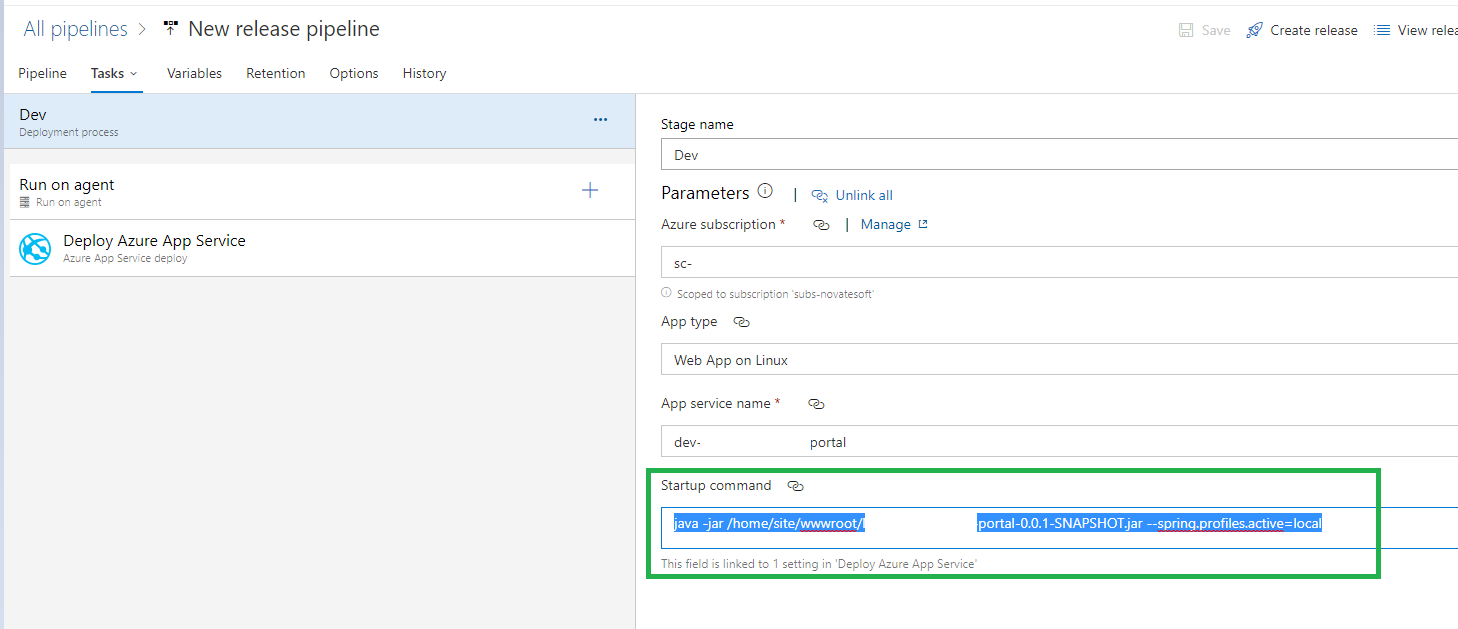
Startup Command to be set if you are using release pipelines.
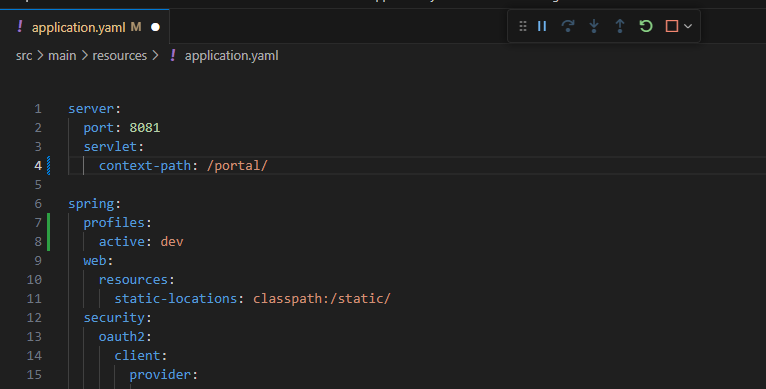
This blog post will explore how to use Spring Boot profiles with an application.yaml file in Visual Studio Code. Spring Boot provides a convenient way to manage application configurations for different environments using profiles. By leveraging profiles, developers can easily switch between different sets of configuration properties based on the current environment, such as development, testing, or production.
To start, we need to create an application.yaml file in our Spring Boot project. This file will contain the configuration properties for our application. In this example, we have defined a server configuration with the port set to 8081 and a servlet context path set to “/portal/”. Additionally, we have specified that the active profile is “dev” using the spring.profiles.active property.
To make use of the application.yaml file, we must ensure that our project is set up with the necessary dependencies. In Visual Studio Code, we can easily manage our project dependencies using the built-in Maven or Gradle support. To enable web application development, we should include the required Spring Boot starter dependencies, such as spring-boot-starter-web.
Next, we can create a Spring Boot application class that will serve as the entry point for our application. This class should be annotated with @SpringBootApplication, which will enable auto-configuration and component scanning. With this setup, our application will automatically detect the application.yaml file and load the configuration properties defined within it.
We can run the application in Visual Studio Code to test our configuration. By default, Spring Boot will use the “dev” profile since it was specified as the active profile in the application.yaml file. However, we can easily switch profiles by modifying the spring.profiles.active property in the application.yaml file or by passing the –spring.profiles.active command-line argument when running the application.
Using profiles with the application.yaml file provides a flexible and convenient way to manage configurations for different environments in a Spring Boot application. With Visual Studio Code’s support for Maven or Gradle, developers can easily set up and manage dependencies, making it a suitable choice for developing Spring Boot applications.