
In this blog post, we’ll delve into the seamless integration of Intune Policy with OneDrive, focusing particularly on the effortless migration of Known Folders. Exploring the myriad options available, we’ll navigate through the Intune Settings Catalog to configure the OneDrive Known Folders move policy.
Whether it’s a physical setup or a virtual environment like AVD or Cloud PC, the OneDrive Known Folders Move (KFM) emerges as a pivotal solution. Among the familiar Windows Folders—Desktop, Documents, and Pictures—this policy ensures a smooth transition, optimizing storage utilization.
To complement the OneDrive KFM, it’s imperative to implement the OneDrive Files On-Demand policy, a strategic move to conserve device space by adopting an on-demand file access approach.
Finally, we’ll unravel the step-by-step configuration process of the OneDrive Known Folder Move (KFM) policy, facilitating automatic user logins and seamless file saving, all orchestrated through the Intune Settings Catalog.
Objective :
- Setup OneDrive for Business for end-users
- Enable KFM (Known Folder Move)
- Block end-users from reverting known folders configuration to their PC
- Block personal OneDrive accounts
- Restrict OneDrive client to sync only specific Azure AD tenant
- Enable Files On-Demand
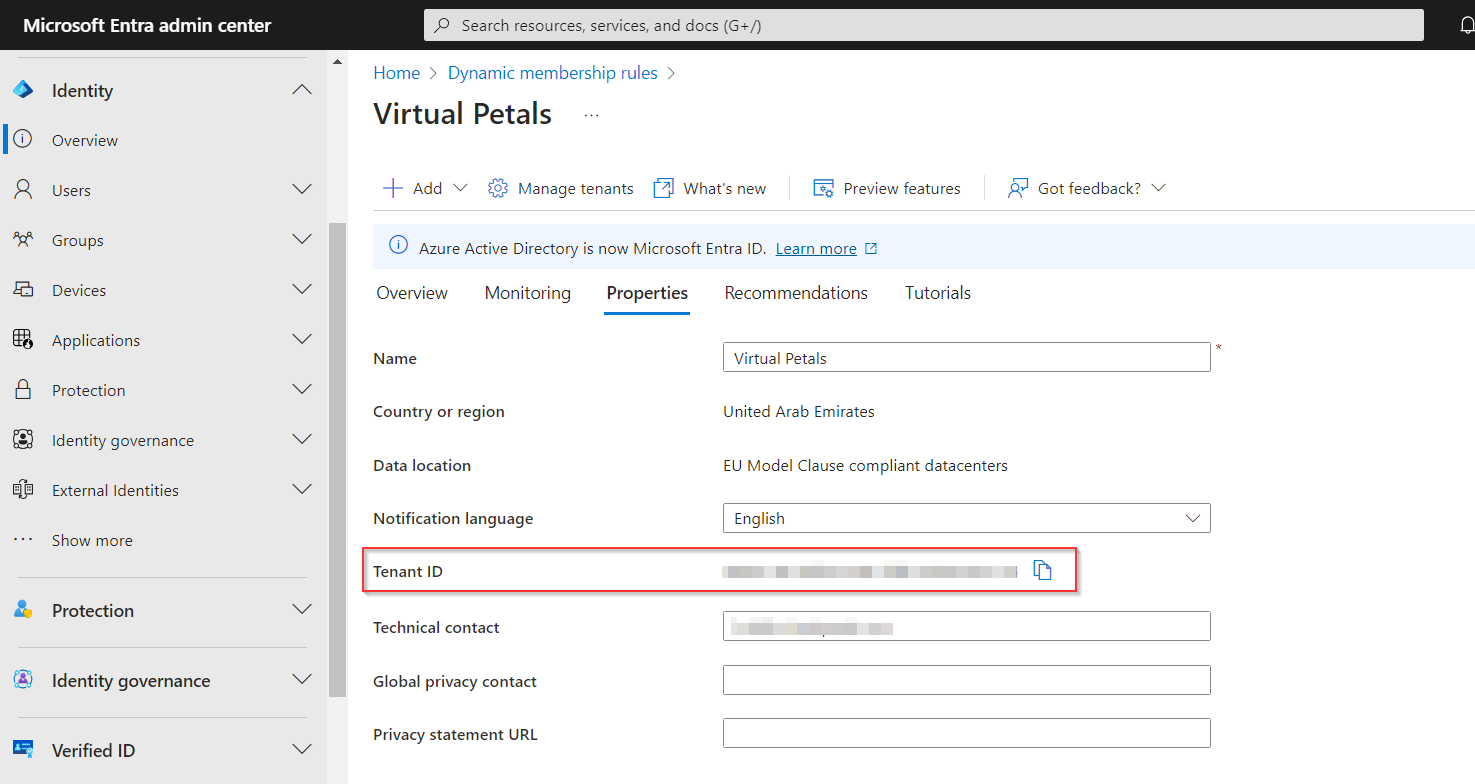
Step 1: To begin setting up the Known Folder Move and restricting the OneDrive client to a single tenant, start by retrieving the Azure AD tenant ID. Sign in to the Azure AD portal, then navigate to Azure Active Directory > Properties. Here, you’ll find the Tenant ID. Copy this ID for later use.
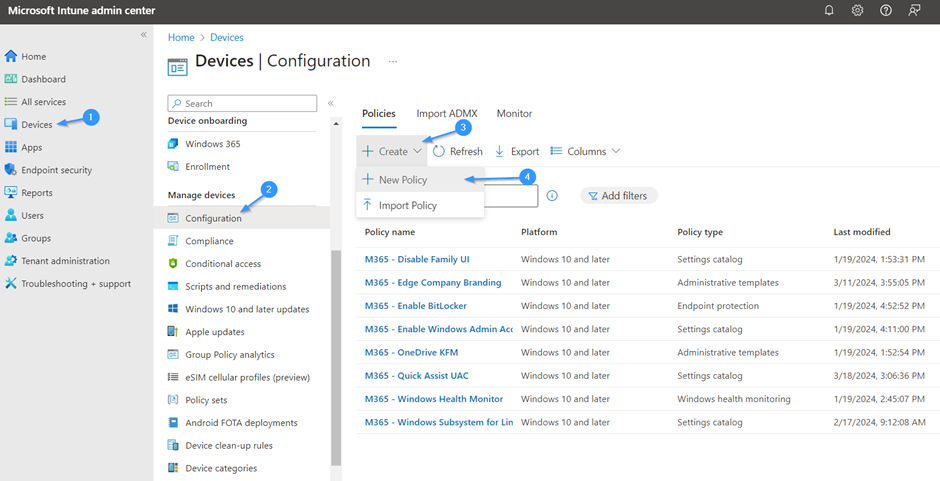
Step 2: With the Tenant ID in hand, let’s proceed to create the Configuration Profile for configuring OneDrive policy settings. Log in to the MEM Admin Center portal, navigate to Devices, then Configuration Profiles, and click on Create Profile.
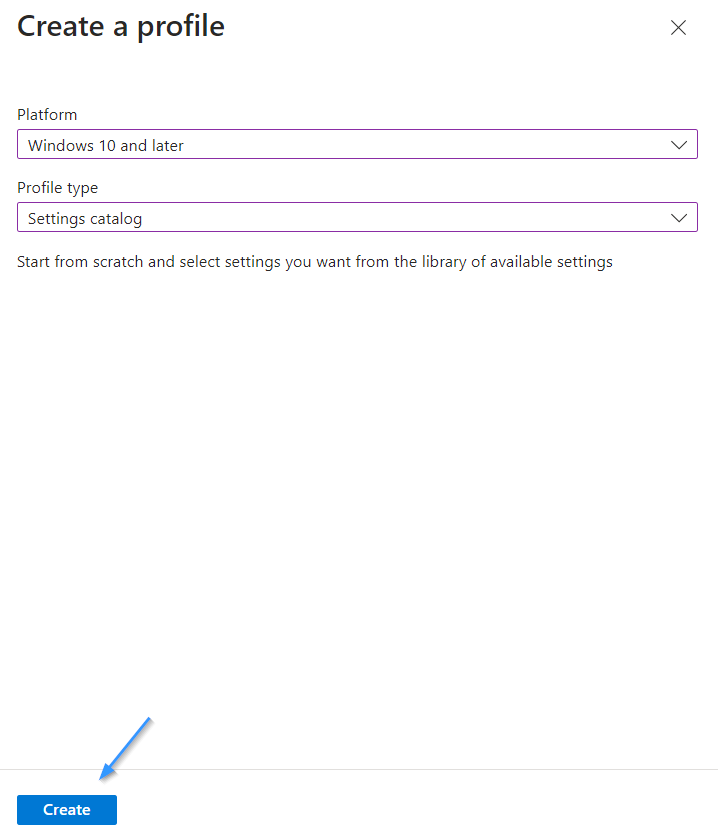
Step 3: Choose “New Policy,” then in the Platform section, select “Windows 10 and later.” Under Profile Type, opt for “Setting Catalog.”
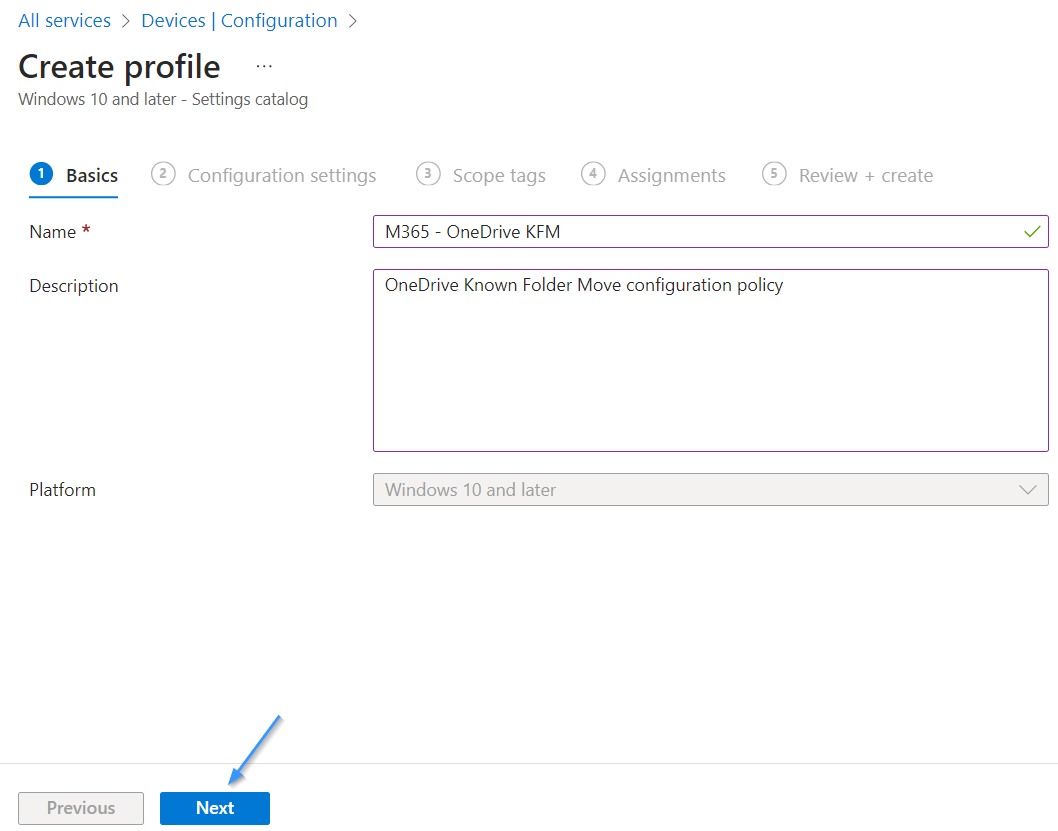
Step 4: In the Basic section, enter a Name and Description for the configuration policy.
Step 5: Navigate to the Configuration Settings page and select “All Settings.” In the search bar, enter ‘OneDrive‘ to find all of the OneDrive available settings.
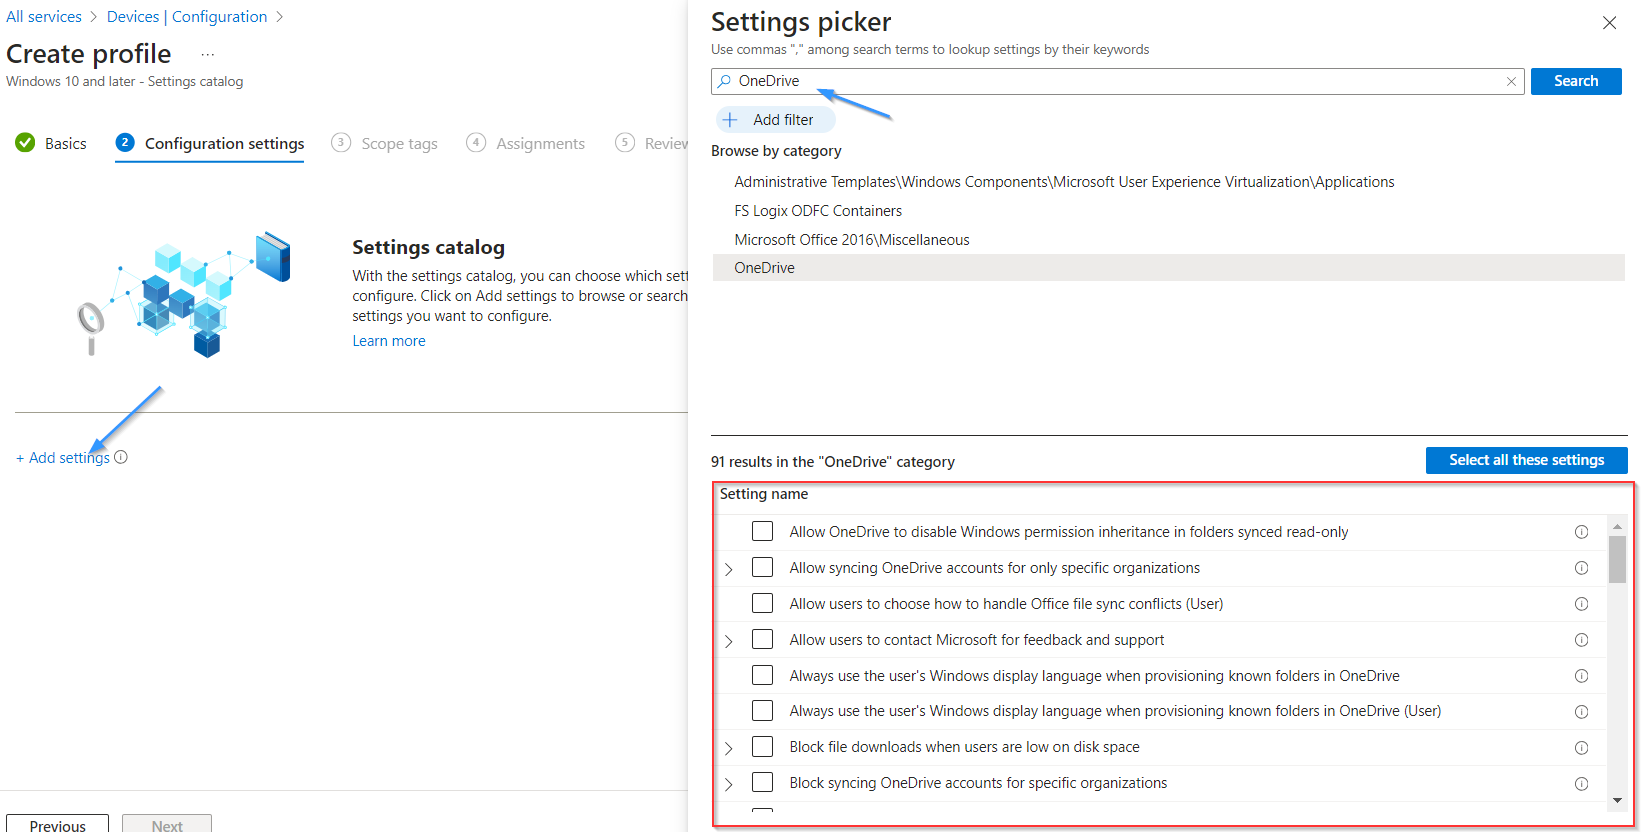
Based on the above objectives, we’ll create the appropriate settings, I will break these down per objective.
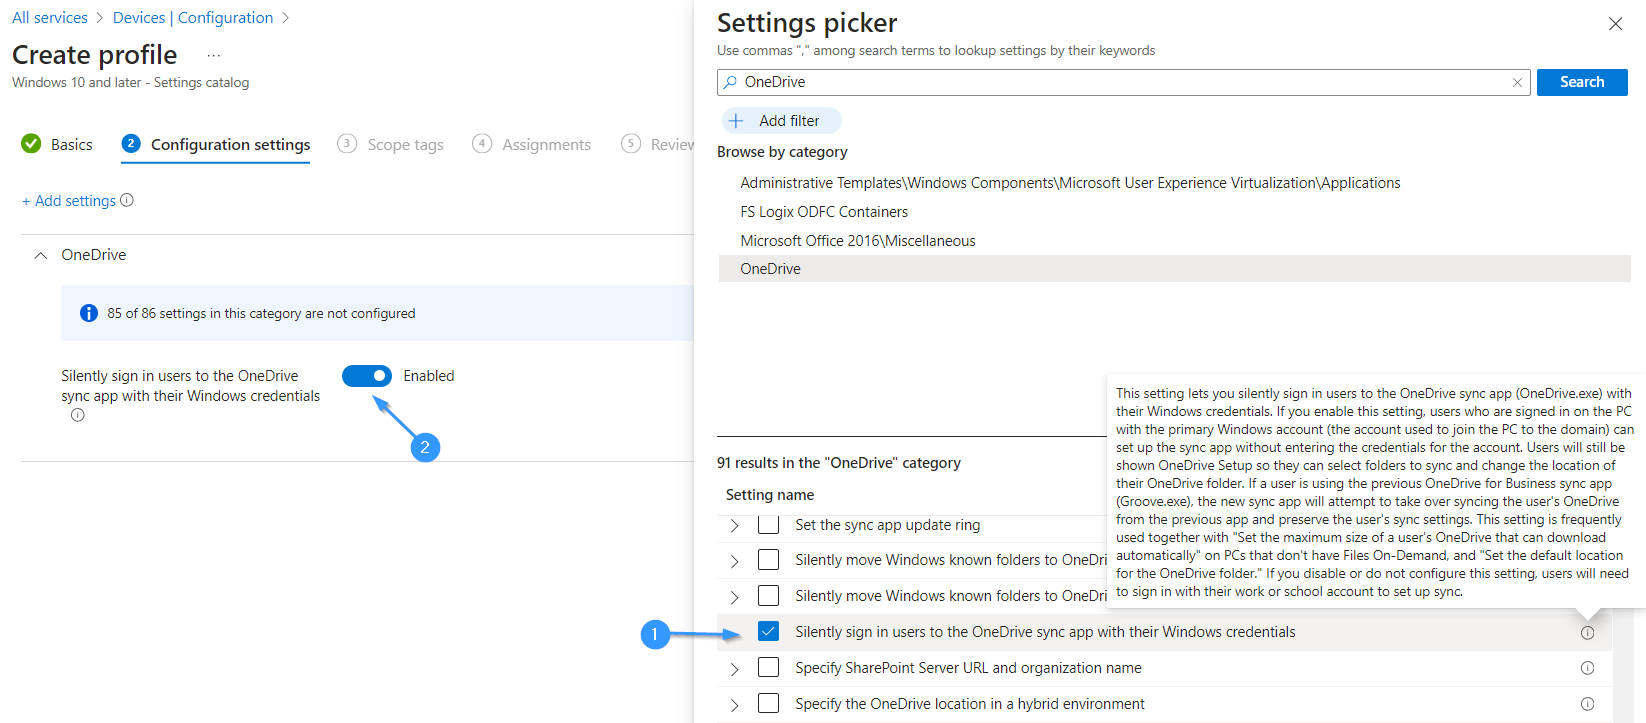
Step 6: “Setup OneDrive for Business for end-users“, this setting lets you ‘Silently sign in the users to the OneDrive sync client with their Windows Credentials’ and set this to Enabled.
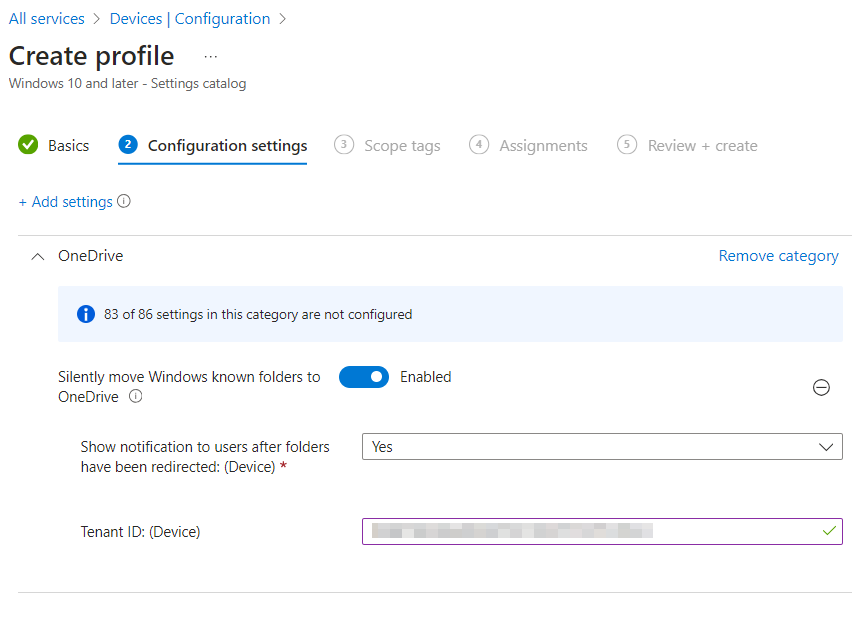
Step 7: “Enable KFM (Known Folder Move)“, Enable the “Silently move Windows known folders to OneDrive” setting, input the Tenant ID, and choose whether to display notifications to users.
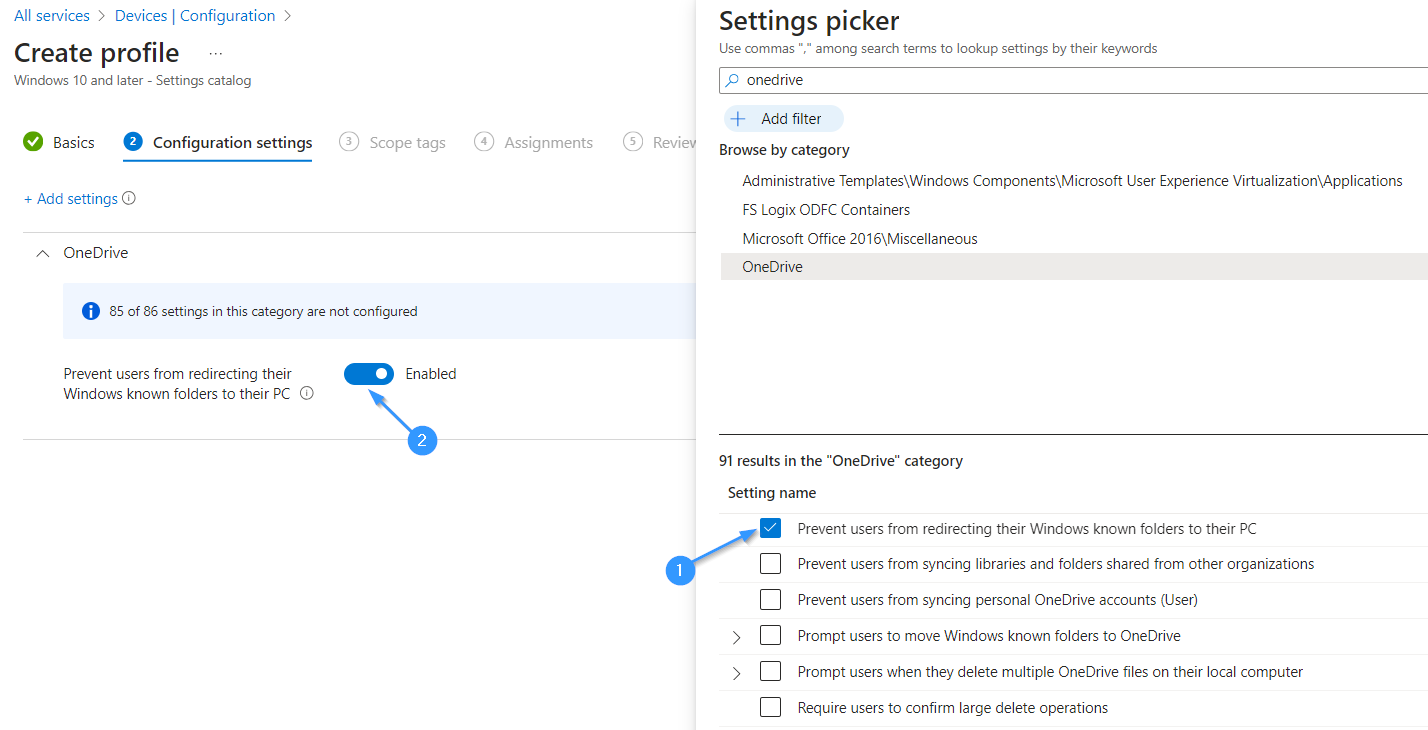
Step 8: ‘Block end-users from reverting known folders configuration to their PC‘, locate the setting titled ‘Prevent users from redirecting their Windows known folders to their PC‘ and set it to ‘Enabled‘.

Step 9: Locate the setting ‘Prevent users from syncing personal OneDrive accounts‘ and Enable it.
Step 10: Locate the setting ‘Allow syncing OneDrive accounts for only specific organizations’, and Enable it.

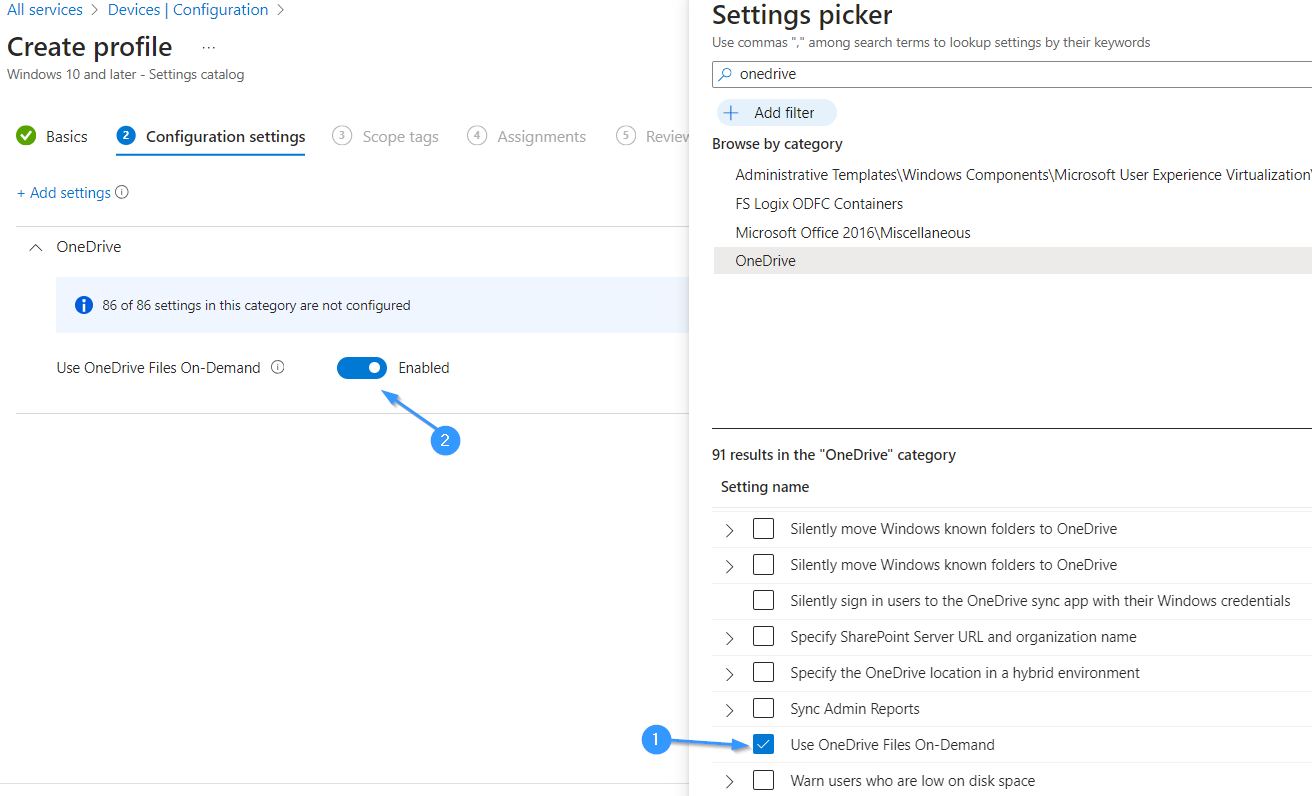
Step 11: Find the setting ‘Use OneDrive Files On-Demand‘ and set this to Enabled.
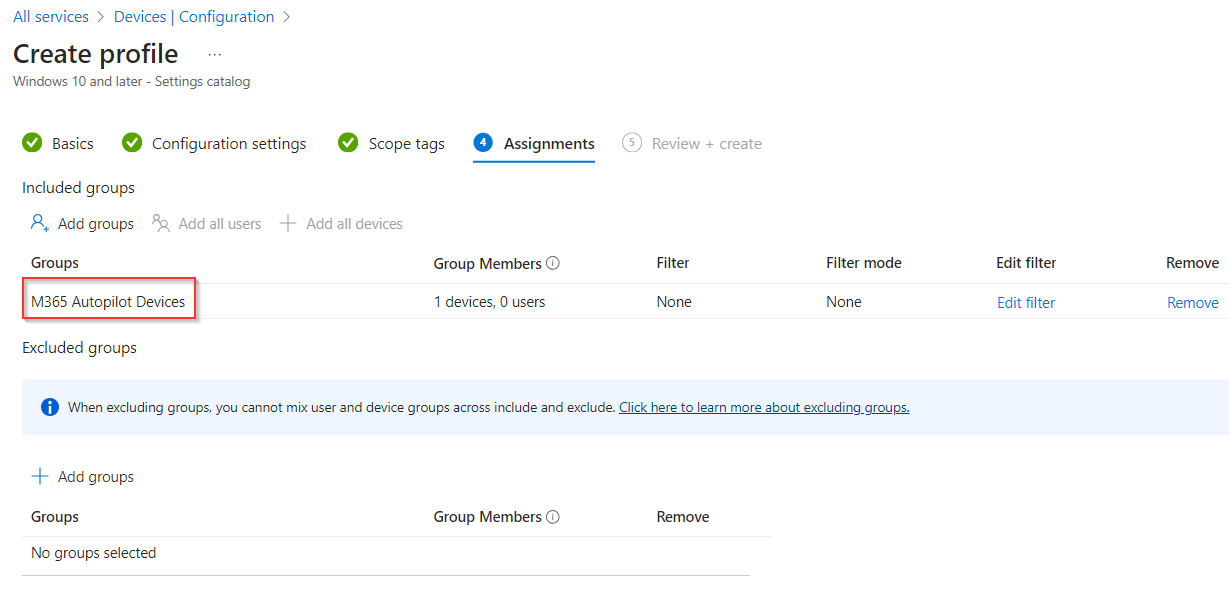
Step 12: Assign the policy to a group, then proceed by clicking on “Next.”
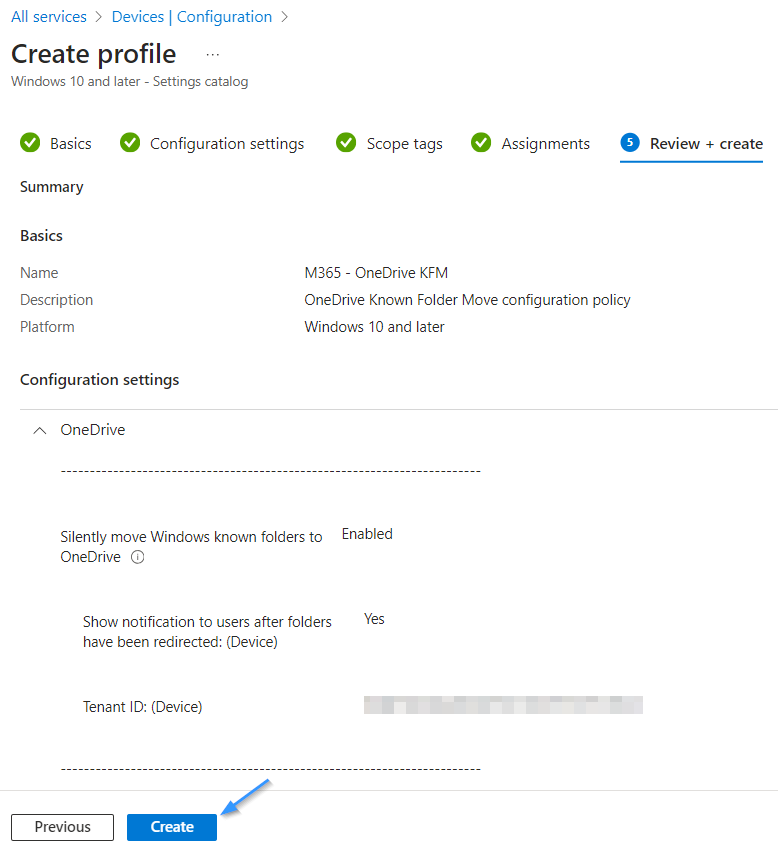
Step 7: Review the policy in the final step and click on “Create” to finish the process.
