
Exploring the Key Benefits and Use Cases of Azure Load Balancer for Efficient Load Distribution and High Availability in Cloud Deployments.
- Azure Load Balancer ensures uninterrupted service by dynamically distributing traffic across multiple virtual machines, redirecting requests away from failed instances to maintain system reliability.
- Easily scale your applications with Azure Load Balancer, distributing incoming traffic among multiple VM instances to handle varying workloads and maintain optimal performance during peak periods.
- Intelligently allocate requests using round-robin or least connections algorithms, preventing any single VM from becoming a bottleneck and ensuring equitable distribution of network traffic.
- Proactively monitor VM health with continuous probes, automatically diverting traffic from unhealthy instances to maintain a robust and reliable application infrastructure.
Step 1 : Here I have created two virtual machines in a same virtual network. Since we have creating Load Balancer with a Basic SKU, we have to have the Virtual Machines should be in single availability set or virtual machine scale set. So lets create two Virtual Machines in the same Availability Set.

Step 2 : We have currently created two Virtual Machines in a Resource Group. But there are other additional services which are also deployed and these services are not required for a Load Balancer Implementation, they are Public IP and we need only one Network Security Group for both the machines. So lets disassociate and delete them.
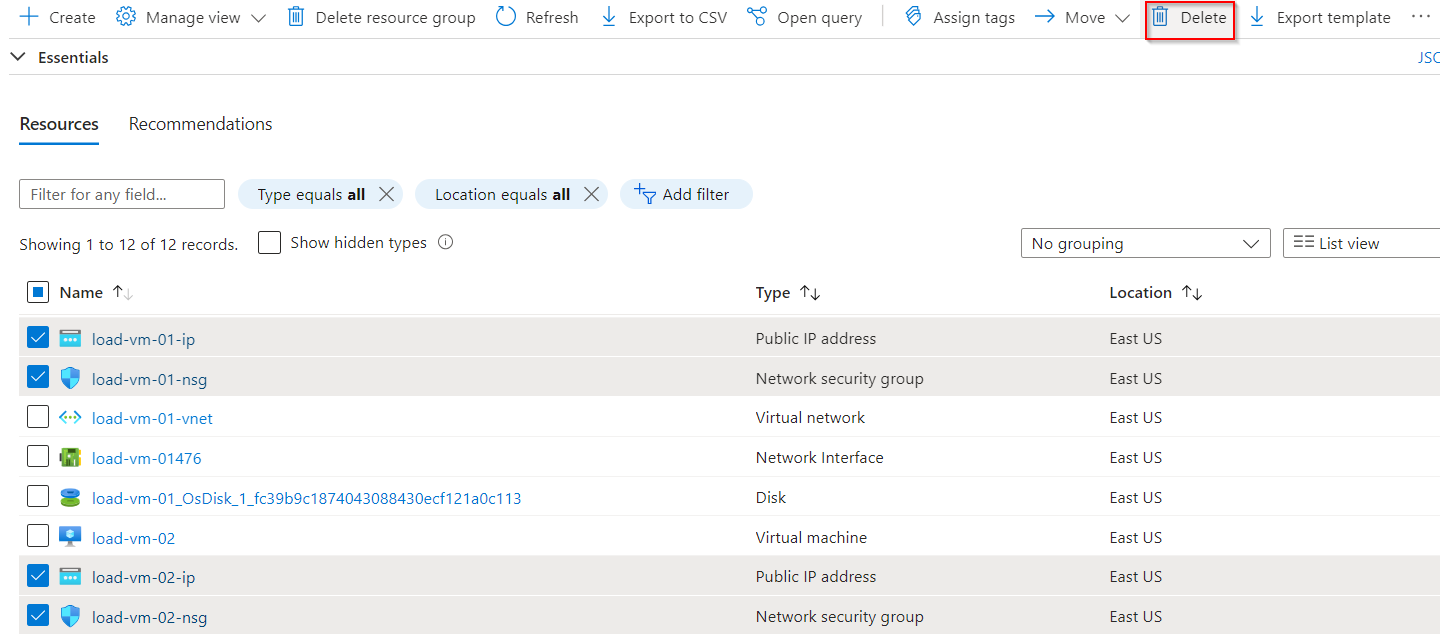
We could have created without an Public IP and Network Security Group in the beginning, but I want to mention that we do not require a Public IP to connect to the Virtual Machines and all the Virtual machines inside the same subnet can have common Network Security Group.
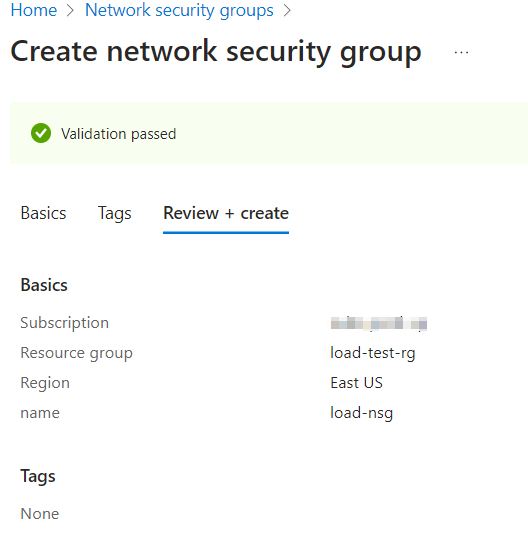
Step 3 : Lets Create a new Network Security Group for the Virtual Machines.
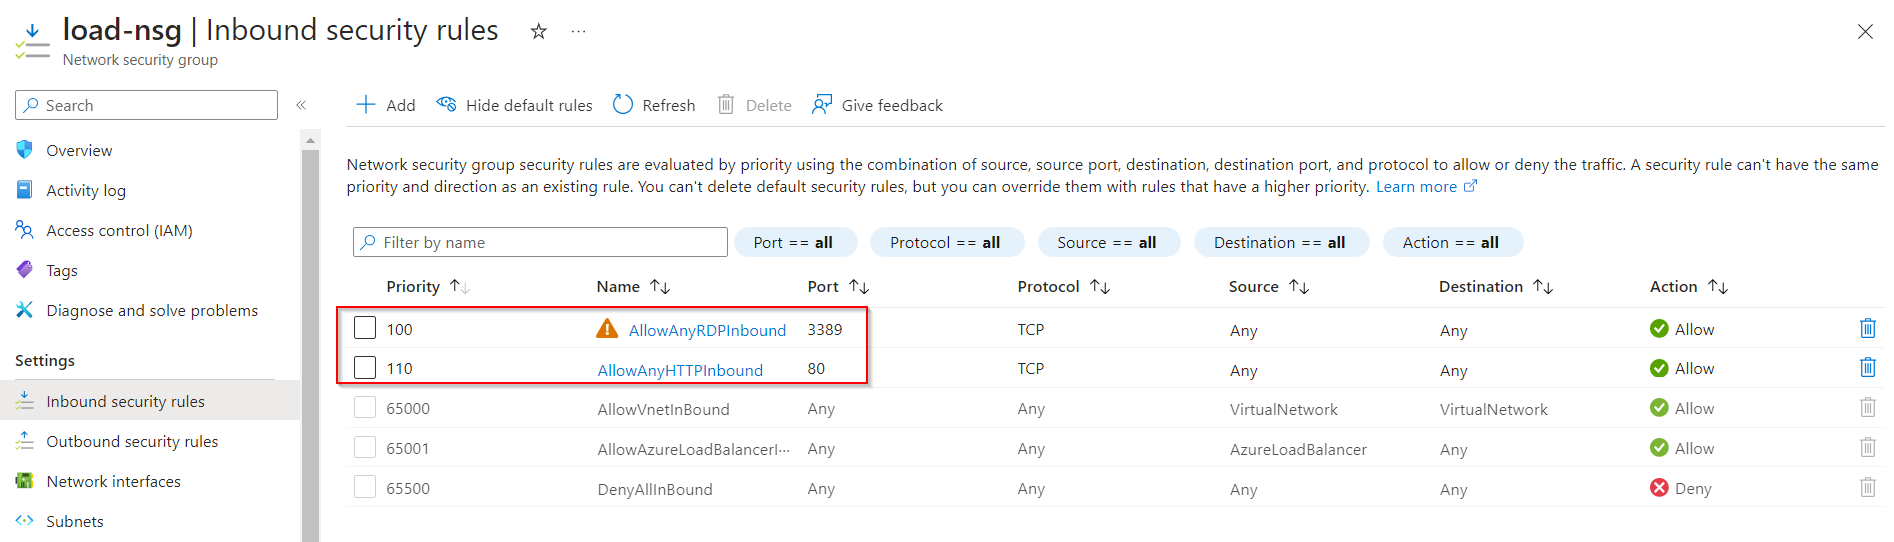
Step 4 : Once this Network Security Group is deployed, lets create some Inbound Security rules in it.
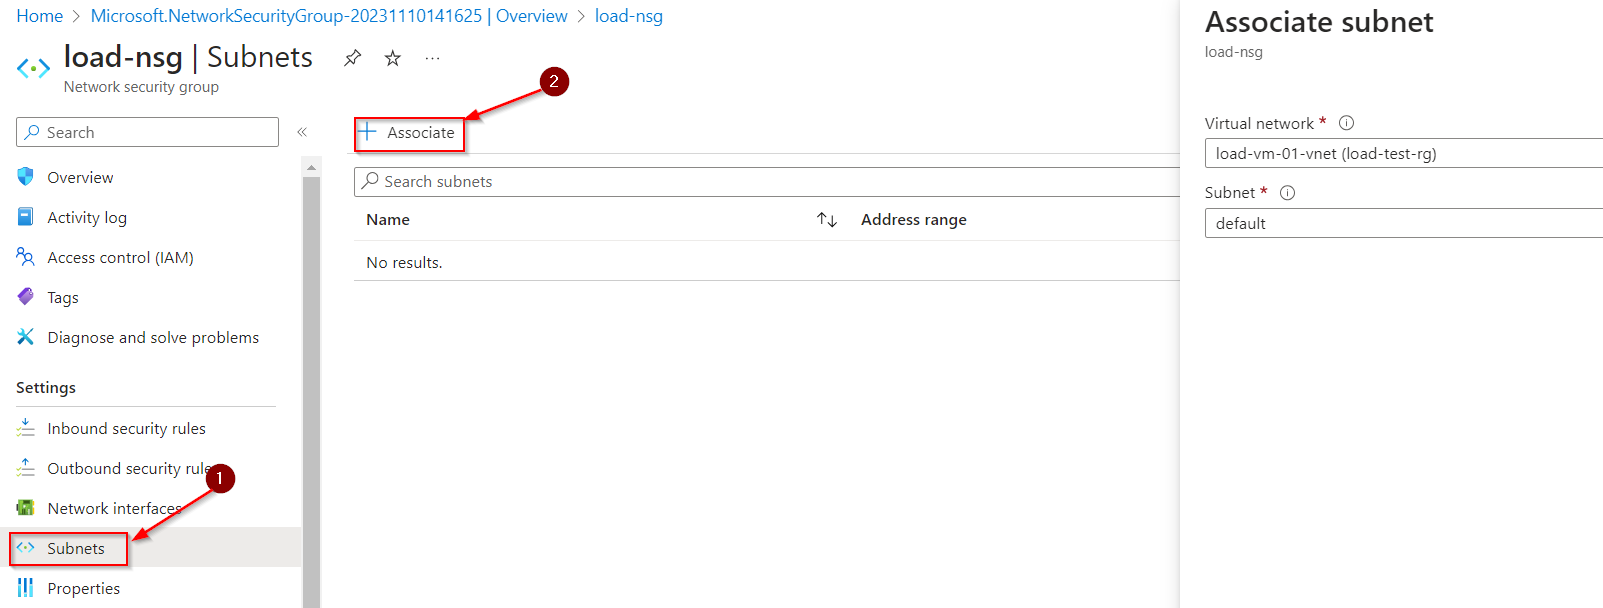
Step 5 : Now we have to Associate this Network Security Group to the Subnet which contains the Virtual Machines.
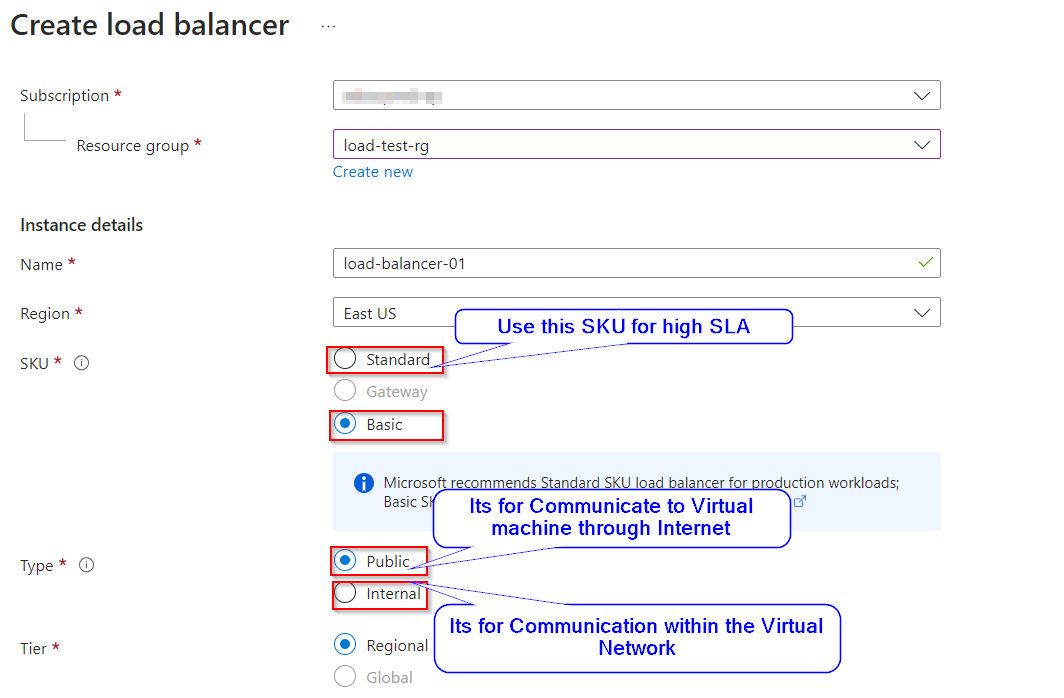
Step 6 : Now Lets start creating our Load Balancer to facilitate connections with the Virtual Machines, optimizing load distribution and ensuring high availability in our networked environment.
Since its for testing purpose I am going with Basic SKU and we need to connect to the Virtual machines from Internet so I have selected Public IP.
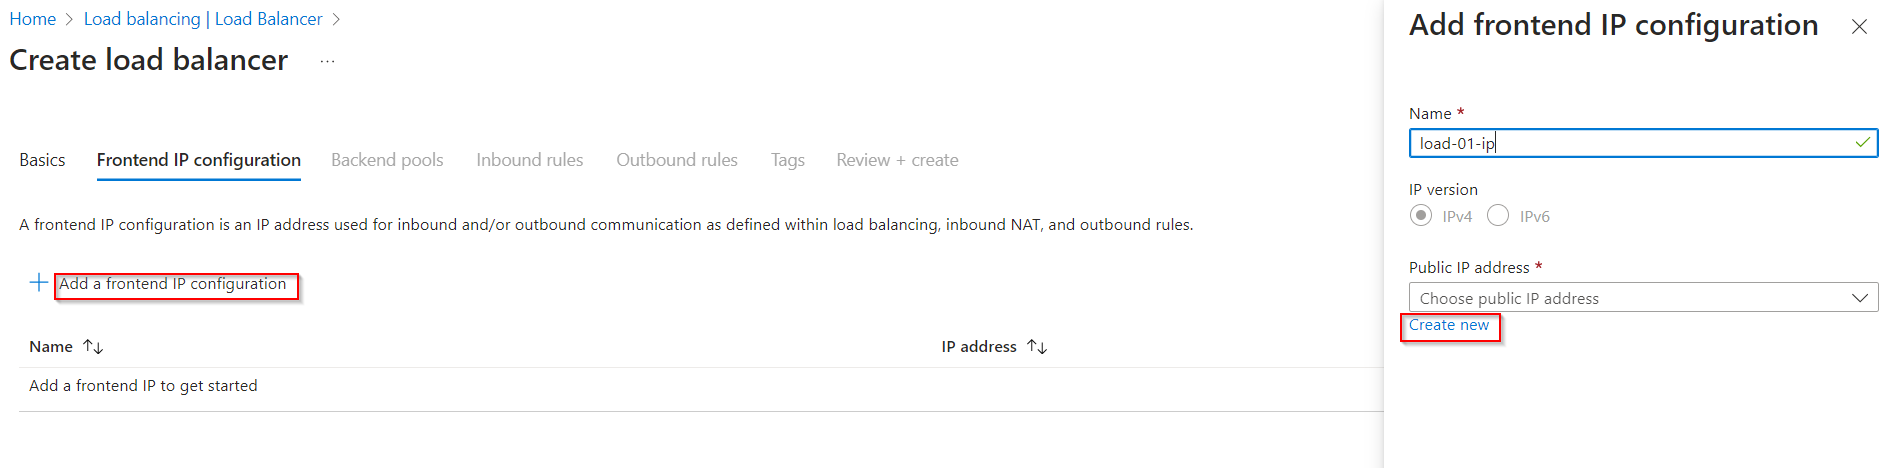
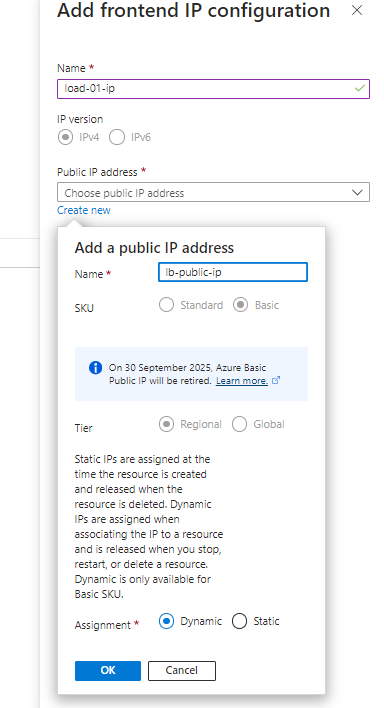
Step 7 : Now we have to Assign an Public IP to our Load Balancer.
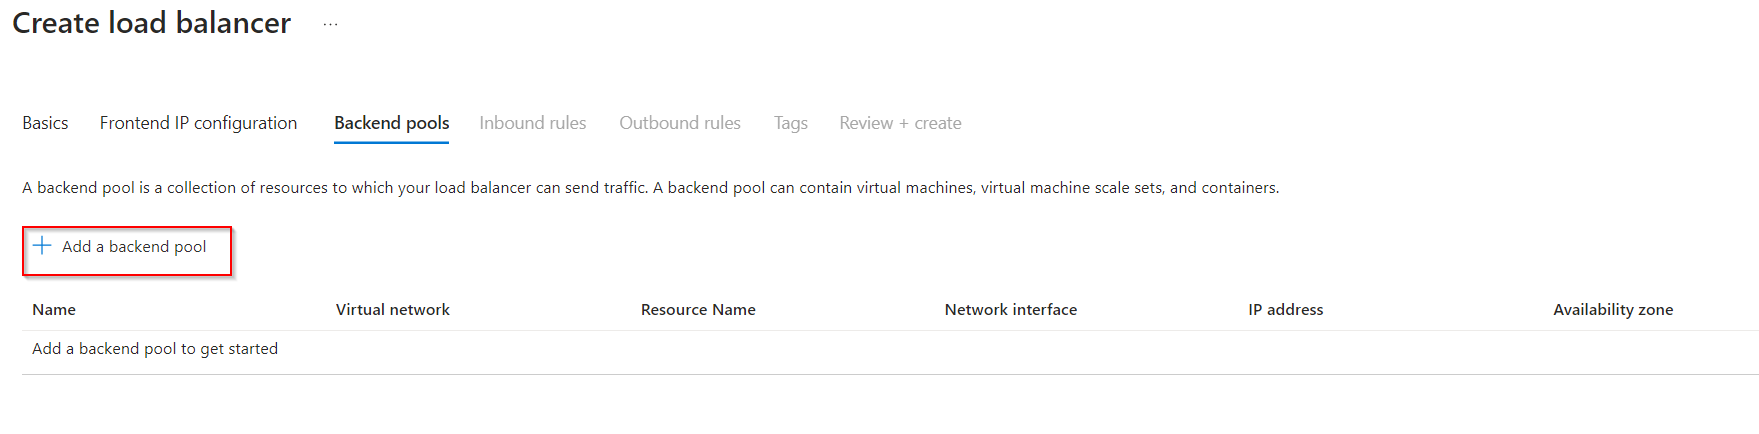
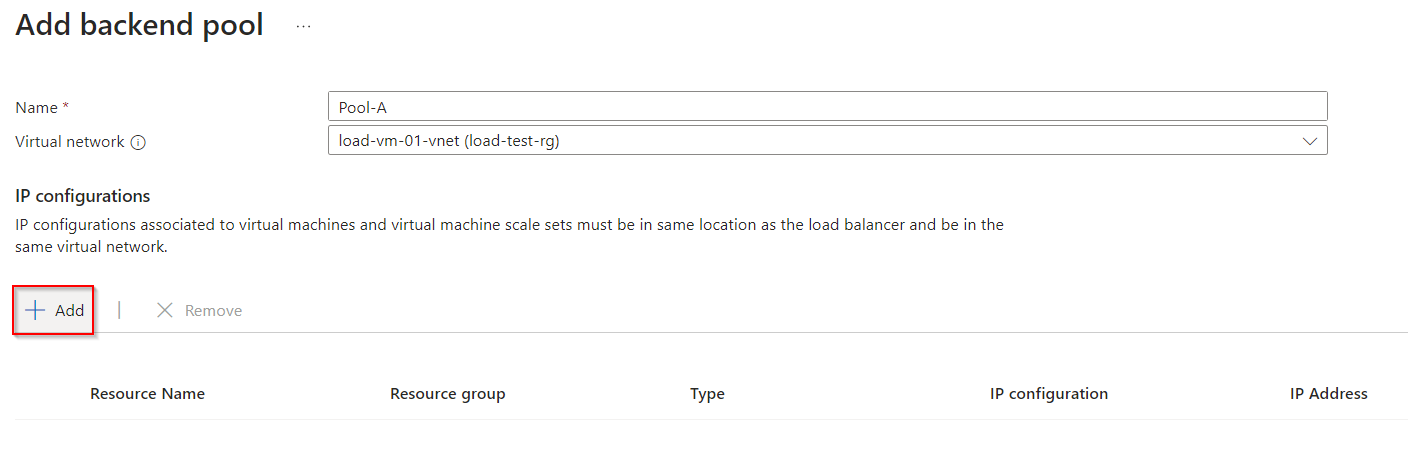
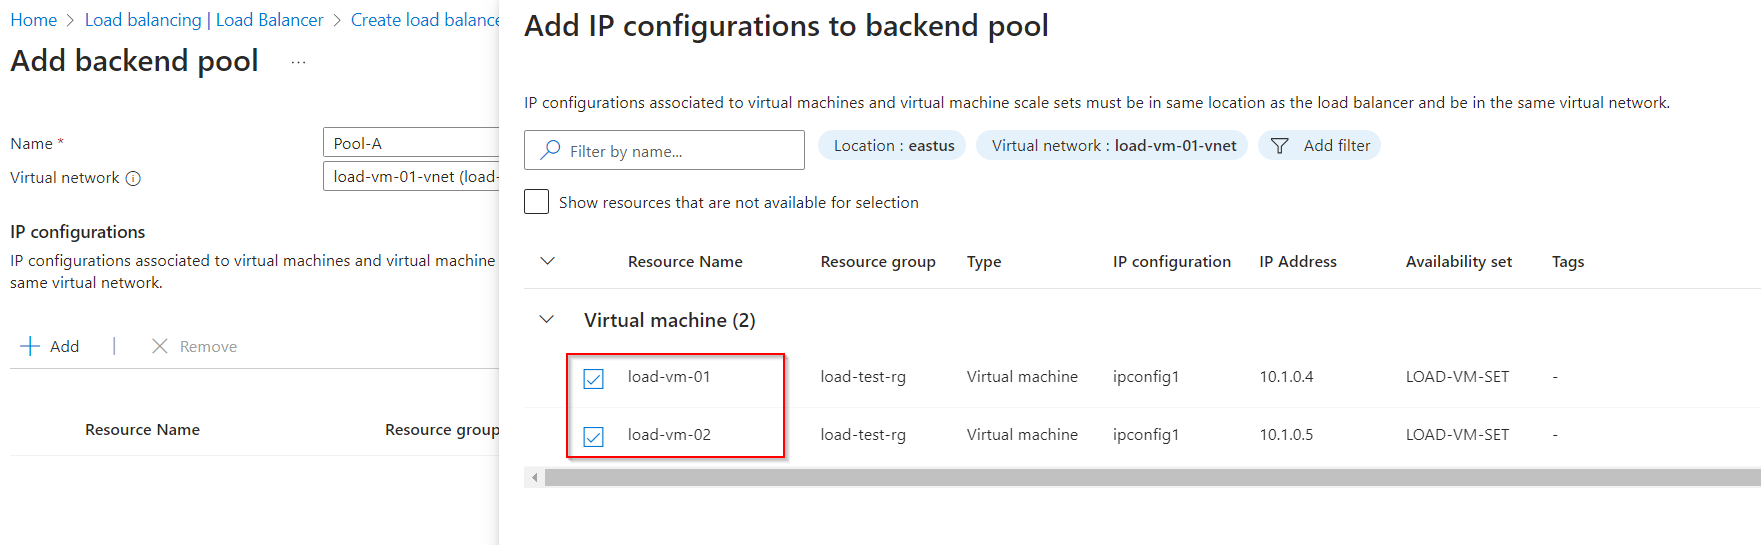
Step 8 : Now lets add Backend Pool by selection the Virtual Network and the Virtual Machines.
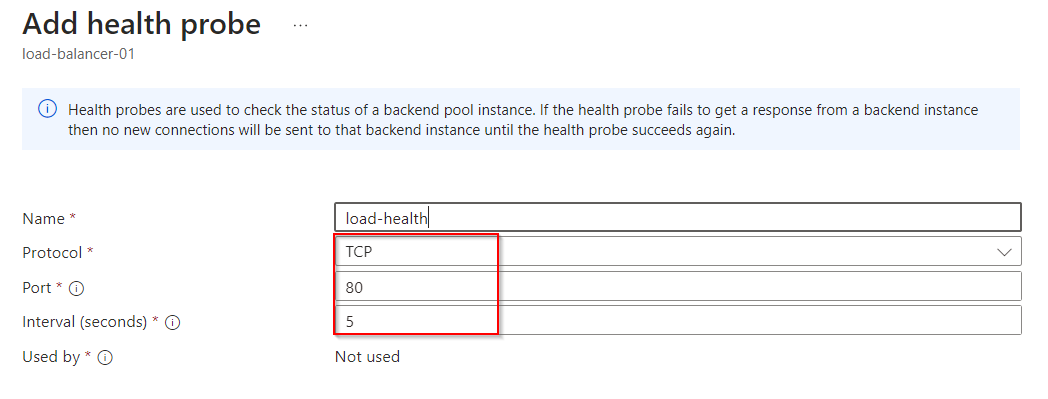
Step 9 : Once the Load Balancer is deployed we have to create Health Brobes in it. The Health Brobes helps the Load Balancer whether Virtual machines are up and running or not.
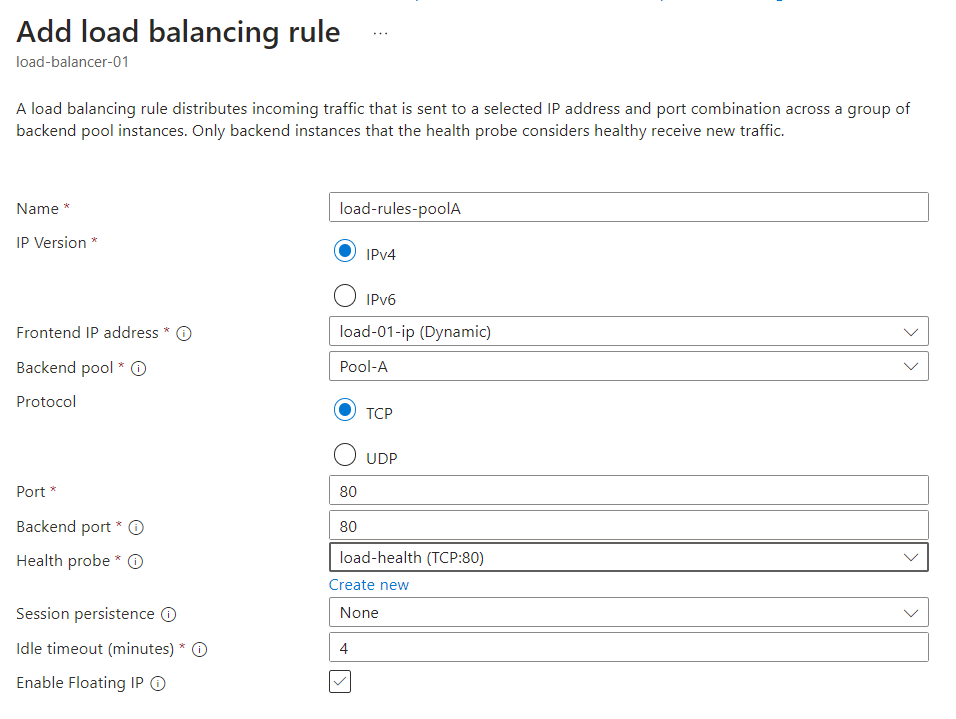
Step 10 : Let add Load Balancer rules this helps the Load Balancer what request should be send to the Backend Pools.
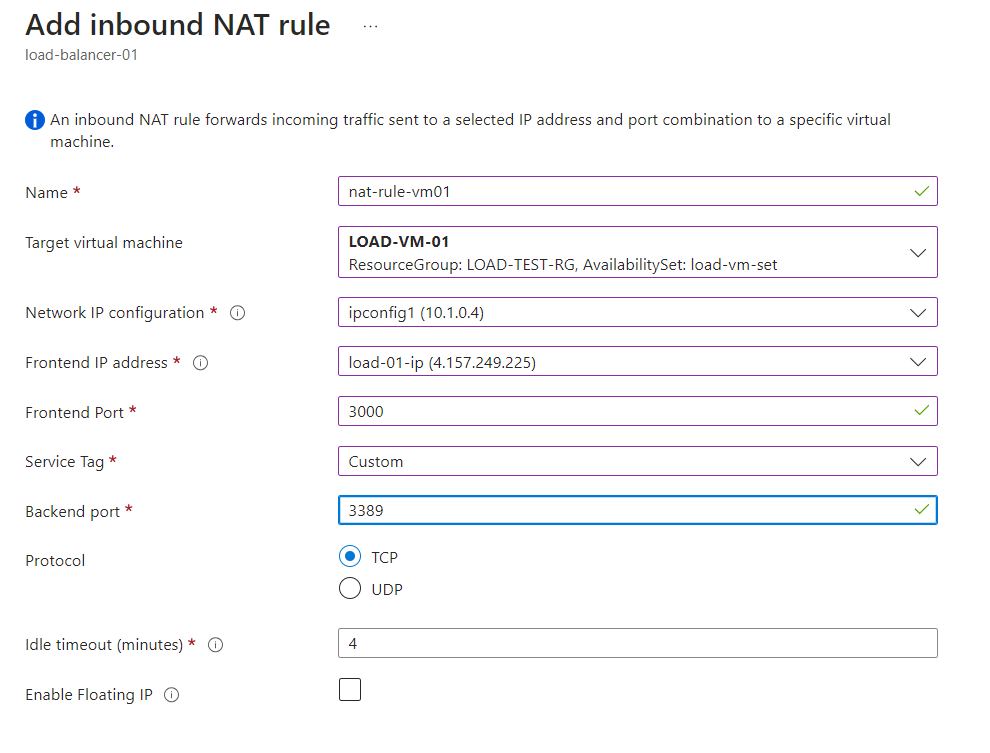
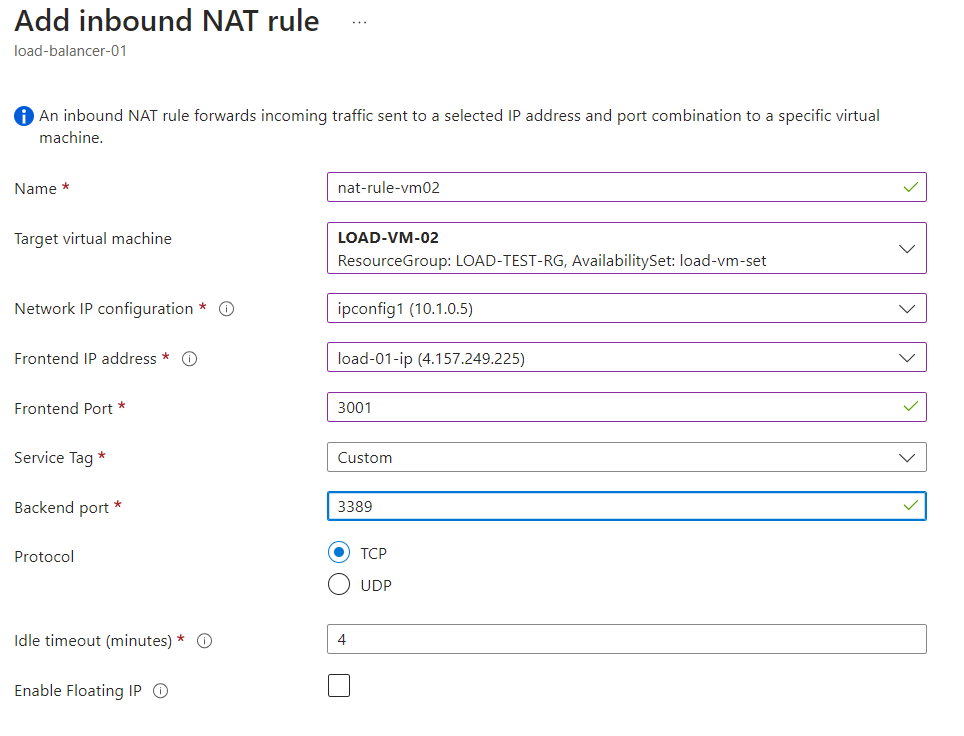
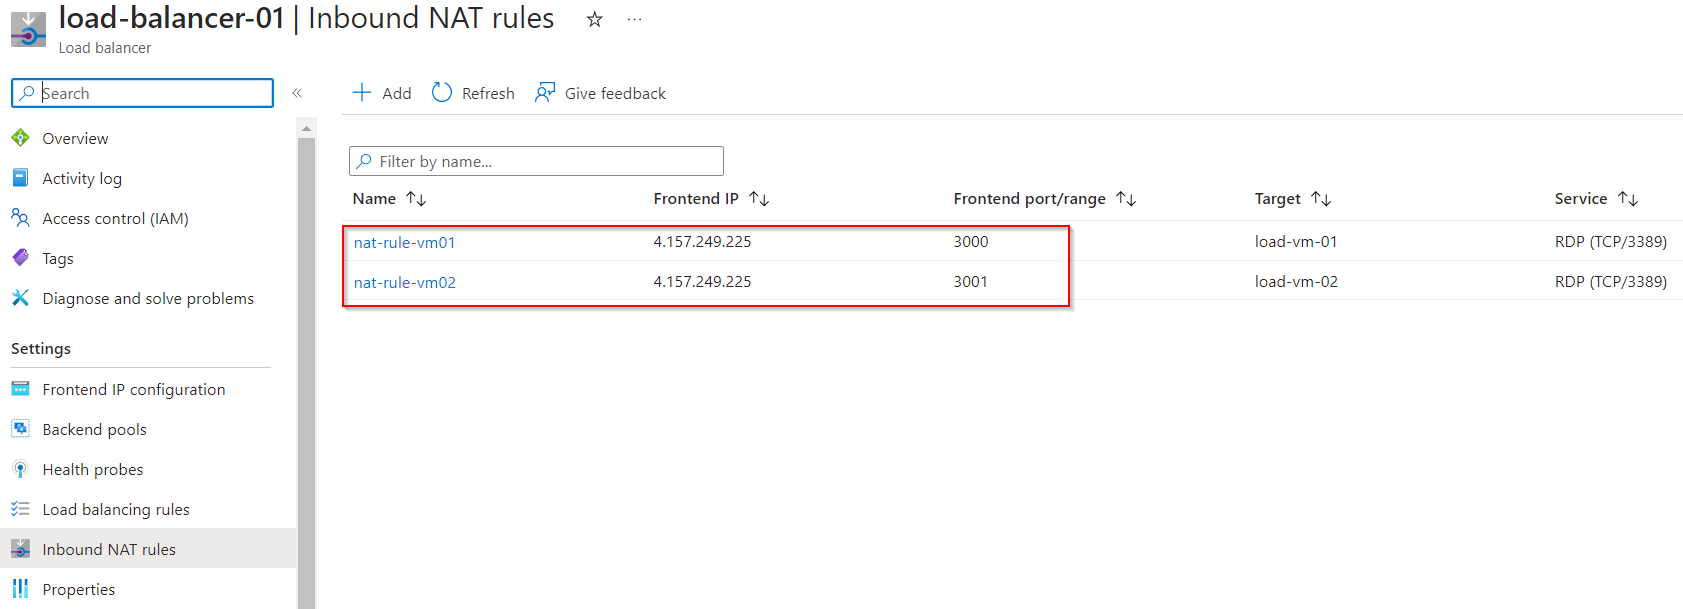
Step 11 : Lets create NAT rules for the Load Balancer. the Nat rules helps in logging in to a particular Virtual Machine.
For Virtual Machine 01
For Virtual Machine 02
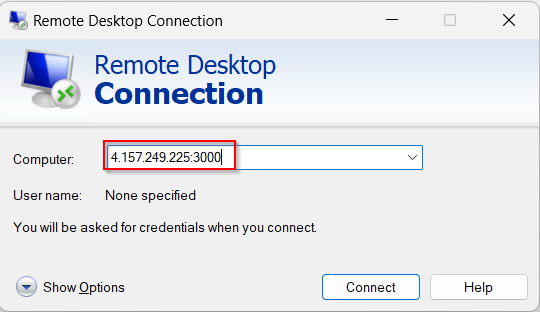
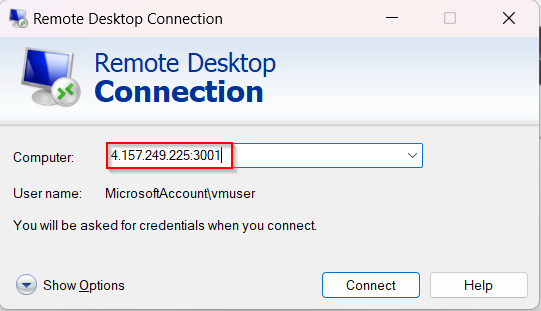
Step 12 : Let connect to both the Virtual Machines using RDP with the IP address do the Load Balancer.
Connecting to Virtual Machine 01. Along with the Public IP of the Load Balancer add the Frontend port number given in the NAT rules.
Connecting to Virtual Machine 02.

Successfully able to connect to Virtual Machines with the help of Load Balancers.
