 cluster")
Create an AKS cluster:
- Sign in to the Azure portal.
- On the Azure portal menu or from the Home page, select Create a resource.
- In the Categories section, select Containers > Azure Kubernetes Service (AKS).
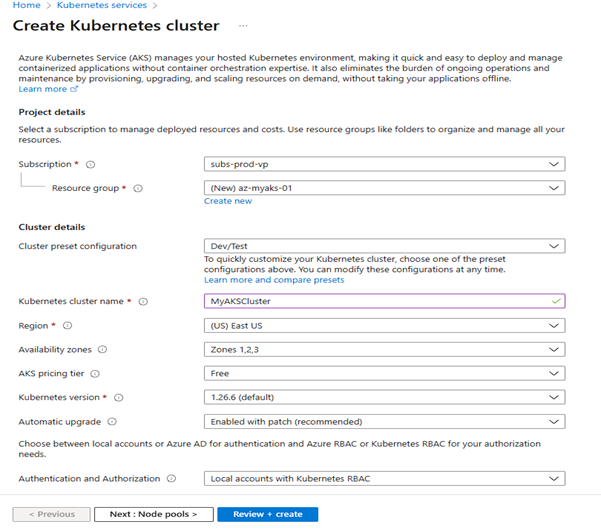
- On the Basics page, configure the following options:
- Project details:
- Select an Azure Subscription.
- Create an Azure Resource group, such as myResourceGroup. While you can select an existing resource group, for testing or evaluation purposes, we recommend creating a resource group to temporarily host these resources and avoid impacting your production or development workloads.
- Cluster details:
- Ensure that the Preset configuration is Standard ($$). For more details on preset configurations, see Cluster configuration presets in the Azure portal.
- Enter a Kubernetes cluster name, such as myAKSCluster.
- Select a Region for the AKS cluster, and leave the default value selected for Kubernetes version.
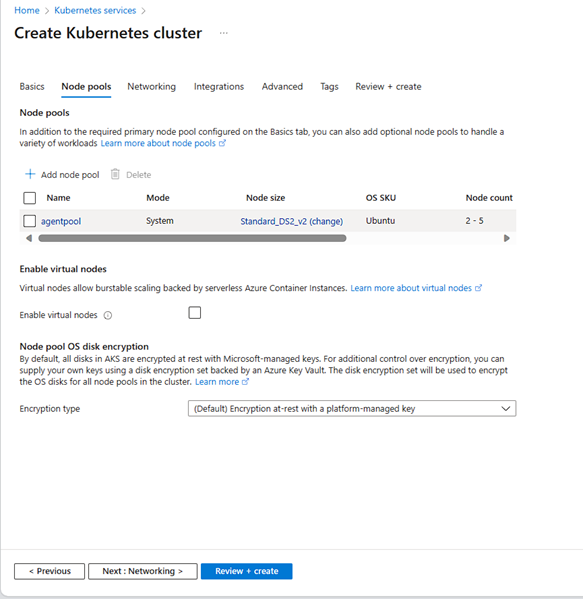
- Primary node pool:
- Leave the default values selected
- Project details:
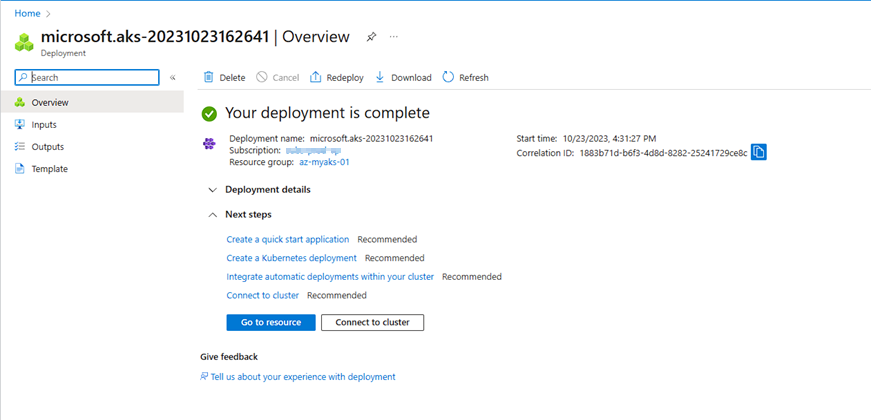
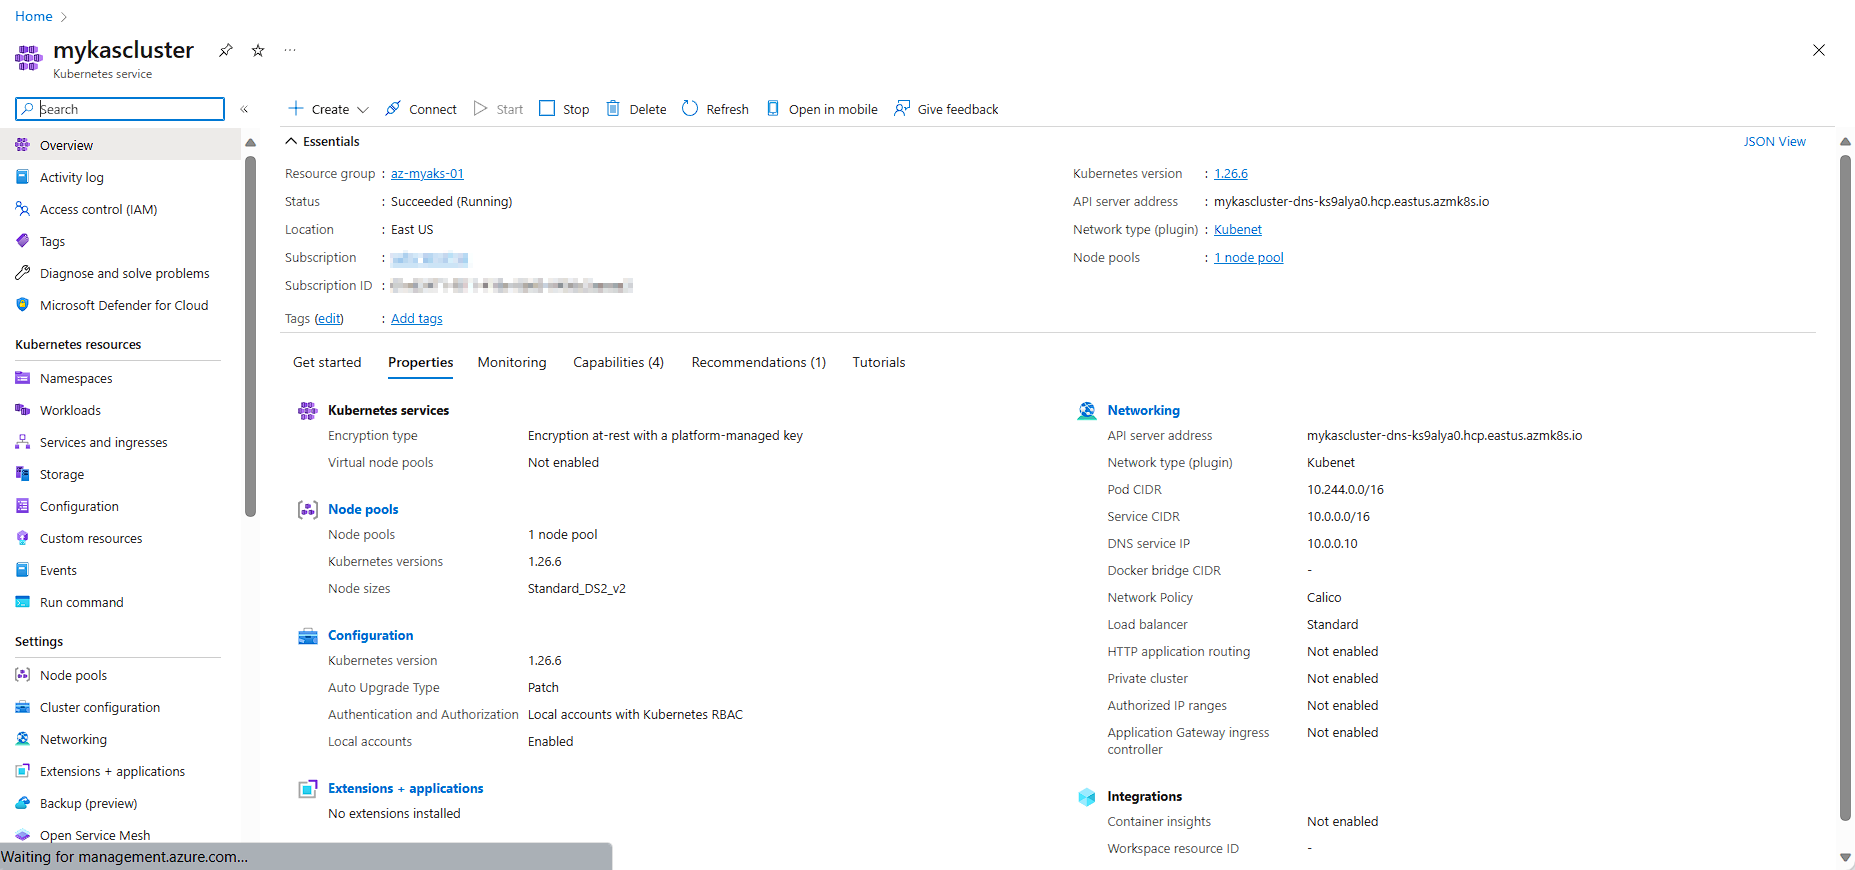
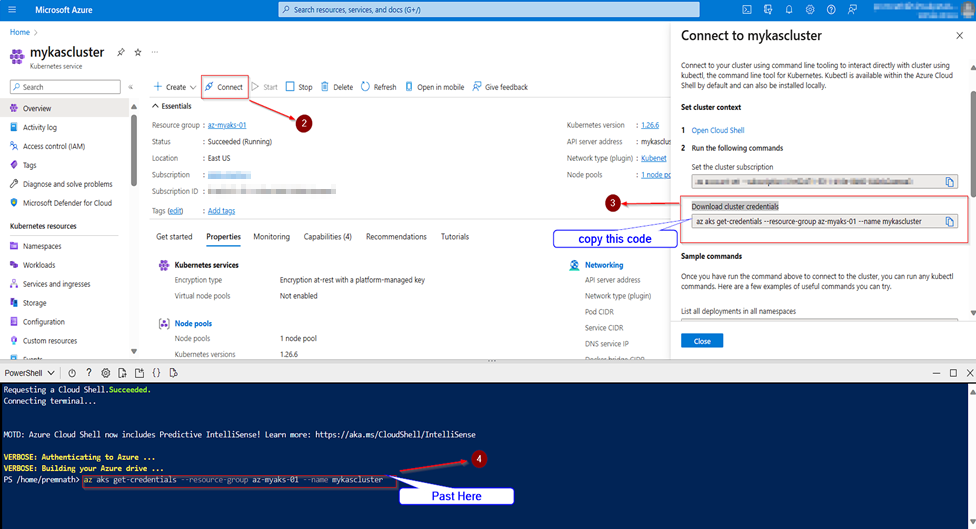
Connect to the cluster :
To manage a Kubernetes cluster, use the Kubernetes command-line client, kubectl. kubectl is already installed if you use Azure Cloud Shell. If you’re unfamiliar with the Cloud Shell, review Overview of Azure Cloud Shell.
Open Cloud Shell using the >_ button on the top of the Azure portal.
Azure Powershell
STEP 1:
Open Cloud Shell using the >_ button on the top of the Azure portal.

STEP 2:
Configure kubectl to connect to your Kubernetes cluster using the Import-AzAksCredential cmdlet. The following command downloads credentials and configures the Kubernetes CLI to use them.
STEP 3:
Verify the connection to your cluster using kubectl get to return a list of the cluster nodes
kubectl get nodes 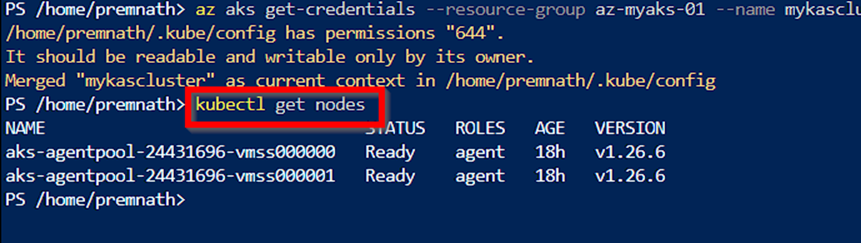
Output shows the single node created in the previous steps. Make sure the node status is
Ready:
| NAME | STATUS | ROLES | AGE | VERSION |
| aks-agentpool-24431696-vmss000000 | Ready | agent | 18h | v1.26.6 |
| aks-agentpool-24431696-vmss000000 | Ready | agent | 18h | v1.26.6 |
Step 4:
Deploy the application
A Kubernetes manifest file defines a cluster’s desired state, like which container images to run.
In this quickstart, you will use a manifest to create all objects needed to run the Azure Vote application. This manifest includes two Kubernetes deployments:
- The sample Azure Vote Python applications.
- A Redis instance
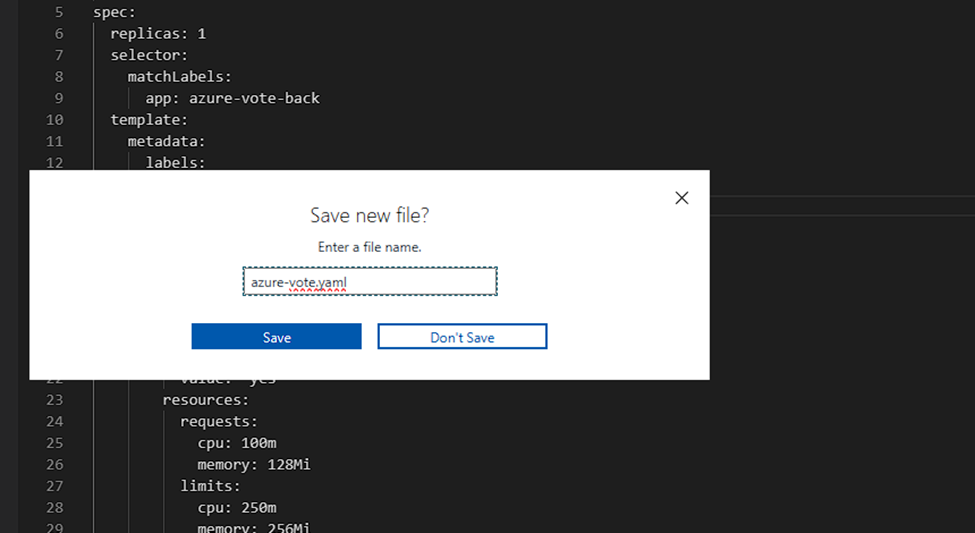
- Open editor using the >_ button on the top of the Azure cloud shell

Step 5
Two Kubernetes Services are also created:
- An internal service for the Redis instance.
- An external service to access the Azure Vote application from the internet.
- In the Cloud Shell, open an editor and create a file named azure-vote.yaml.
- Paste in the following YAML definition:
apiVersion: apps/v1
kind: Deployment
metadata:
  name: azure-vote-back
spec:
  replicas: 1
  selector:
    matchLabels:
      app: azure-vote-back
  template:
    metadata:
      labels:
        app: azure-vote-back
    spec:
      nodeSelector:
        "kubernetes.io/os": linux
      containers:
      - name: azure-vote-back
        image: mcr.microsoft.com/oss/bitnami/redis:6.0.8
        env:
        - name: ALLOW_EMPTY_PASSWORD
          value: "yes"
        resources:
          requests:
            cpu: 100m
            memory: 128Mi
          limits:
            cpu: 250m
            memory: 256Mi
        ports:
        - containerPort: 6379
          name: redis
---
apiVersion: v1
kind: Service
metadata:
  name: azure-vote-back
spec:
  ports:
  - port: 6379
  selector:
    app: azure-vote-back
---
apiVersion: apps/v1
kind: Deployment
metadata:
  name: azure-vote-front
spec:
  replicas: 1
  selector:
    matchLabels:
      app: azure-vote-front
  template:
    metadata:
      labels:
        app: azure-vote-front
    spec:
      nodeSelector:
        "kubernetes.io/os": linux
      containers:
      - name: azure-vote-front
        image: mcr.microsoft.com/azuredocs/azure-vote-front:v1
        resources:
          requests:
            cpu: 100m
            memory: 128Mi
          limits:
            cpu: 250m
            memory: 256Mi
        ports:
        - containerPort: 80
        env:
        - name: REDIS
          value: "azure-vote-back"
---
apiVersion: v1
kind: Service
metadata:
  name: azure-vote-front
spec:
  type: LoadBalancer
  ports:
  - port: 80
  selector:
    app: azure-vote-front
Step 6
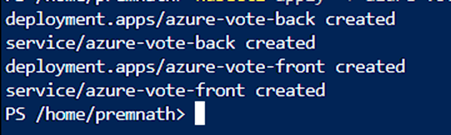
Deploy the application using the kubectl apply command and specify the name of your YAML manifest:
kubectl apply -f azure-vote.yaml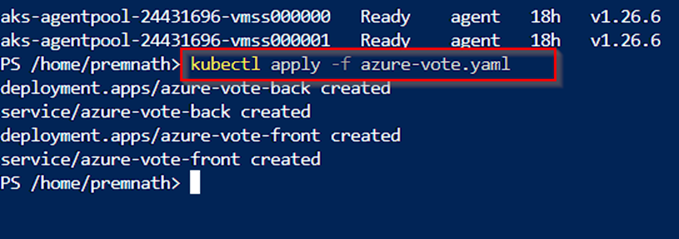
Output shows the successfully created deployments and services:
Step 7
Test the application
When the application runs, a Kubernetes service exposes the application front end to the internet. This process can take a few minutes to complete. To monitor progress, use the kubectl get service command with the --watch argument
kubectl get service azure-vote-front –watch 
COPY EXTERNAL IP AND PASTE TO LOCAL HOST
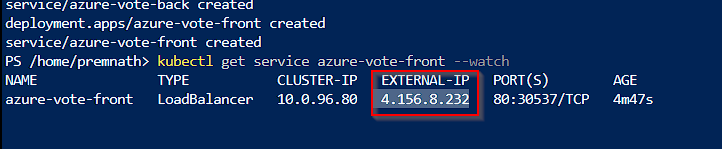
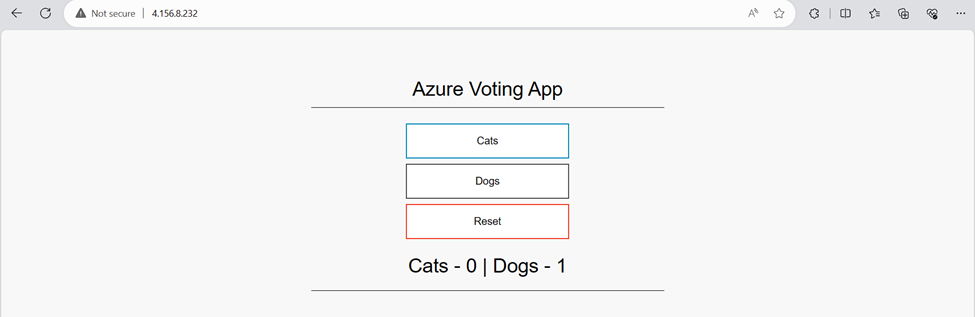
To see the Azure Vote app in action, open a web browser to the external IP address of your service.

 cluster with the Azure portal. This step-by-step guide simplifies the process, ensuring a seamless and efficient deployment experience for your containerized applications on Microsoft Azure.)