
Deploying a Next.js app on Azure App Service using Azure DevOps Pipelines can be done directly within the YAML file itself, incorporating the deployment steps into the build pipeline. By defining deployment configurations in the YAML file, you integrate the deployment process seamlessly into the overall build process without a separate release pipeline.
- YAML Configuration: Within the YAML file, define different stages or jobs for building and deploying your Next.js app. This can include steps such as installing dependencies, building the app, and packaging it for deployment.
- Deployment Stage: Specify a deployment stage within the YAML file. This stage includes steps tailored to deploy your Next.js app to Azure App Service. You’ll define tasks like configuring the Azure subscription, specifying the app type (webAppLinux in this case), providing the package path, defining the runtime stack, and more.
Step 1 : Create a new project in Azure Devops and add the respective Next js Codes to the repository accordingly.
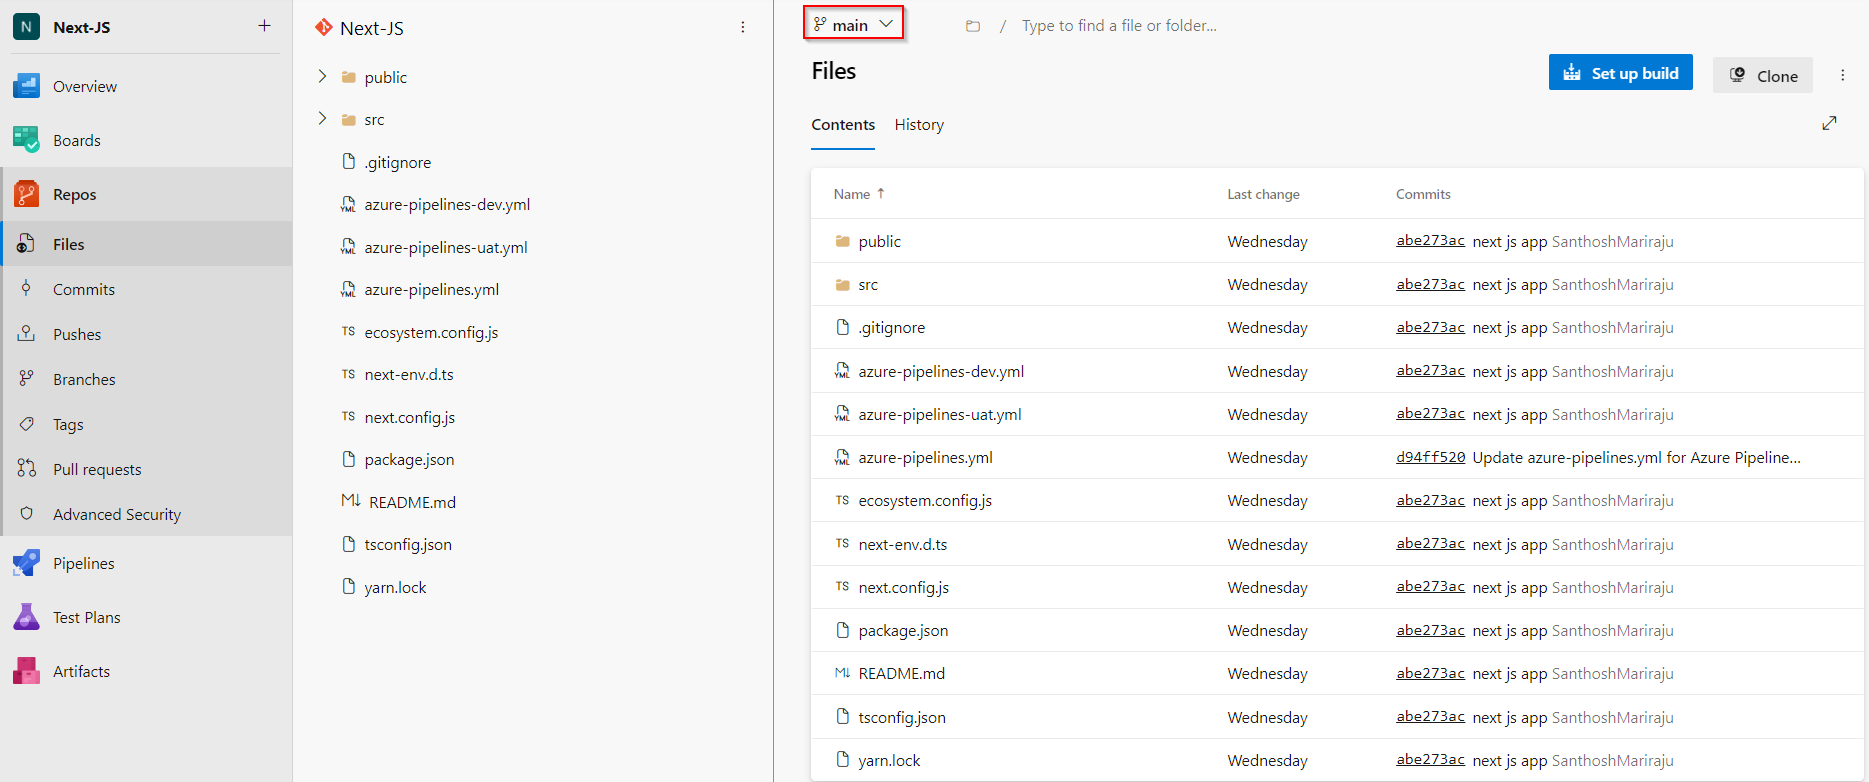
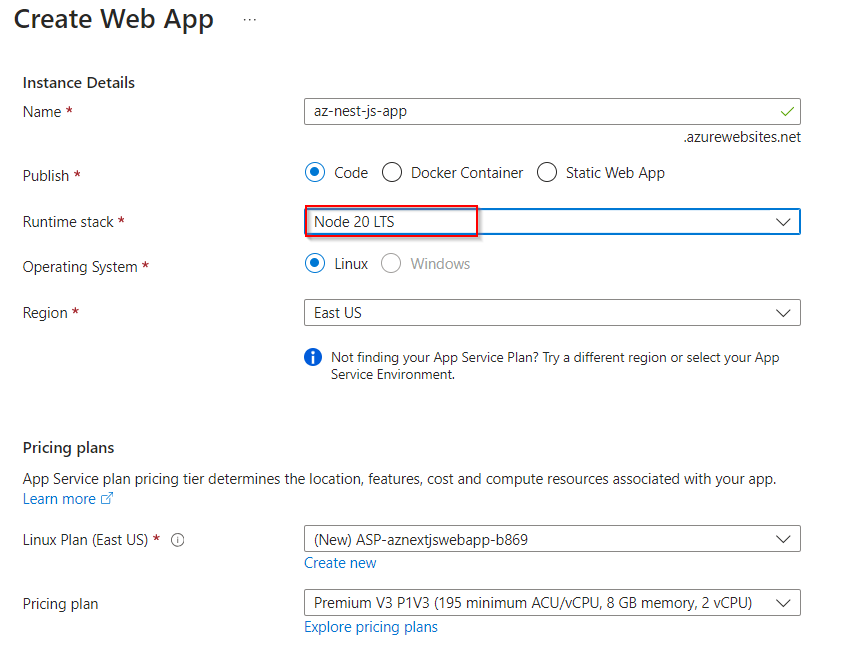
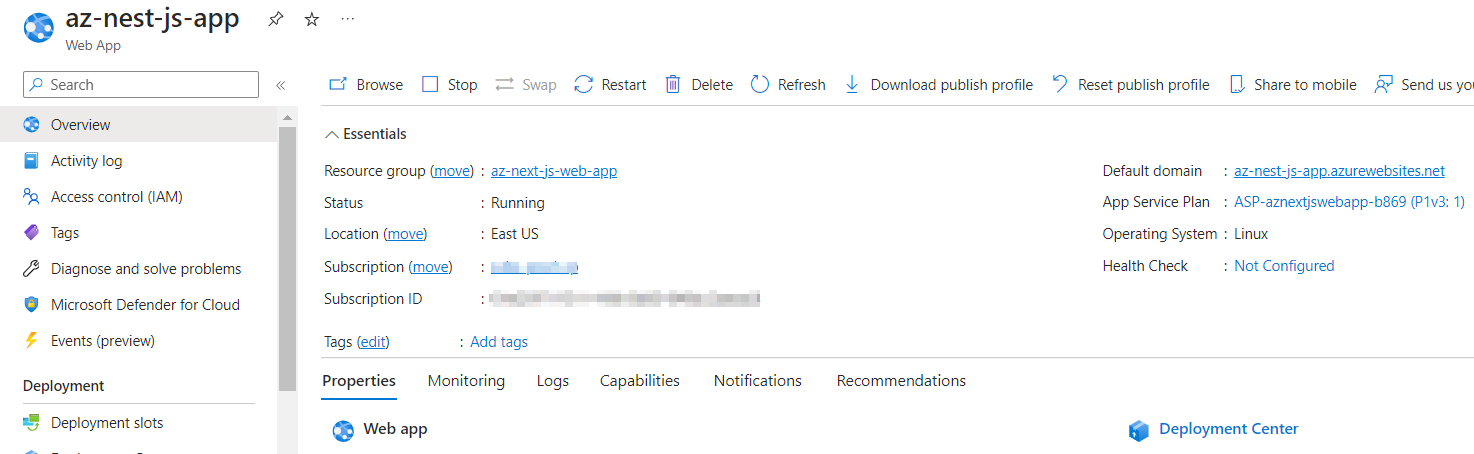
Step 2 : The Next js application is ready in our repository in main branch. Now lets create a Azure App Service for the Next js application to be deployed.
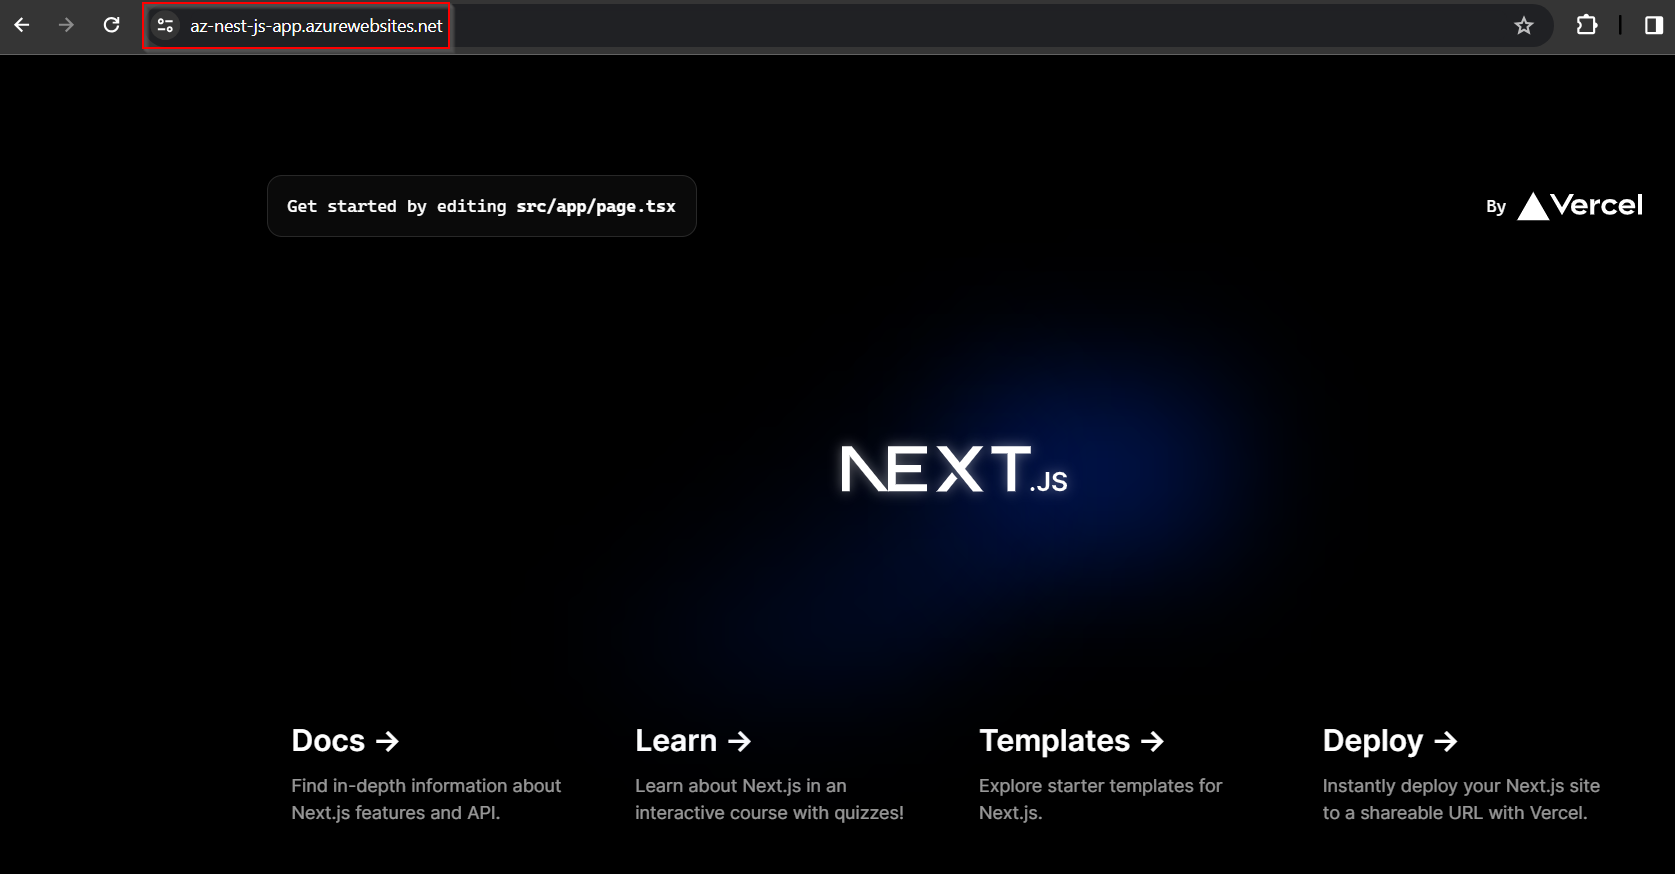
Check the Default domain URL of the app service this is created.
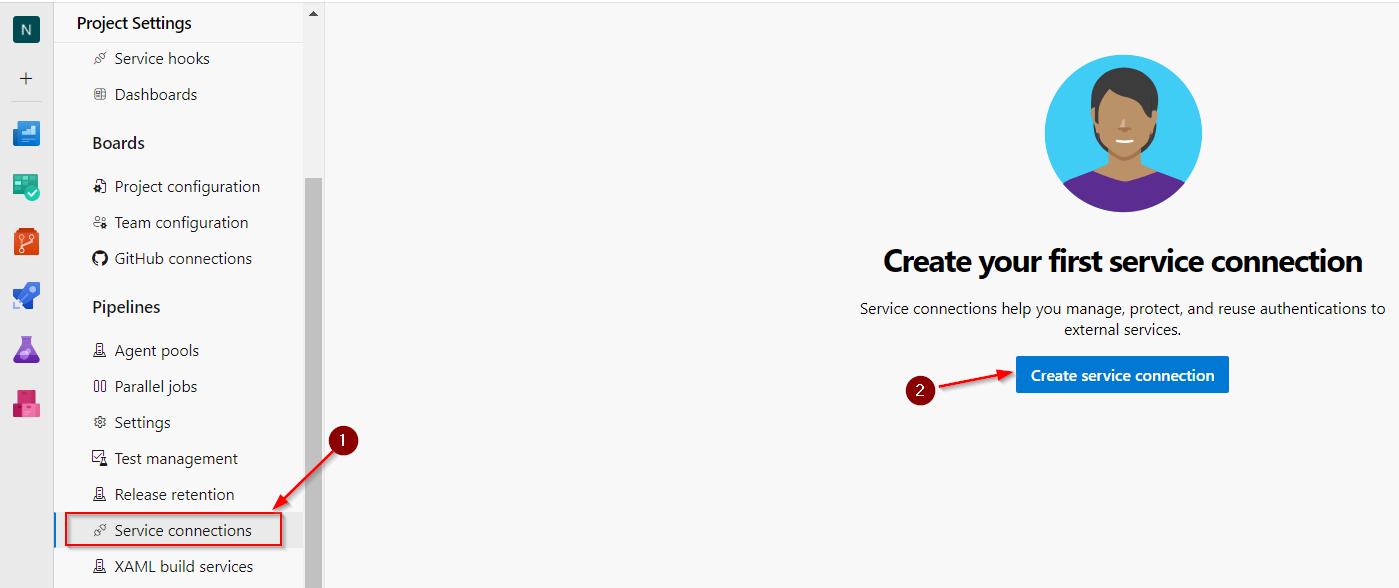
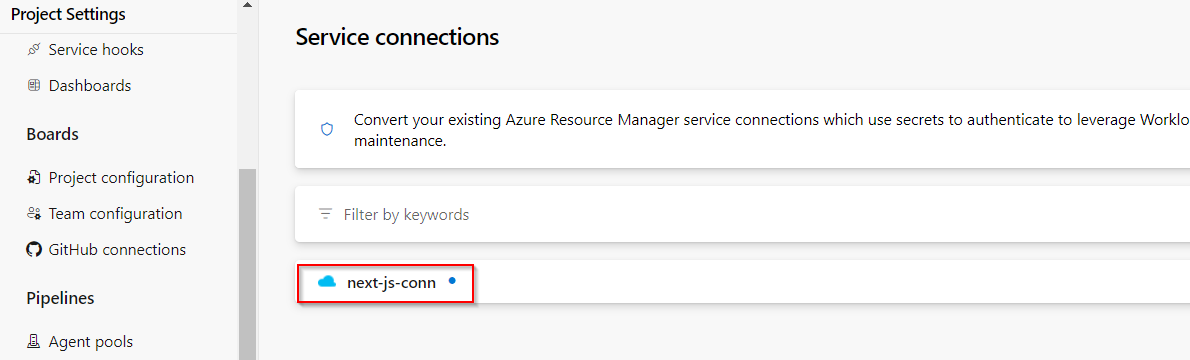
Step 3 : Create a Server Connection between the Azure Web App in the Azure Subscription and Azure Devops.
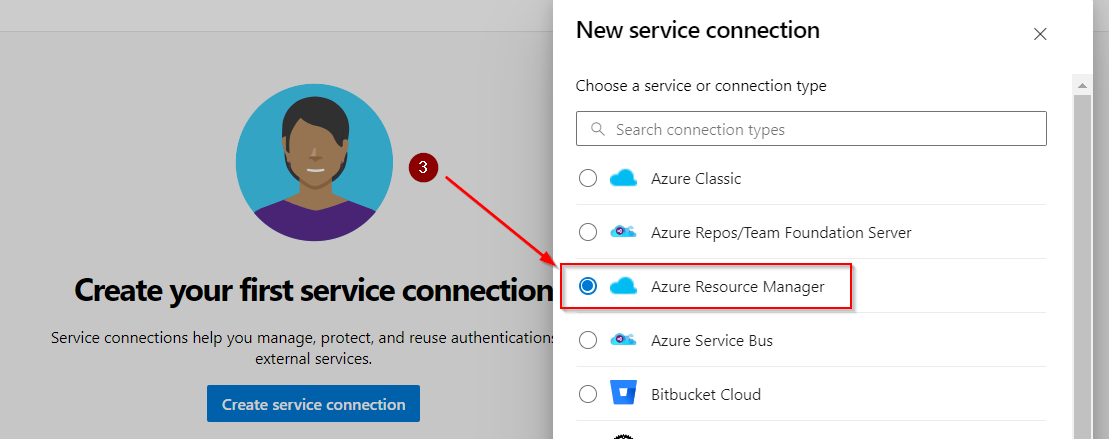
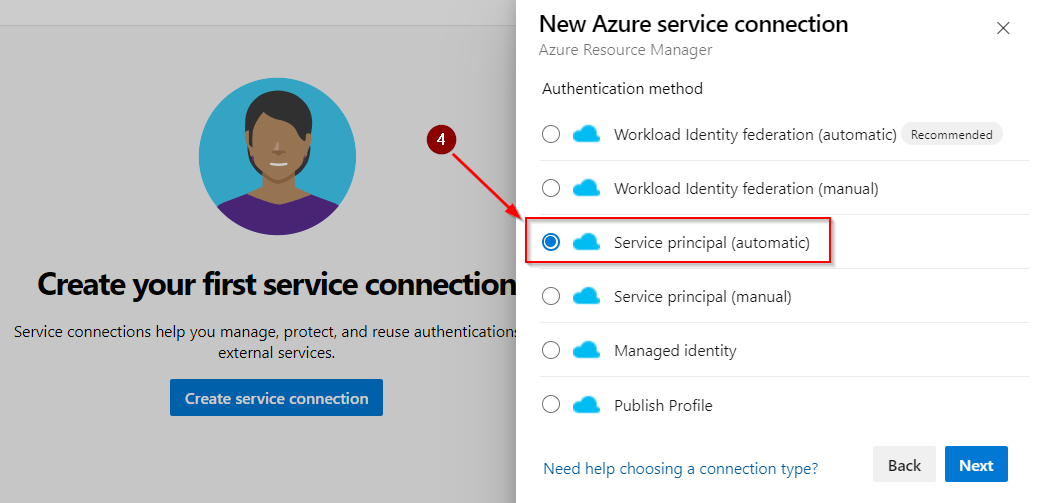
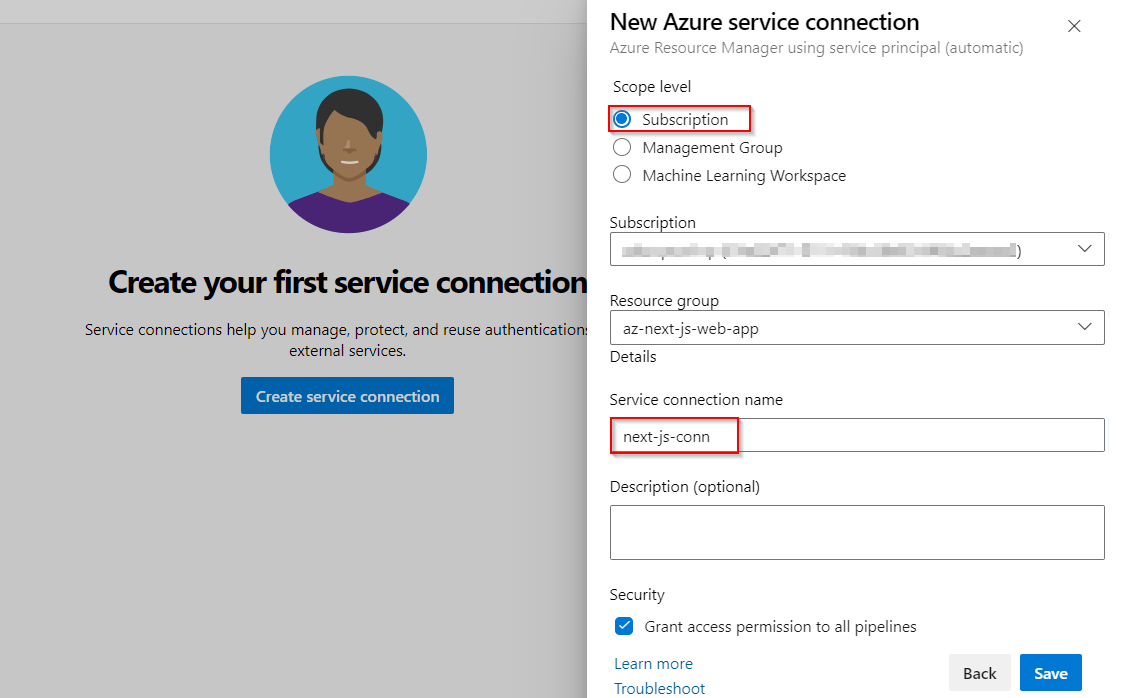
In Azure Devops click on Project Settings> Server Connection> New Connection. And fill the required parameters for the connection.
Select the Subscription and the Resource Group that contains the Azure Web App and fill the check box Grand access permissions to all the pipelines.
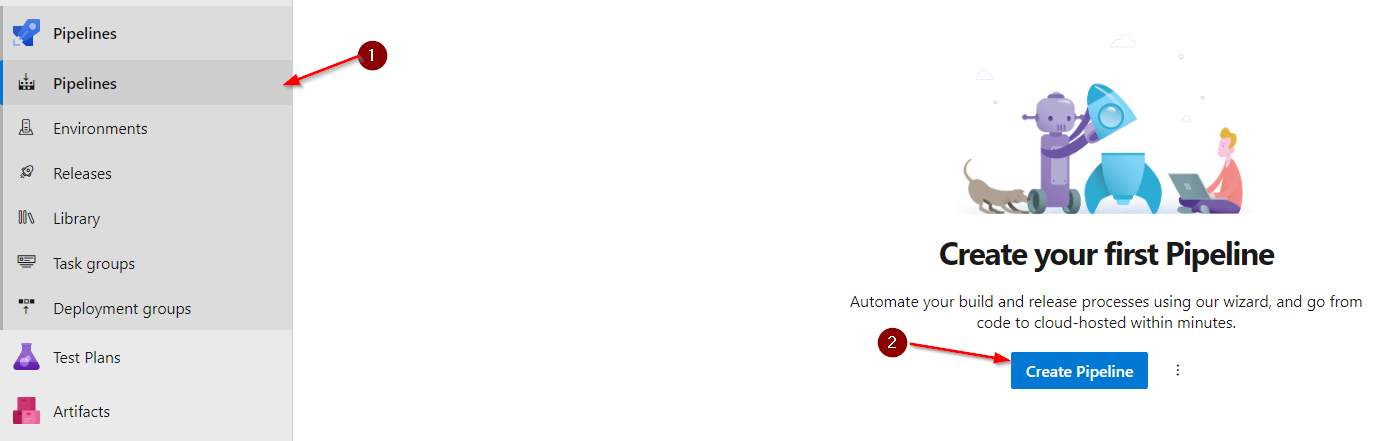
Step 4 : Lets start creating a Pipeline for the Application. Click on Pipelines> New Pipelines.
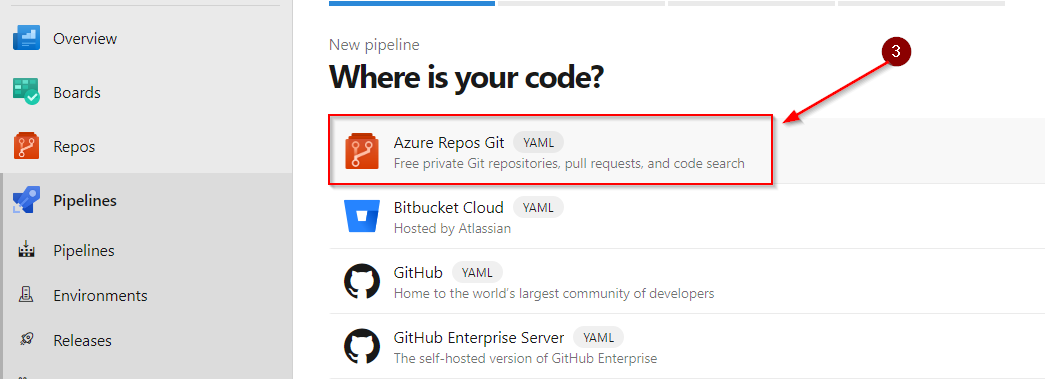
Select what type of Repository of the Project.
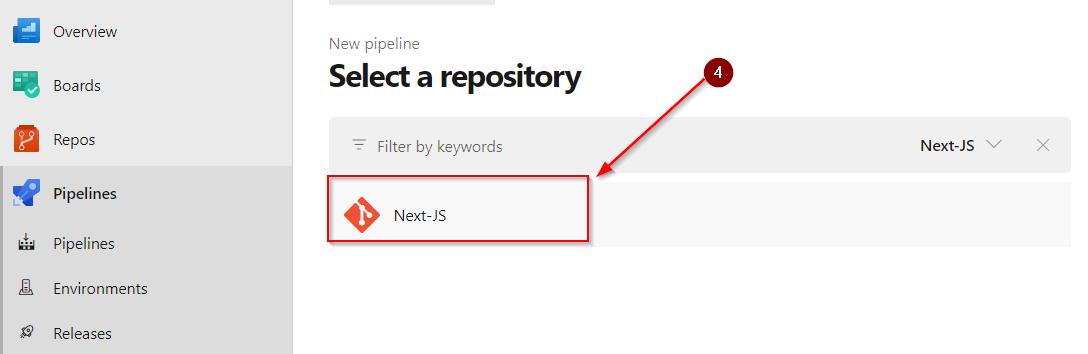
Select the Repository where the application is placed.
Now assign a Create or Assign a YAML file configuration in the Pipeline line creation.
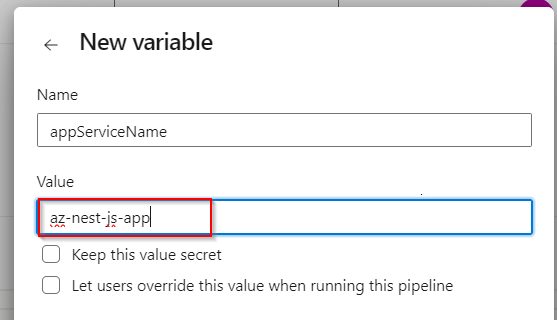
Step 5 : Create variables in for Azure Web Apps this may help us when we use multiple stages of deployment(Dev UAT and Prod).

To create a variable click on Variables> New Variable. Give value as App Service Name.
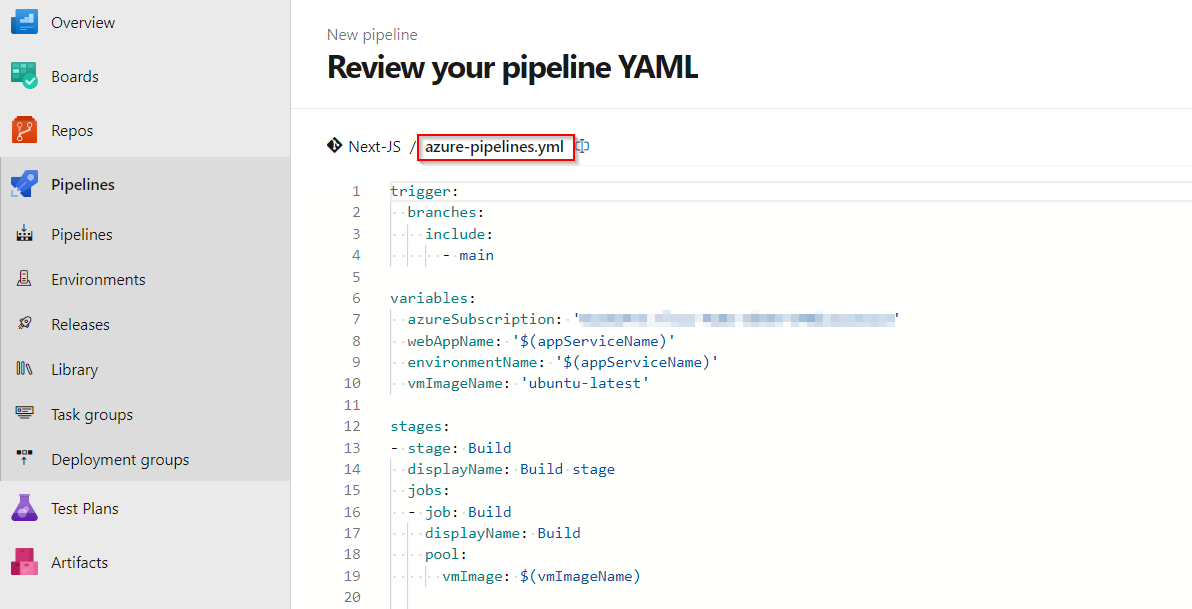
Use this Yaml file for your project.
trigger:
  branches:
    include:
      - main

variables:
  azureSubscription: '#############'  #Replace it with Azure Subscription ID
  webAppName: '$(appServiceName)'
  environmentName: '$(appServiceName)'
  vmImageName: 'ubuntu-latest'

stages:
- stage: Build
  displayName: Build stage
  jobs:
  - job: Build
    displayName: Build
    pool:
      vmImage: $(vmImageName)

    steps:
    - task: NodeTool@0
      inputs:
        versionSpec: '18.x'
      displayName: 'Install Node.js'

    - script: |
        yarn install
        yarn build
      displayName: 'yarn install and build'

    - task: ArchiveFiles@2
      displayName: 'Archive files'
      inputs:
        rootFolderOrFile: '$(System.DefaultWorkingDirectory)'
        includeRootFolder: false
        archiveType: zip
        archiveFile: $(Build.ArtifactStagingDirectory)/$(Build.BuildId).zip
        replaceExistingArchive: true

    - publish: $(Build.ArtifactStagingDirectory)/$(Build.BuildId).zip
      artifact: drop

- stage: Deploy
  displayName: Deploy stage
  dependsOn: Build
  condition: succeeded()
  jobs:
  - deployment: Deploy
    displayName: Deploy
    environment: $(environmentName)
    pool:
      vmImage: $(vmImageName)
    strategy:
      runOnce:
        deploy:
          steps:
          - task: AzureWebApp@1
            inputs:
              azureSubscription: 'next-js-conn' #Replace it with the Service Connection Name
              appType: 'webAppLinux'
              appName: '$(appServiceName)'
              package: '$(Pipeline.Workspace)/drop/$(Build.BuildId).zip'
              runtimeStack: 'NODE|18-lts'
Step 6 : Add a Start Up command in our App Service > Configuration > General Settings.
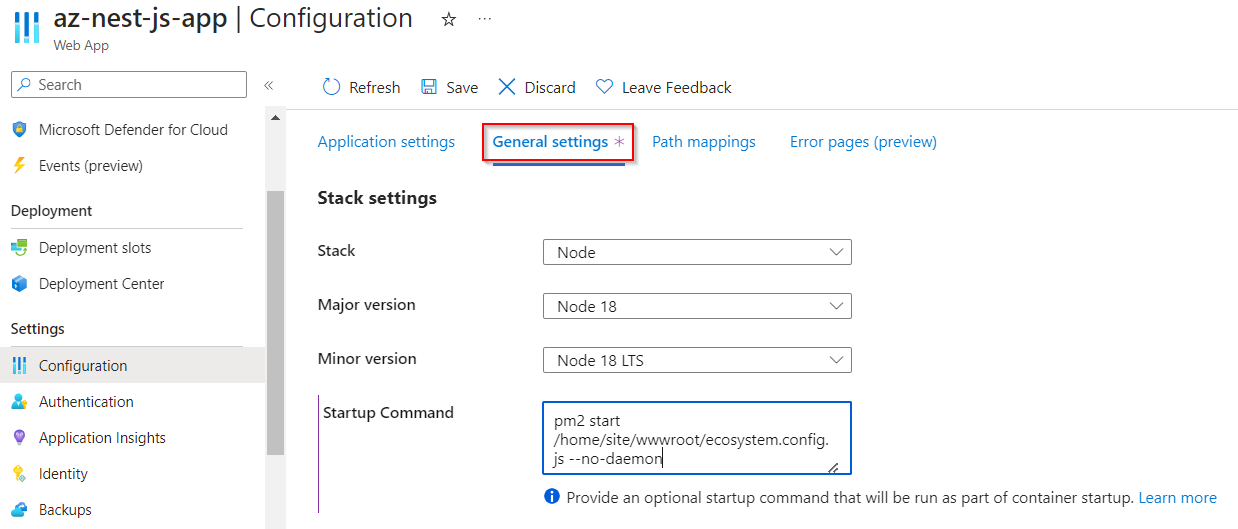
The Start up command.
pm2 start /home/site/wwwroot/ecosystem.config.js --no-daemonStep 7 : I have also added a ecosystem.config.js file to my application.
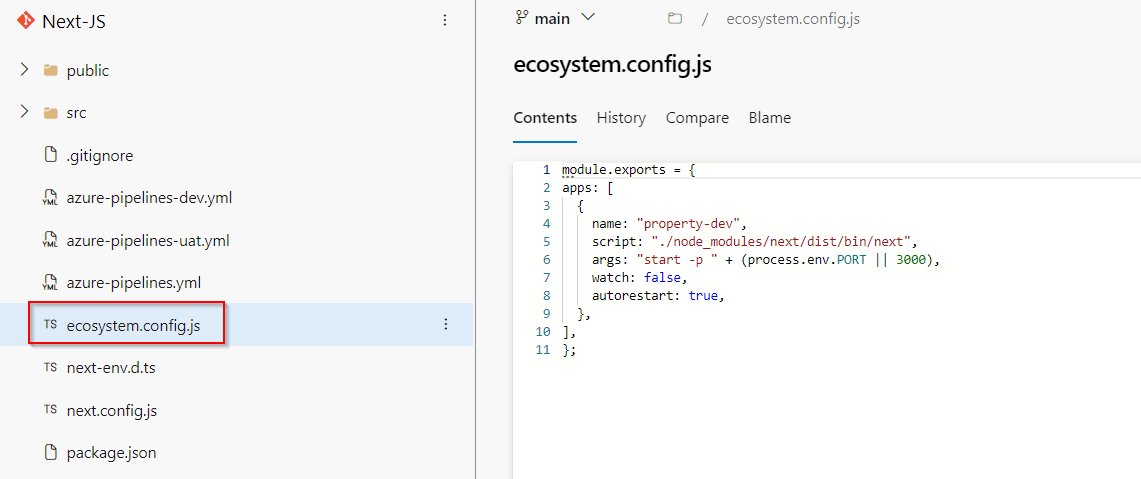
ecosystem.config.js
module.exports = {
apps: [
{
name: "property-dev",
script: "./node_modules/next/dist/bin/next",
args: "start -p " + (process.env.PORT || 3000),
watch: false,
autorestart: true,
},
],
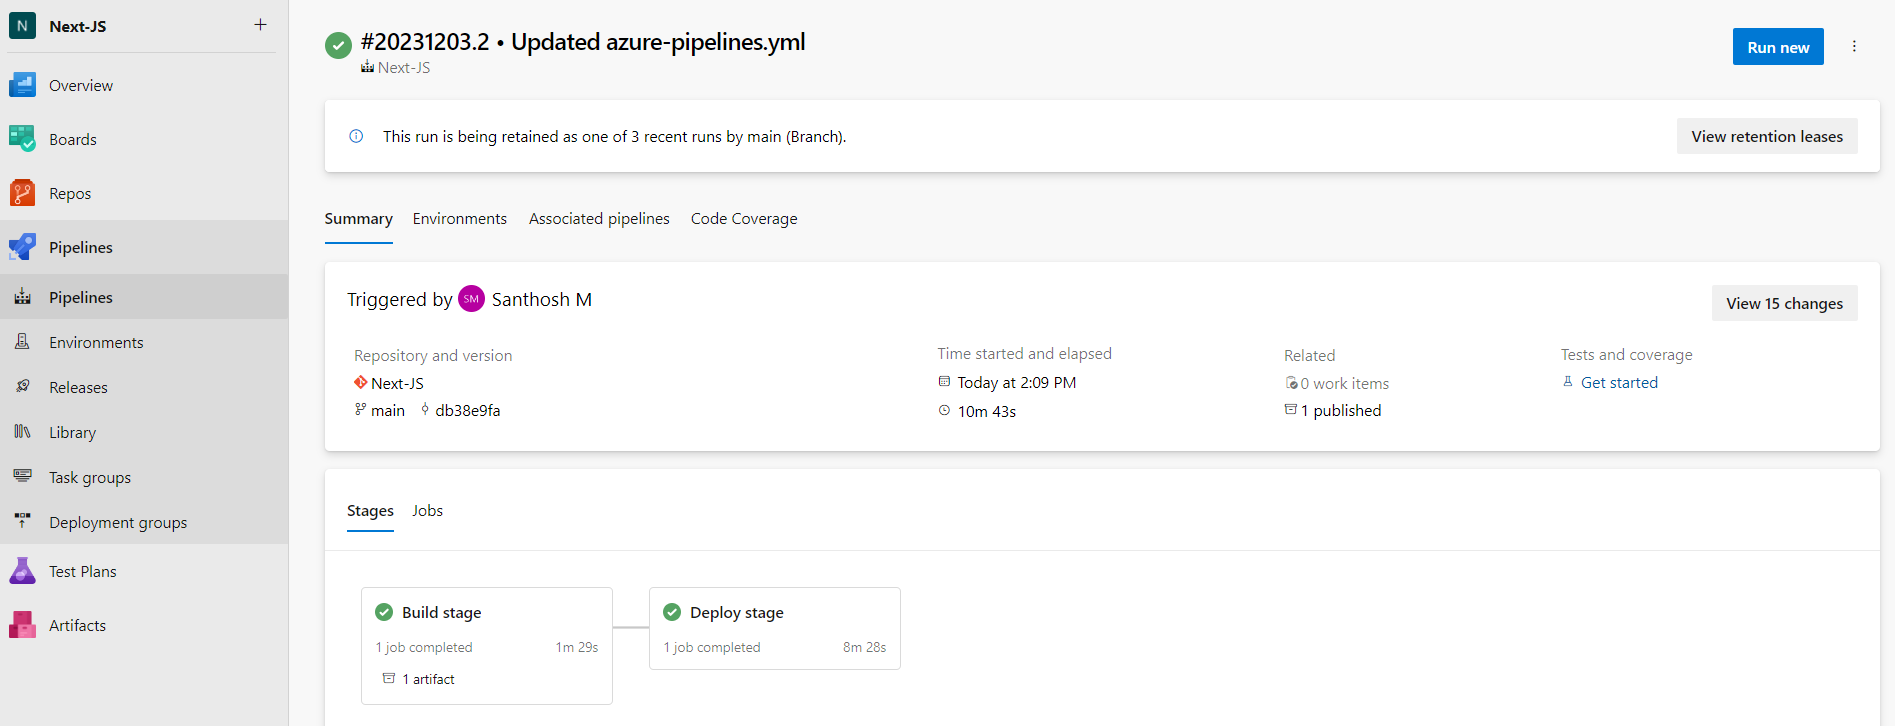
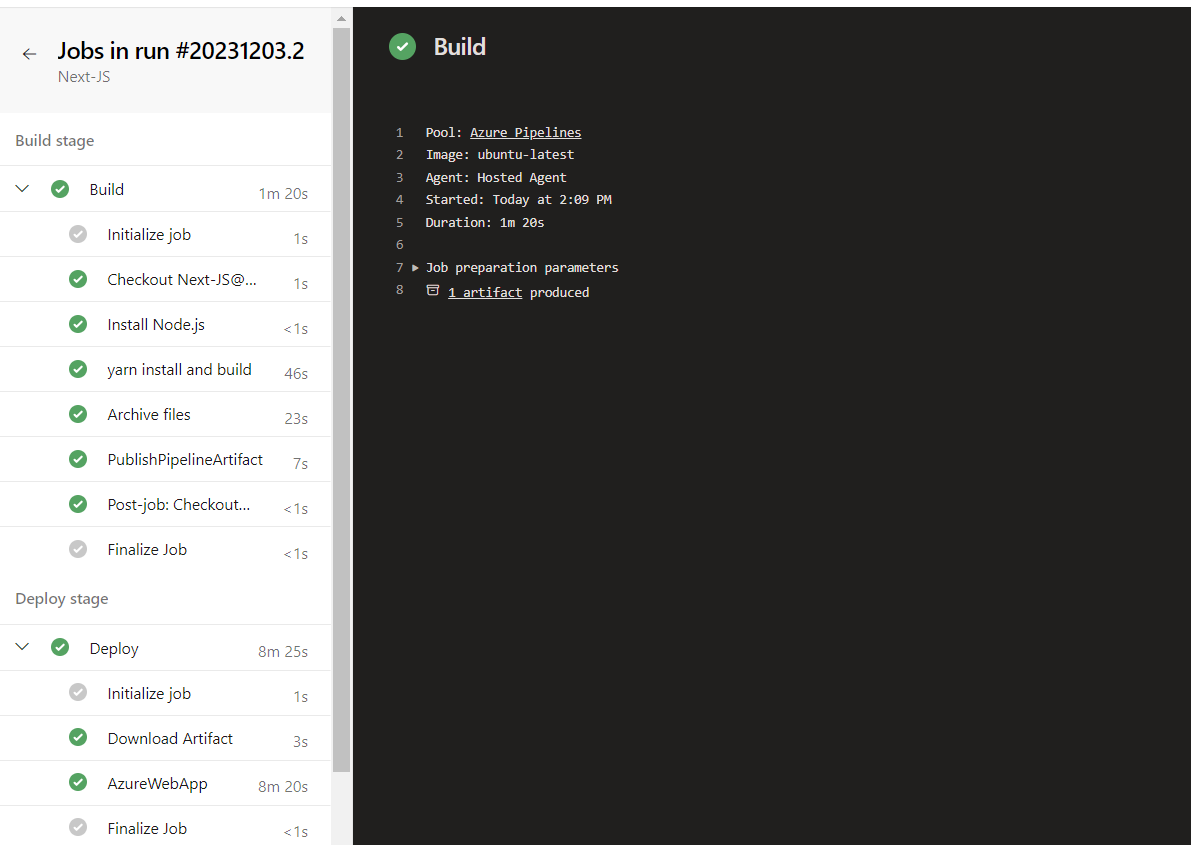
};Step 8 : Lets run the pipeline and view the Application
Important notes & Naming Conventions :(Optional)
1.Create a separate IT admin account for the Devops project with Ownership access.
Ex : itadmin01@azure365pro.com
2.Create all the resources in the same location, so that it is organized and it makes it easier to perform common operations on them.
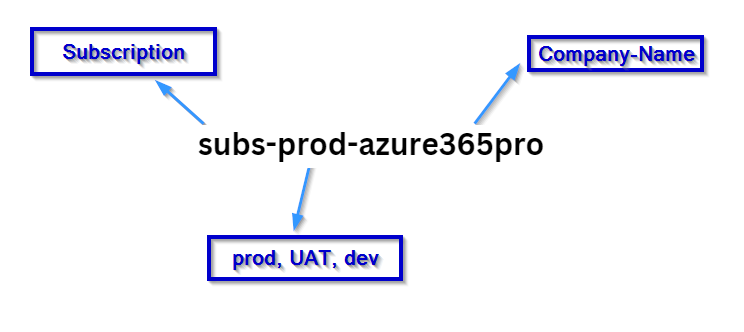
3.Subscription Naming –
3.Resources Group and Resources Naming –

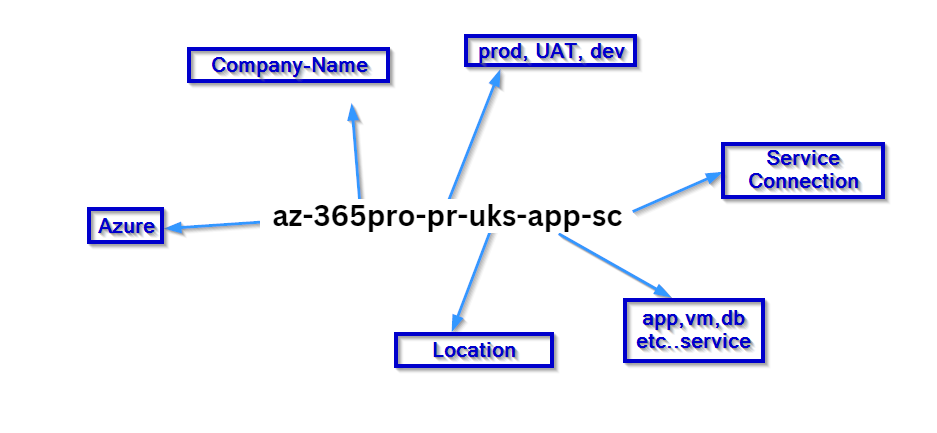
4.Service Connection Naming –
