")
Let’s see how to migrate Azure CSP to Enterprise Tenant VM Disk Migration
Azure CSP to Enterprise Tenant VM Disk Migration using Storage Explorer, It’s an Offline Migration where the virtual machine disk has to be deallocated.
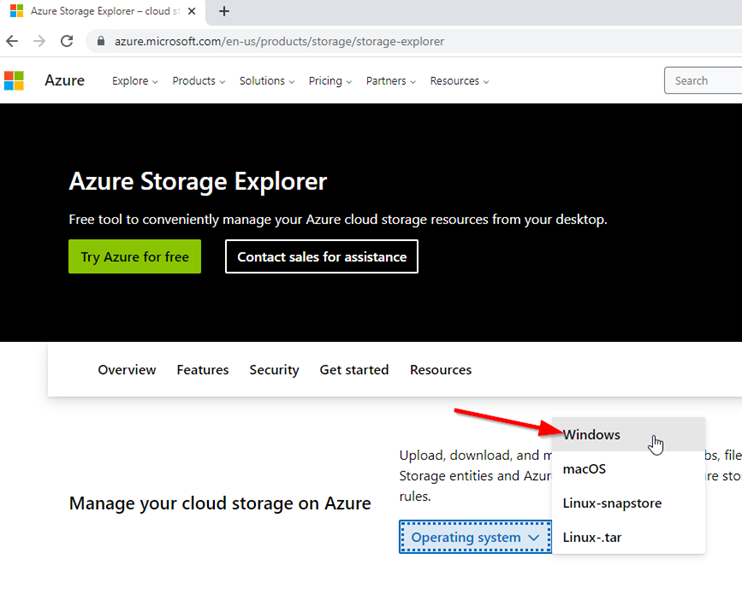
Download Azure Storage Explorer https://azure.microsoft.com/en-us/products/storage/storage-explorer
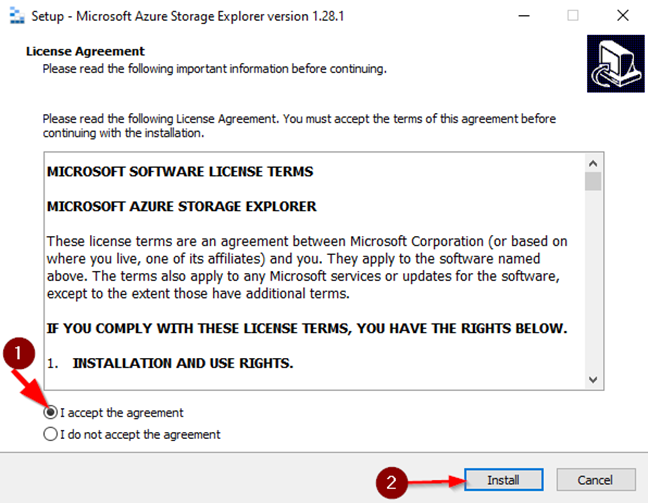
Install the Storage Explorer
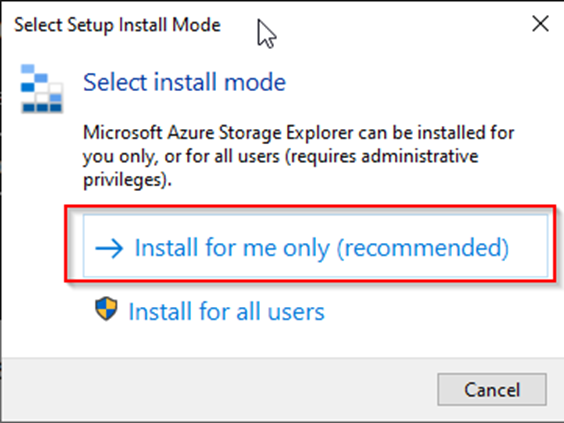
Follow the Steps and install Azure Storage Explorer
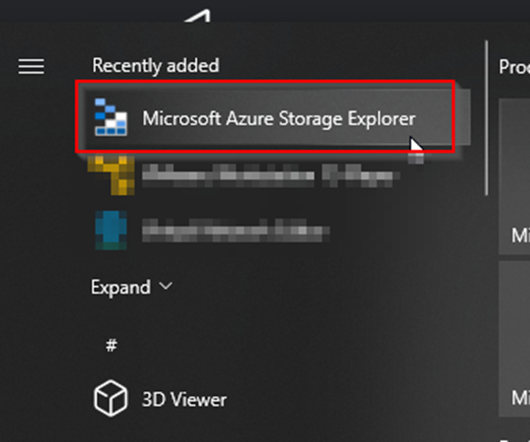
Microsoft Azure Storage Explorer
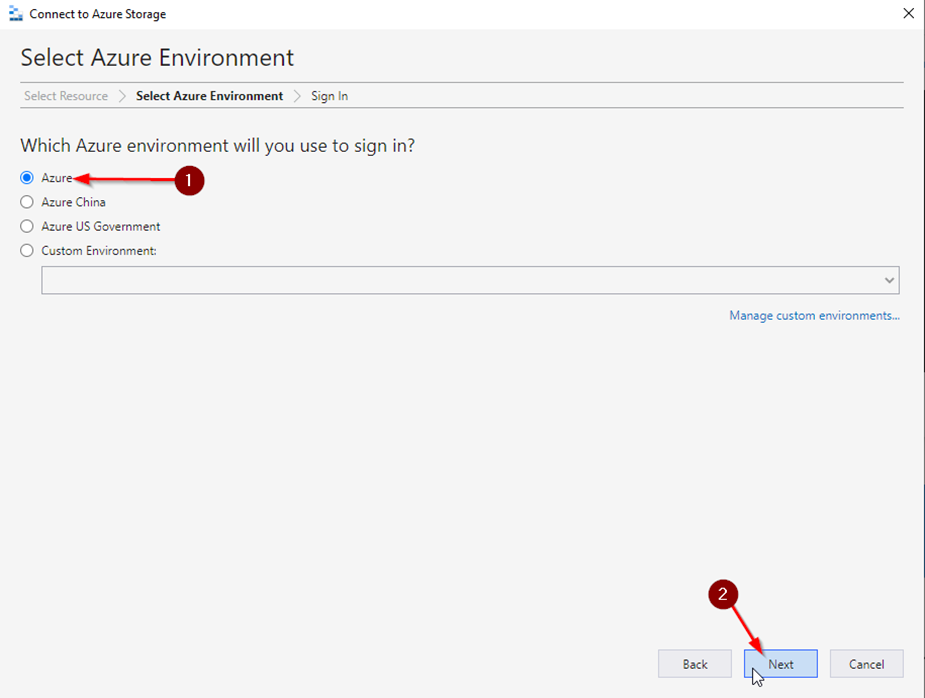
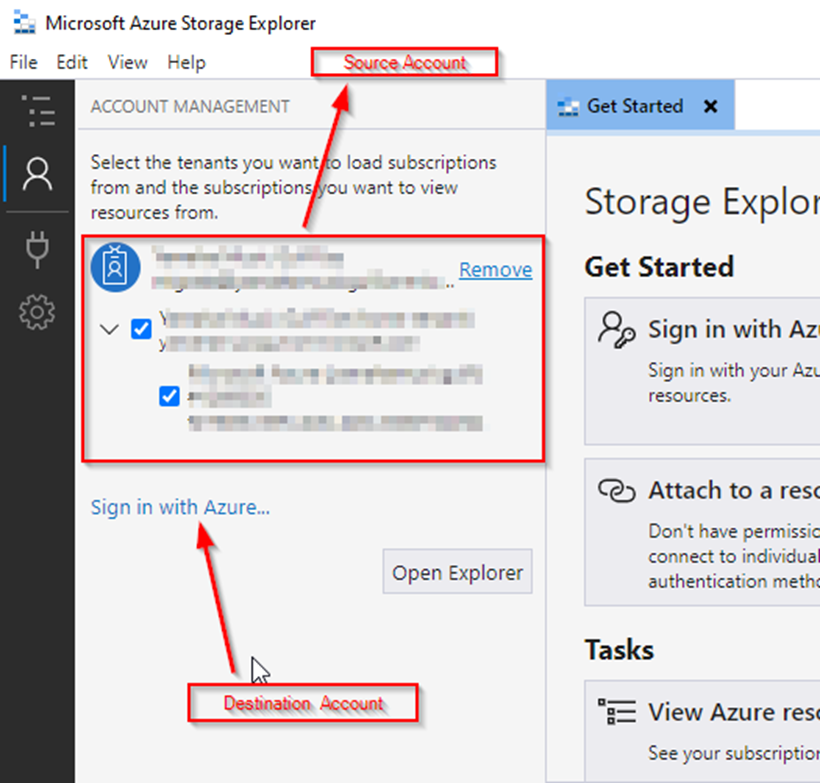
Sign in with Azure – Source Azure Account

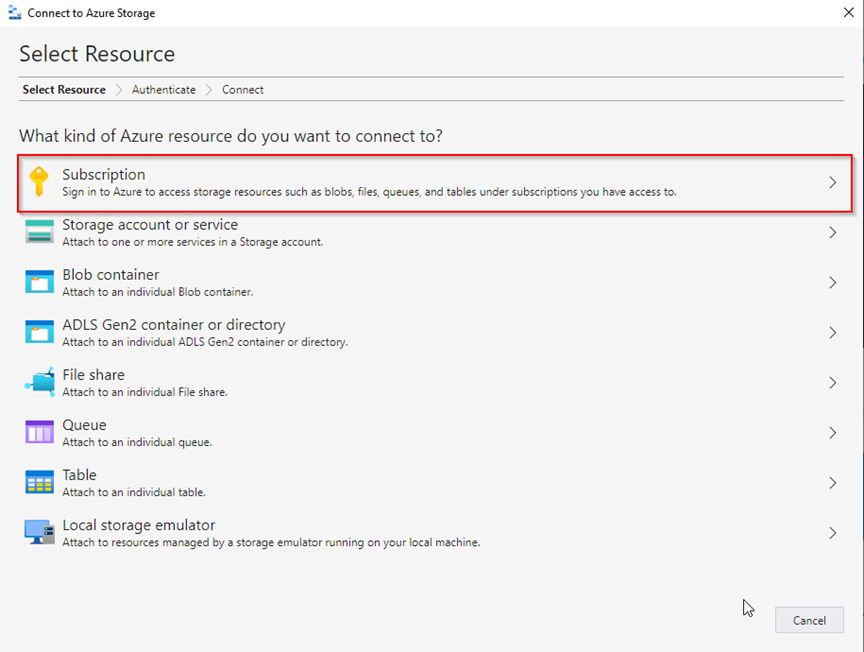
Choose the Subscription
Check Source Account & Click Sign in to add another account for the destination.
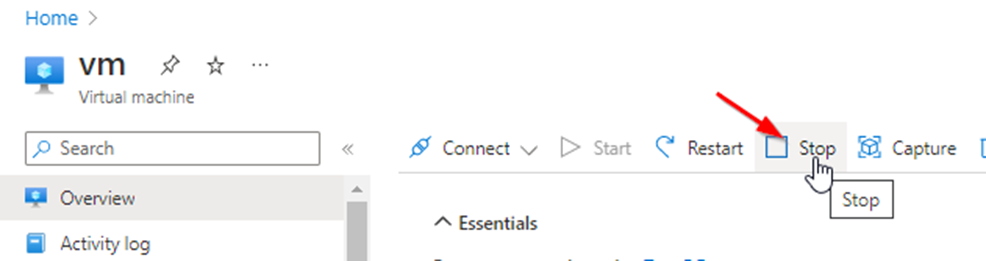
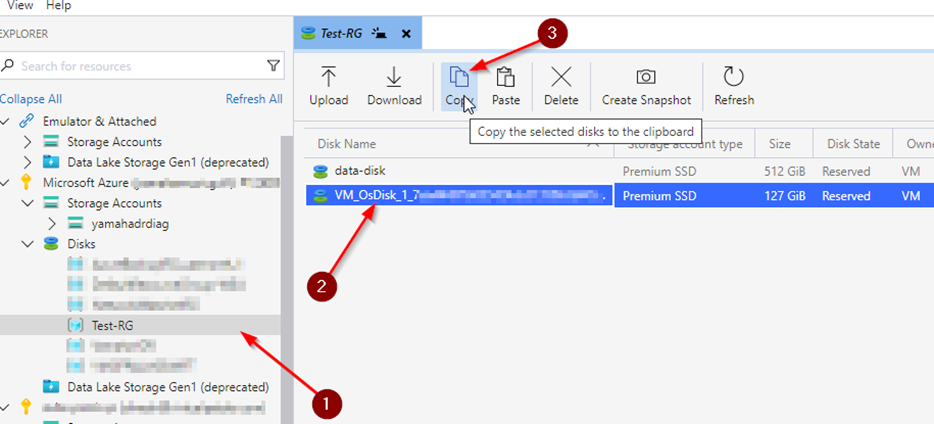
Make sure that the Source OS VM has been Shutdown & Stopped
Select the Resource group & OS Disk and click copy
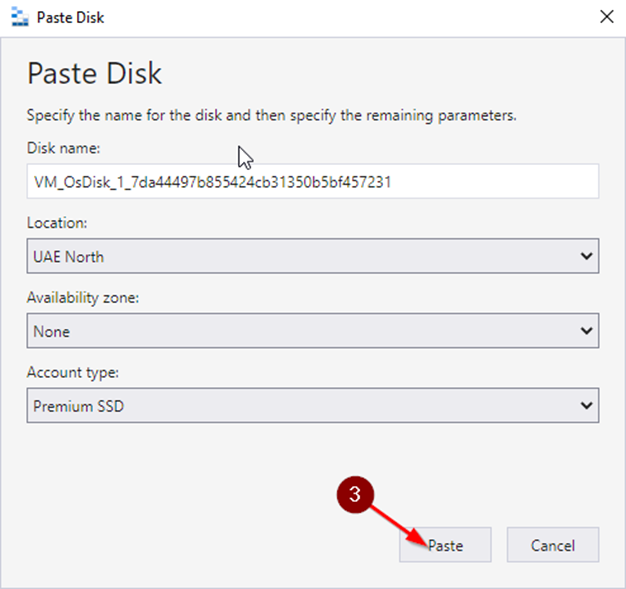
Select Destination Resource Group and Past
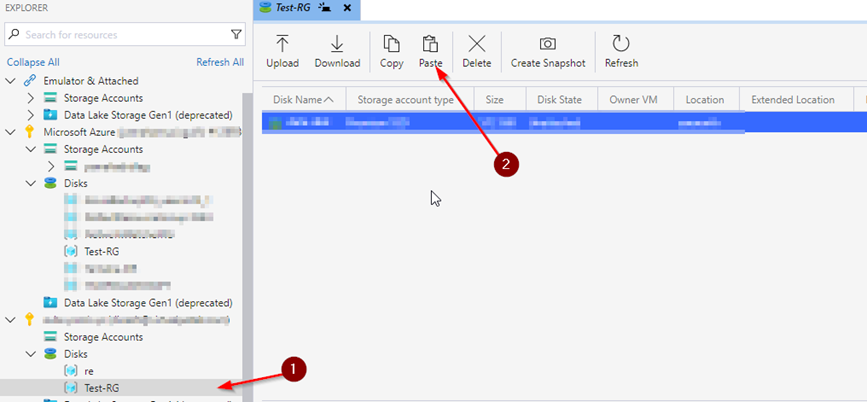
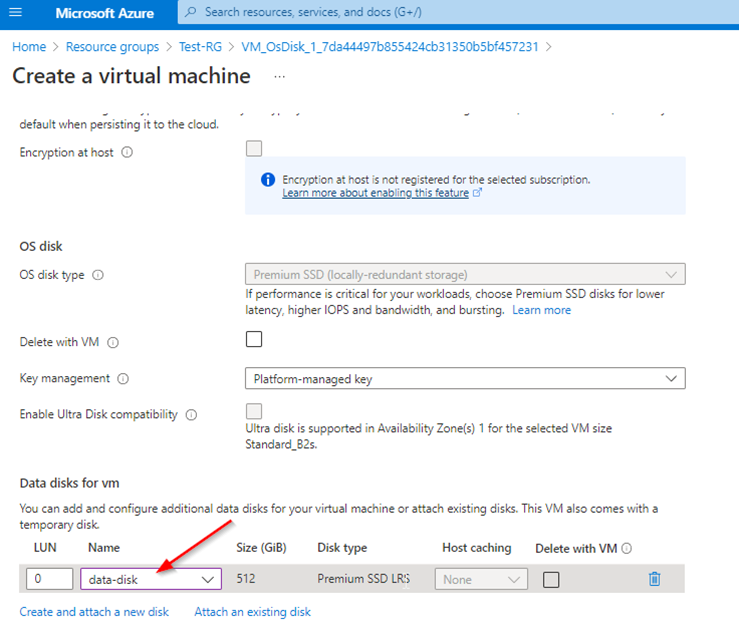
Do the same to the Attached Disk, As per this document it is data-disk

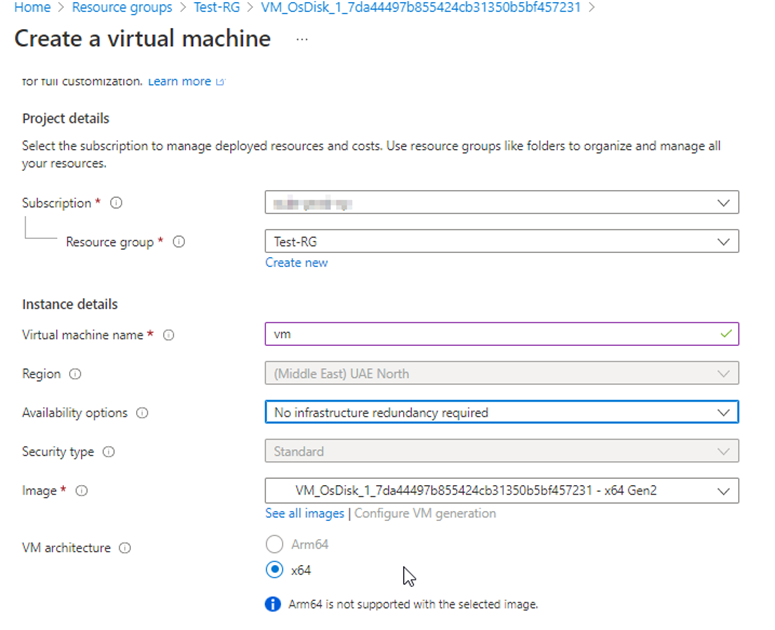
On the destination resource group, open the OS disk & click Create VM
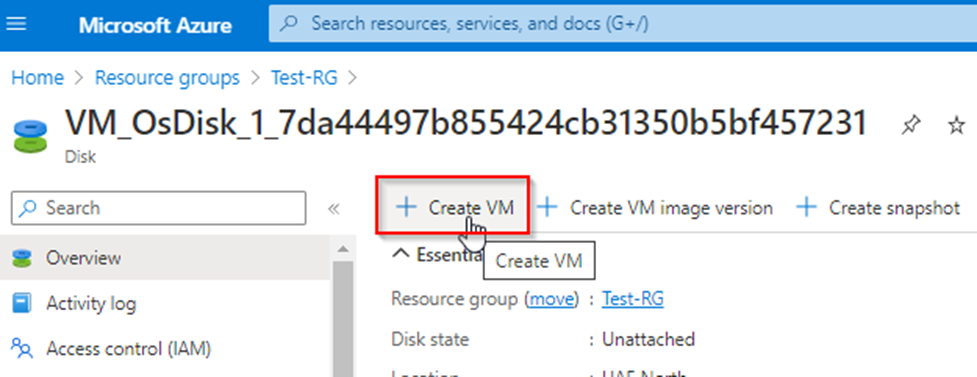
Select the defaults.
Attach the data disk and create the Virtual Machine. It will boot with the old operating system.
