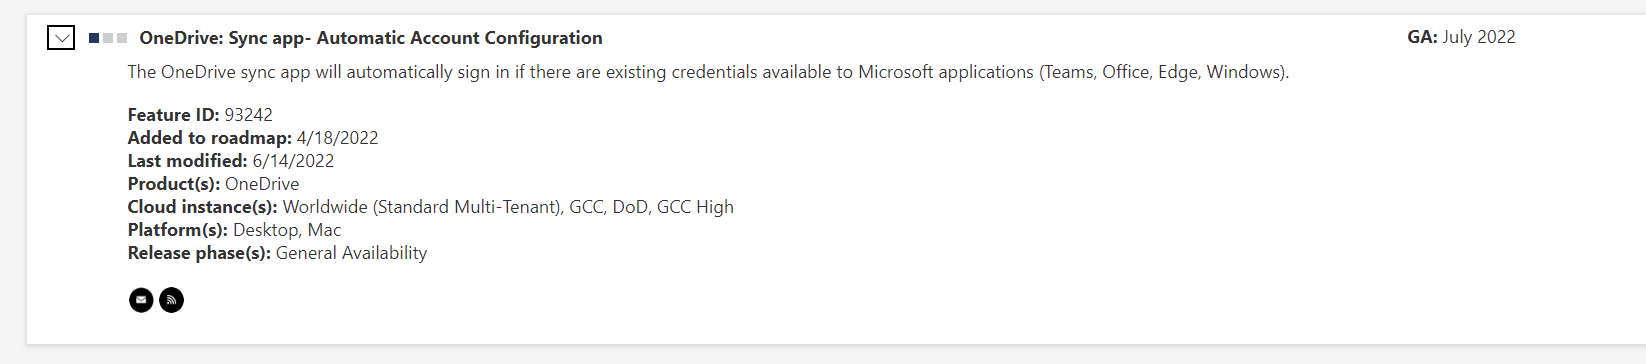
Microsoft 365 One Drive Auto Account Configuration Roadmap | Microsoft 365 – Highly Recommended to wait for this roll out instead of these workarounds.
One Drive Sign-in Policies works like a charm on Hybrid AD Joined Devices but there are scenarios like Users will not re-login when it logs out after the rolling window of 90 days for re-authentication or user intentionally logs out from One Drive.
Percentage of Computers are Protected with Windows Known Folders are backed up (Recovery of Files incase of ransomware)
Educating the user is impossible to keep one drive logged in so that their folders are protected.
Let’s see how to
- Force Sign in with Configuration Profiles (Settings Catalog – One Drive).
- When user Logs out intentionally or logs out for re authentication – Use Remediation policy using Endpoint Manager to clear registry
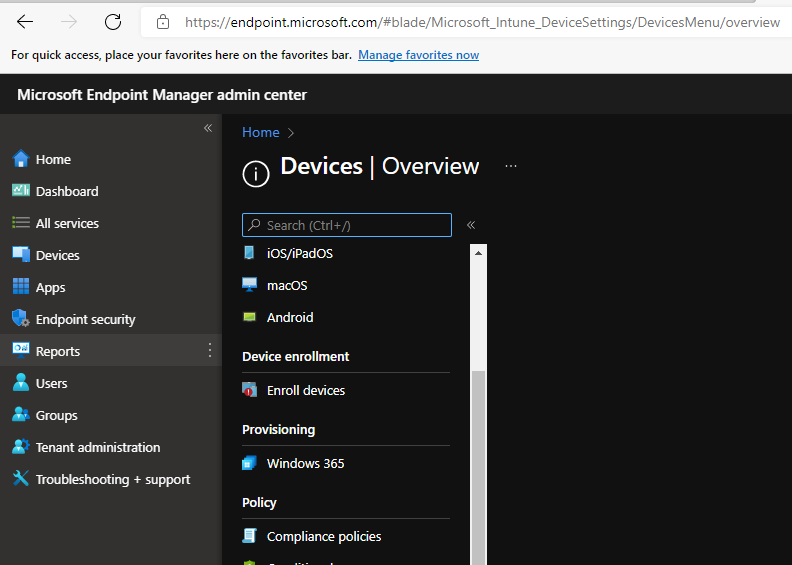
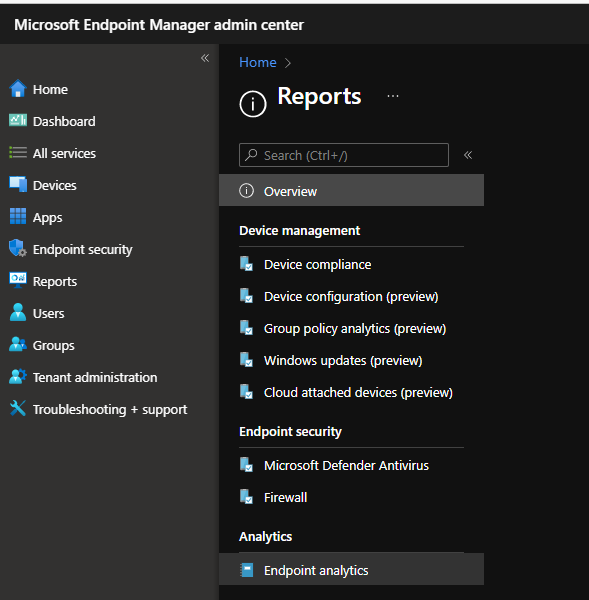
- Collect Admin Reports and get visibility on Microsoft 365 App Admin Center.
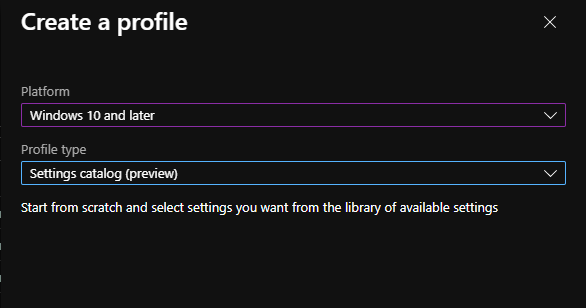
Force Sign in with Configuration Profiles (Settings Catalog – One Drive)
We assume Seamless Single Sign-on has been configured already. if you are using Hybrid Joined devices you need some additional configuration changes in Azure AD Connect. if it’s Azure AD joined you can follow without any additional configuration changes.
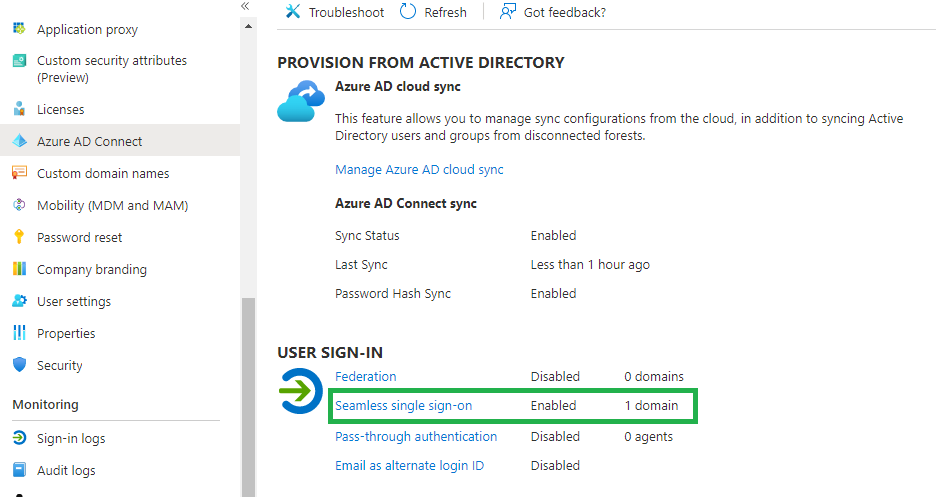
As we have Single Sign-on Available for all Corporate devices now. Now we need to Apply a Single Sign-on Policy for One Drive using Settings Catalog in the Endpoint manager and not using Group policies as we are phasing out group policies.
Let’s create a Configuration Profile for One Drive using Settings Catalog.
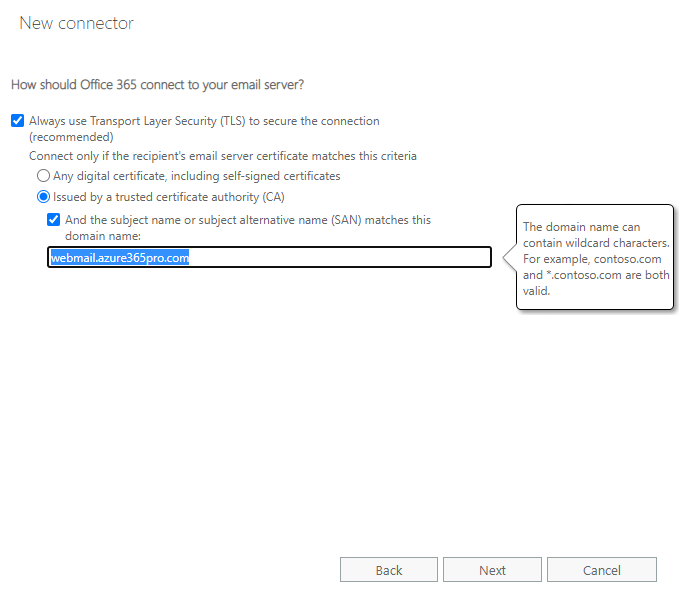
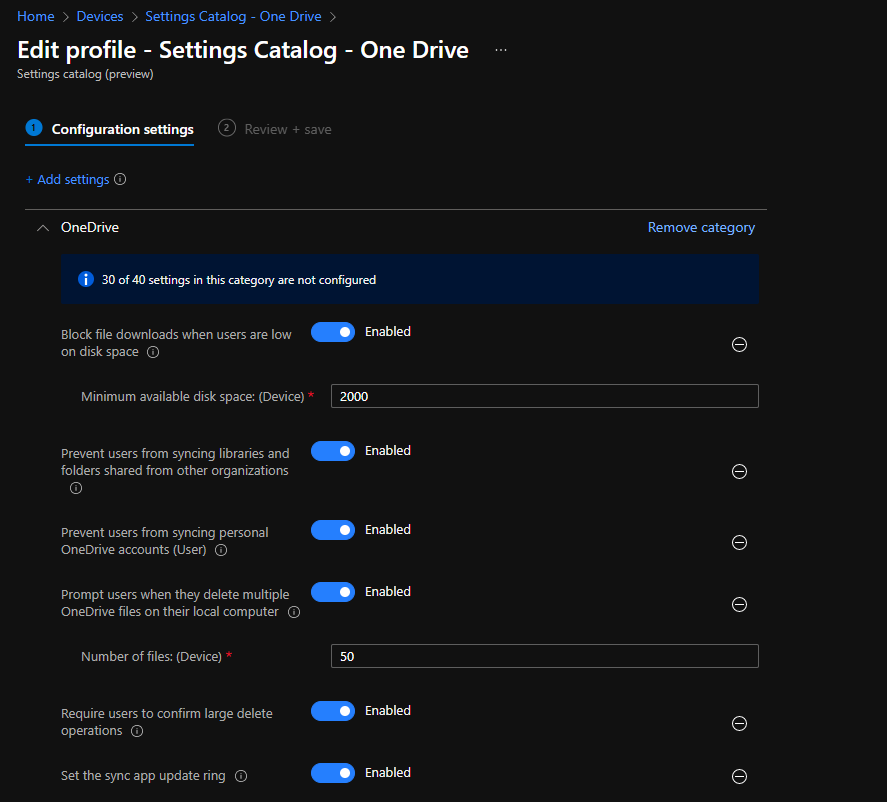
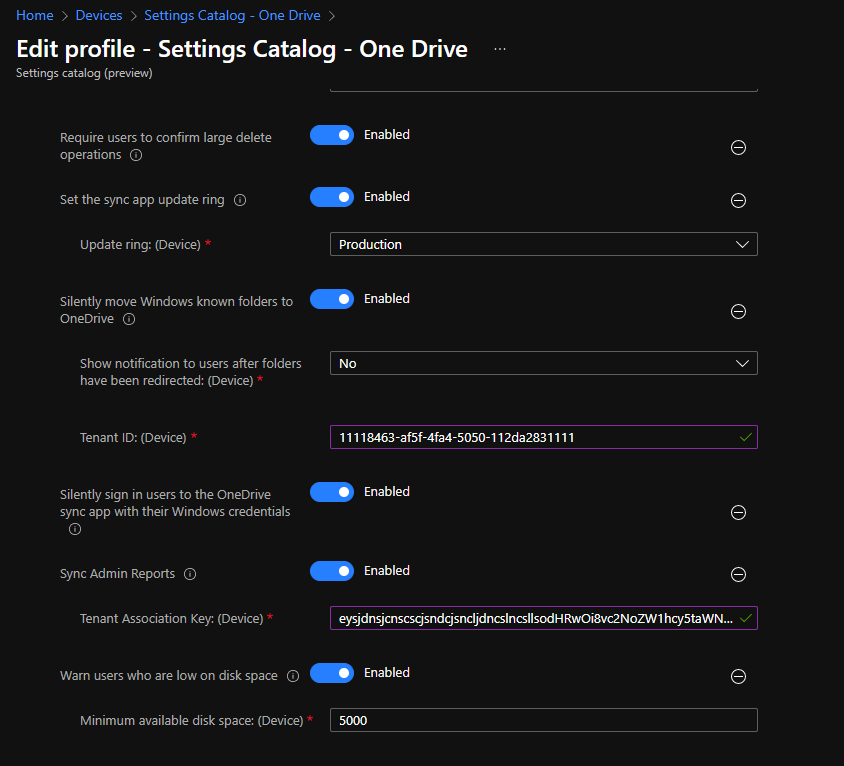
It’s a Configuration Profile to Stop users to sync external office 365 organizations in the Corporate laptops. Silently backup Windows known folders without any prompts for the user and Sync Admin Reports getting visibility in Config.office.com. You can change them as per your requirements.
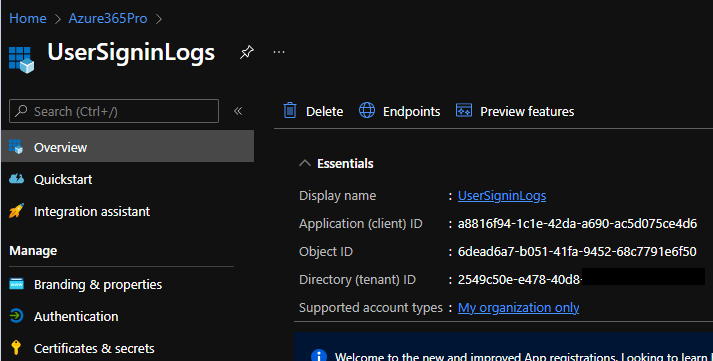
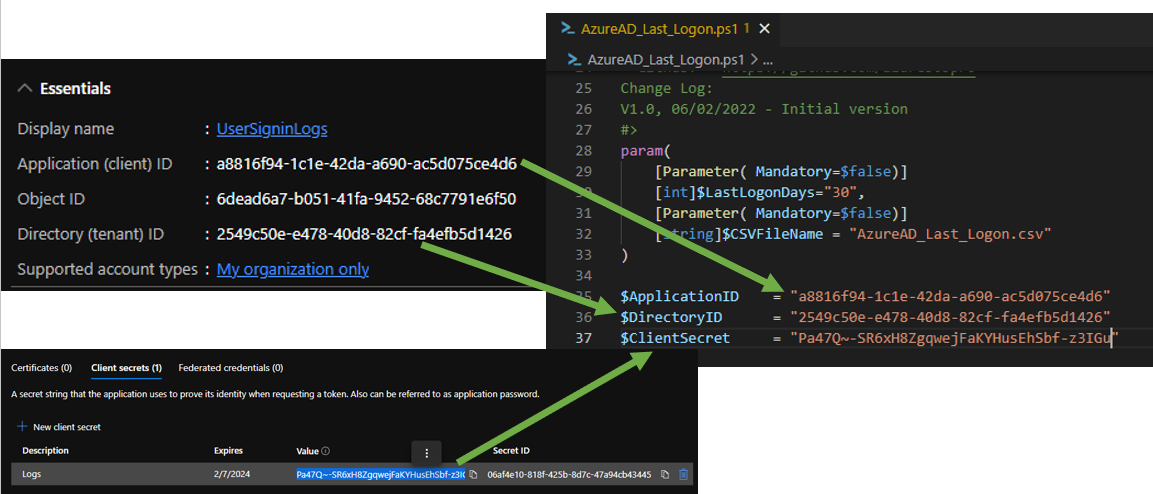
Tenant ID can be found in Azure AD Portal Properties
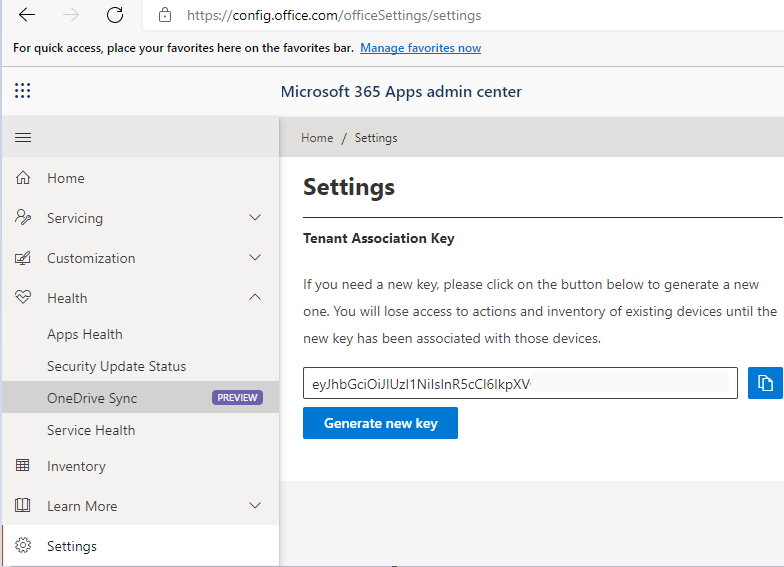
Tenant Association Key can be found in Apps Admin Center Settings
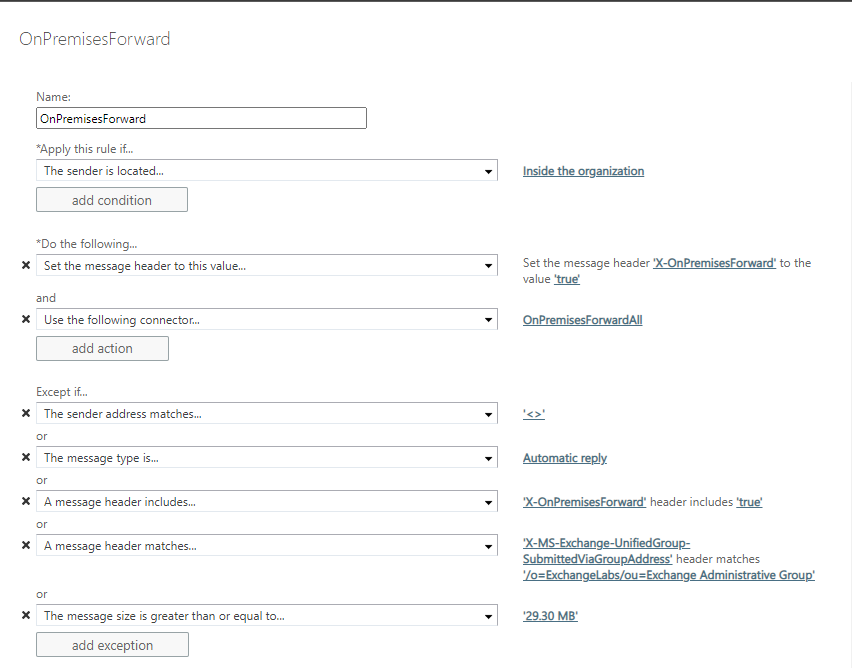
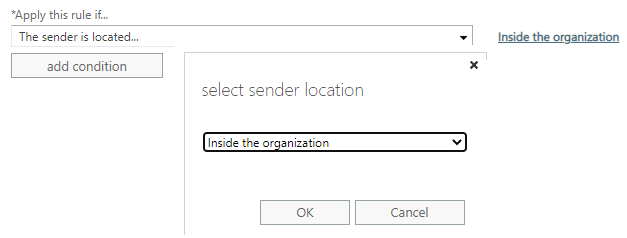
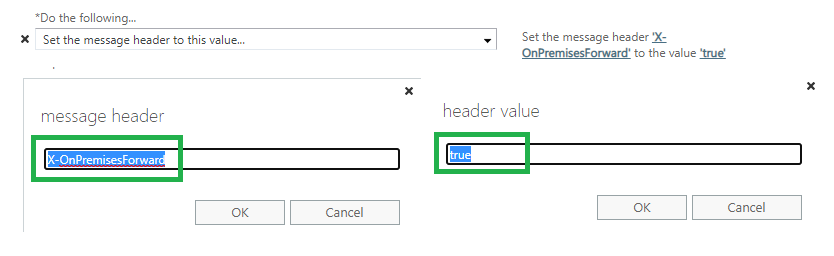
Now the Single Sign-on is available for users to log in to their machines and One Drive Single Sign-on configuration profile to take effect for seamless login but if the users log out intentionally or it gets logged out for re-authentication let’s tackle them using proactive remediation policy with a script package (Feature inside endpoint analytics).
When a user Logs out intentionally or logs out for re-authentication
Lets create a Script package under proactive remediations
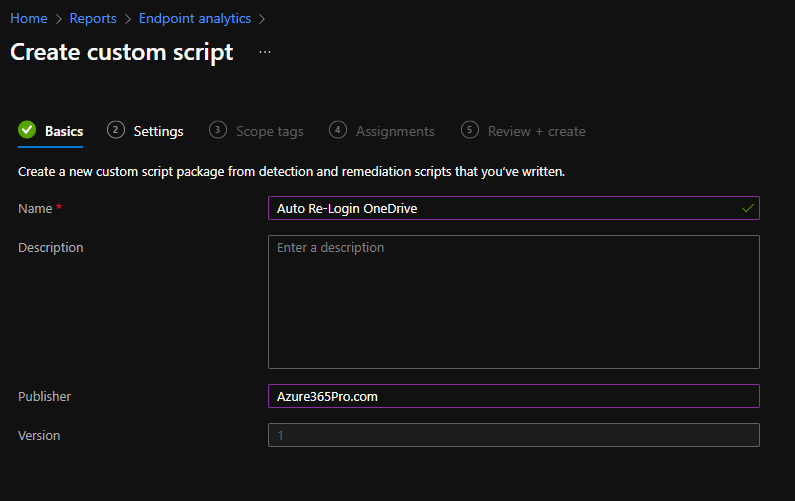
Detection and Remediation Script to clear the registry – SilentAccountConfig Registry
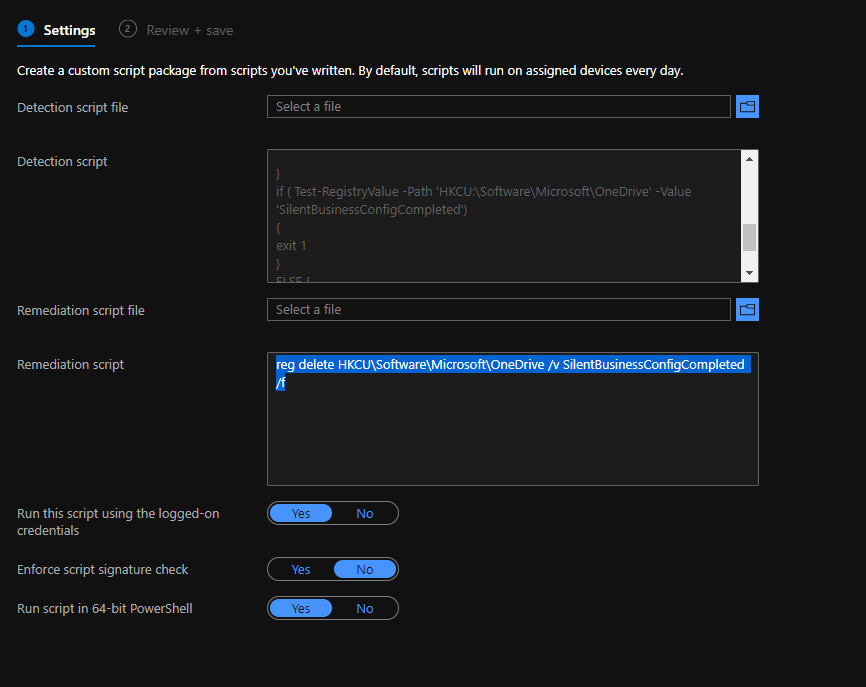
SilentAccountConfig creates a SilentBusinessConfigCompleted registry entry once SilentAccountConfig has successfully provisioned the user in OneDrive.exe. This prevents SilentAccountConfig from reprovisioning the user in OneDrive.exe if the user manually stops syncing.
Computer\HKEY_CURRENT_USER\Software\Microsoft\OneDrive

Detection Script –
function Test-RegistryValue {
param (
[parameter(Mandatory=$true)]
[ValidateNotNullOrEmpty()]$Path,
[parameter(Mandatory=$true)]
[ValidateNotNullOrEmpty()]$Value
)
try {
Get-ItemProperty -Path $Path | Select-Object -ExpandProperty $Value -ErrorAction Stop | Out-Null
return $true
}
catch {
return $false
}
 }
if ( Test-RegistryValue -Path 'HKCU:\Software\Microsoft\OneDrive' -Value 'SilentBusinessConfigCompleted')
{
exit 1
}
ELSE {
exit 0
}
Remediation Script –
reg delete HKCU\Software\Microsoft\OneDrive /v SilentBusinessConfigCompleted /f
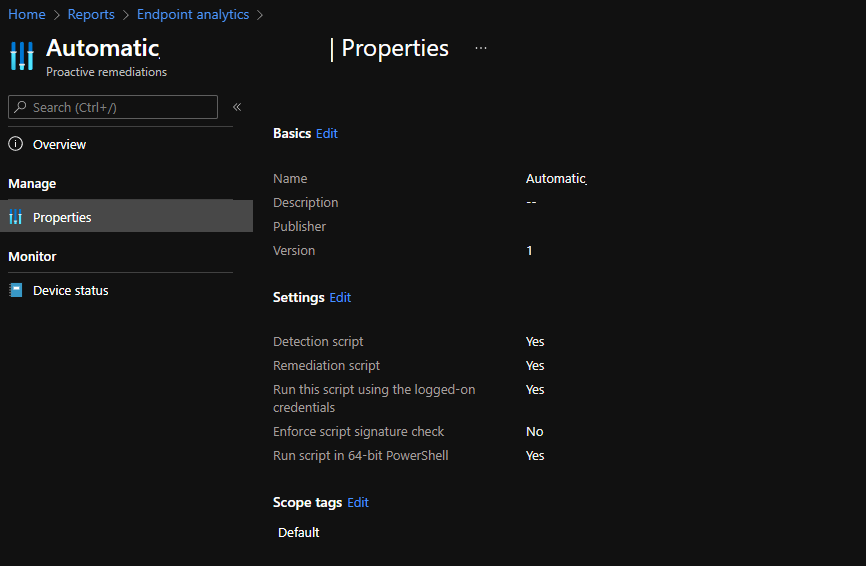
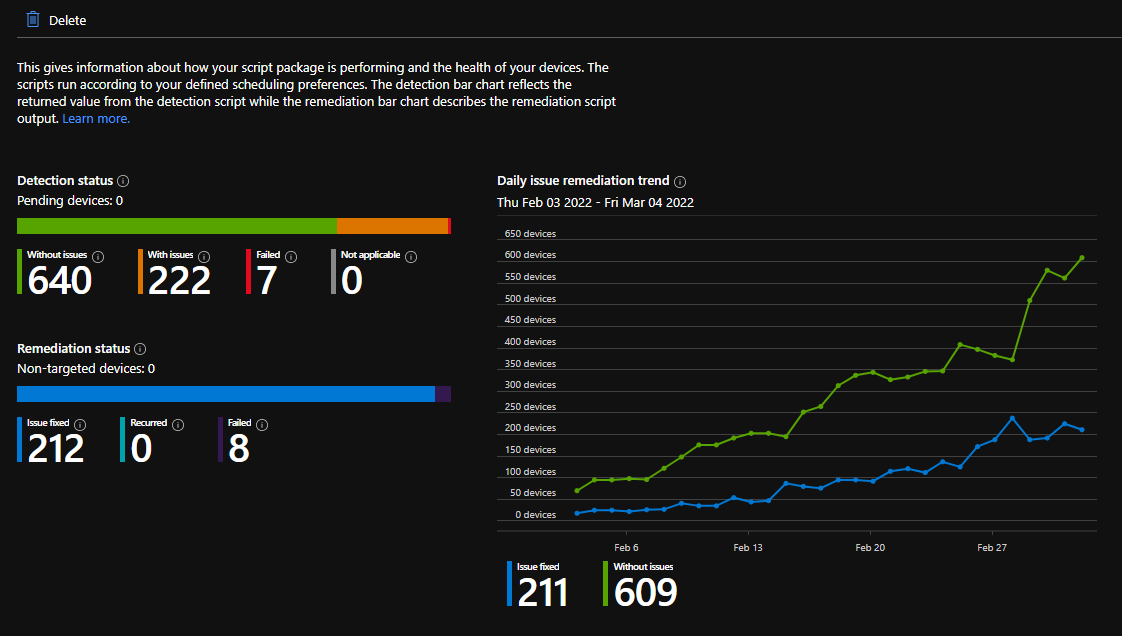
Now you can see Proactive Remediation analytics on how many machines the registry getting cleared. So that you can make sure everything is going as per your plan to improve One Drive Adoption by increasing the Sign-ins
Collect Admin Reports and get visibility on Microsoft 365 App Admin Center
One Drive Sync Health can provide you good visibility on how much Known Folders are backed up in your environment. So that you can be aware of the percentage of recovery in some disaster recovery scenarios.
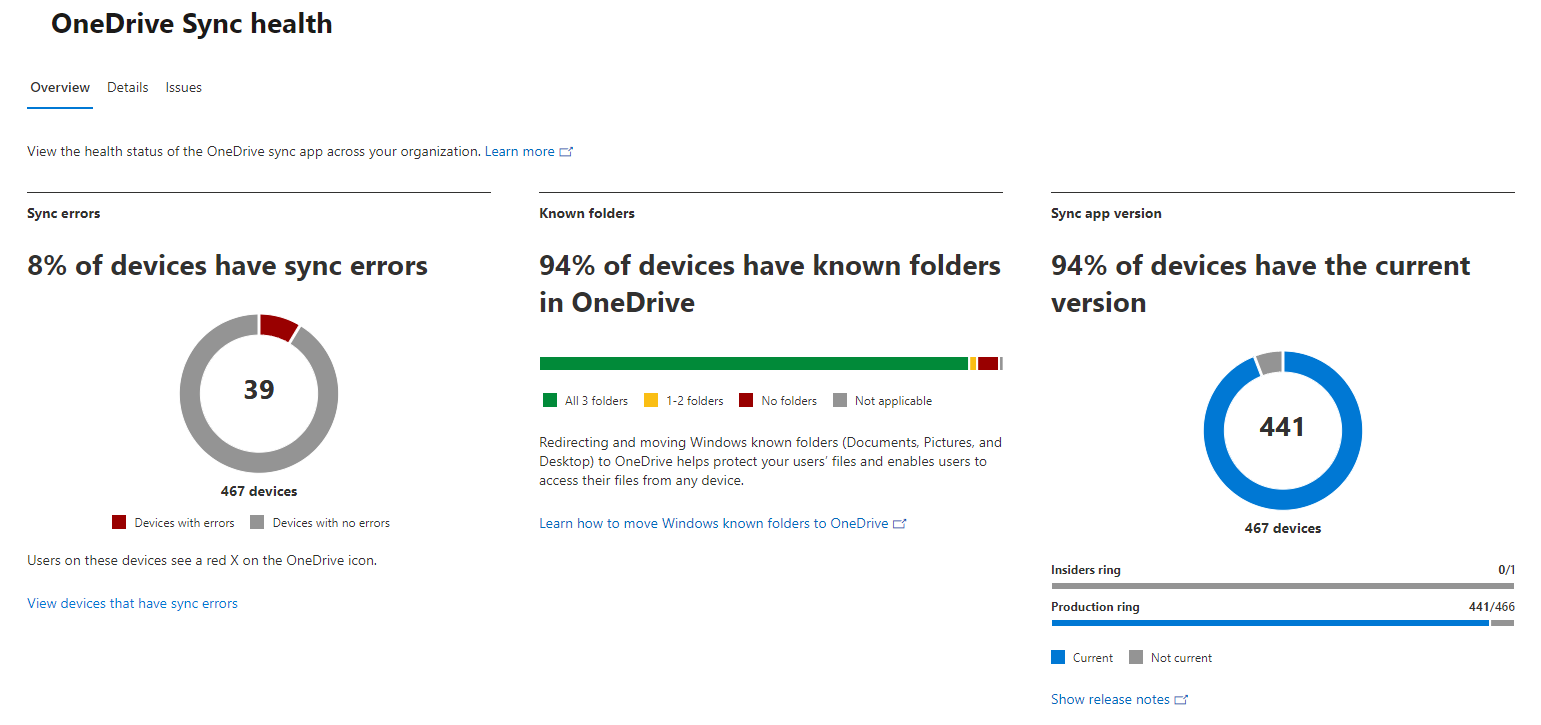
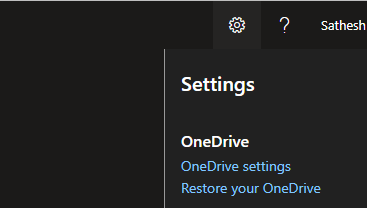
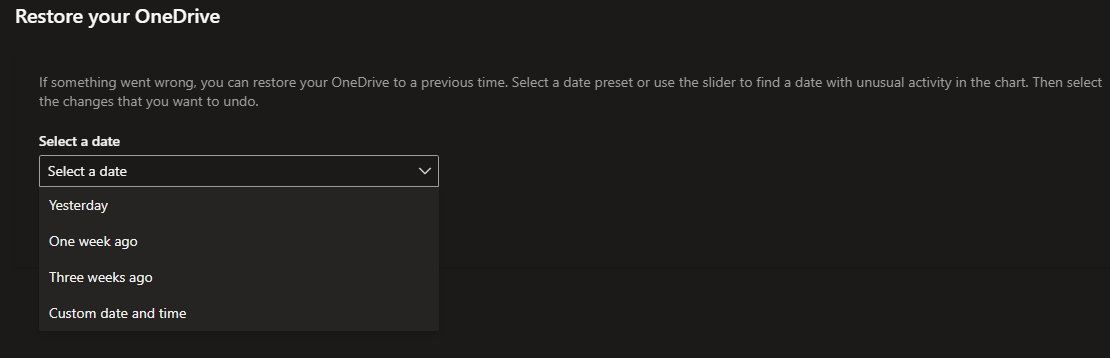
As you know you can restore your entire One Drive to a certain date it helps in recovery scenarios from Desktop Crashes to Ransomware.