38 C
Dubai
Monday, May 5, 2025
Home Blog Page 18

Azure DevOps Pipelines for Static Web Apps with GitHub

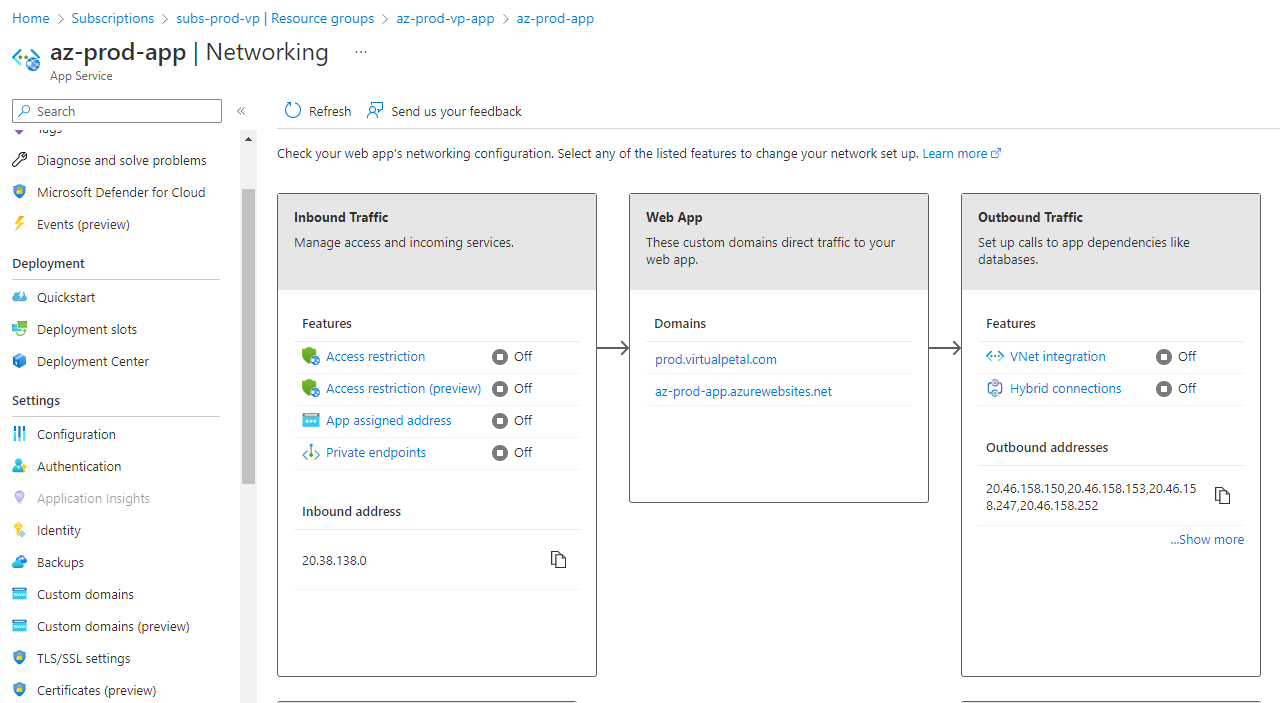
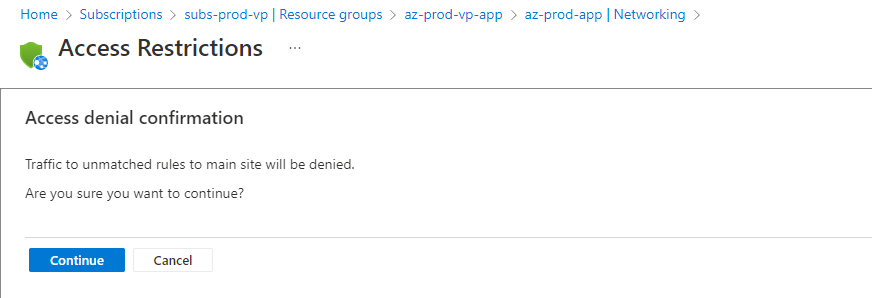
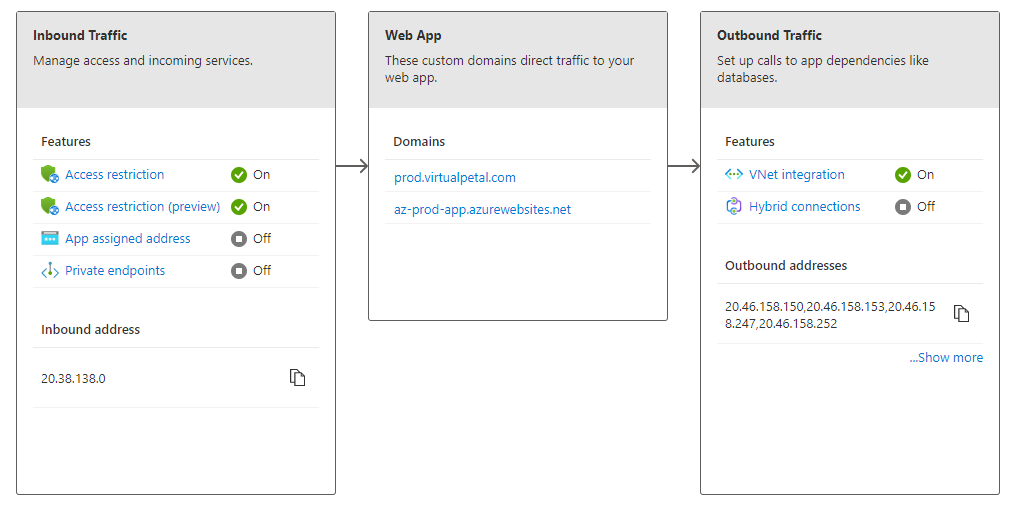
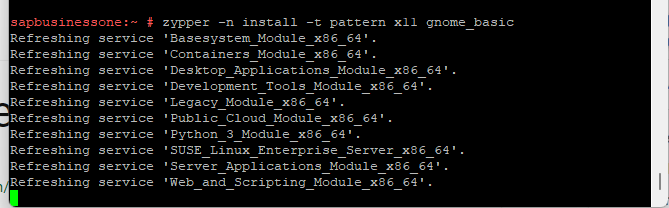
In this requirement. We are using CI / CD from the GitHub repository and Deploying Next Js Static pages which are using “Strapi – Open source Node.js Headless CMS” from an Azure App Service. We are not using staging slots in this to keep the UAT and Prod completely independent

Good to know – CI/CD are Continuous Integration, Continuous Delivery, and Continuous Deployment

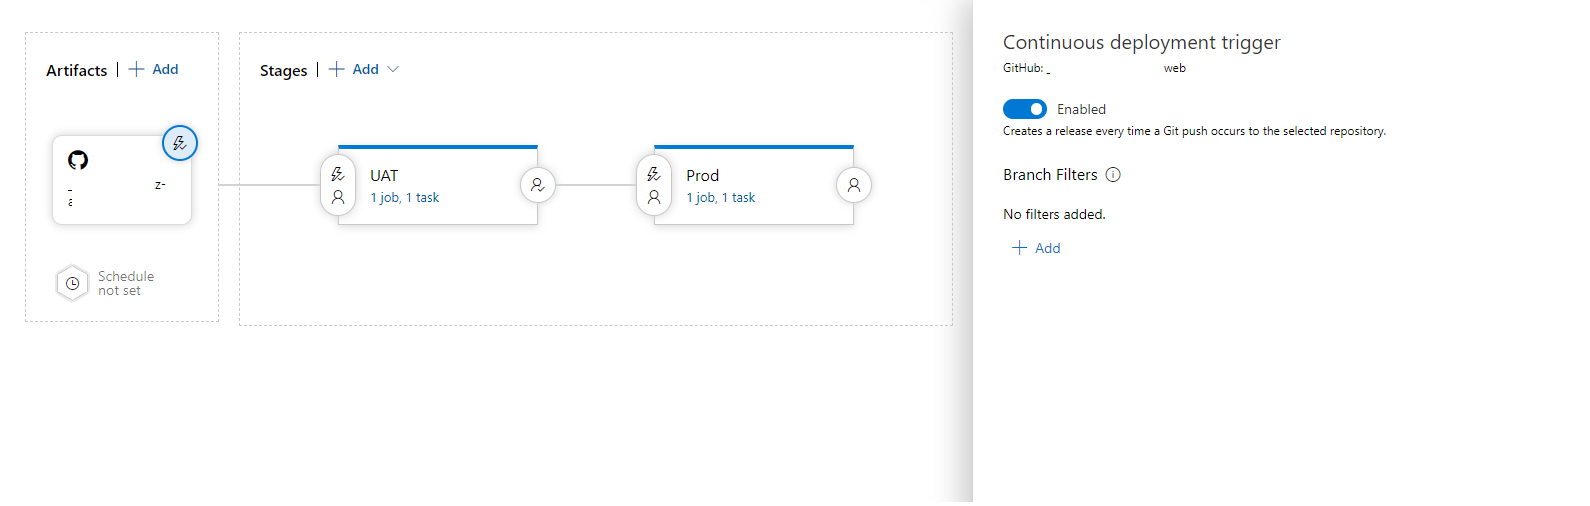
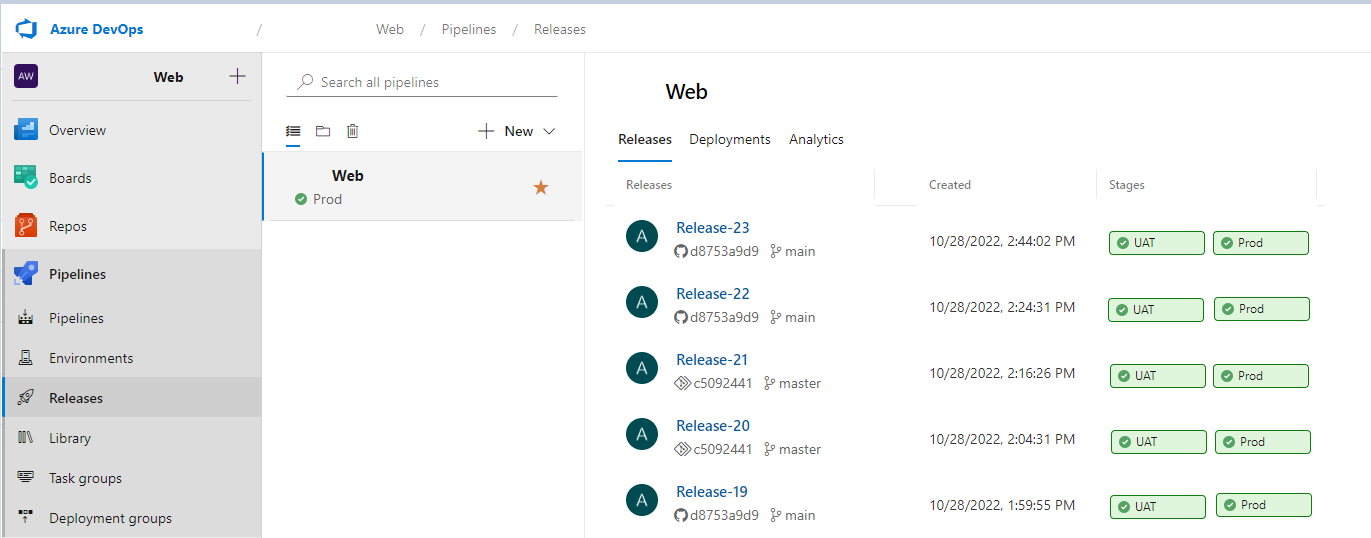
Pipelines are integrated with GitHub Repo for CI / CD and are deployed to UAT (Azure Static Web App ) where they can be tested, if it gets approved (Approval Gates) after testing it will be deployed to Production. Otherwise, the change can be rejected.

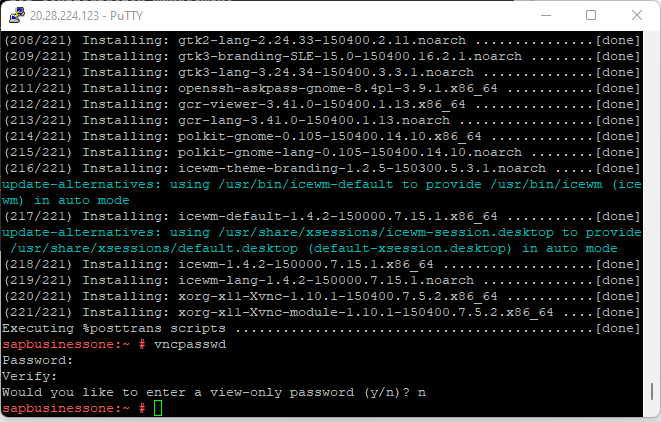
Ran the node js locally using [ npm run dev / npm run build ] which went through successfully.

Linking a similar article for CI / CD is done for Azure App Service using Azure DevOps
Azure DevOps Pipelines for App Service with GitHub – Azure365Pro.com

As you see below we are using a Git hub source repository. First Deploys to a Standard UAT Azure Static Web App if changes are approved by an approver, It’s deployed to a Production Azure Static Web App.

Please note: Azure DevOps integration using Deployment tokens currently supports only on the Standard version of Azure static Web Apps and not in the free version of Azure Static Web Apps.

Now you can see the releases happening on UAT and Production environments without any manual steps. Let’s see how to implement the same.

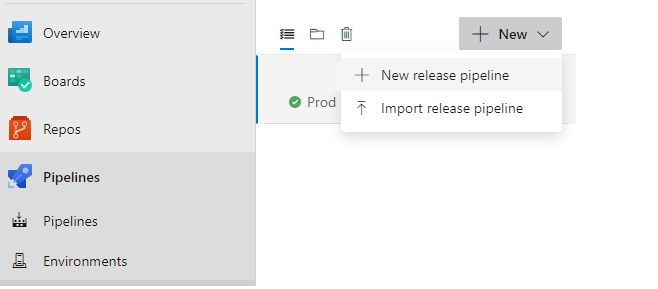
Create New Release Pipeline

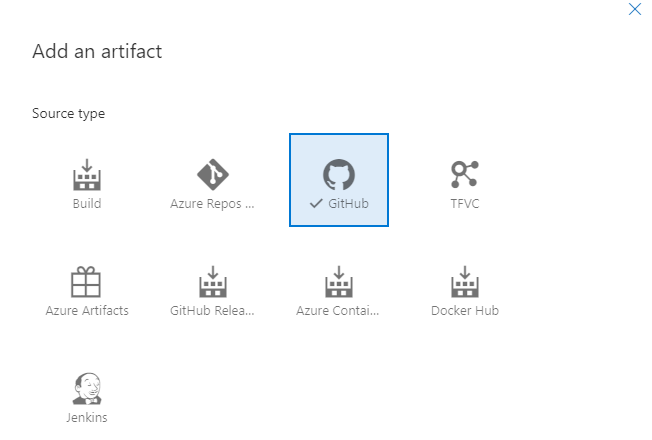
Utilizing GitHub Repo Source Type

To Keep the Git hub repo more secure – We will use Personal Tokens in this Scenario as the account hold many repos belonging to different projects. (Most of them can skip this step – It’s only for companies who want to host many repositories from different customers)

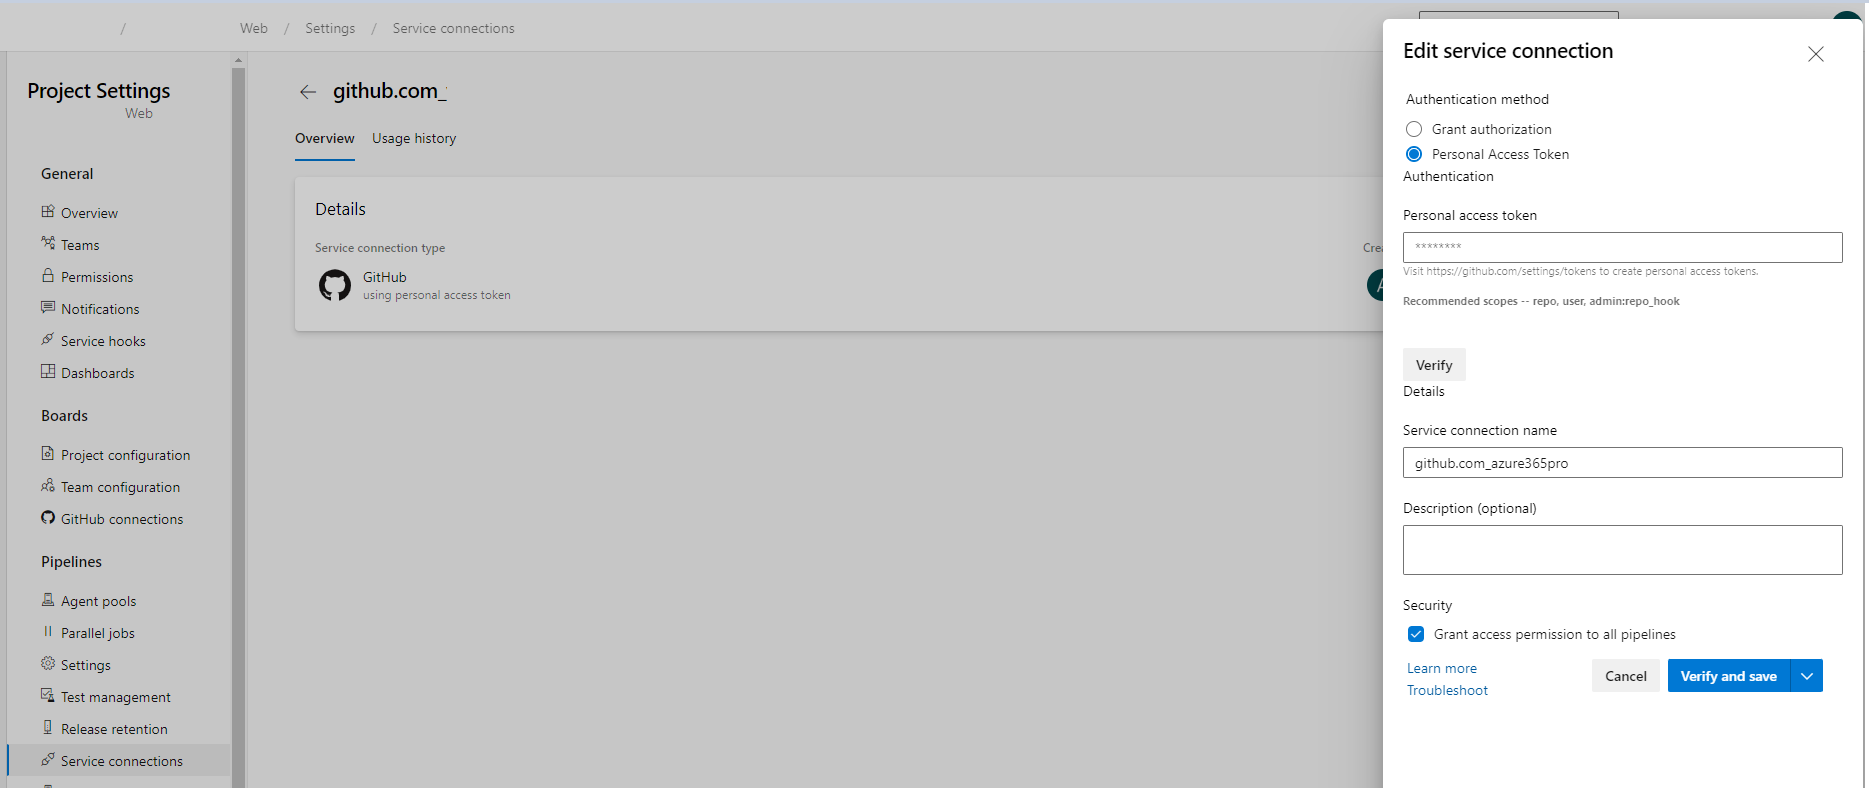
Use the personal token generated from Github Fine-Grained Tokens – Which has access to the specific Repo.

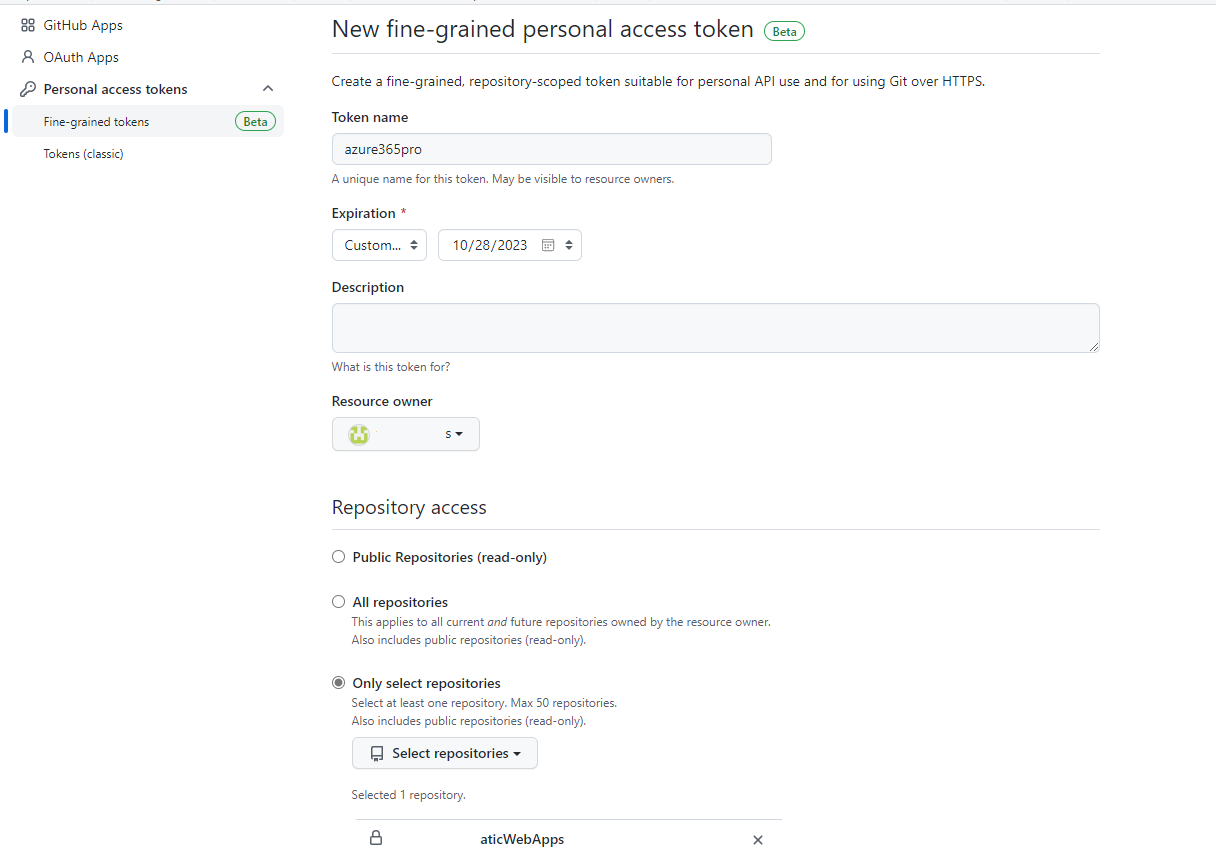
Provide All Repository Permissions

Create a Stage using ubuntu-latest

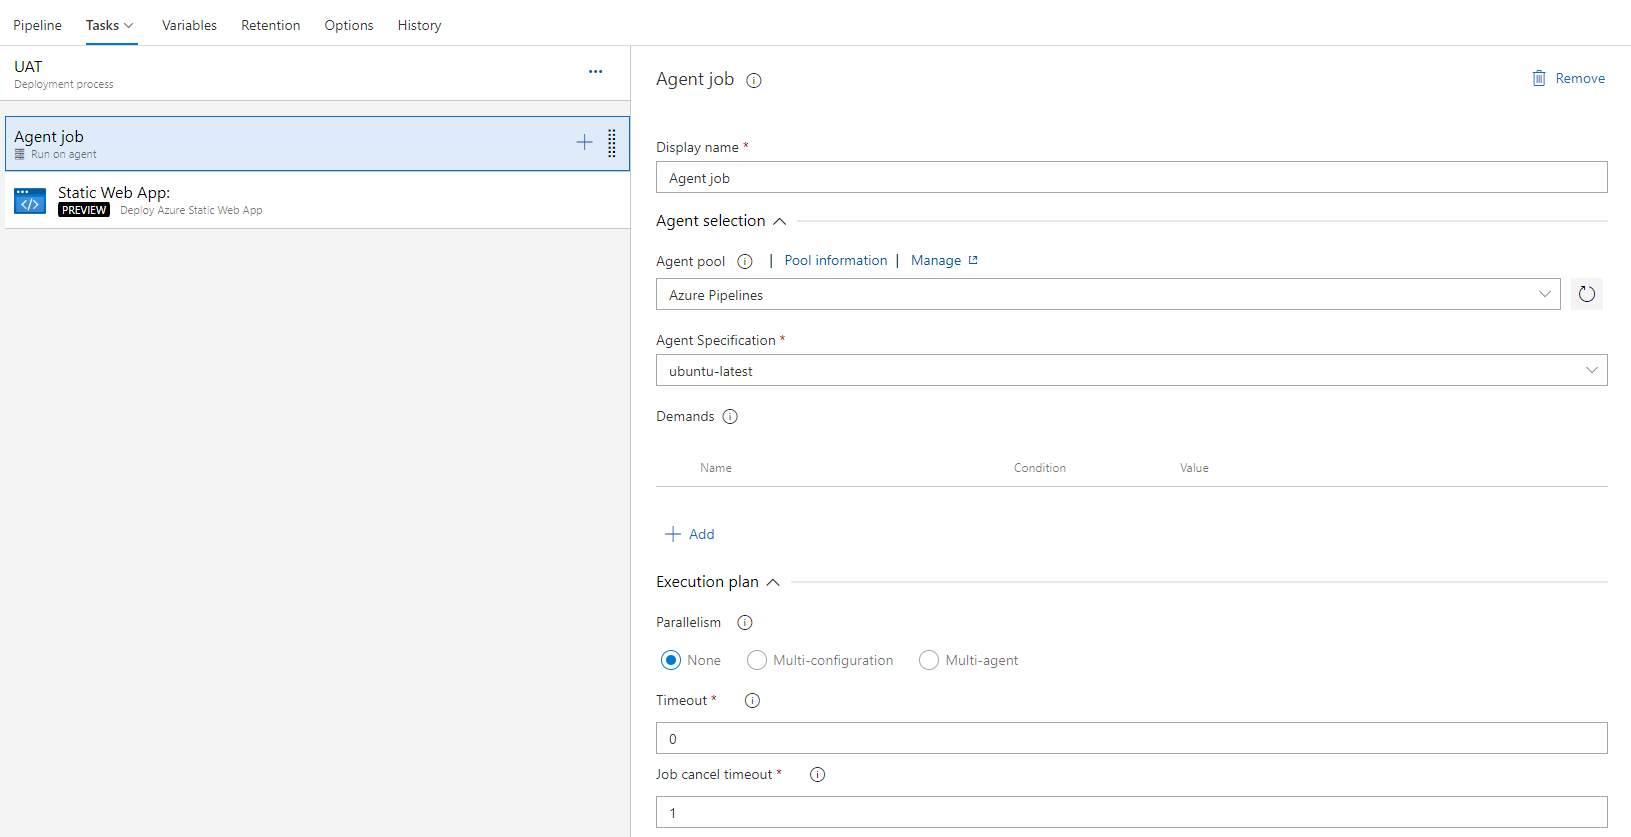
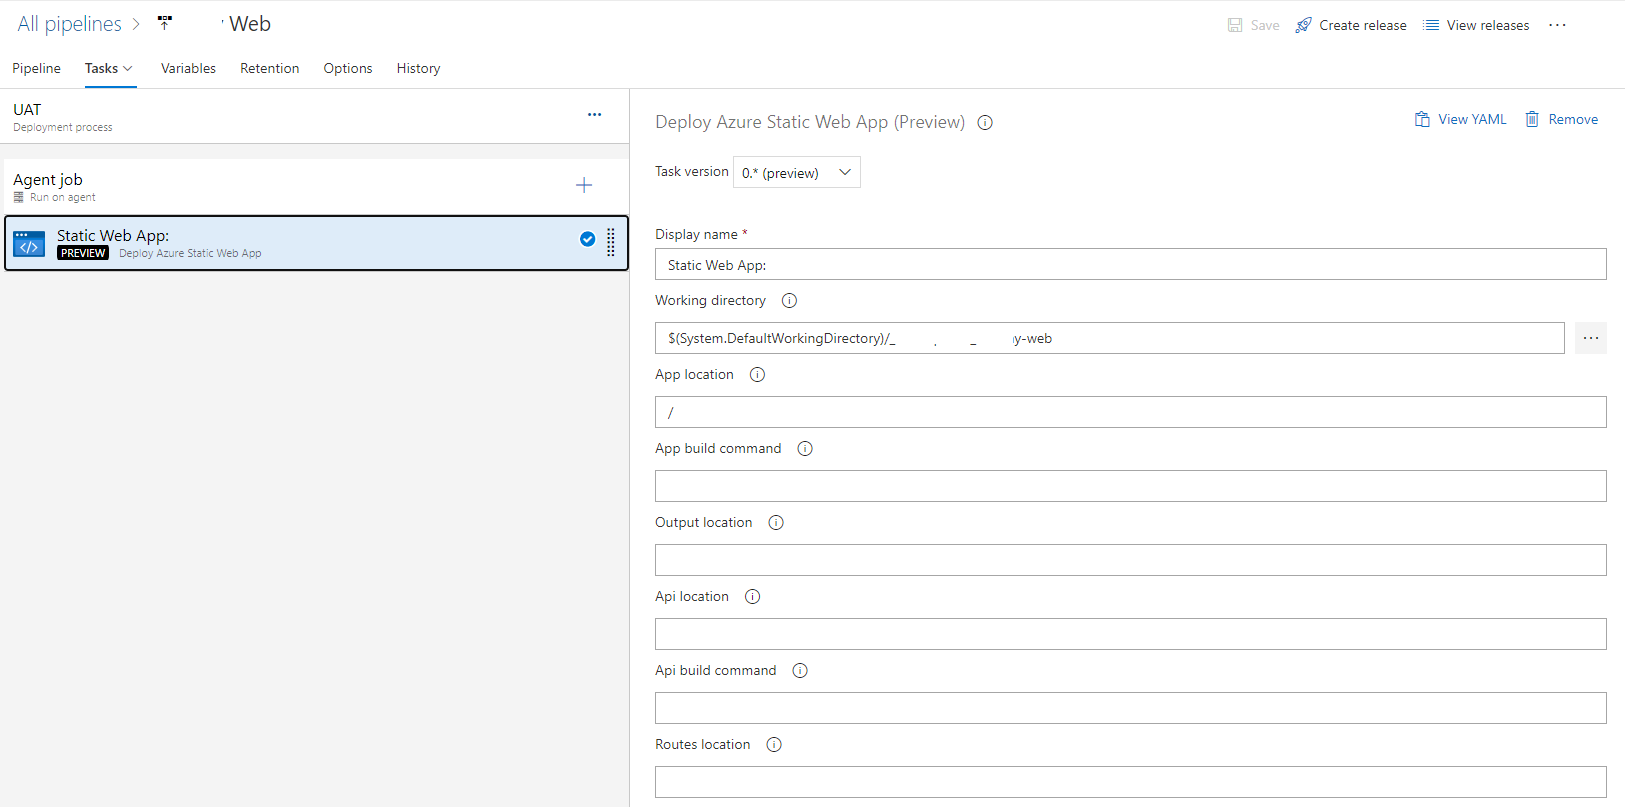
Create another task – Static Web App – Deploy Azure Static Web App, which is currently in preview.

App Location set to “/”

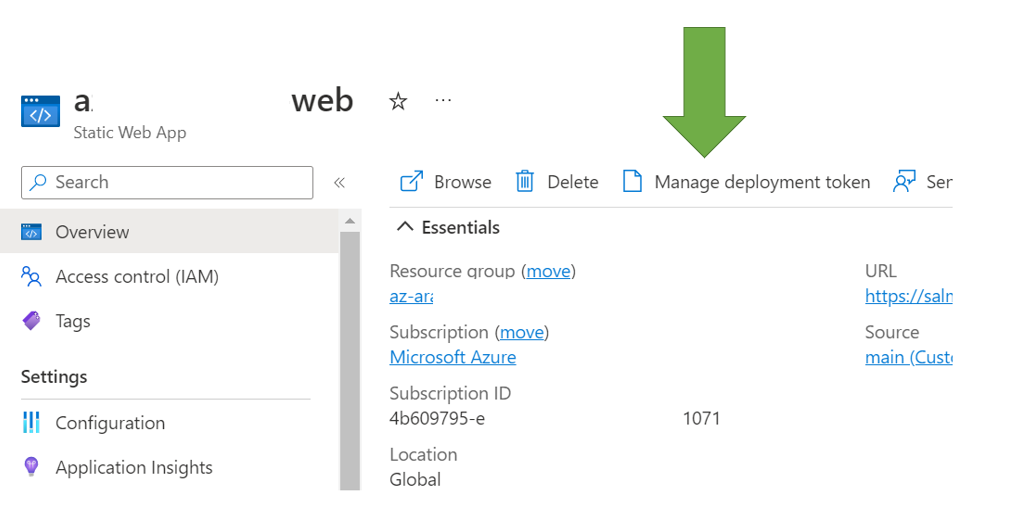
Now Get the deployment token from the Azure Static Web App

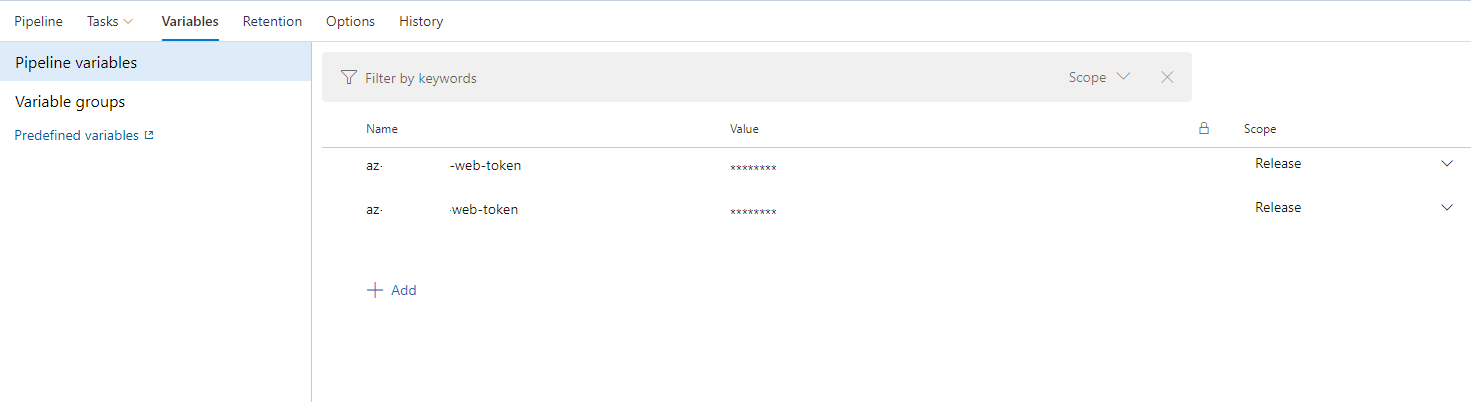
Enter the variable value to be set on the Azure Static Web Apps API token

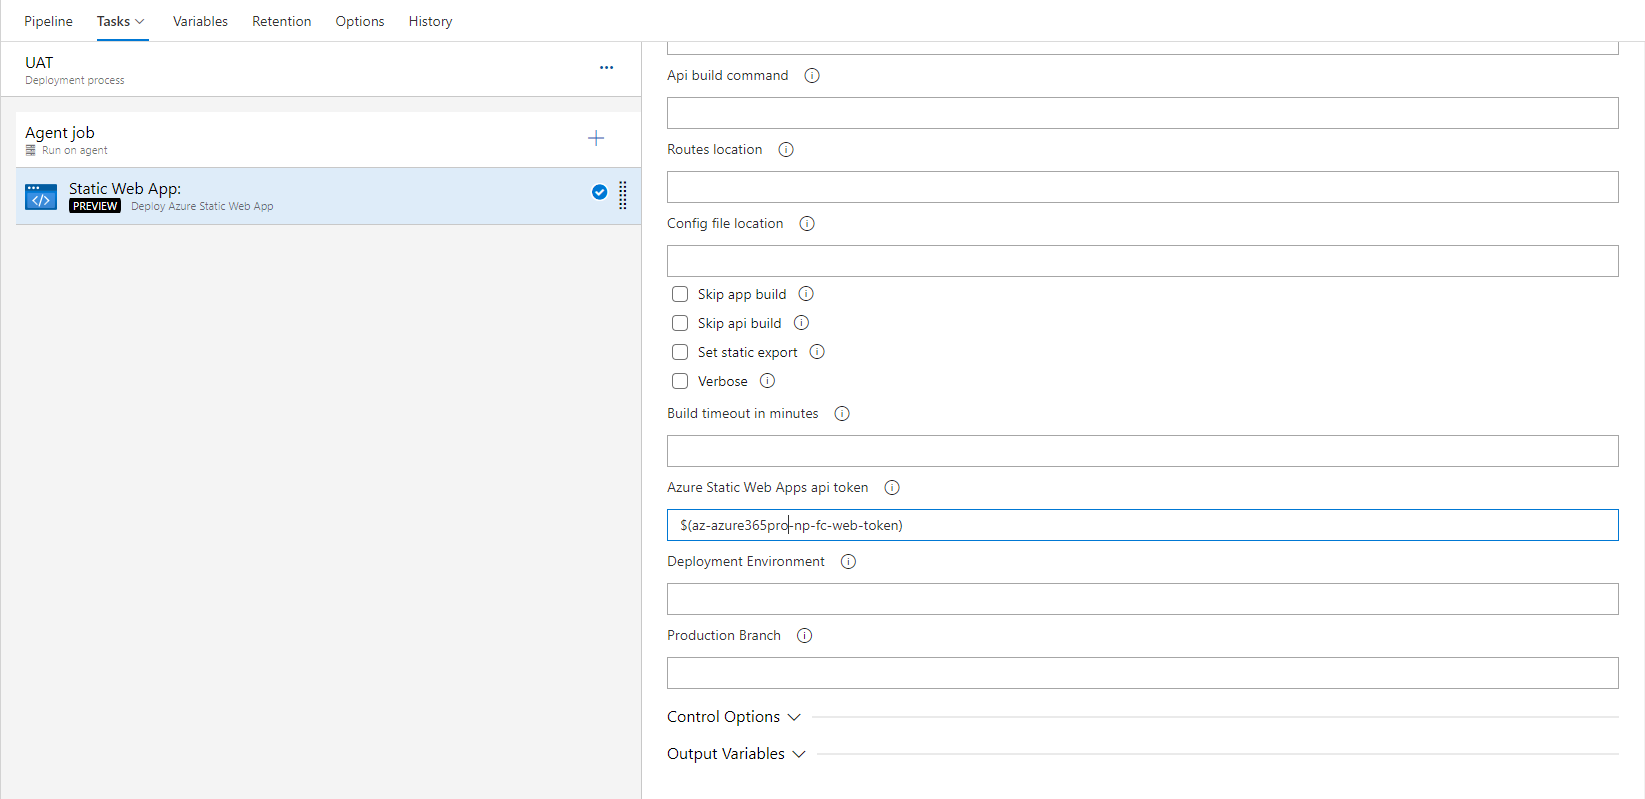
Create variables for UAT and Prod to use at different stages

Name – Variable Name
Value – Deployment Token Value
and press the lock button to save it as a secret

Now if you deploy it. It generates its yml and deploys it to the appropriate static web app using the deployment token
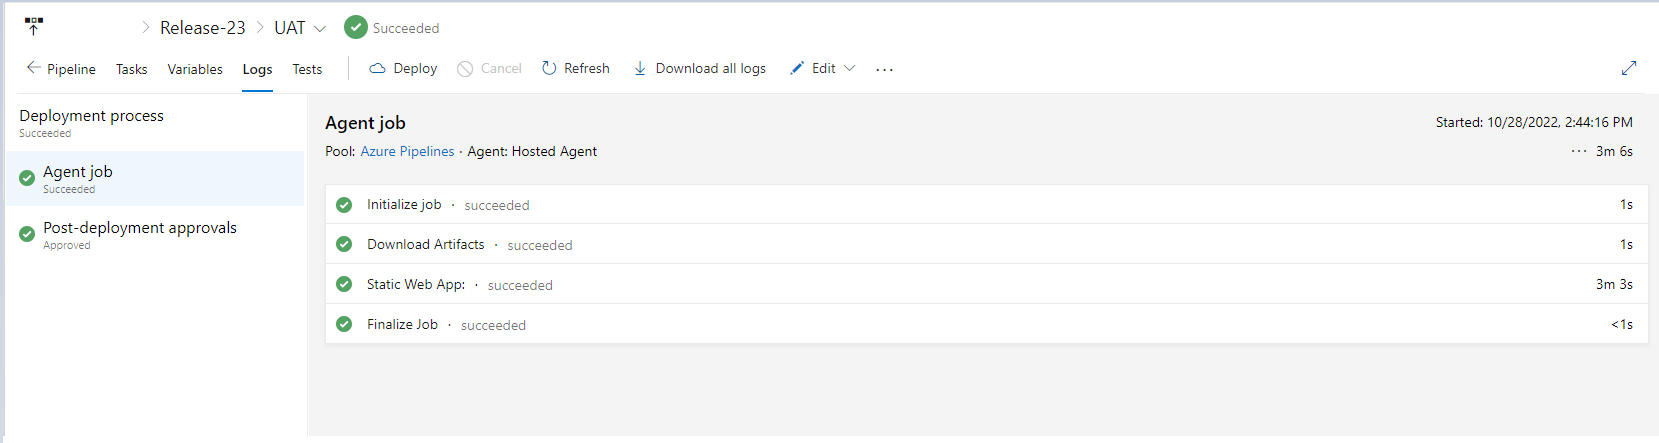
Deploys to UAT

Deploys to Prod

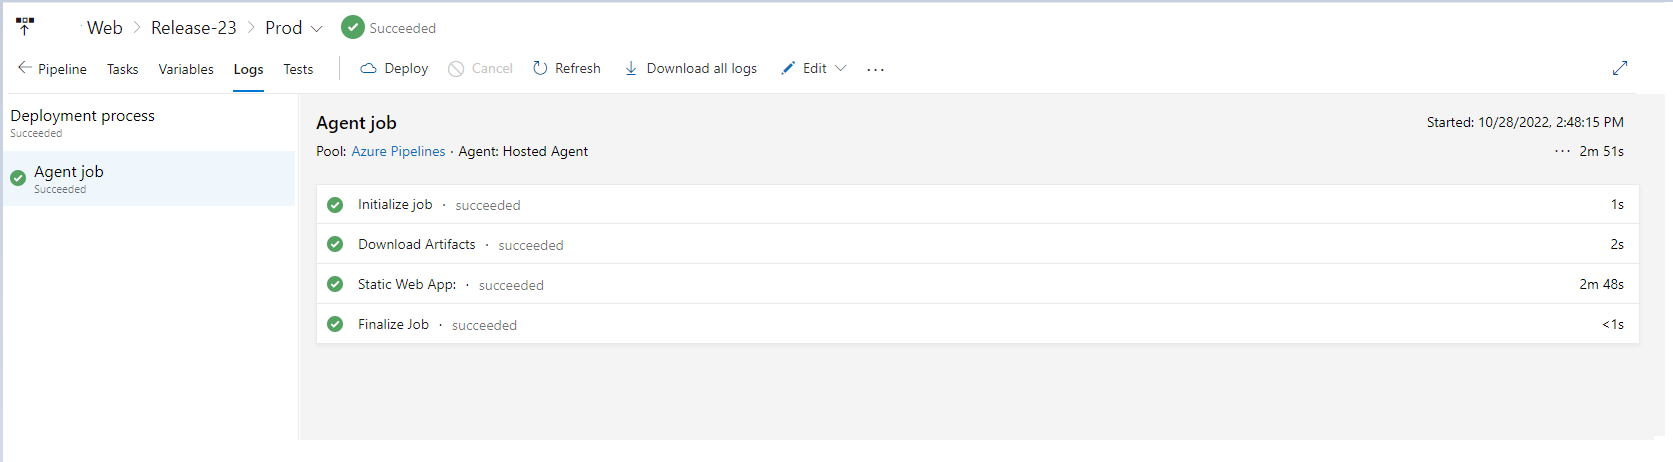
If you see the stages – UAT and Prod succeeded.

Enabled Continous Deployment Trigger in this specific scenario. On Each commit/push to the repo it Auto Deploys to UAT.

Azure AD Single Sign-on with Workplace from Meta

Let’s do Single Sign-on and Auto-provisioning from Azure AD to Workplace from Meta (Formerly known as Facebook Workplace.

Log in to the Facebook Workplace.

Place below details, Downlow Raw 64 Cert from Azure AD App, which you created from Azure AD Portal.
SAML URL
SAML issuer URL
SAML Logout URL

Certificate Base 64 – From Azure AD – Without White Spaces

Test SSO to confirm everything is working as expected.

Configure below from the Azure AD side.

EntityID
Reply URL
Sign on URL

Provision users using Microsoft Azure Active Directory SCIM Auto Provisioning from the Facebook workplace side.

Now users are syncing back and forth from Identity Provider.

Now enable SSO as default.

Assign Email Domains for the SSO to recognize when the user logs In

In order to list the domains. Make sure Domains are verified in Email Domains.

Single Sign-on is enabled on Login Page for the Facebook Workplace.

Sharepoint Integration with Workplace.

Add to Workplace

Install Microsoft Sharepoint

Provided Access to Sharepoint Sites –

Now you can add files from Sharepoint

Change Workplace Subdomain if needed

POST Data to Logic App to Store in Azure SQL Database

As per the requirement – Source Oracle Netsuite Database – will have its integration platform that can POST this data. Which needs to be saved in an Azure SQL database.

So as you can see the POST is being done to a Logic App which will be storing this in an Azure SQL Database.

Content-Type –

application/json

Create a Logic App

Choose the Appropriate SQL Connection

Insert Row

Respond Success if Status Code is 200

You can see it getting stored in Azure SQL Database, You need to install SQL Management Studio and Create the Tables, I just imported the tables using a plain text file.

Import tables Columns using Flat File

Implementing Application Gateway with Web Application Firewall

Let’s implement Web Application Gateway with Web Application Firewall, Assuming the backend is an App Service which is my case, the Custom domain is added to the in-app service with SNI SSL. See Restricting App Service through Application Gateway

The following Naming Convention is used as per Microsoft’s Recommendations, You can always make it flexible in the way you interpret and understand it better.

az – Denotes Azure
vp – Project Reference
uaen – UAE North
appgw – Application Gateway

  • az-vp-np-uaen-appgw
  • az-vp-np-uaen-appgw-be (Backend )
  • az-vp-np-uaen-appgw-rule
  • az-vp-np-uaen-appgw-listener
  • az-vp-np-uaen-appgw-be-settings
  • az-vp-np-uaen-appgw-hb (Health Probe)
  • az-vp-np-uaen-appgw-ssl-profile


Let’s create an Application Gateway – Using a Dedicated Subnet for my Application Gateway

Associate a Public IP from a Public IP Prefix

Add a backed Pool

Add Backend pool

Add a routing rule attaching a pfx file (Ideally from Key Vault)

Choose backend Targets – Use Well know CA Certificate

Frontends – Routing Rules and Backend Pools are configured now

Create the Application Gateway

Add Custom Health Probe – Apply Host with backend custom domain

Now the site is up using Application Gateway – The A Record is pointing to Application Gateway. As to have better HA ( High Availability ) you need to use traffic manager or Azure Front Door with CDN for different scenarios. Azure Front door is peace of mind as SSL can be managed and renewed automatically.

Enable WAF V2 – Prevention

OWASP 3.0 is used in this case

Create SSL Profile with TLS 1.3

Update SSL profile in Listener (The one we created above)

Now you can see the CIPHERS are hardened.

Restricting App Service through Application Gateway

Let’s restrict app service to connect only through the app gateway, Considering Custom Domain is Added with SSL
Choose Networking and Configure Outbound Traffic with VNet Integration. See Application Gateway Web Application Firewall Configuration if needed

Choose the Appropriate Subnet for Outbound Traffic.

Outbound Traffic with VNet Integration is enabled

Now choose Unmatched Rule Action to Deny

Add and Allow only Application Gateway Subnet to work

Choose Continue

Traffic to unmatched rules to the main site will be denied.

Now Access Restrictions are in Place for Inbound and Outbound Traffic only through Application Gateway.

Now you can see App Service is Accessible only through the Application gateway and not direct (Error 403 – Forbidden)

Configuring xrdp vnc gnome with SUSE Linux Enterprise on Azure

Configuring SUSE Enterprise Linux for SAP Business One in this case on Microsoft Azure. Am describing a sample preparation using public IP assigned on Suse Linux. but in real-world scenarios. Either use bastion or a jump box or secured VPN to connect to the instance.
Using SUSE Enterprise Linux 15 SP4 with 24×7 Support


Create a new virtual machine and click on select from all images and search for suse from your marketplace.

Create a new virtual Machine. Choose the Image.

To Elevate

sudo su -

Install xrdp for Remote Desktop or VNC. I have covered both.

zypper install xrdp

Configured xrdp

service xrdp start
chkconfig --set xrdp on
systemctl start xrdp
systemctl enable xrdp

Now Remote Desktop Working as expected.

After RDP enter the linux password via xrdp.

It’s working as expected

Now let’s see how to install vnc

zypper install xorg-x11-Xvnc

Enter

vncpasswd

Configure the vncserver and set boot at startup. You may need to re-run it to set auto start.

vncserver :1

It’s working as expected. It works on 5901 – and the NSG rule has to be allowed in order to use it.

Lets install GUI Gnome

zypper -n install -t pattern x11 gnome_basic

Lets edit this file and sent default_VM=”gnome”

vi /etc/sysconfig/windowmanager

Shift i

esc and :wq to save and exit

cat to view

cat /etc/sysconfig/windowmanager

Set Graphical Target as default

ln -fs /usr/lib/systemd/system/graphical.target /etc/systemd/system/default.target

reboot

GUI is up via vnc and xrdp

To Reset root password

Reset root password
sudo passwd root

Sample NSG rules allowing xrdp and vnc and ssh

× How can I help you?