33 C
Dubai
Wednesday, April 30, 2025
Home Blog Page 10

Azure Front Door for Virtual Machine’s hosting a Website.

  • Front Door handles incoming requests and routes traffic based on custom domains and load balancing rules.
  • Setup implements Azure Front Door to distribute traffic between two virtual machines hosting a website—one on Azure and the other on AWS.
  • Health probes ensure high availability and monitor the health of the VMs.
  • Caching is used to optimize performance and reduce response times for frequently accessed content.
  • Security features like Web Application Firewall (WAF) and IP restrictions are implemented to protect against threats and unauthorized access.
  • Monitoring is enabled through Application Insights, providing valuable insights into application performance and usage.
  • Geographic-based routing is configured to improve the user experience by directing traffic to the closest available server location.
  • The setup provides a resilient and highly available infrastructure for hosting the website across multiple cloud providers.

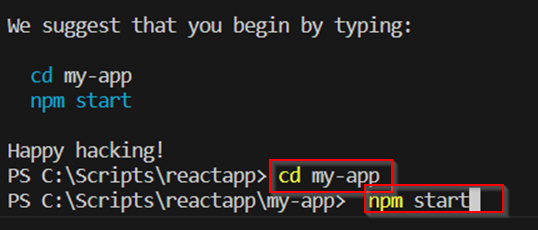
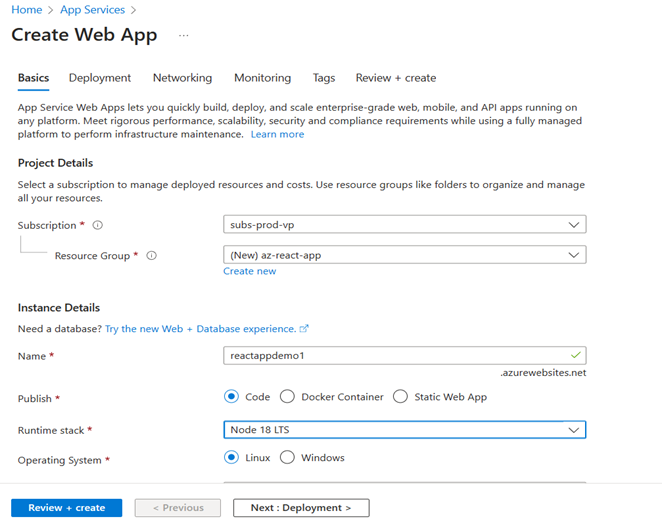
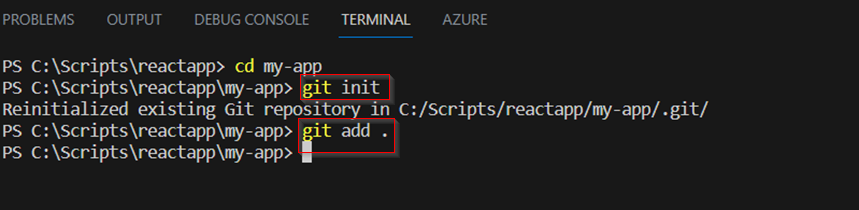
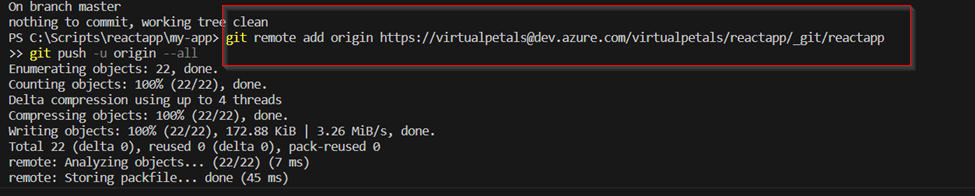
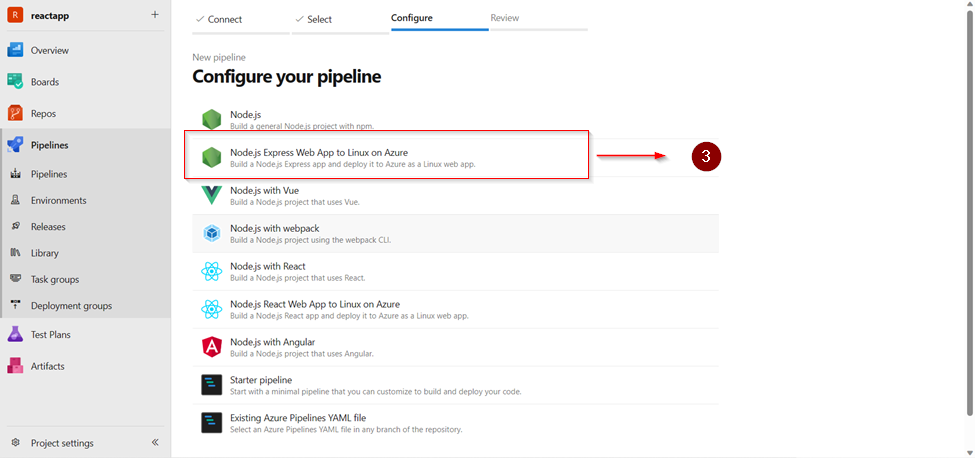
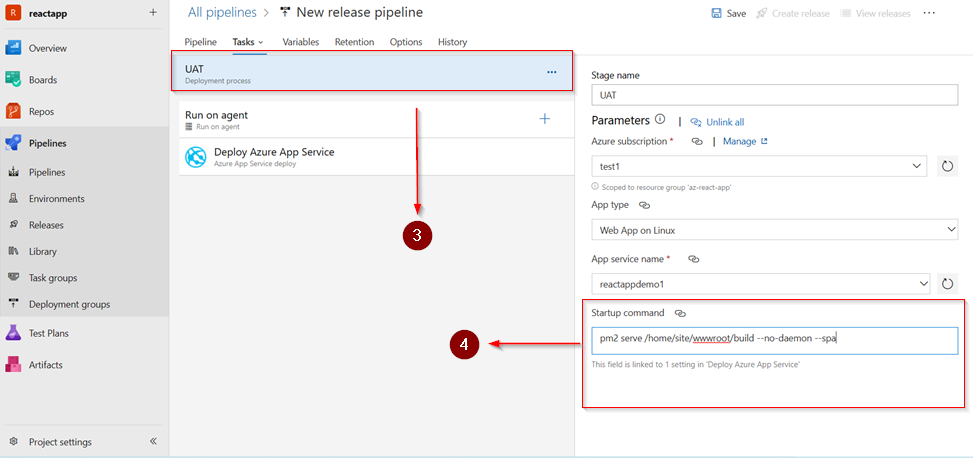
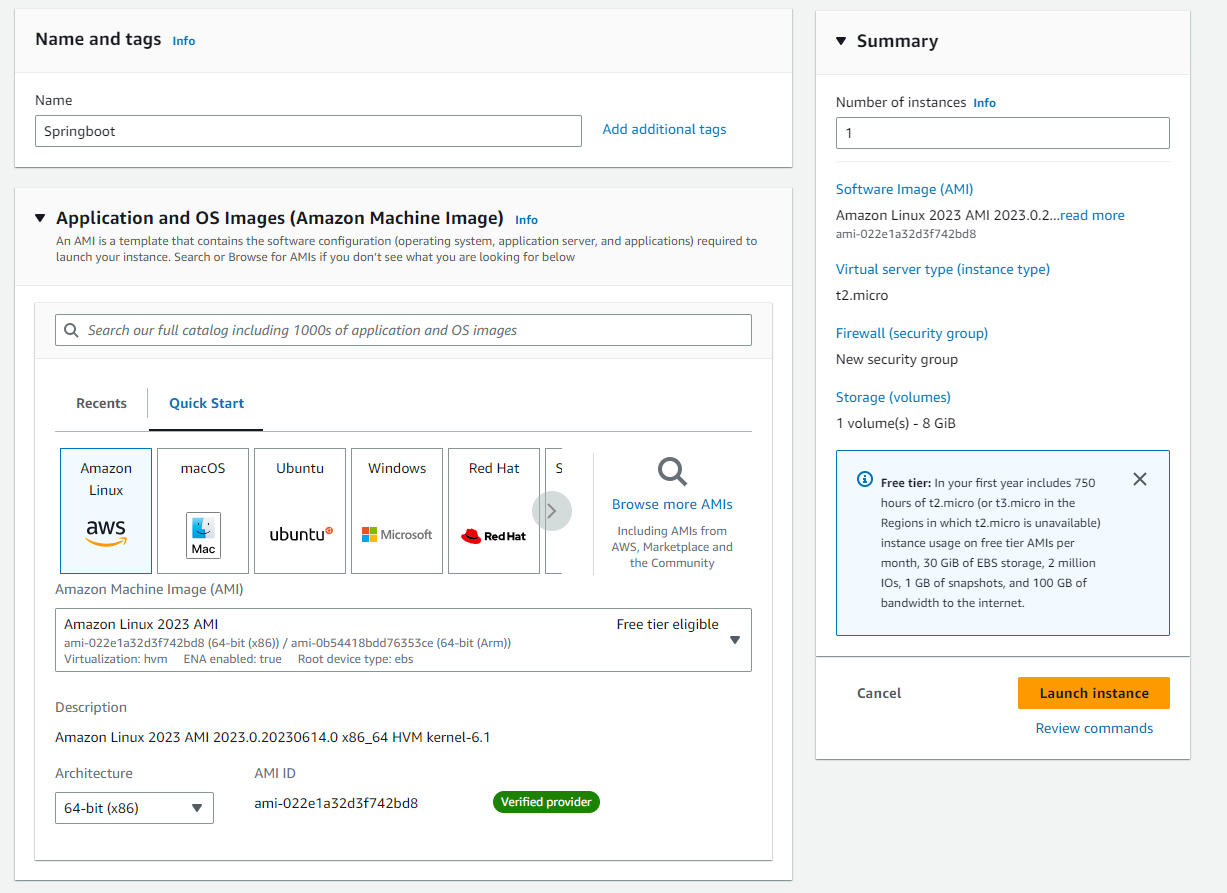
Let create a virtual machine in Azure and then install Web server (IIS) to host a website.

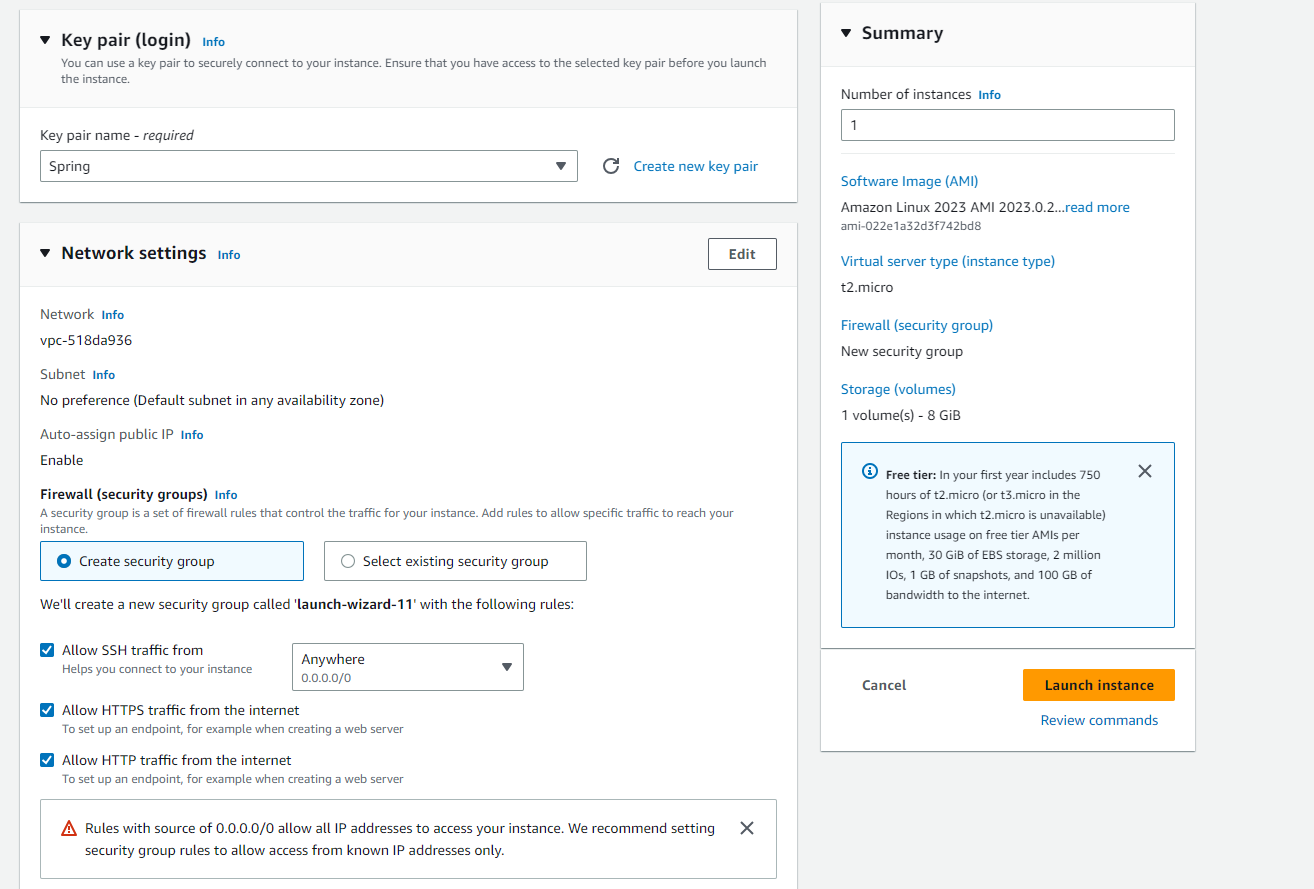
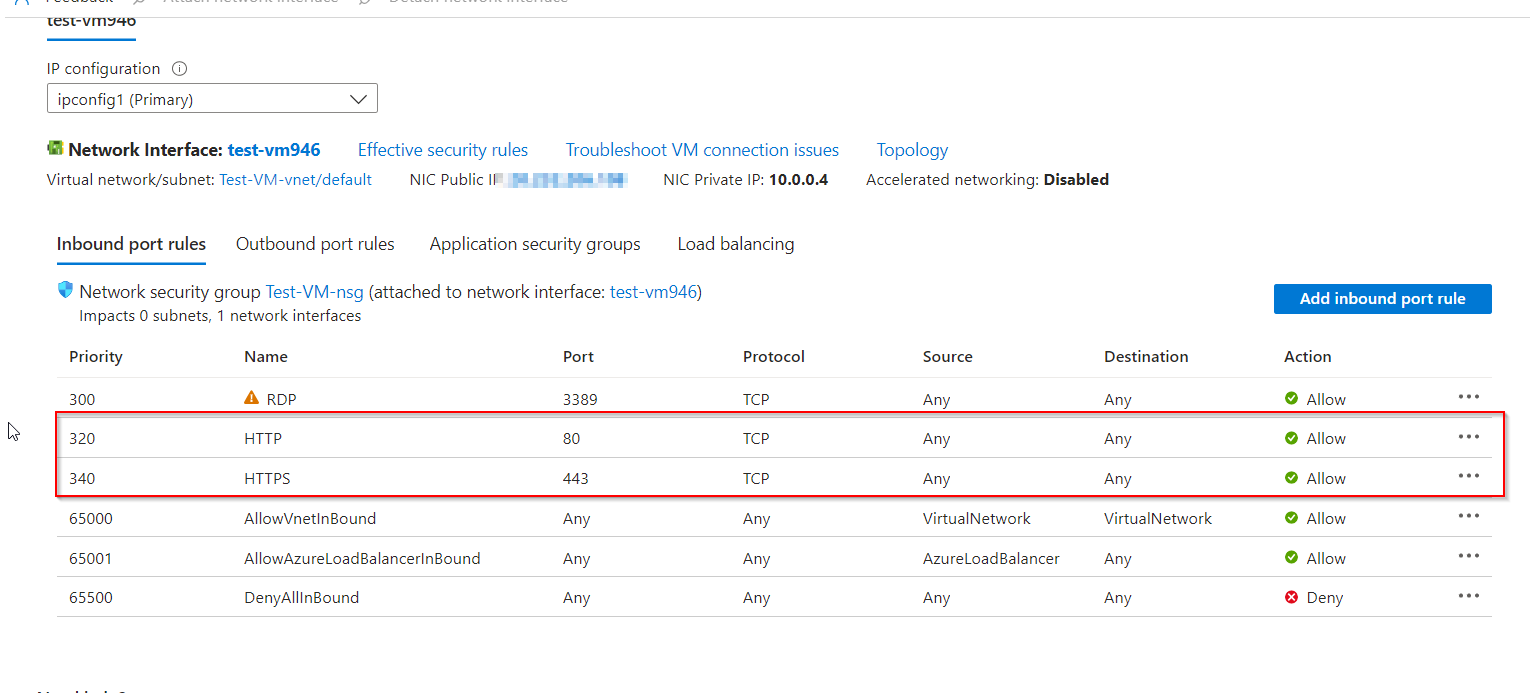
Allow http and https port in the virtual machine to host the website.

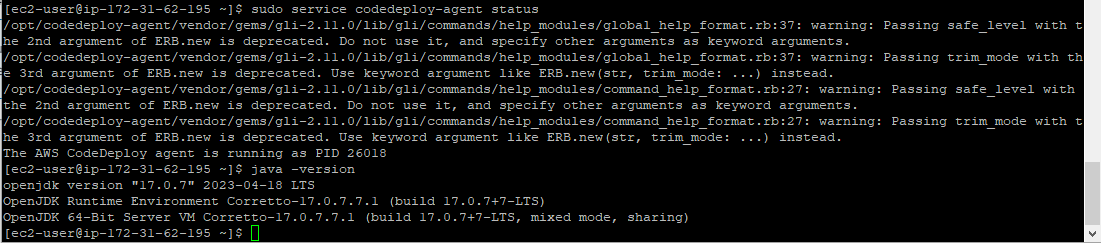
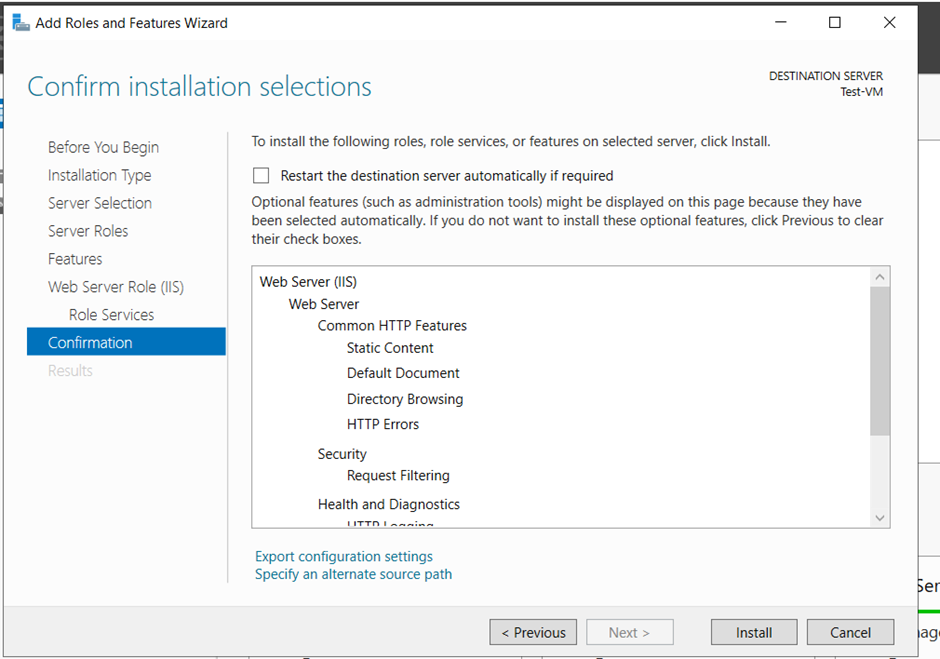
Now open the Virtual Machine and in Windows Server Manager install Web Server IIS.

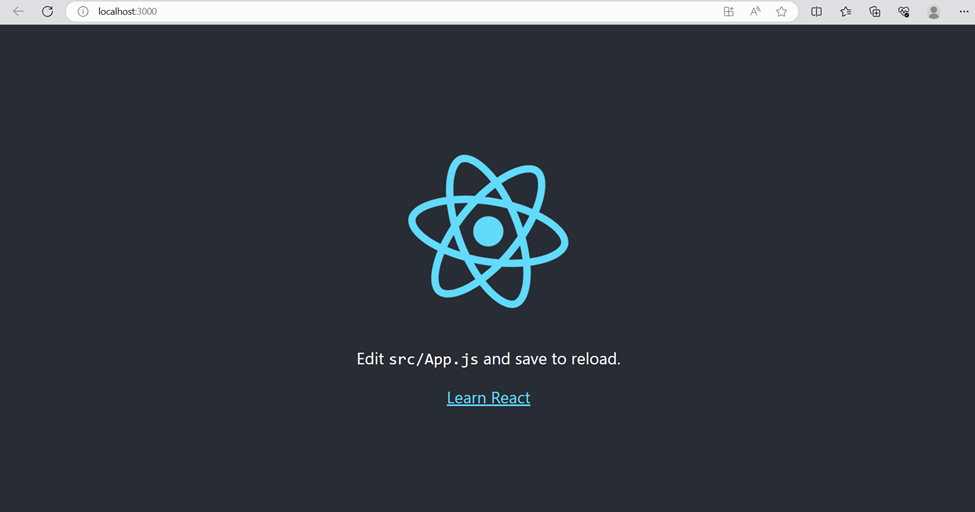
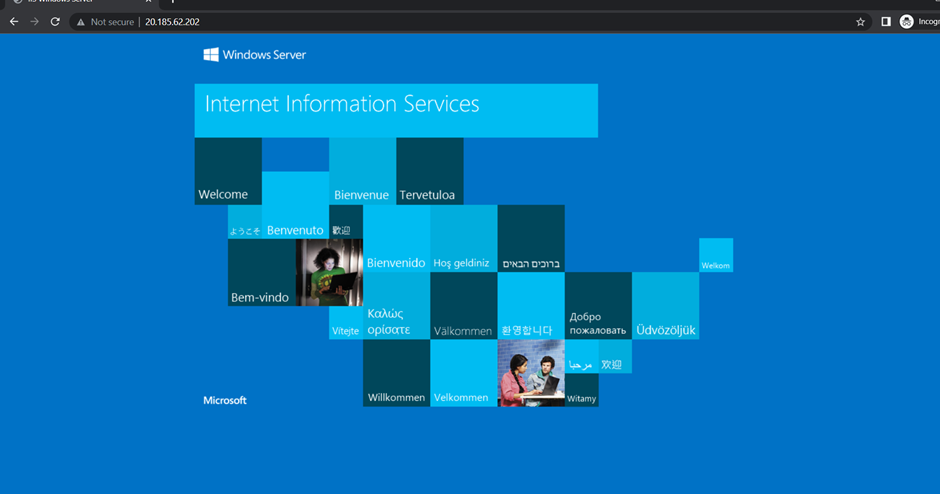
Check weather the server is installed in the VM by pasting the IP’s in a new tab.

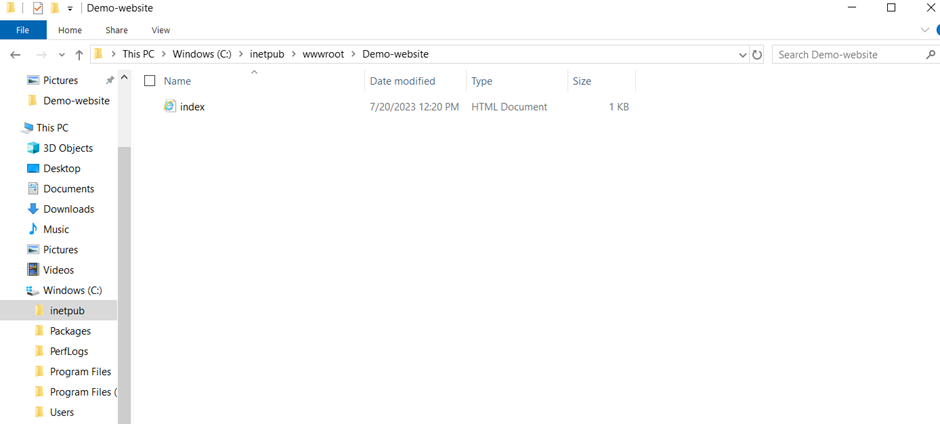
Now inside the intelpub > wwwroot > folder of the virtual machine place your website page.

.

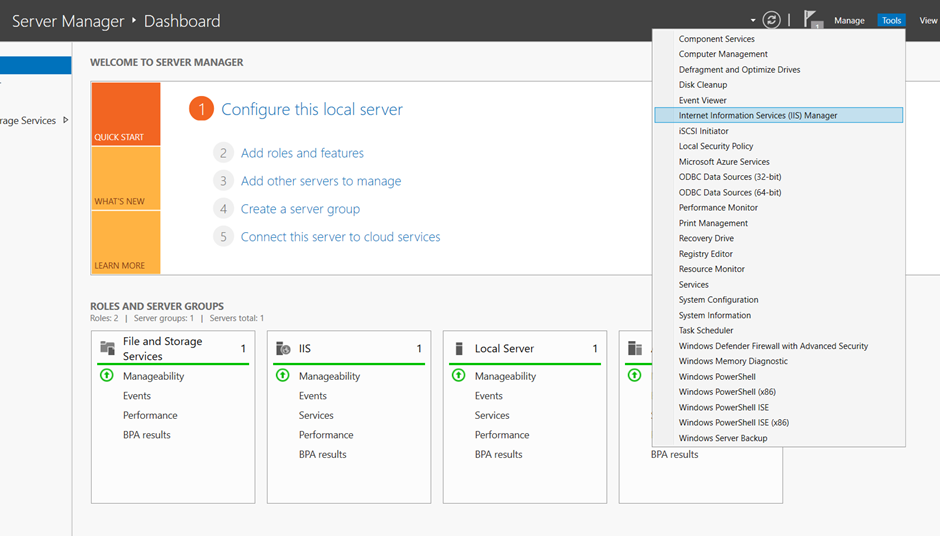
Then in the Server Manager click on Internet Information Service(IIS) Manager.

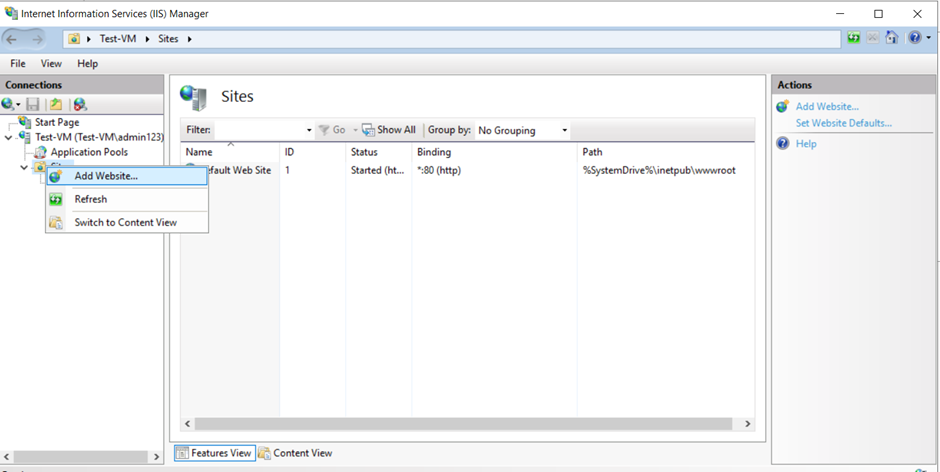
Click on Add website.

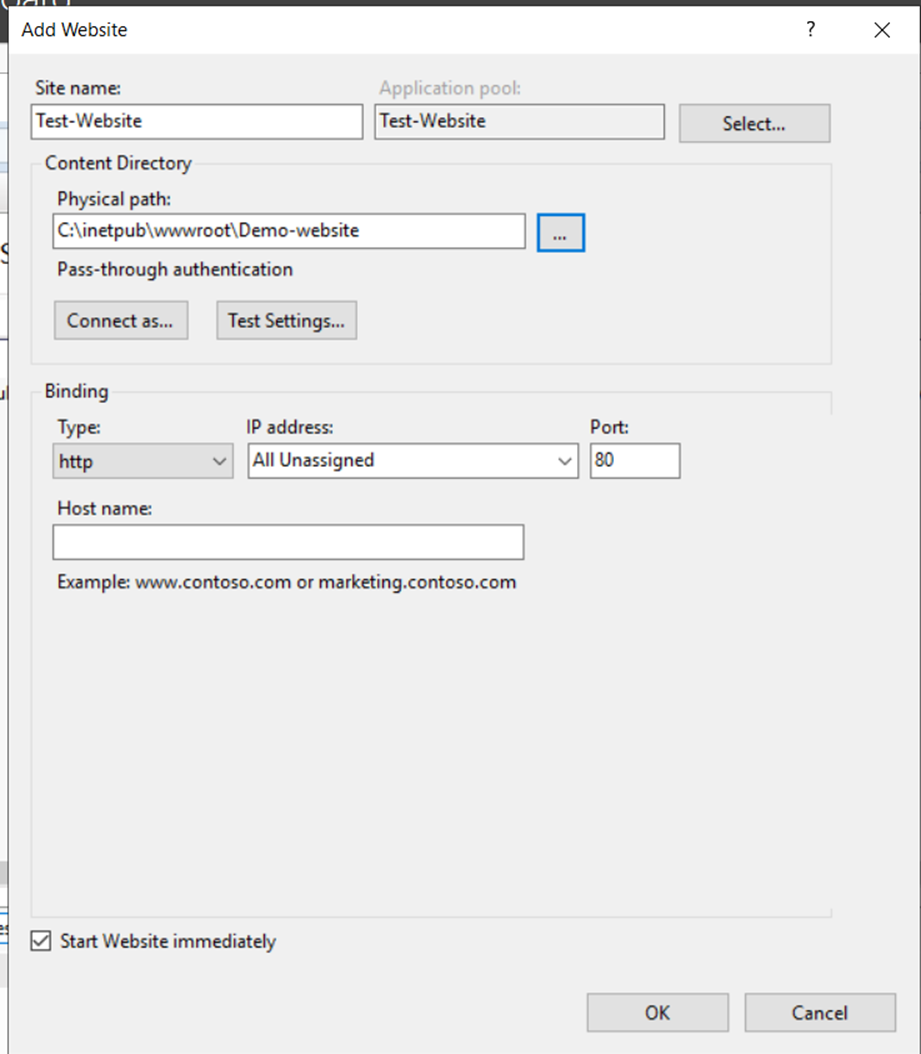
Give a name to your website and add the physical path of the file and click OK.

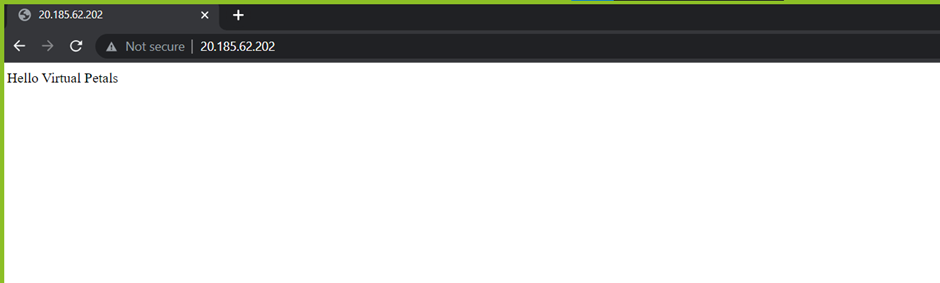
Then check weather the Azure Virtual Machine is hosting the website.

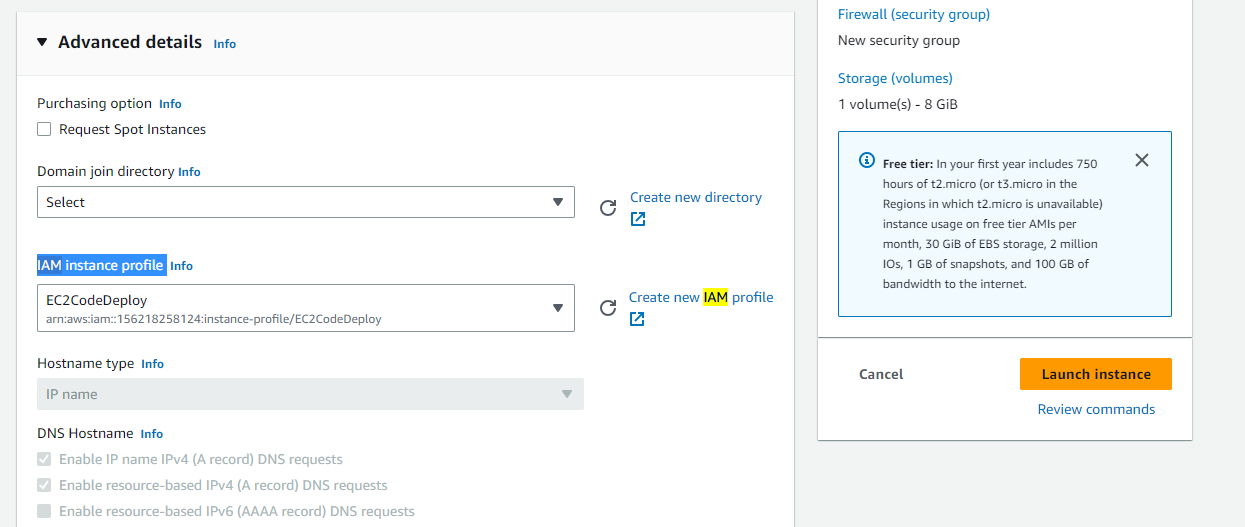
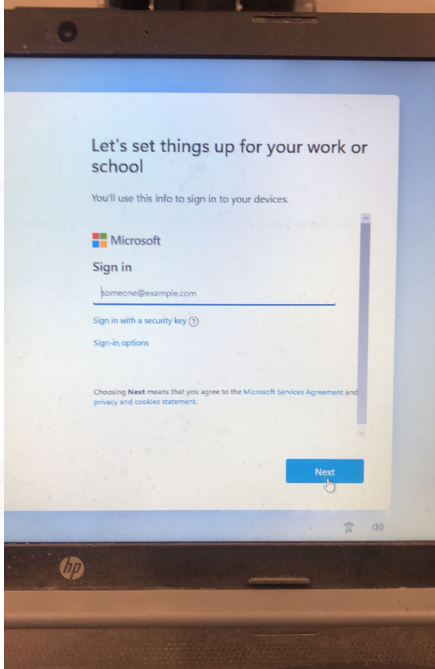
Next step create another Virtual machine to host the website in a different platform( Here I have created a VM in AWS and hosted the website).

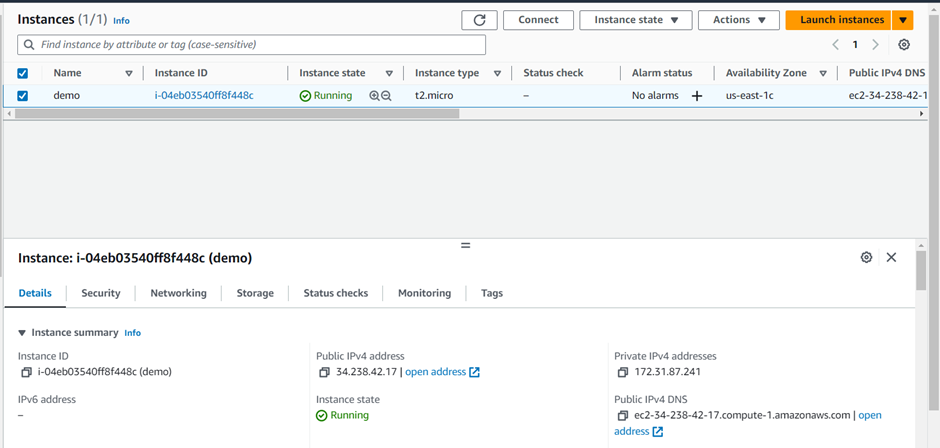
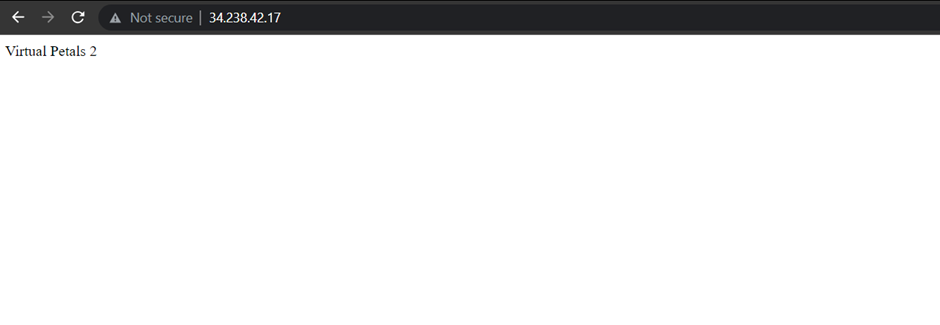
Check weather the Virtual Machine created in AWS is hosting the website.

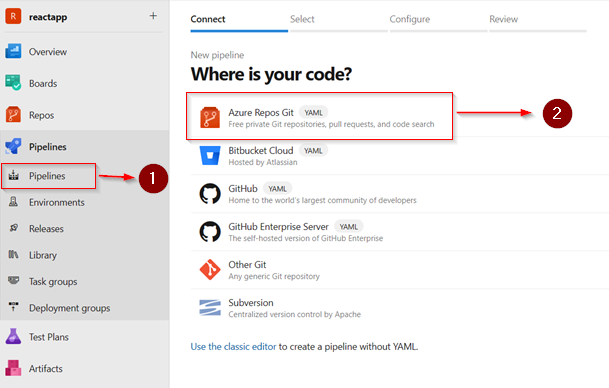
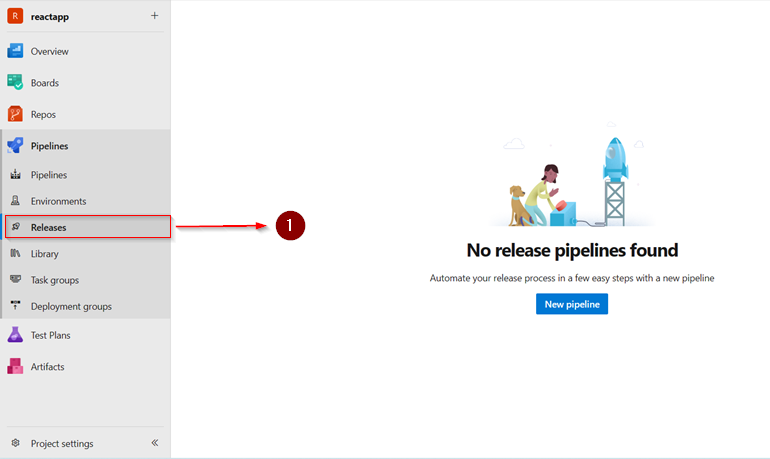
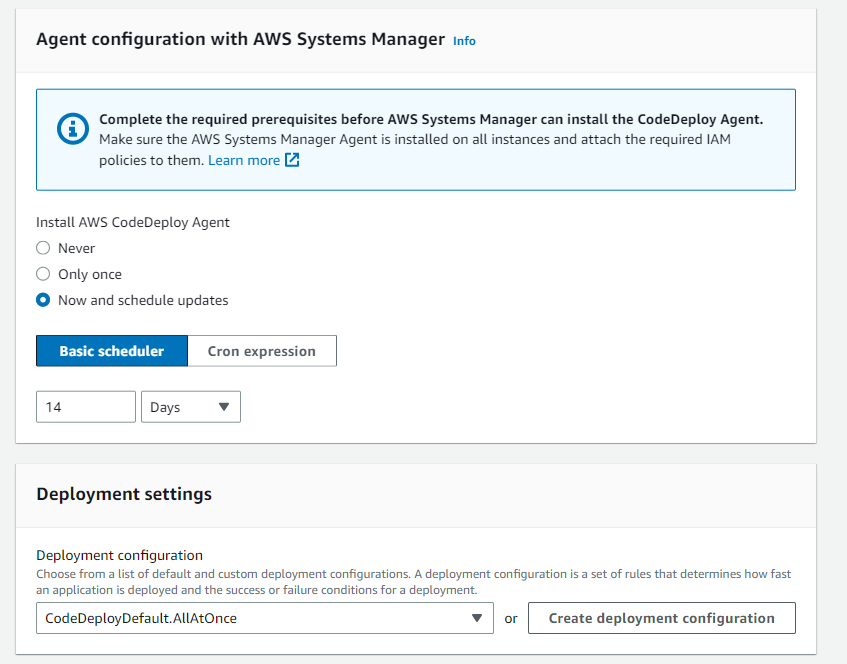
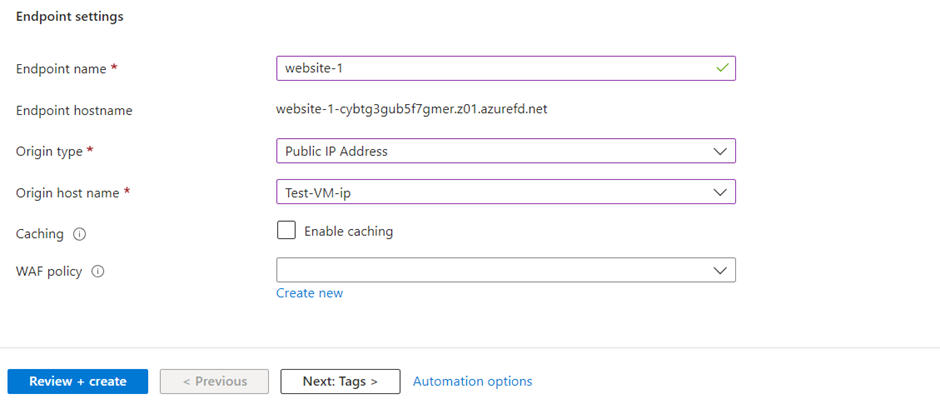
Now lets create a Azure Front Door to Load balance the Virtual Machine’s to host websites.

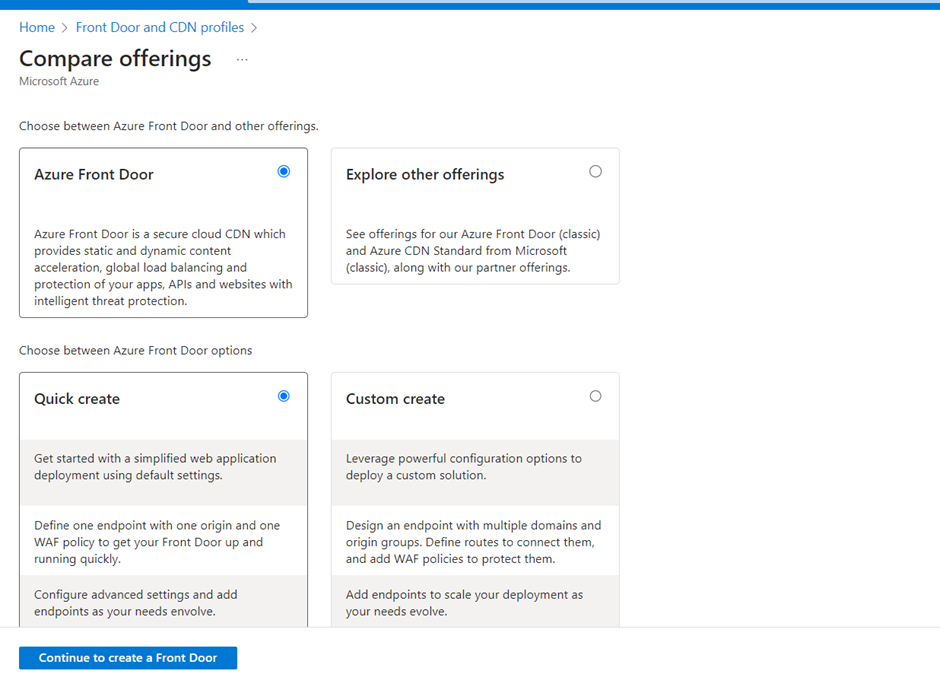
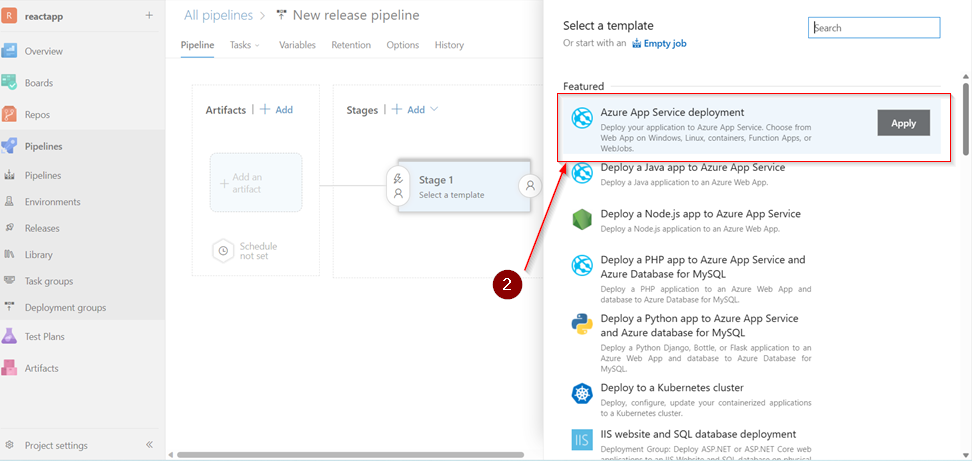
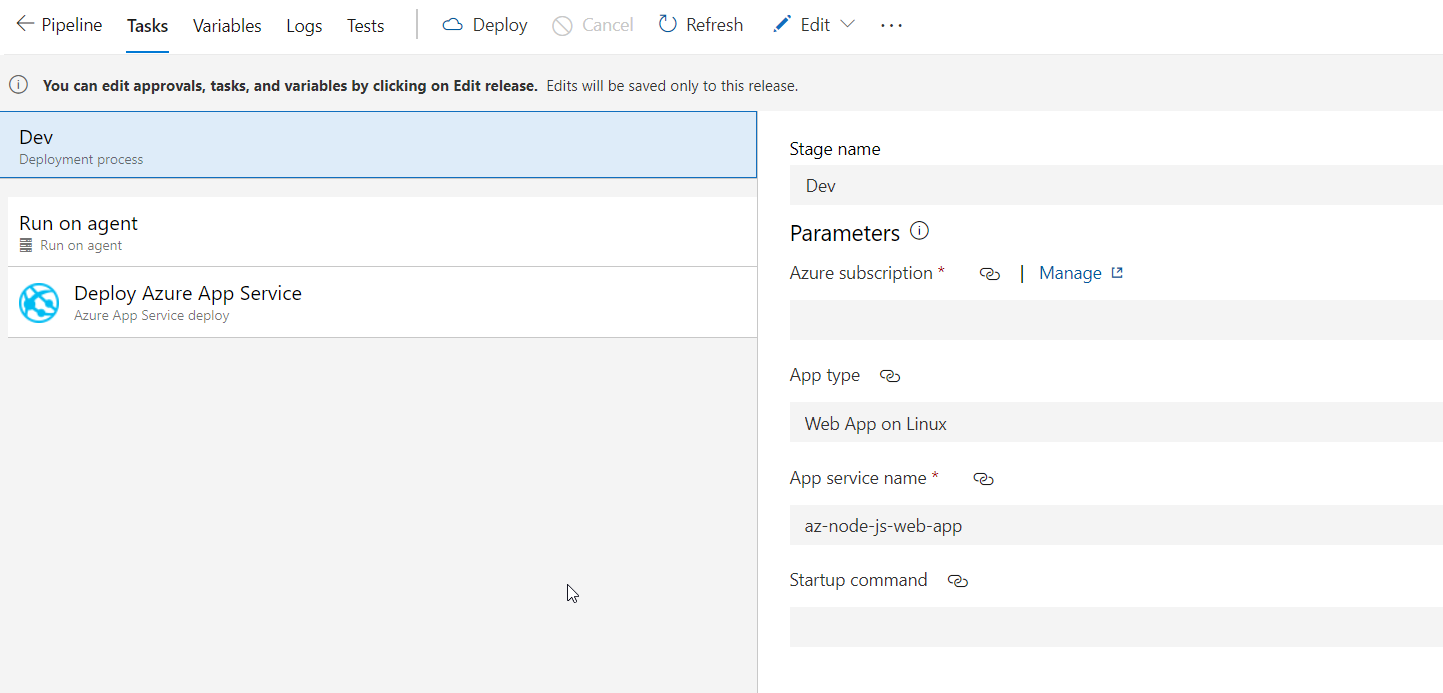
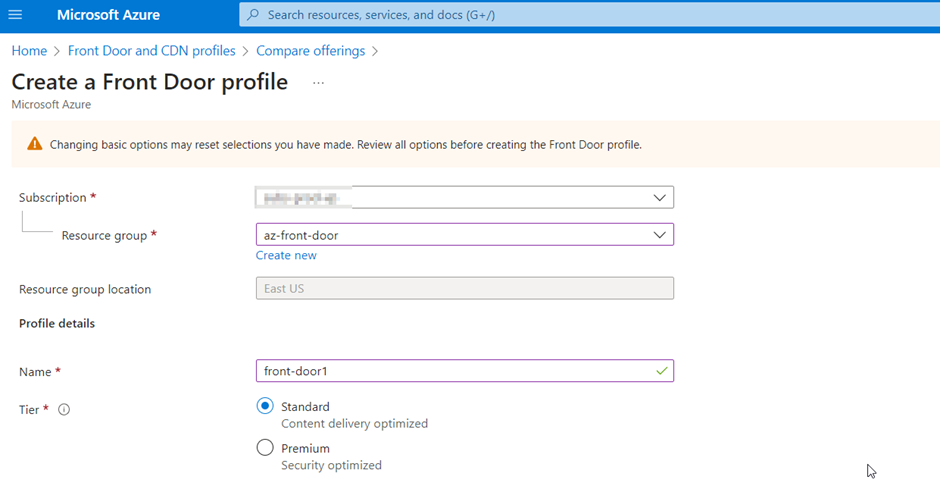
Fill the required details to create a Azure Front Door and add the primary virtual machine hosting the website.

.

Now in Azure Front Door click on Front Door Manager and click on default route.

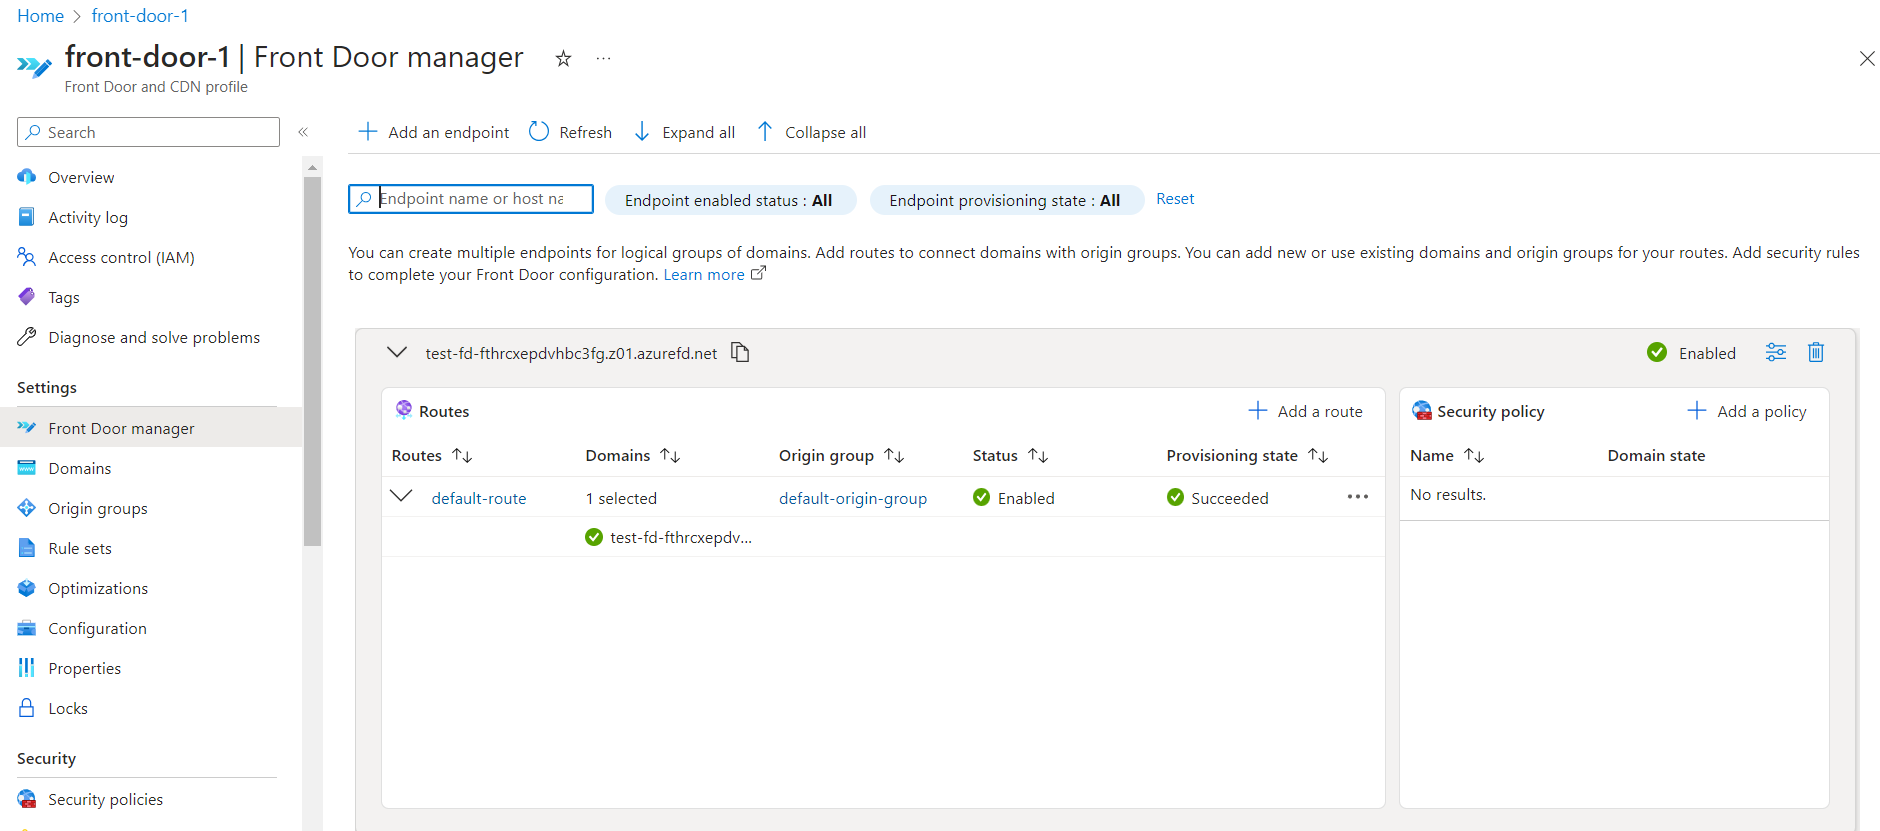
In default route setting un-check the checkbox – Redirect all traffic to use HTTPS.

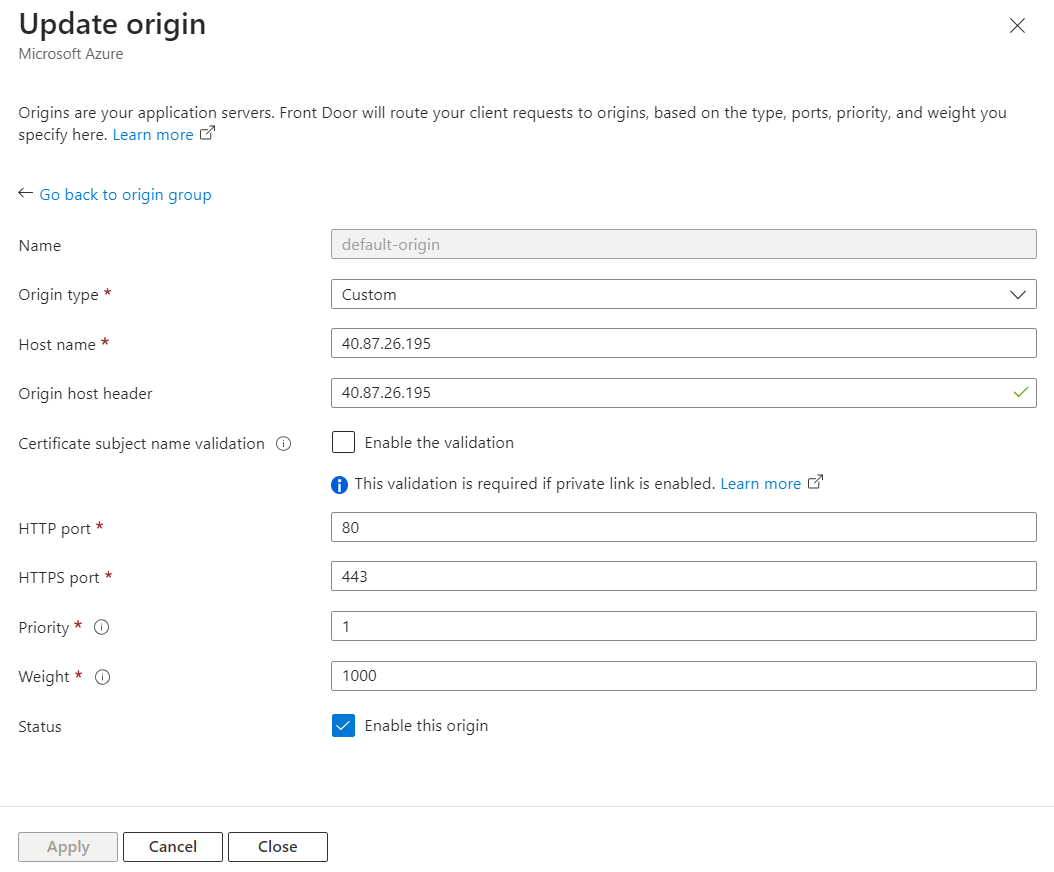
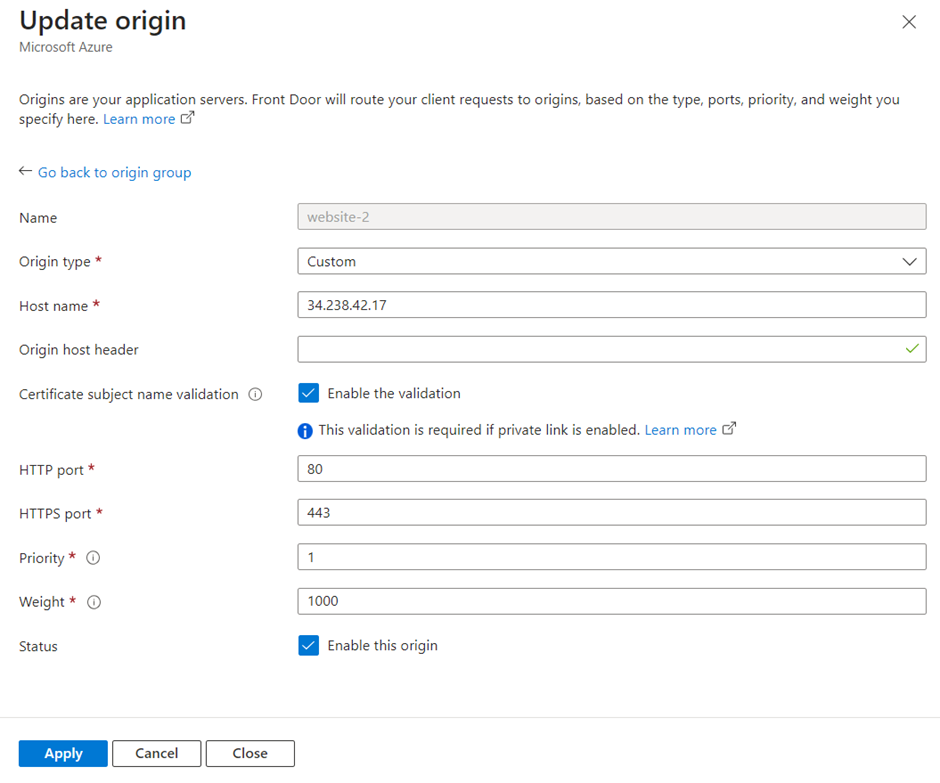
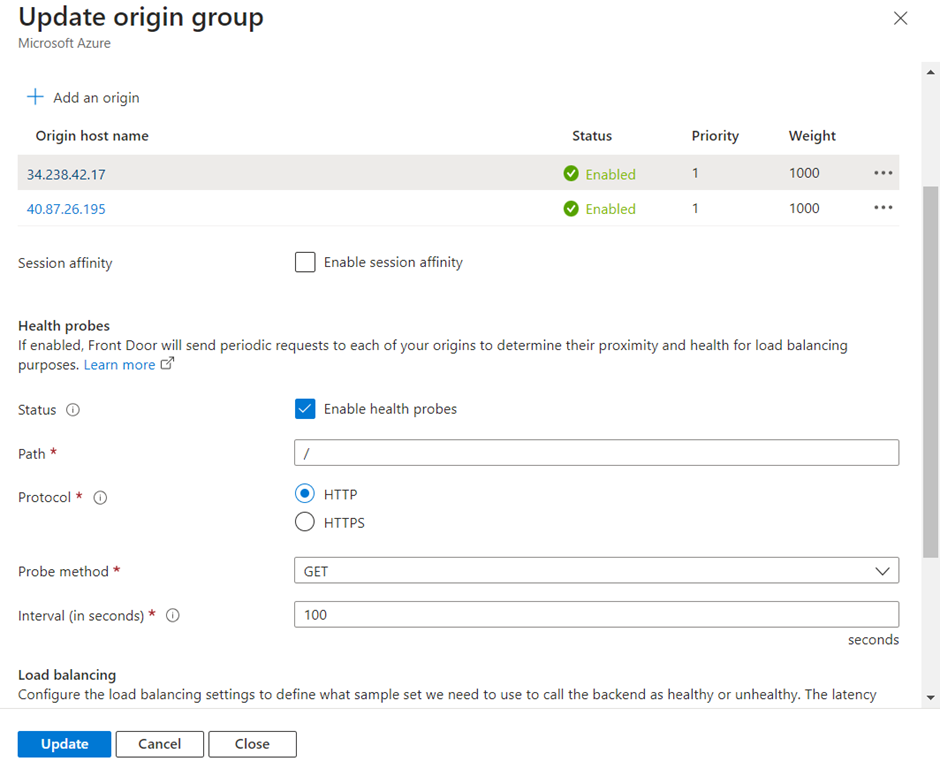
Click on default origin groups and add the both the Virtual Machine IP’s in it and give priority level as 1 for both.

.

.

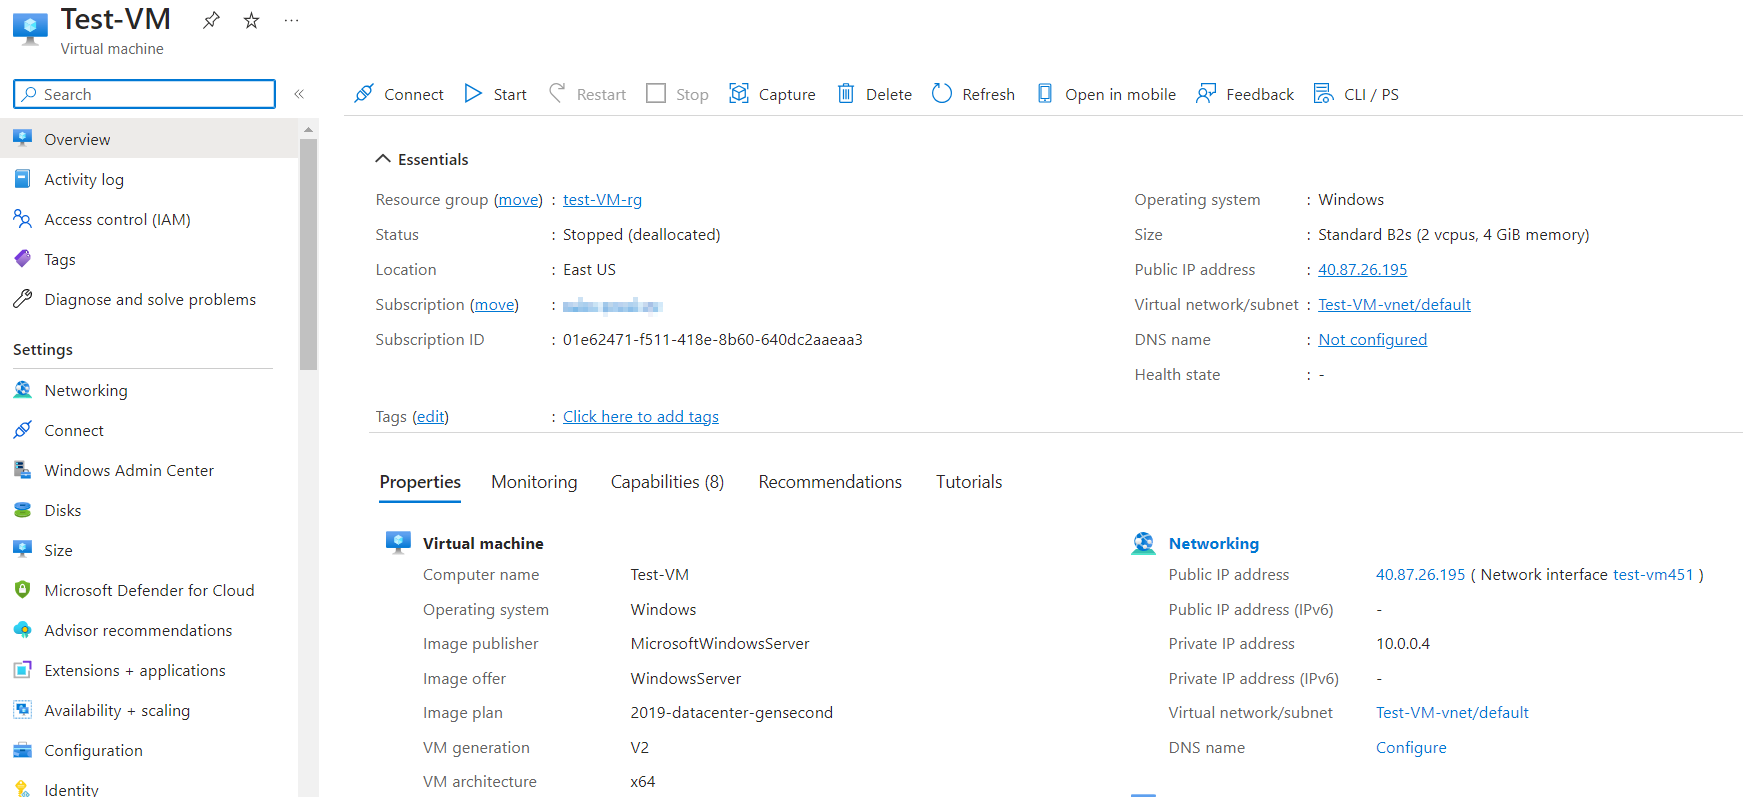
Now once Azure Front Door is created for the two virtual machine, test it by shutting down one VM that is hosting the first website.

Once its shutdown the second VM in AWS should host the second website.

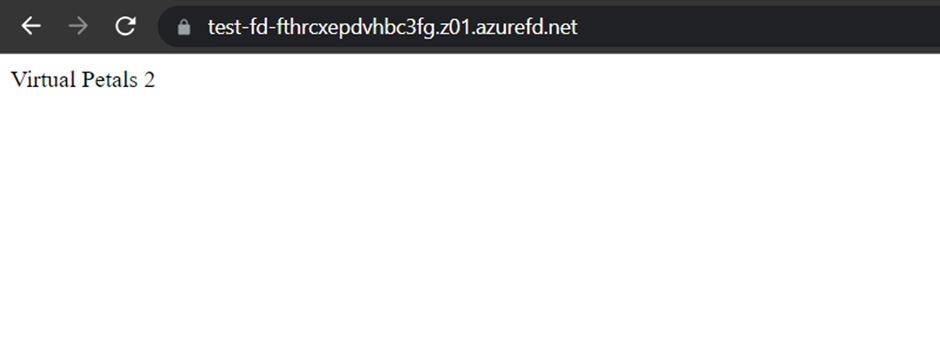
Use the Azure Front Door URL to view the website.

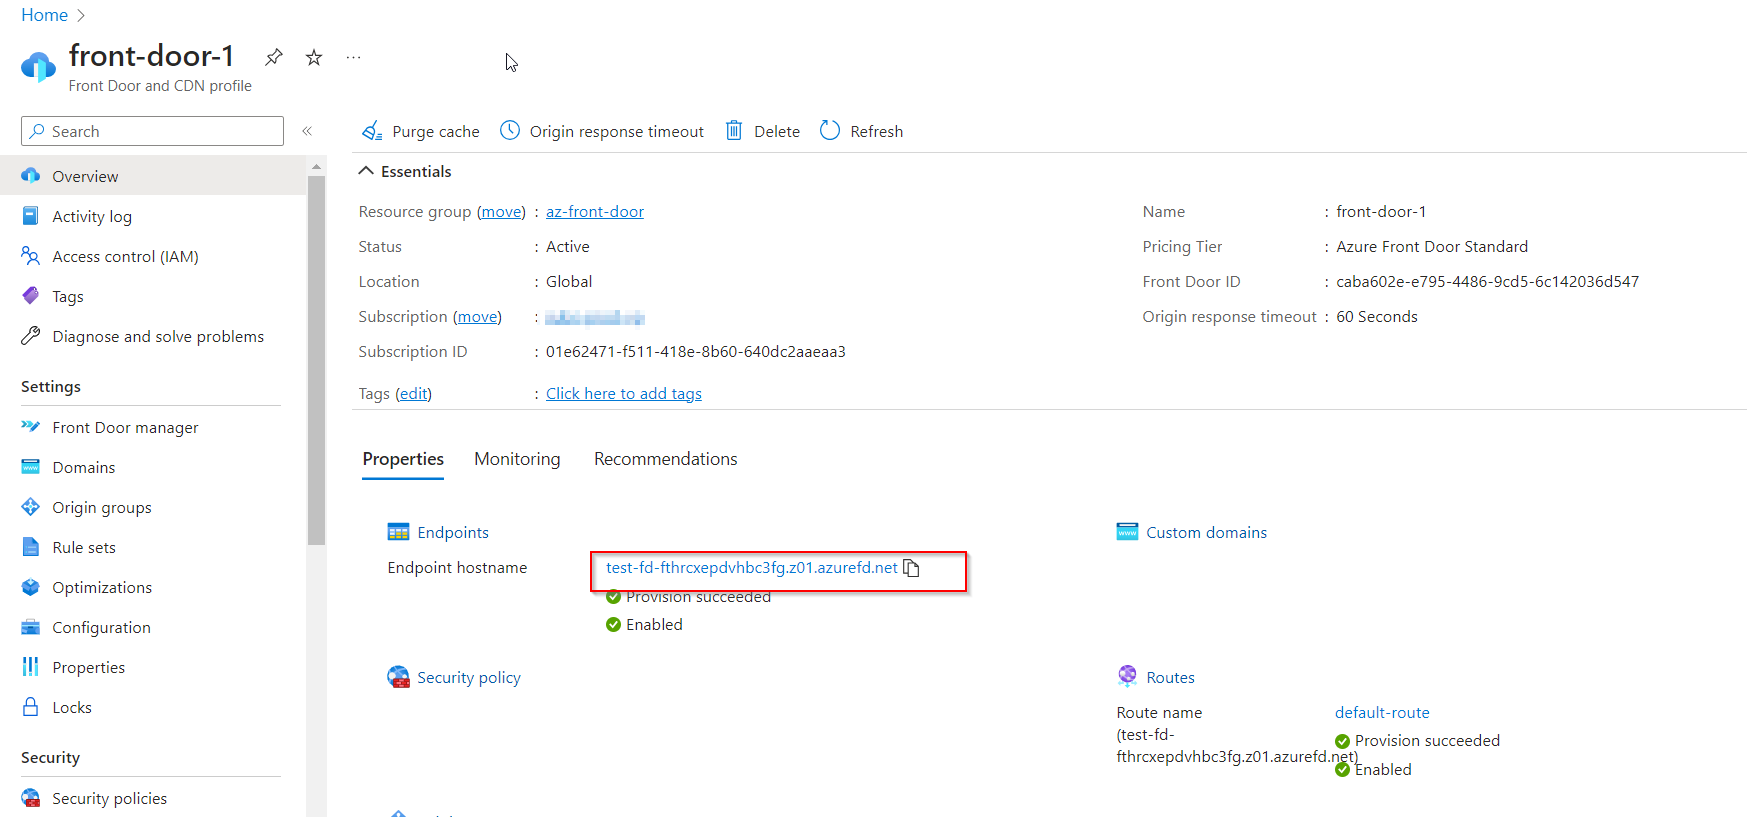
Website is hosted by the second VM using Azure Front Door successfully.

How to Deploy a React app to Azure using DevOps Pipelines

Prerequisites:

  • An Azure account with active subscription.
  • Azure DevOps (https://dev.azure.com/)
  • Code editor (Vscode.)
  • Node.js (Install the required npm package)

Step 1: Creating the React App and Test Locally.

  • mkdir App
  • cd App
  • create the app using — npx create-react-app <app-name>.
  npx create-react-app  
  cd my app  
  npm start  

This will open a browser http://localhost:3000/

Step 2: Configure Azure App Service.

Login into https://portal.azure.com

  • Create an App Service with a basic B1 App service Plan.

copy default domain link past localhost

see there are no applications then go to azure devops

Step 3: Create the Azure DevOps Project and connect to the App service instance.

Login into https://dev.azure.com/ and create a new project

Setting up a Service Connection

To connect to the App Service from DevOps, we will need to first setup a service connection. Start by opening up DevOps, and select “Project Settings”.

In the Pipelines section, select “Service Connections” and hit the “Create service connection” button.

We will select “Azure Resource Manager” as the type, and hit next

Keep “Service Principle (automatic)” as the Authentication method.

Keep “Subscription” as the scope and make sure the correct one is selected. Then make sure to choose the same Resource Group that you created for the App Service above. We will also need to create and note a “Service Connection Name” that you will be using in the pipeline next. After you are finished, hit “Save” to create your service connection.

Click on repos to copy the Git credentials on a notepad.

Push from the local to remote repository using the below git commands on Git bash.

 git init 
  git add .  

git commit -m “

  git commit -m “ new file ”  

git remote add origin

  git remote add origin <url to your Azure DevOps repo>  

This brings a prompt, login into your Azure DevOps portal then this shows that the App has been push to the Azure repo.

Step 4: Create a build pipeline; there are two methods.

Method 1 :

To connect the pipeline to the App service instance created.

  • Create pipeline.
  • Choose Azure repose (YAML)

Choosing Node.js Express Web App on Linux on Azure

Using below YAML – azure-pipelines.yml code


# Node.js with React
# Build a Node.js project that uses React.
# Add steps that analyze code, save build artifacts, deploy, and more:
# https://docs.microsoft.com/azure/devops/pipelines/languages/javascript

trigger:
- master

pool:
  vmImage: ubuntu-latest

steps:
- task: NodeTool@0
  inputs:
    versionSpec: '18.x'
  displayName: 'Install Node.js'

- script: |
    npm install
    npm run build
  displayName: 'npm install and build'

- task: ArchiveFiles@2
  inputs:
    rootFolderOrFile: '$(System.DefaultWorkingDirectory)'
    includeRootFolder: false
    archiveType: 'zip'
    archiveFile: '$(Build.ArtifactStagingDirectory)/$(Build.BuildId).zip'
    replaceExistingArchive: true

- task: PublishBuildArtifacts@1
  inputs:
    PathtoPublish: '$(Build.ArtifactStagingDirectory)'
    ArtifactName: 'drop'
    publishLocation: 'Container' 

As you can see below, running this store my build to Azure Artifact where Azure Releases can use them.

Step 5: Creating the release pipeline and Deploying to Azure

This is to push the code from the build pipeline from CI/CD to Azure Web App.

Enable continuous integration on the project

Choose azure app service deployment

The startup command set to

pm2 serve /home/site/wwwroot/build --no-daemon --spa

click to save then run pipelines

succeeded Pipelines

Now we have a successful deployment, we can navigate on to the Web App URL simplereactappp.azurewebsites.net which should be running

Method 2

To connect the pipeline to the App service instance created.

  • Create pipeline.
  • Choose Azure repose (YAML)
  • Choosing Node.js Express Web App on Linux on Azure

Using below YAML – azure-pipelines.yml code

   trigger:
- master

variables:

  # Azure Resource Manager connection created during pipeline creation
  azureSubscription: 'xxxxxxxxx'

  # Web app name
  webAppName: 'xxxxx'

  # Environment name
  environmentName: 'xxxxx'

  # Agent VM image name
  vmImageName: 'ubuntu-latest'

stages:
- stage: Build
  displayName: Build stage
  jobs:
  - job: Build
    displayName: Build
    pool:
      vmImage: $(vmImageName)

    steps:
    - task: NodeTool@0
      inputs:
        versionSpec: '18.x'
      displayName: 'Install Node.js'

    - script: |
        npm install
        npm run build --if-present
      displayName: 'npm install, build'

    - task: ArchiveFiles@2
      displayName: 'Archive files'
      inputs:
        rootFolderOrFile: '$(System.DefaultWorkingDirectory)'
        includeRootFolder: false
        archiveType: zip
        archiveFile: $(Build.ArtifactStagingDirectory)/$(Build.BuildId).zip
        replaceExistingArchive: true

    - upload: $(Build.ArtifactStagingDirectory)/$(Build.BuildId).zip
      artifact: drop

- stage: Deploy
  displayName: Deploy stage
  dependsOn: Build
  condition: succeeded()
  jobs:
  - deployment: Deploy
    displayName: Deploy
    environment: $(environmentName)
    pool:
      vmImage: $(vmImageName)
    strategy:
      runOnce:
        deploy:
          steps:
          - task: AzureWebApp@1
            displayName: 'Azure Web App Deploy: xxxxx'
            inputs:
              azureSubscription: 'xxxxx'
              appType: 'webAppLinux'
              appName: 'xxxx'
              deployToSlotOrASE: true
              resourceGroupName: 'xxx'
              slotName: 'production'
              package: '$(Pipeline.Workspace)/drop/$(Build.BuildId).zip'
              runtimeStack: 'NODE|18-lts'  

Successful Deploy

Deploy Node.js to Azure App Service with Azure DevOps

Install Node.js on a local device with recommended systems configuration and run Node.js app using Visual Studio Code by the following commands.

npm install
npm run
node filename.js

After running the node.js services, create a Azure app service for Node.js in azure portal.

.

Now lets create repository in Azure Devops and add a branch called develop and push all the application to that branch.

.

Add a file and and past the below code and save it with an extension .yml and click on commit.

[powershell]
# Node.js
# Build a general Node.js project with npm.
# Add steps that analyze code, save build artifacts, deploy, and more:
# https://docs.microsoft.com/azure/devops/pipelines/languages/javascript

trigger:
- main
- develop

pool:
  vmImage: ubuntu-latest

steps:
- task: NodeTool@0
  inputs:
    versionSpec: '18.x'
  displayName: 'Install Node.js'

- script: |
    cd ./backend
    npm install
   # npm run build
  displayName: 'npm install and build'

- task: ArchiveFiles@2
  inputs:
    rootFolderOrFile: '$(System.DefaultWorkingDirectory)/backend'
    includeRootFolder: false
    archiveType: 'zip'
    archiveFile: '$(Build.ArtifactStagingDirectory)/$(Build.BuildId).zip'
    replaceExistingArchive: true

- task: PublishBuildArtifacts@1
  inputs:
    PathtoPublish: '$(Build.ArtifactStagingDirectory)'
    ArtifactName: 'drop'
    publishLocation: 'Container'


[/powershell]

.

Now lets start creating a Pipeline for the Node.js application.

Click on Pipelines and click on new pipeline. Select the current repository and add the existing YAML file and

run the pipeline.

.

Once pipeline creation is successful, lets create a release pipeline.

Create a release pipeline using the information’s from the Azure app service that you have created early and deploy the release pipeline.

.
.
.

The release pipeline that deploys the code tp the Azure app service.

.

The output for the code that is deployed to the Azure app service

Prepare AWS EC2 for Java Spring Boot Application and CodeDeploy

This article provides a step-by-step guide on preparing an AWS EC2 instance for running a Java Spring Boot application with CodeDeploy. The process includes executing the following commands in PowerShell:

  1. Updating the EC2 instance with the latest packages using the command sudo yum update.
  2. Installing the Amazon Corretto 17 JDK in headless mode for Java application support with sudo yum install java-17-amazon-corretto-headless.x86_64 -y.
  3. Installing Ruby as a prerequisite for CodeDeploy using the command sudo yum install ruby -y.
  4. Navigating to the /home/ec2-user directory with cd /home/ec2-user.
  5. Downloading the CodeDeploy agent installer script from the AWS S3 bucket using wget.
  6. Granting executable permissions to the installer script with chmod +x ./install.
  7. Running the CodeDeploy agent installer script in automatic mode with sudo ./install auto.

By following these instructions, you will set up your EC2 instance to be ready for deploying and managing Java Spring Boot applications using CodeDeploy.

.

Created .ppk key pair

.
.

Assign Proper IAM Role for Code Deploy

.
.
sudo yum update
sudo yum install java-17-amazon-corretto-headless.x86_64 -y
sudo yum install ruby -y
cd /home/ec2-user
wget https://aws-codedeploy-us-east-1.s3.us-east-1.amazonaws.com/latest/install
chmod +x ./install
sudo ./install auto
.
.
.
.
.
.

You can verify the installation.

sudo service codedeploy-agent status
java -version

It is recommended to let the AWS Systems manager Deploy the agent , In our scenario we are doing everything manually.

Windows AutoPilot Screen Not Appearing

Auto Pilot, upon reboot, keeps coming as a normal screen. Not entering into the autopilot screen.

Reason 1 – It could be Home Edition

Reason 2 – It could be Conditional Access Causing the issue like Compliant Devices or Unknown devices rule is blocking (intune company portal and extension pack should be excluded)

Reason 3 – Azure AD registered device should be deleted and should be imported again . as the old device causing the issue.

Type Win + R – Win Ver –

If it shows Windows 11 Home Single Language Operating System. Auto Pilot will never work until you convert this to Pro or EnterpriseAs Home Edition is not supported with Windows Auto Pilot.

For Home Edition, you will see an event viewer error as
Event ID 100 – Autopilot Policy [CloudAssignedRegion] not found


Set-Executionpolicy -scope process -Executionpolicy unrestricted -force
Install-script -name Get-WindowsAutoPilotinfo -force

Convert to pro and simply run below to auto import the serial number.

Get-WindowsAutoPilotinfo -online

Install Node Js using nvm

To install Node.js using nvm (Node Version Manager), follow these four steps:

  1. Install nvm: Download and install nvm, a tool for managing multiple Node.js versions, by executing the installation command provided by the nvm documentation for your operating system.

    Download Install nvm
    Releases · coreybutler/nvm-windows (github.com)
    Using nvm-setup.exe for windows
  2. Open a new terminal: After nvm is successfully installed, open a new terminal window or tab to ensure the changes take effect.
  3. Install Node.js: Run the following command in the terminal to install the latest stable version of Node.js:
nvm install 18
nvm use 18
  1. Verify the installation: To verify that Node.js is installed correctly, run the following command:

It should display the installed Node.js version.

That’s it! You have now installed Node.js using nvm.

× How can I help you?