1. Developers pull remote repository on local machine and apply latest changes
2. Commit code and push to Azure repository develop branch
3. The latest changes are reviewed and merged to Azure repository main or master branch
4. Automatically trigger the build and deploy web app on Azure app service
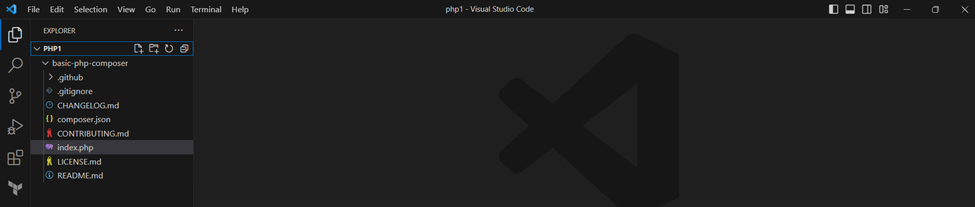
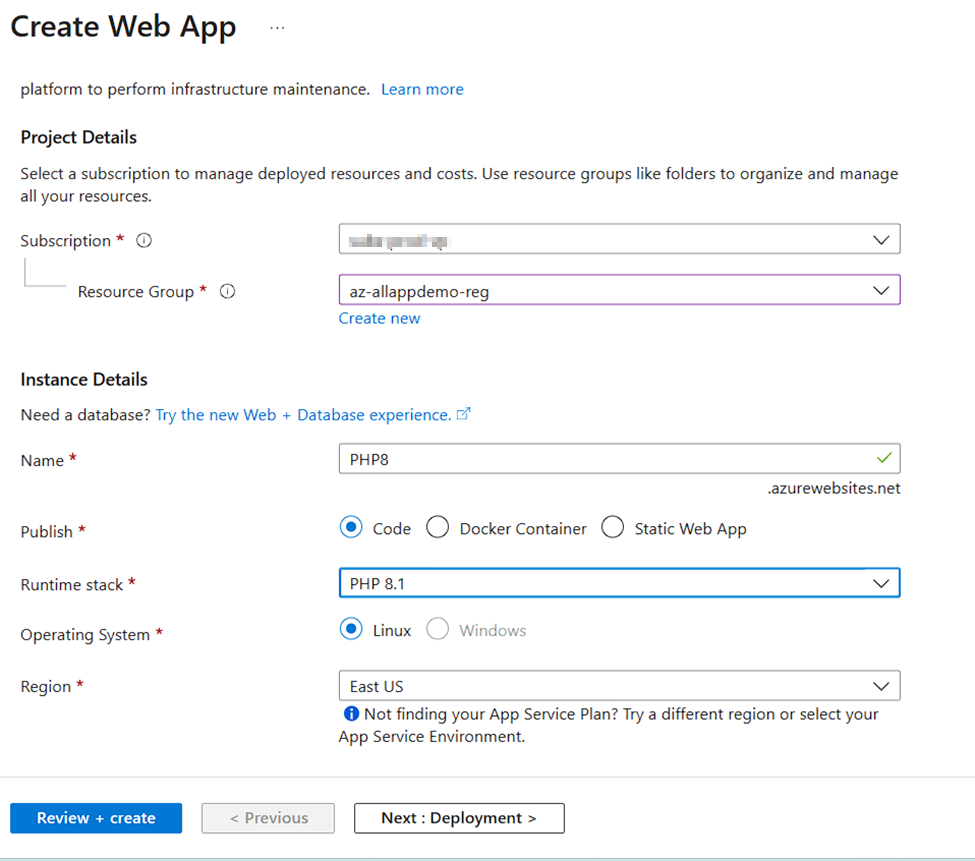
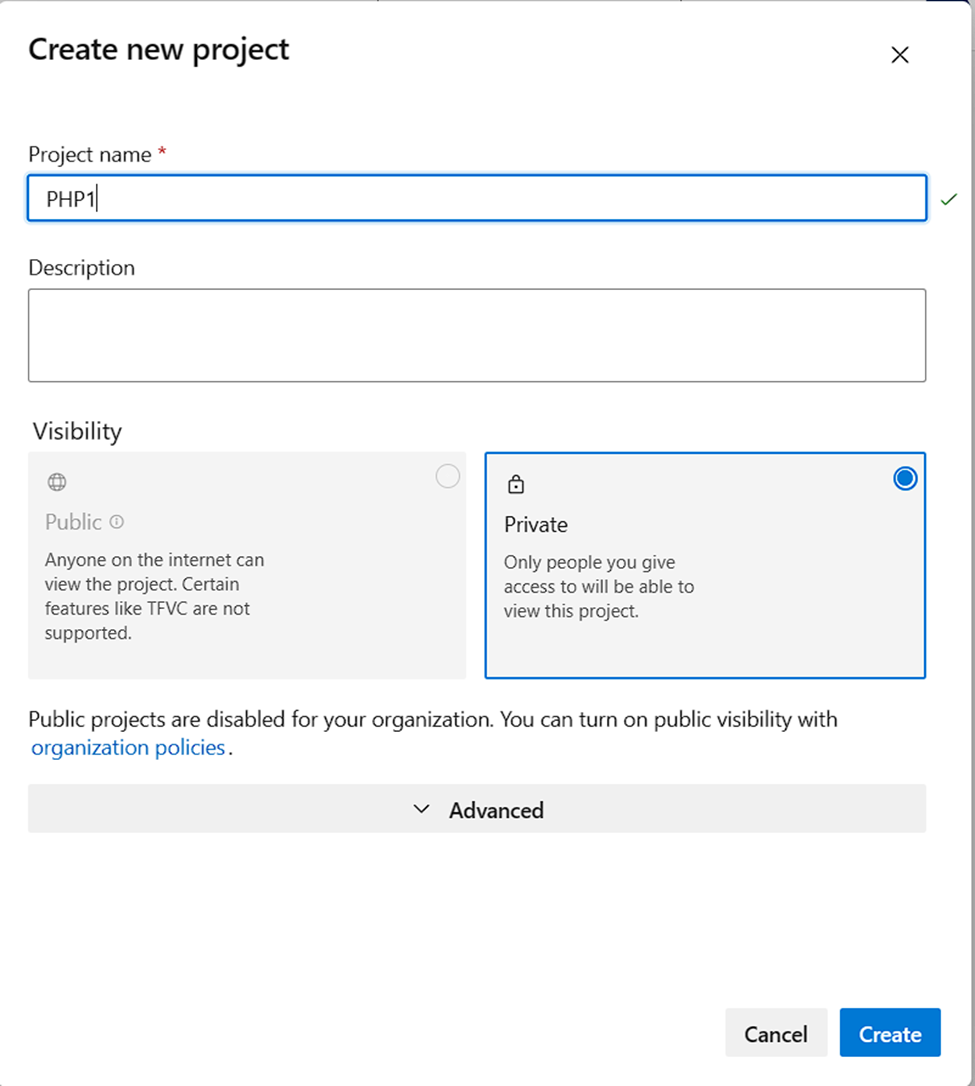
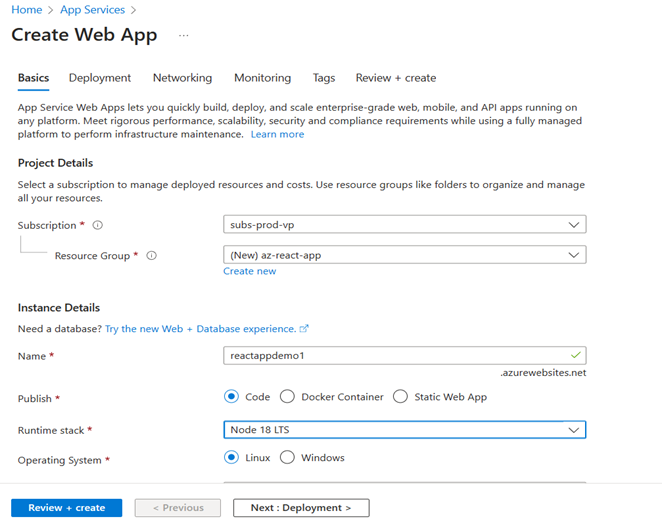
Step 1: Creating the PHP Web app and Test Locally.
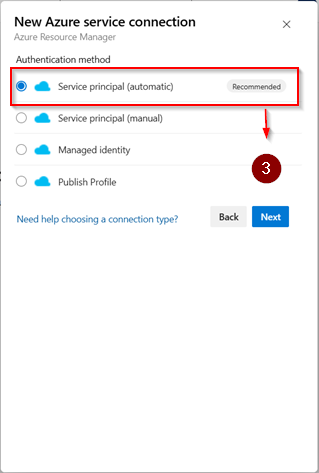
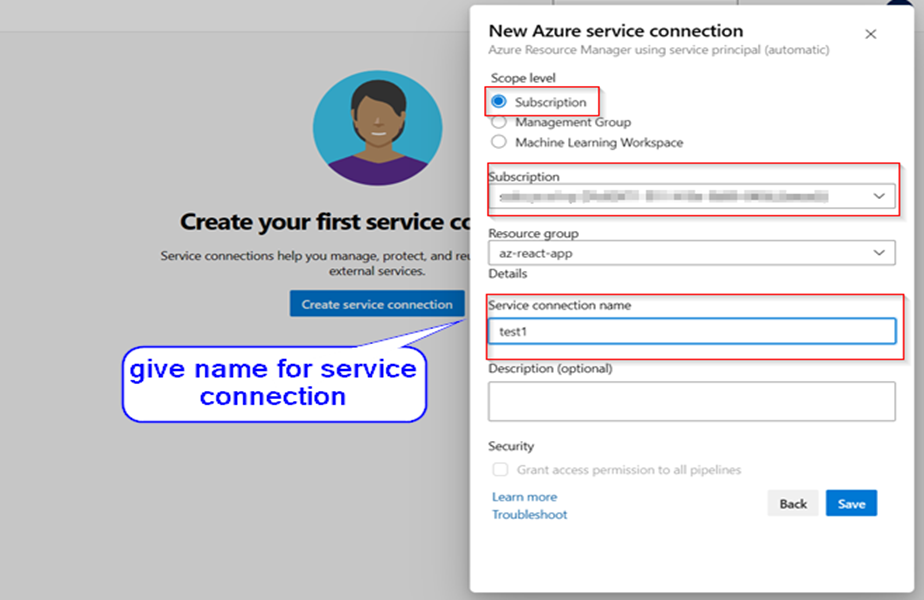
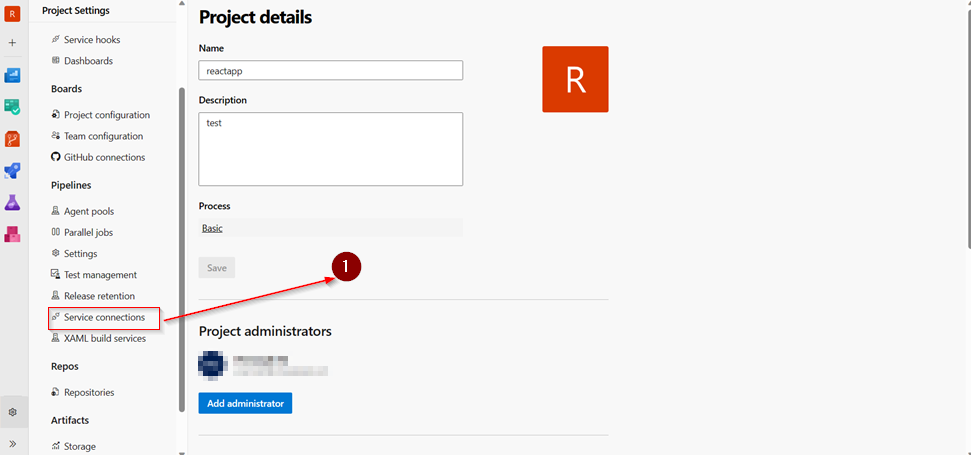
To connect to the App Service from DevOps, we will need to first setup a service connection. Start by opening up DevOps, and select “Project Settings”.
In the Pipelines section, select “Service Connections” and hit the “Create service connection” button.
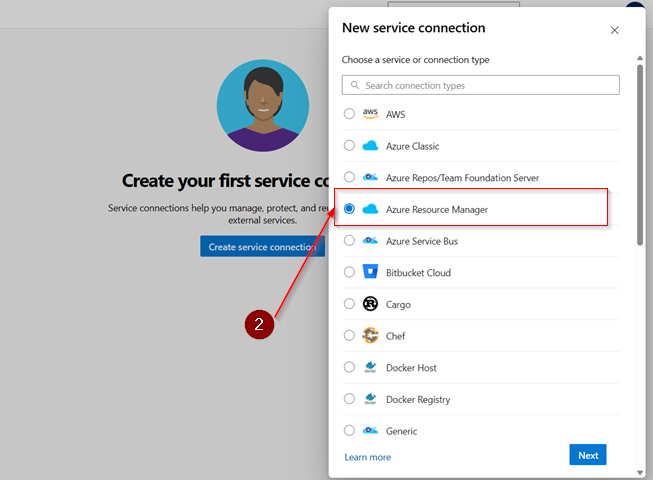
We will select “Azure Resource Manager” as the type, and hit next
Keep “Service Principle (automatic)” as the Authentication method.
Keep “Subscription” as the scope and make sure the correct one is selected. Then make sure to choose the same Resource Group that you created for the App Service above. We will also need to create and note a “Service Connection Name” that you will be using in the pipeline next. After you are finished, hit “Save” to create your service connection.
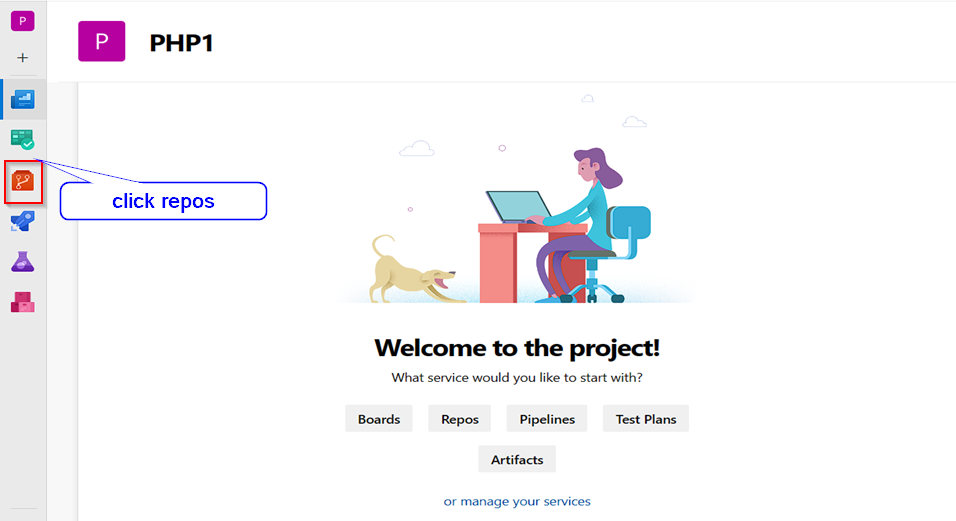
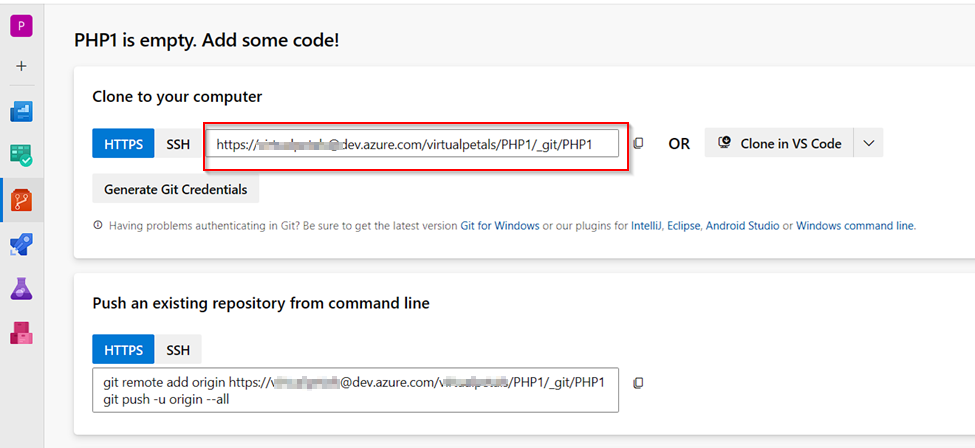
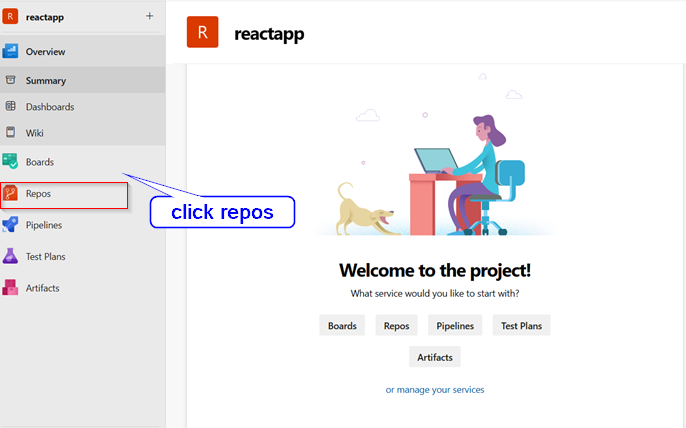
Click on repos to copy the Git credentials on a notepad.
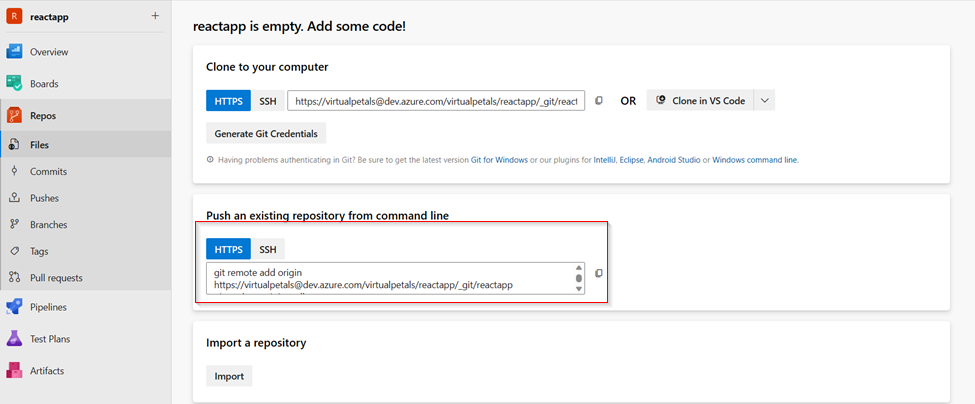
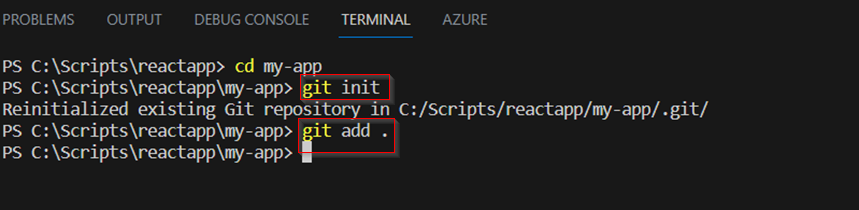
Push from the local to remote repository using the below git commands on Git bash.
git init
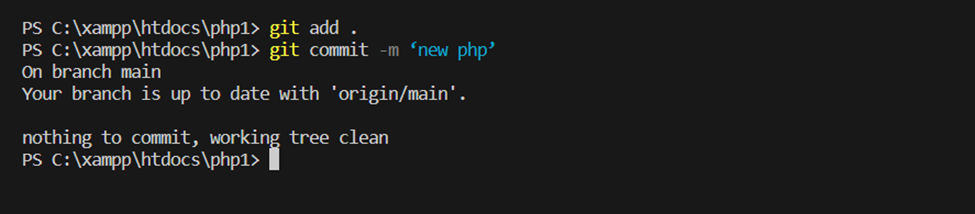
git add .
git commit -m ‘initial commit’
git push
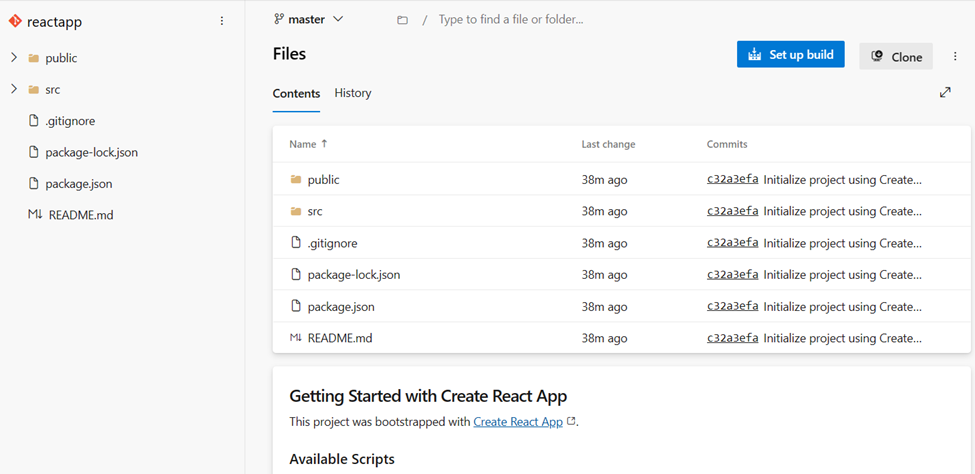
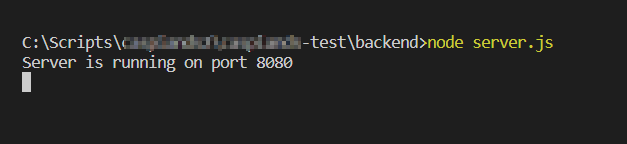
This brings a prompt, login into your Azure DevOps portal then this shows that the App has been push to the Azure repo.
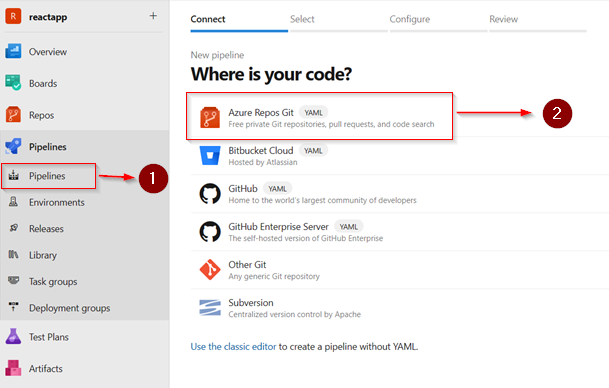
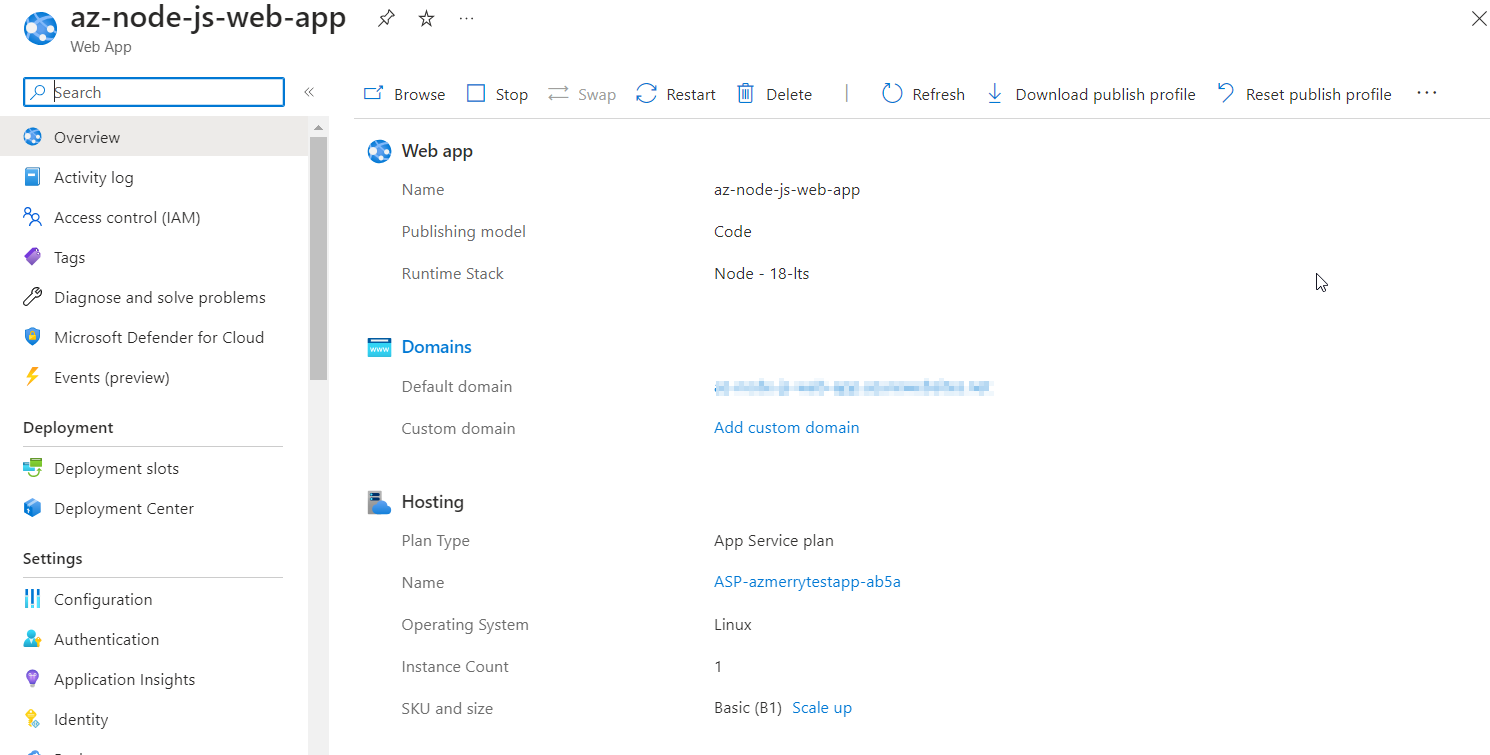
Step 4: Create a Build Pipeline.
To connect the pipeline to the App service instance created.
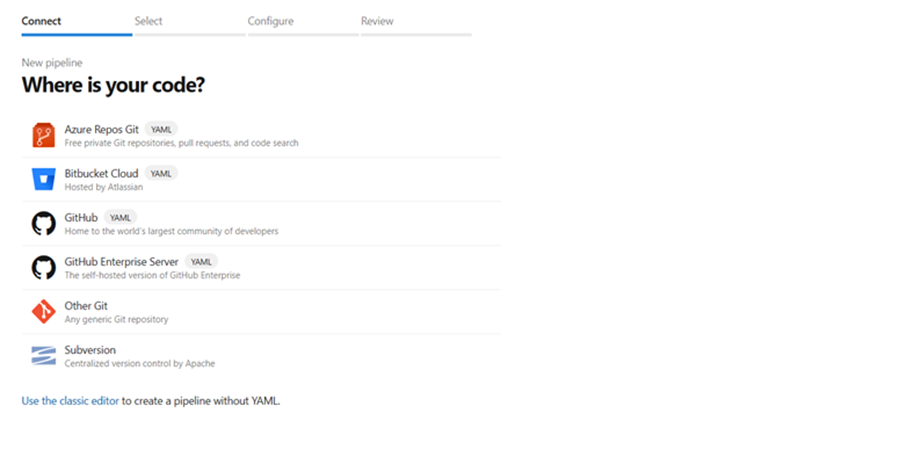
1.Create pipeline.
2.Choose Azure repose (YAML)
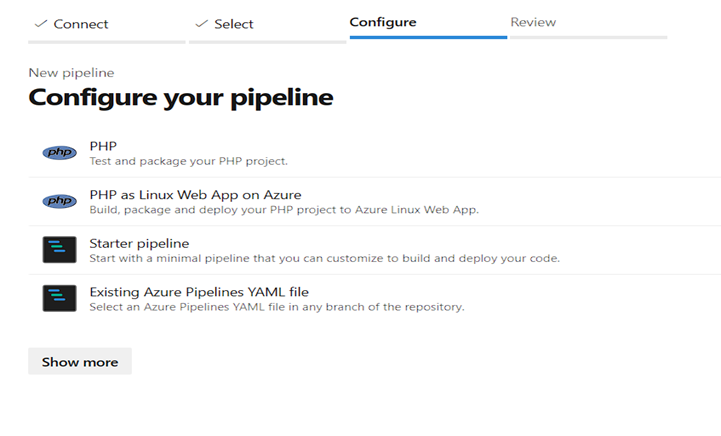
Select PHP as Linux Web App on Azure to configure your pipeline.
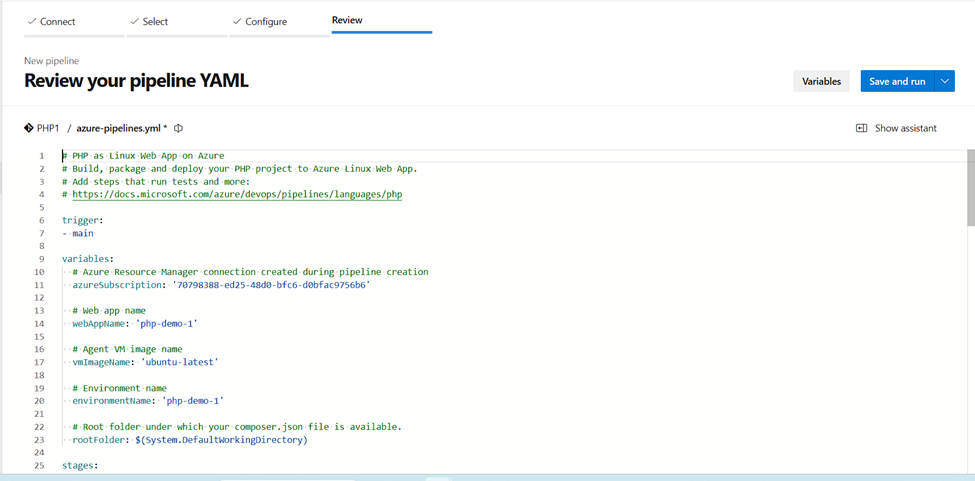
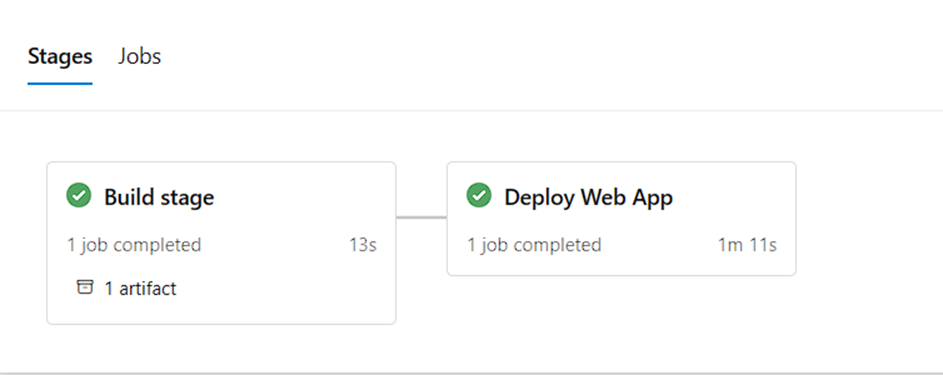
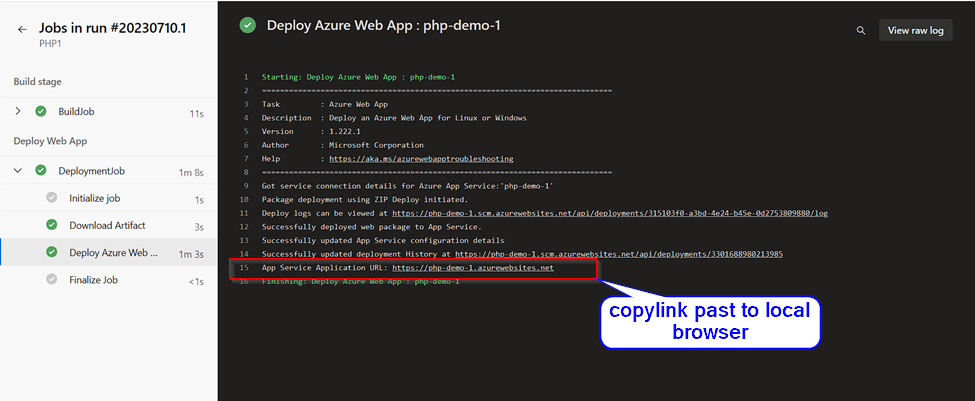
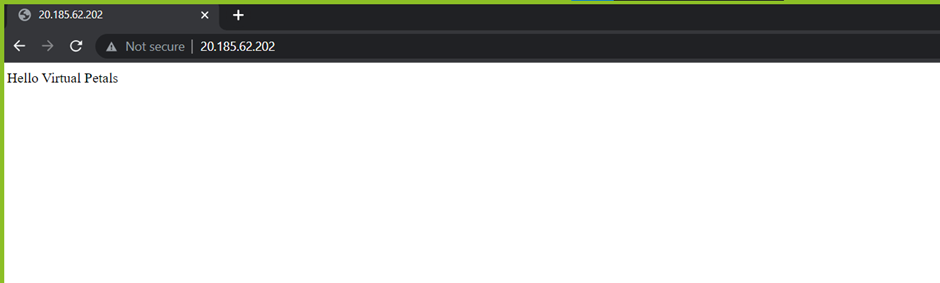
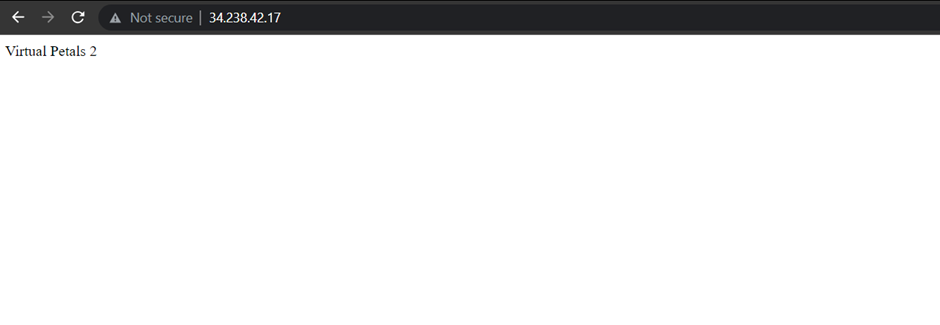
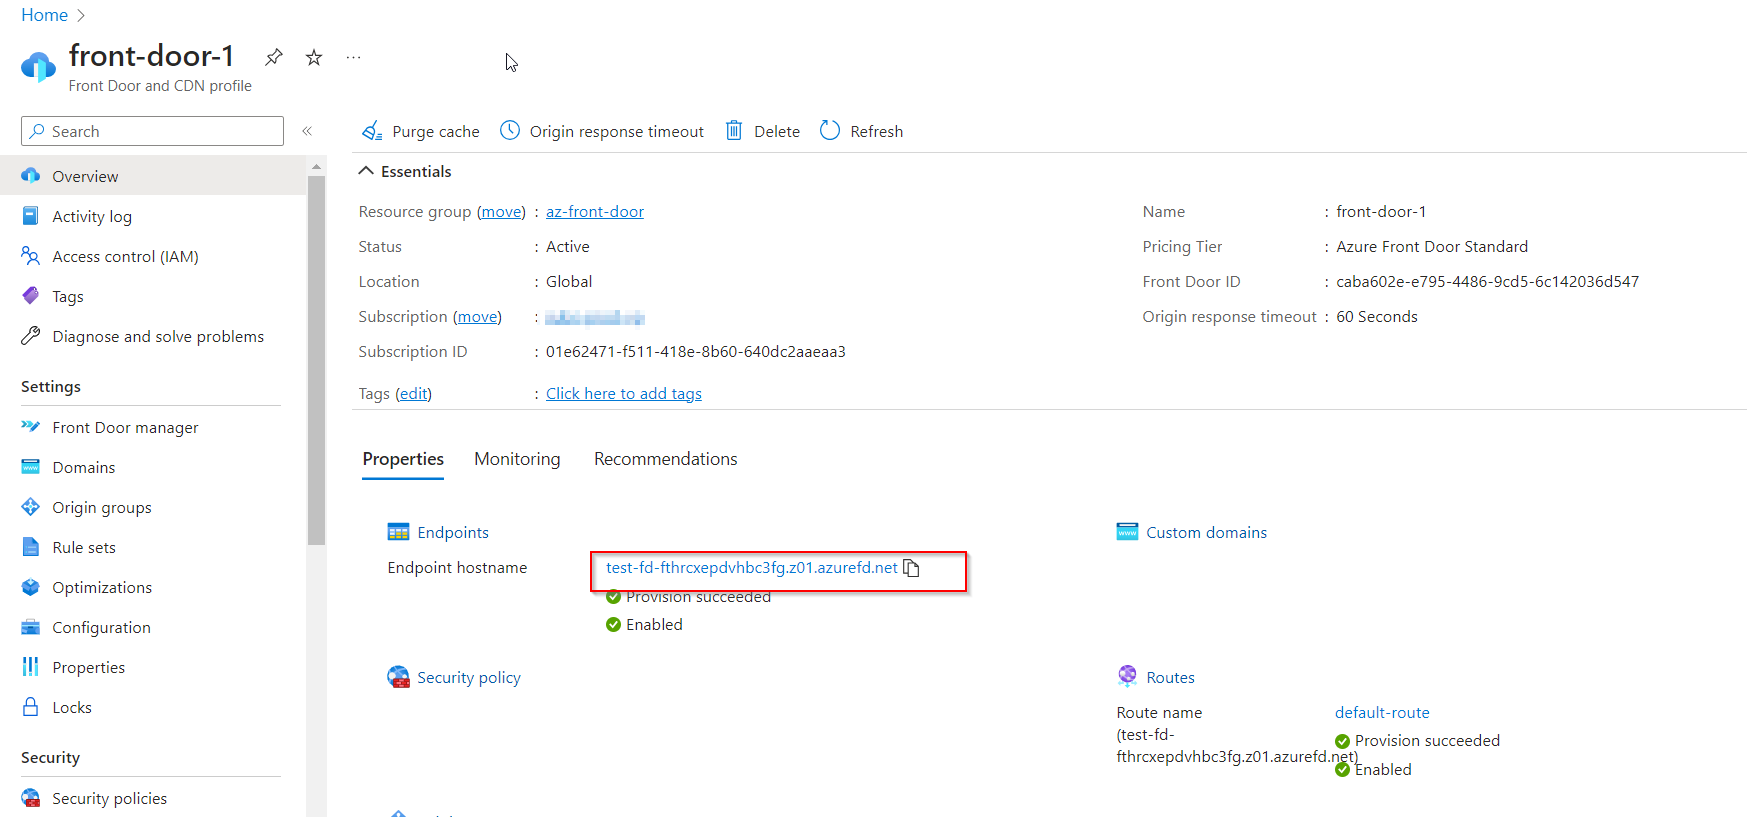
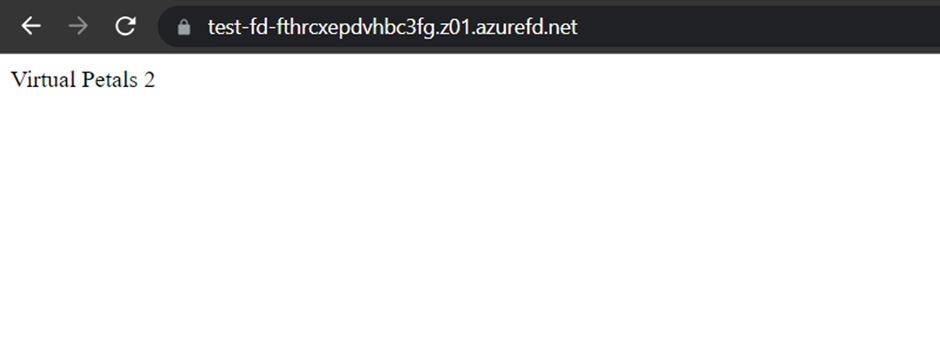
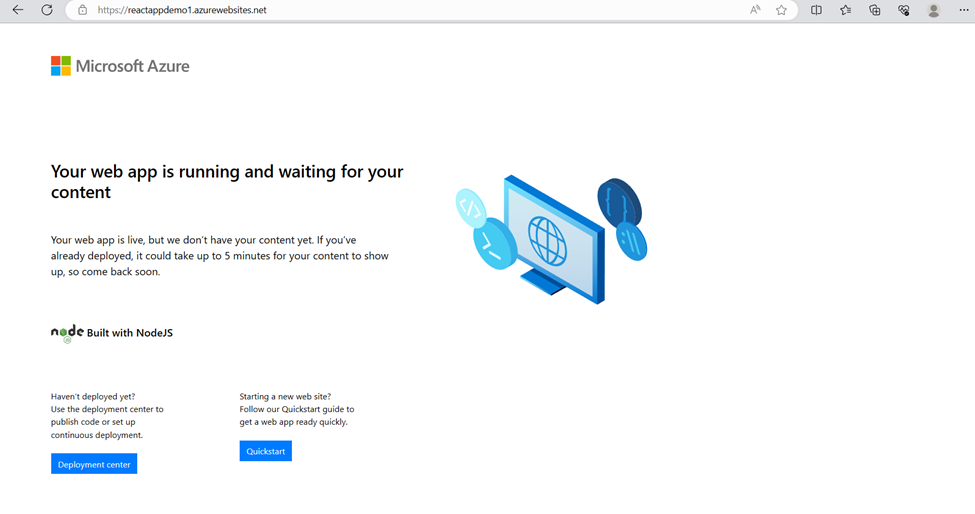
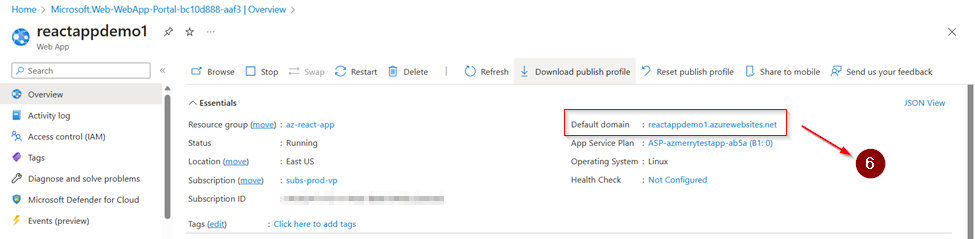
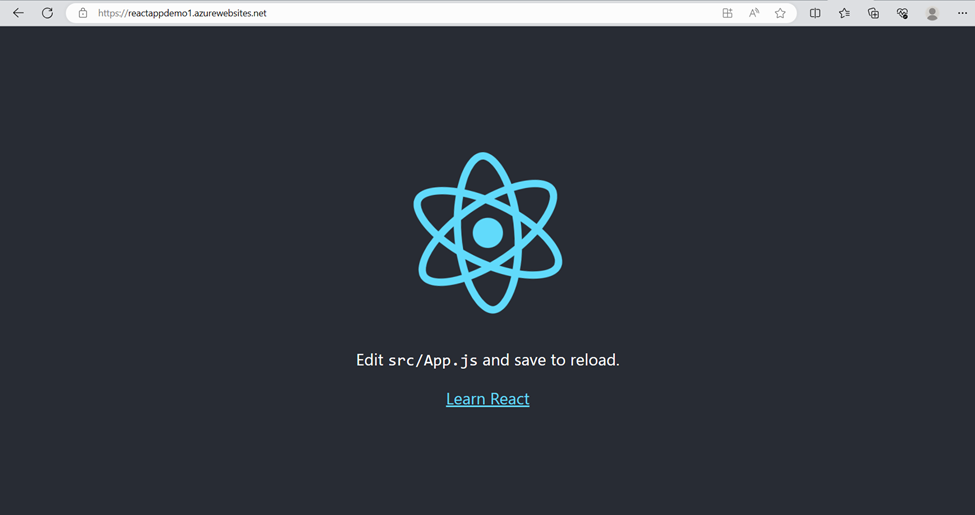
The YAML file configuration triggers the pipeline to run whenever there is any update in the main branch of the repository. It builds and releases the code without having to make separate release pipeline. The stages will show that the code has been archived and deployed and the changes can be verified by reloading app service URL.
Local Browser
Key notes
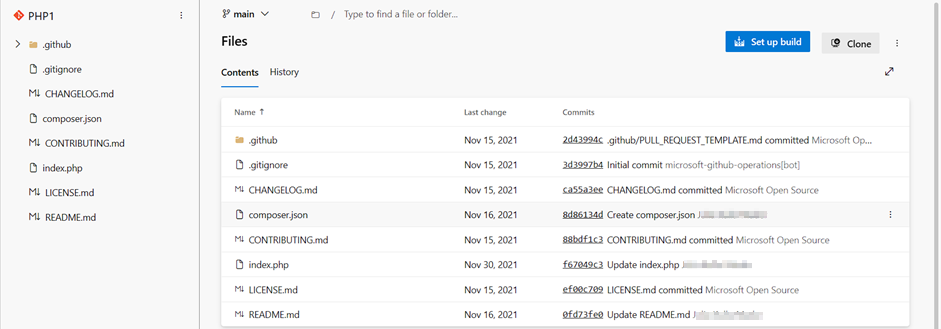
composer. Json files is important to set upbuild. otherwise, it is failed to build job.
To connect to the App Service from DevOps, we will need to first setup a service connection. Start by opening up DevOps, and select “Project Settings”.
In the Pipelines section, select “Service Connections” and hit the “Create service connection” button.
We will select “Azure Resource Manager” as the type, and hit next
Keep “Service Principle (automatic)” as the Authentication method.
Keep “Subscription” as the scope and make sure the correct one is selected. Then make sure to choose the same Resource Group that you created for the App Service above. We will also need to create and note a “Service Connection Name” that you will be using in the pipeline next. After you are finished, hit “Save” to create your service connection.
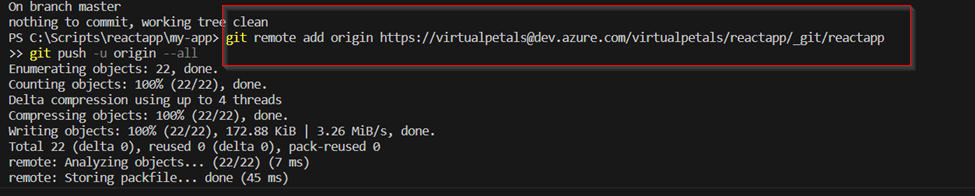
Click on repos to copy the Git credentials on a notepad.
Push from the local to remote repository using the below git commands on Git bash.
git init
git add .
git commit -m “
git commit -m “ new file ”
git remote add origin
git remote add origin <url to your Azure DevOps repo>
This brings a prompt, login into your Azure DevOps portal then this shows that the App has been push to the Azure repo.
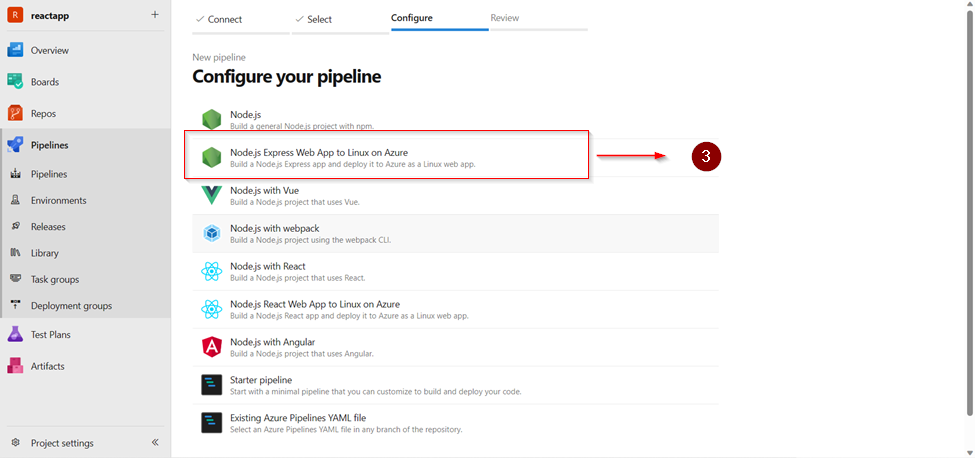
Step 4: Create a build pipeline; there are two methods.
Method 1 :
To connect the pipeline to the App service instance created.
Create pipeline.
Choose Azure repose (YAML)
Choosing Node.js Express Web App on Linux on Azure
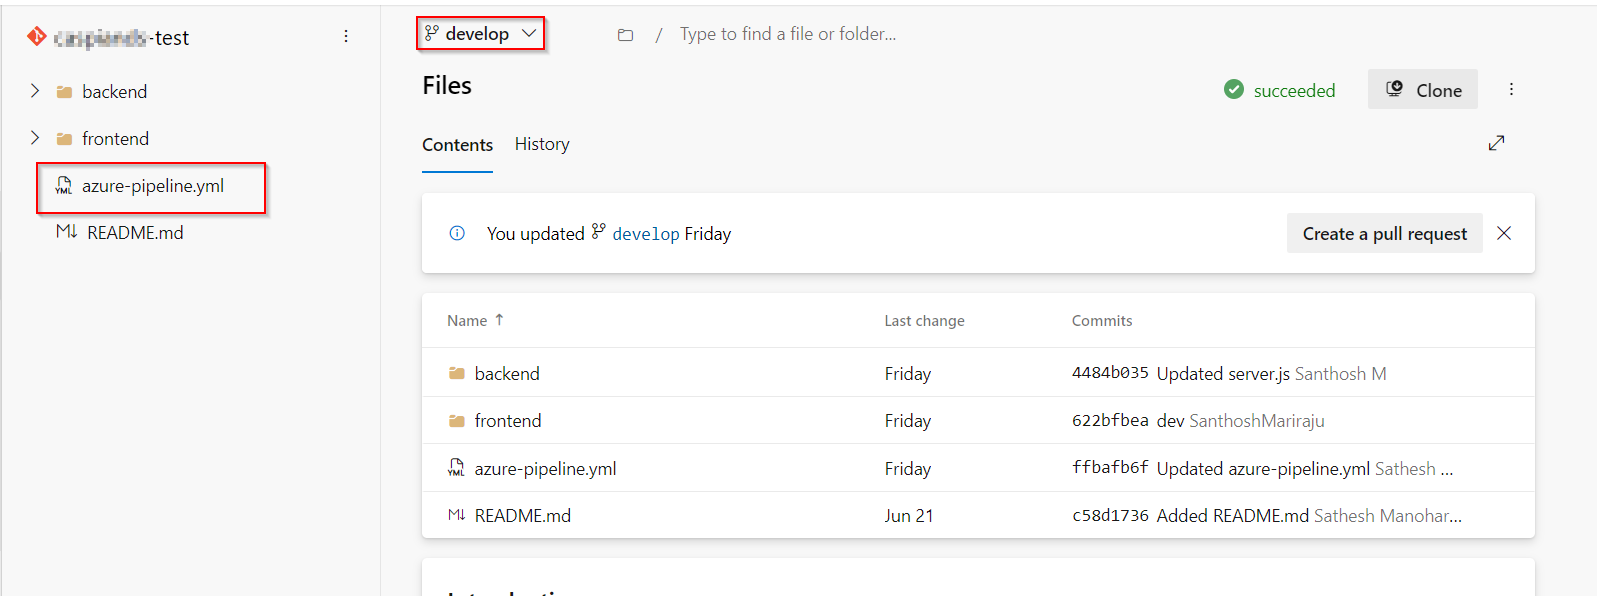
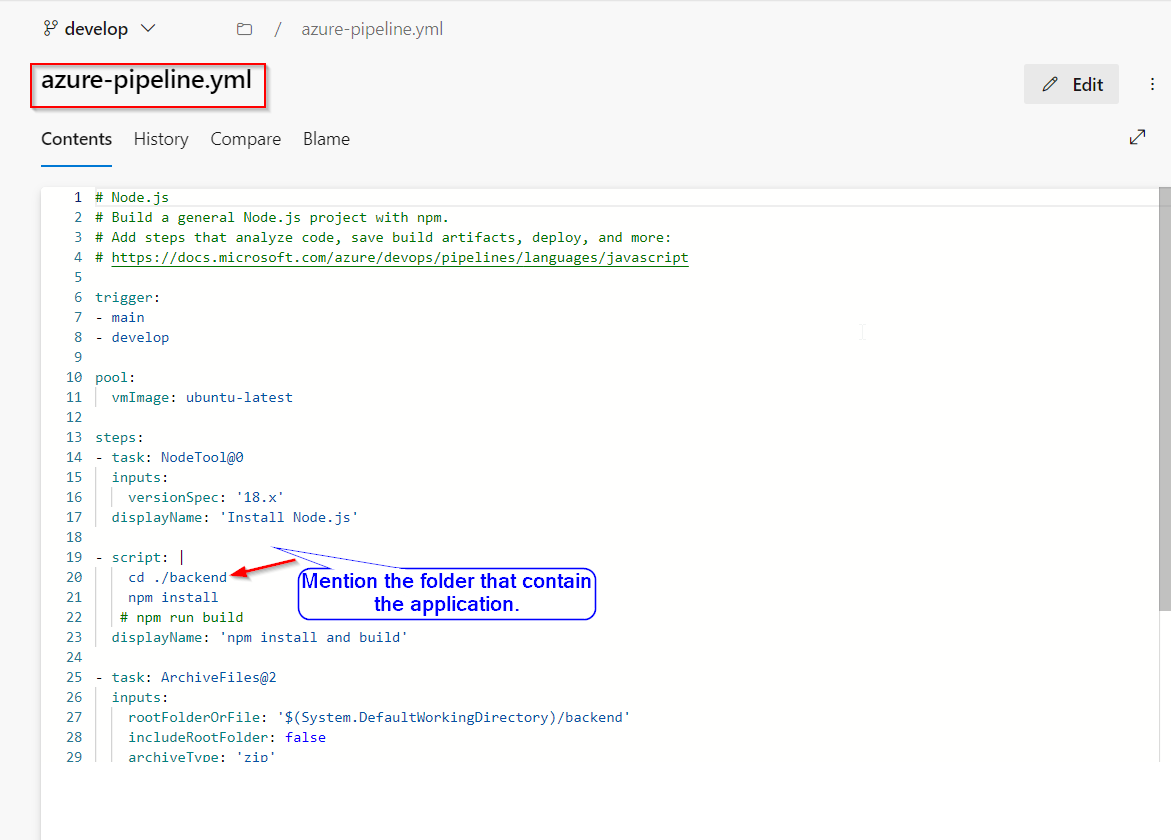
Using below YAML – azure-pipelines.yml code
# Node.js with React
# Build a Node.js project that uses React.
# Add steps that analyze code, save build artifacts, deploy, and more:
# https://docs.microsoft.com/azure/devops/pipelines/languages/javascript

trigger:
- master

pool:
  vmImage: ubuntu-latest

steps:
- task: NodeTool@0
  inputs:
    versionSpec: '18.x'
  displayName: 'Install Node.js'

- script: |
    npm install
    npm run build
  displayName: 'npm install and build'

- task: ArchiveFiles@2
  inputs:
    rootFolderOrFile: '$(System.DefaultWorkingDirectory)'
    includeRootFolder: false
    archiveType: 'zip'
    archiveFile: '$(Build.ArtifactStagingDirectory)/$(Build.BuildId).zip'
    replaceExistingArchive: true

- task: PublishBuildArtifacts@1
  inputs:
    PathtoPublish: '$(Build.ArtifactStagingDirectory)'
    ArtifactName: 'drop'
    publishLocation: 'Container'
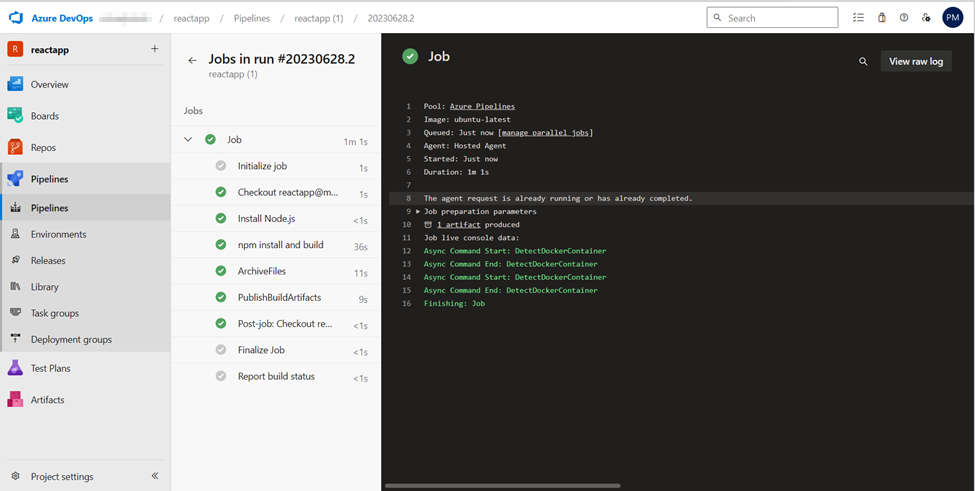
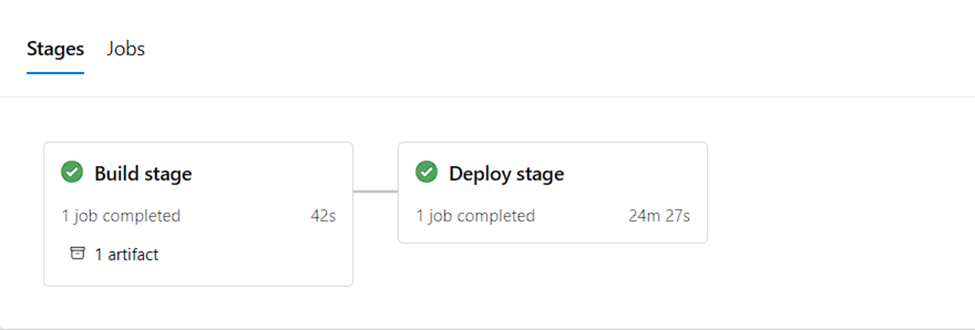
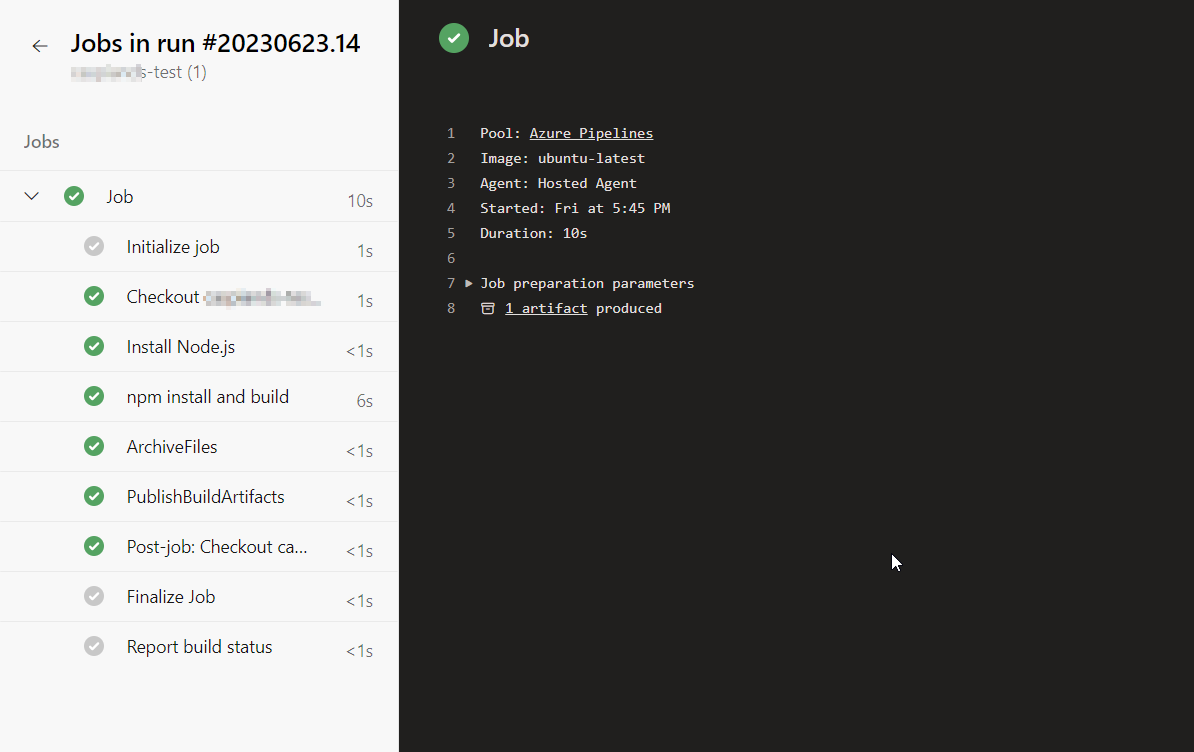
As you can see below, running this store my build to Azure Artifact where Azure Releases can use them.
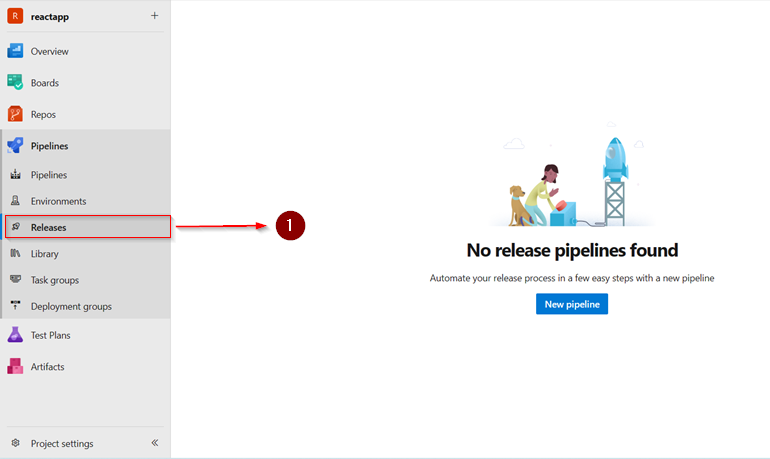
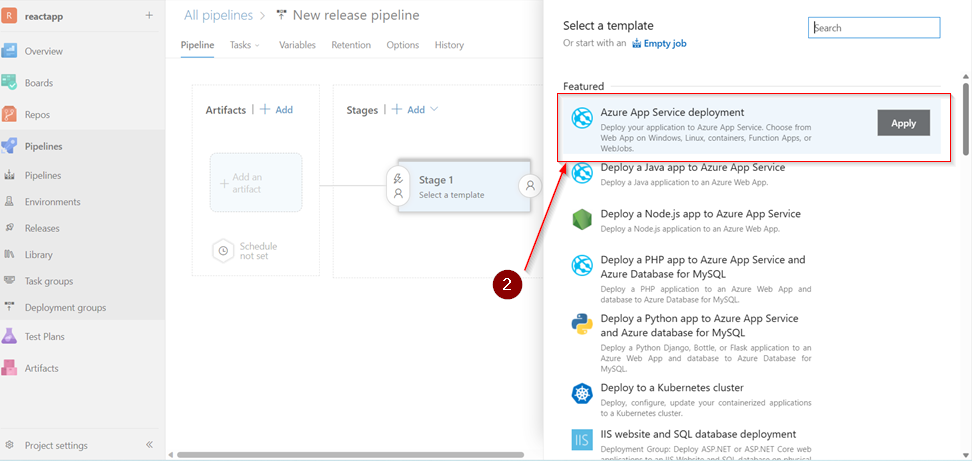
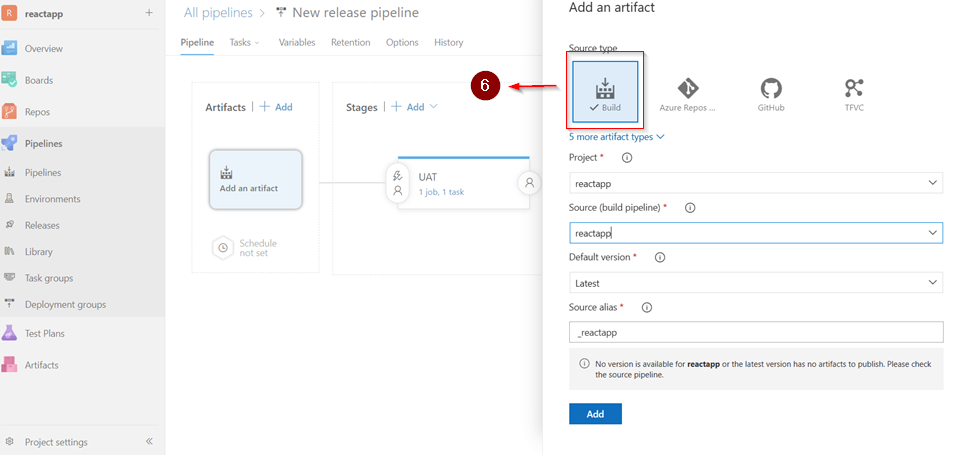
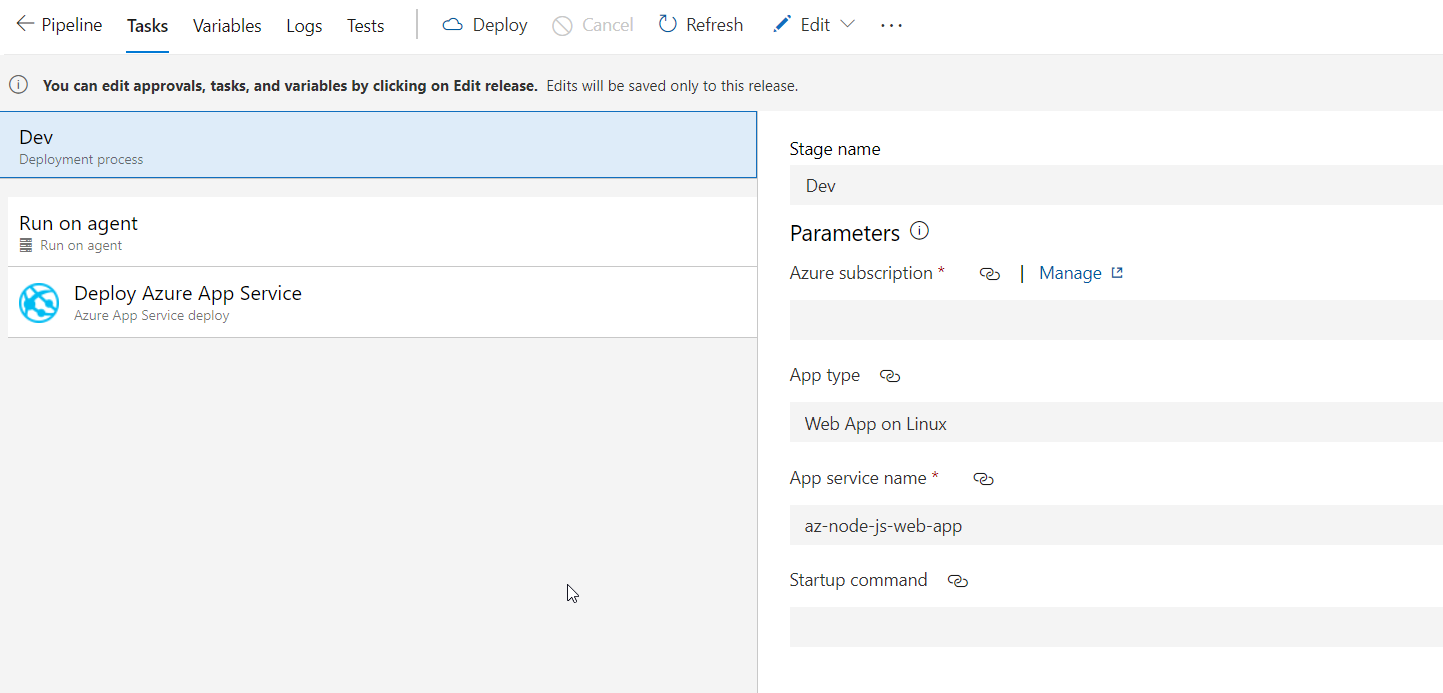
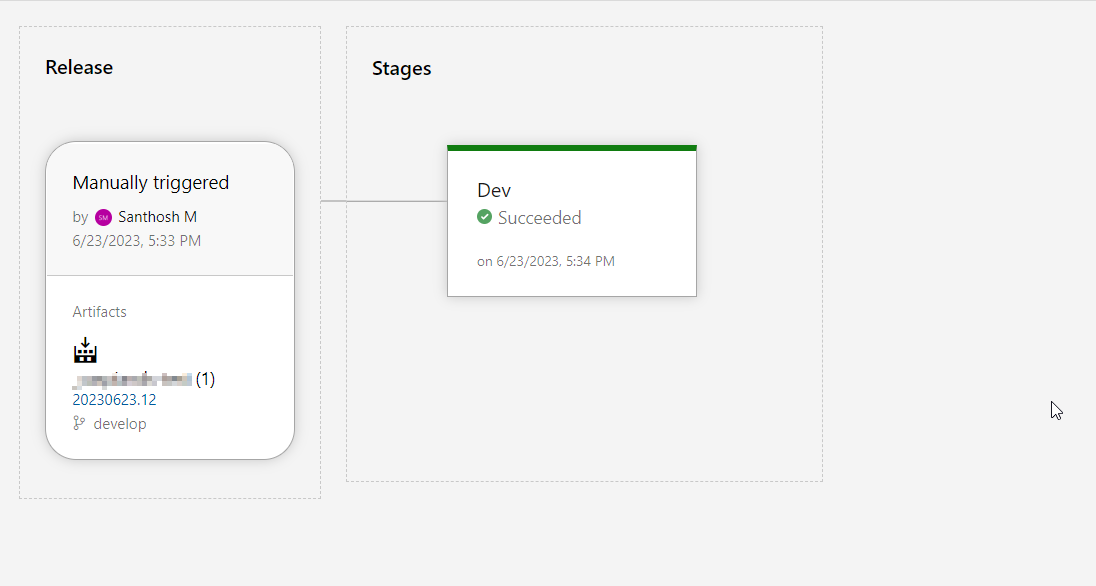
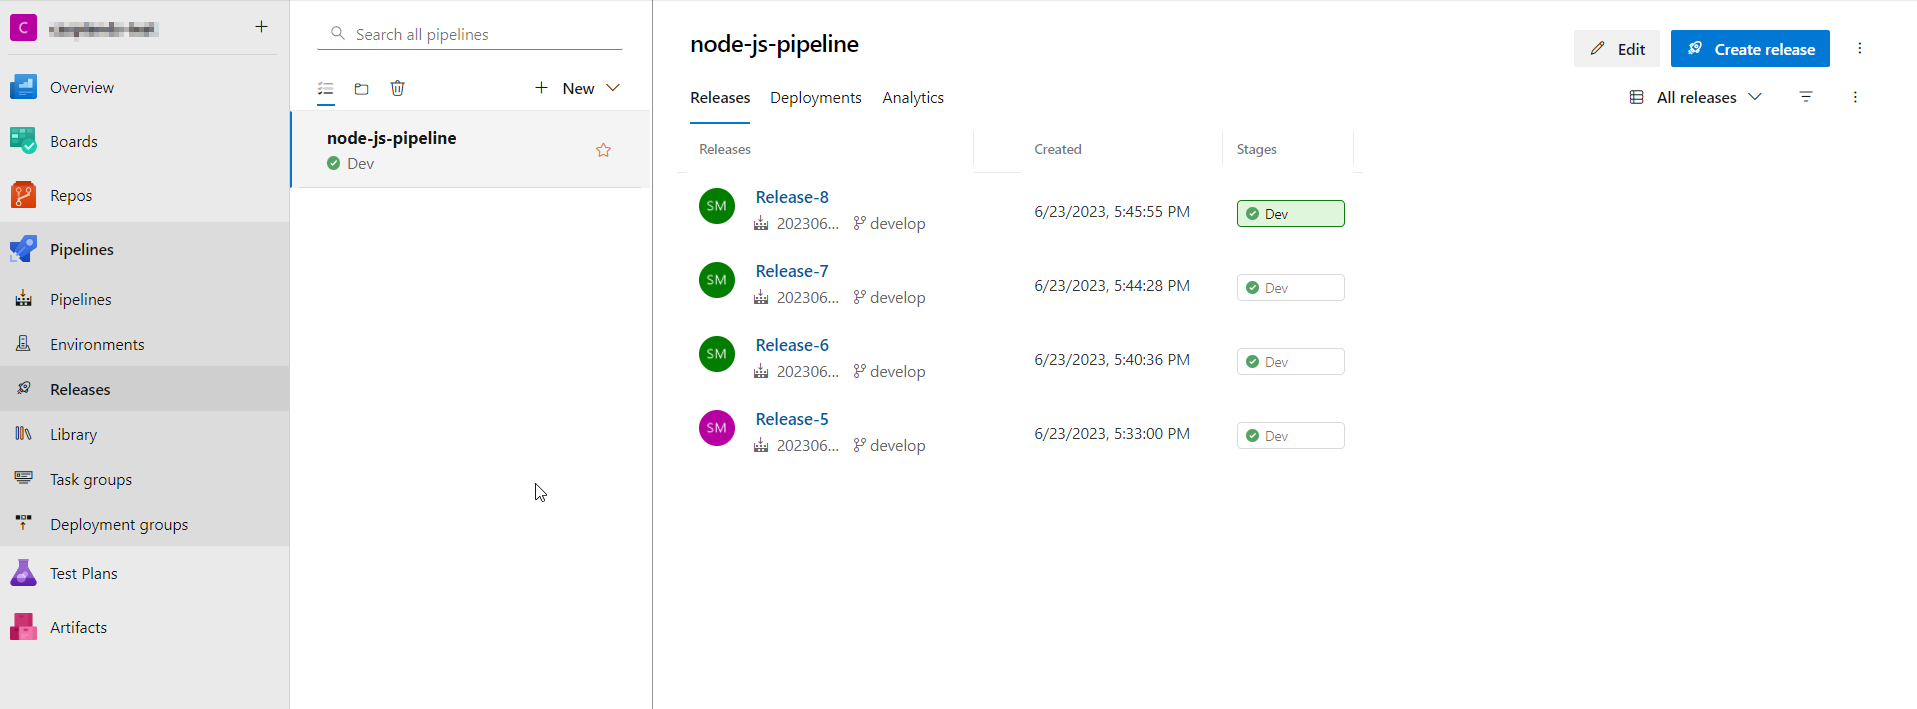
Step 5: Creating the release pipeline and Deploying to Azure
This is to push the code from the build pipeline from CI/CD to Azure Web App.
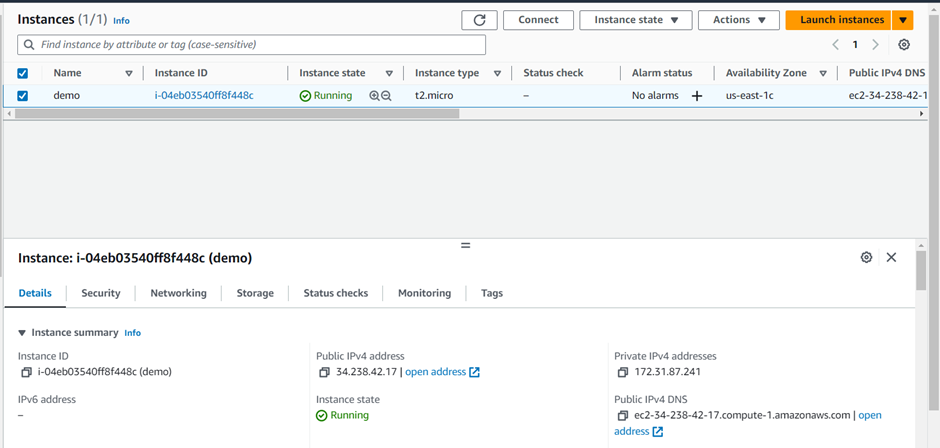
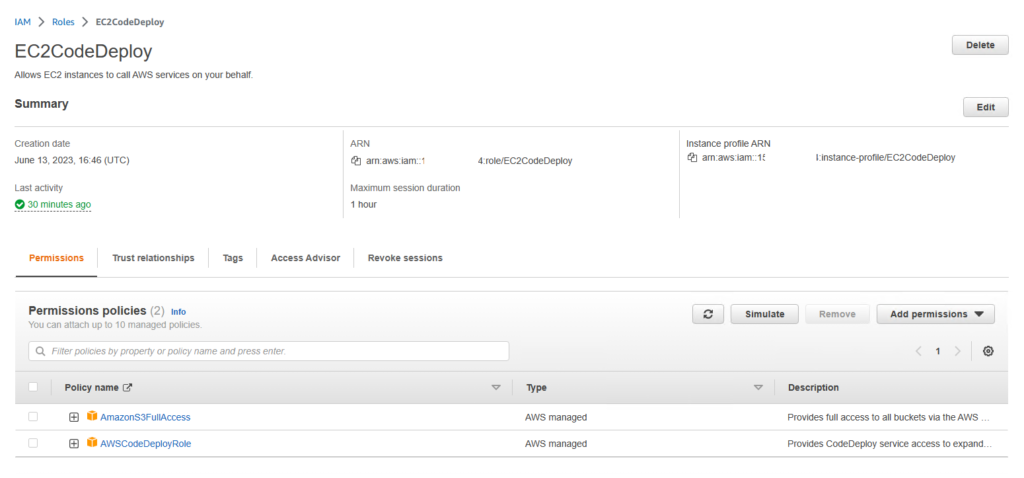
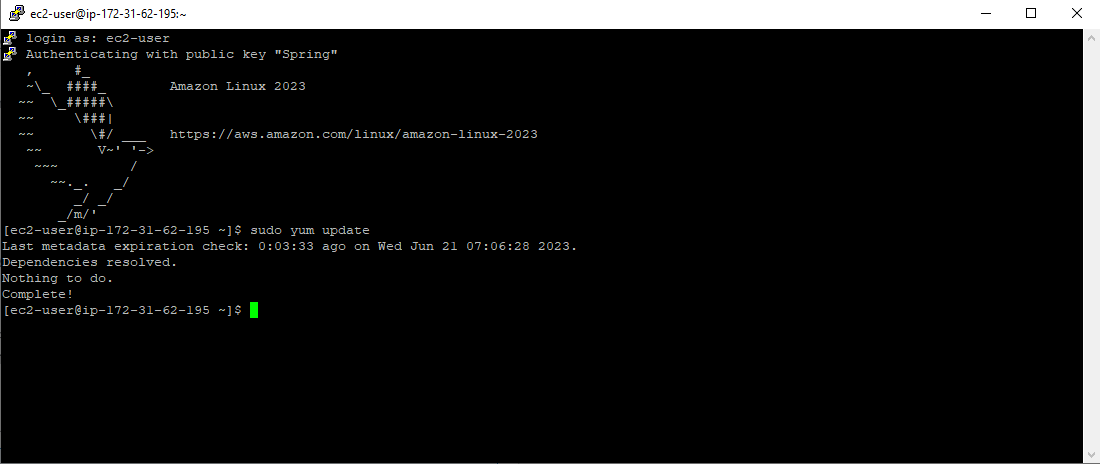
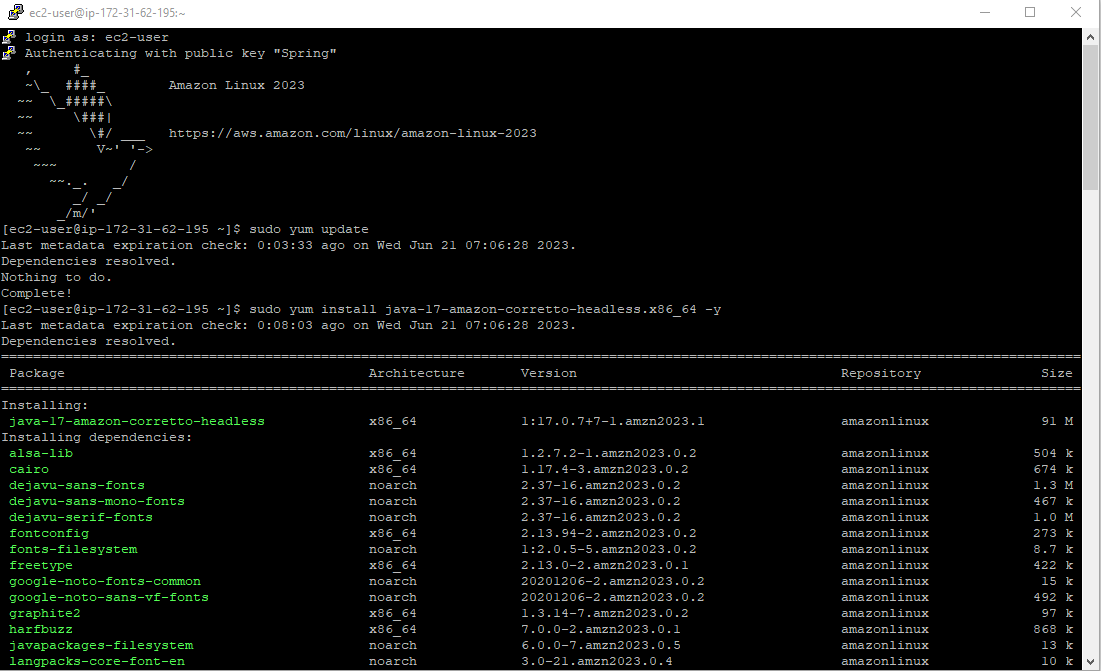
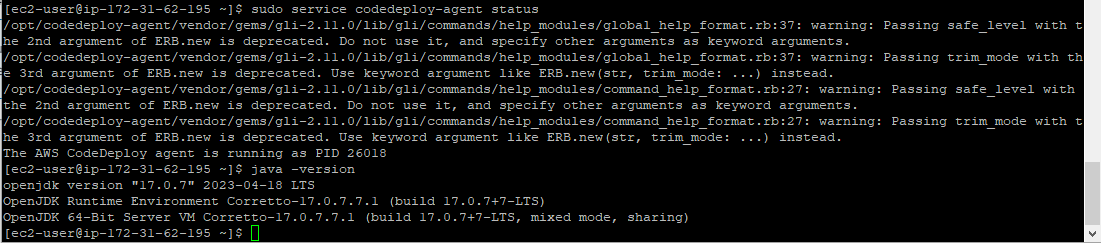
This article provides a step-by-step guide on preparing an AWS EC2 instance for running a Java Spring Boot application with CodeDeploy. The process includes executing the following commands in PowerShell:
Updating the EC2 instance with the latest packages using the command sudo yum update.
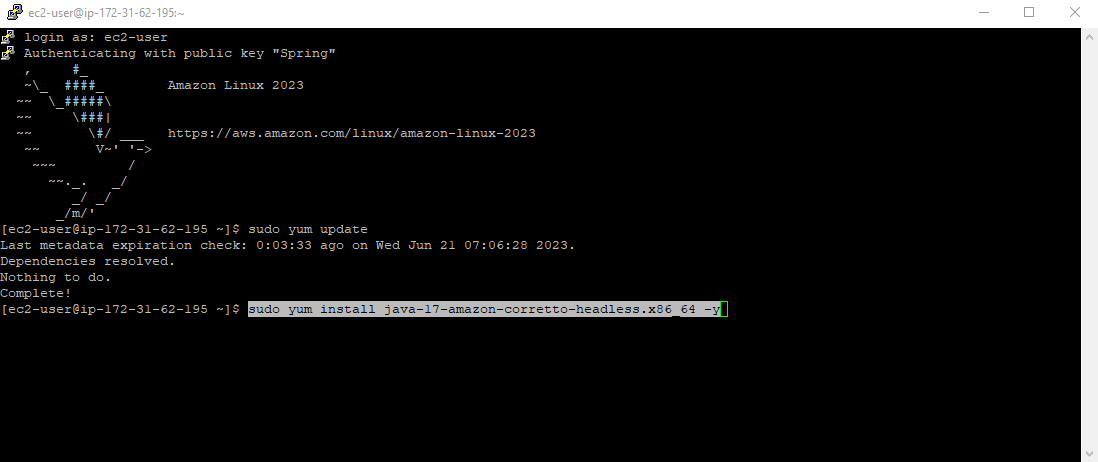
Installing the Amazon Corretto 17 JDK in headless mode for Java application support with sudo yum install java-17-amazon-corretto-headless.x86_64 -y.
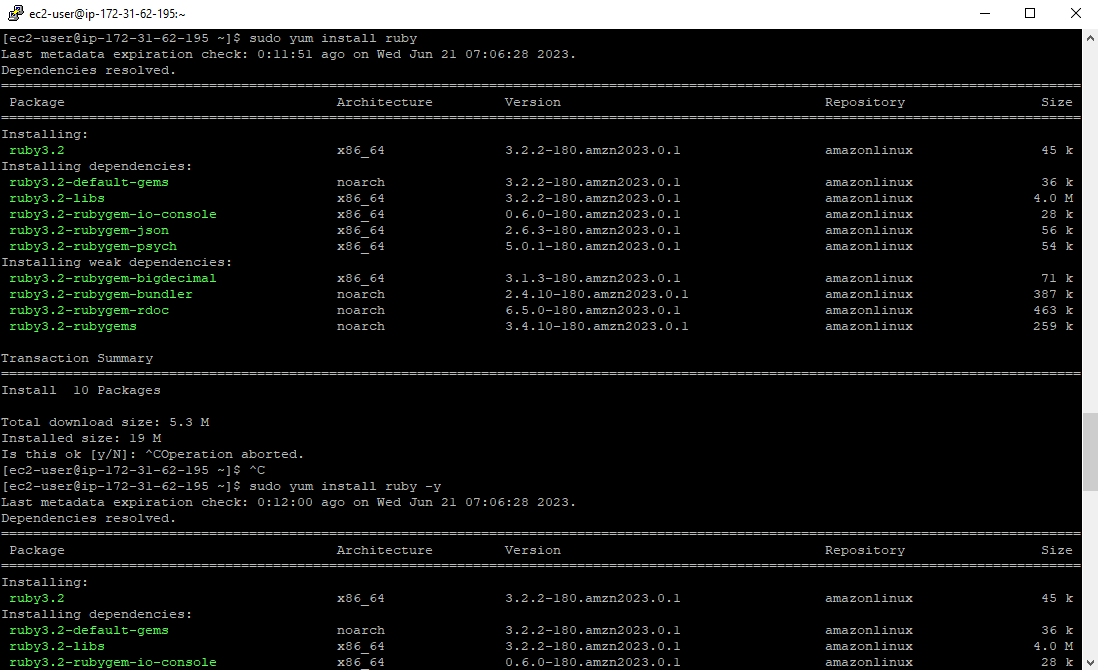
Installing Ruby as a prerequisite for CodeDeploy using the command sudo yum install ruby -y.
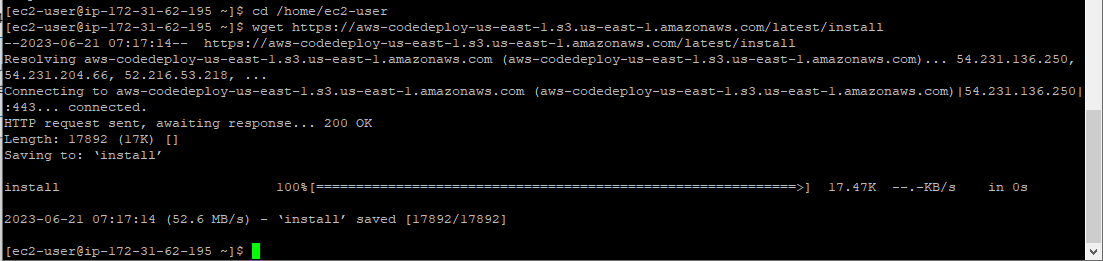
Navigating to the /home/ec2-user directory with cd /home/ec2-user.
Downloading the CodeDeploy agent installer script from the AWS S3 bucket using wget.
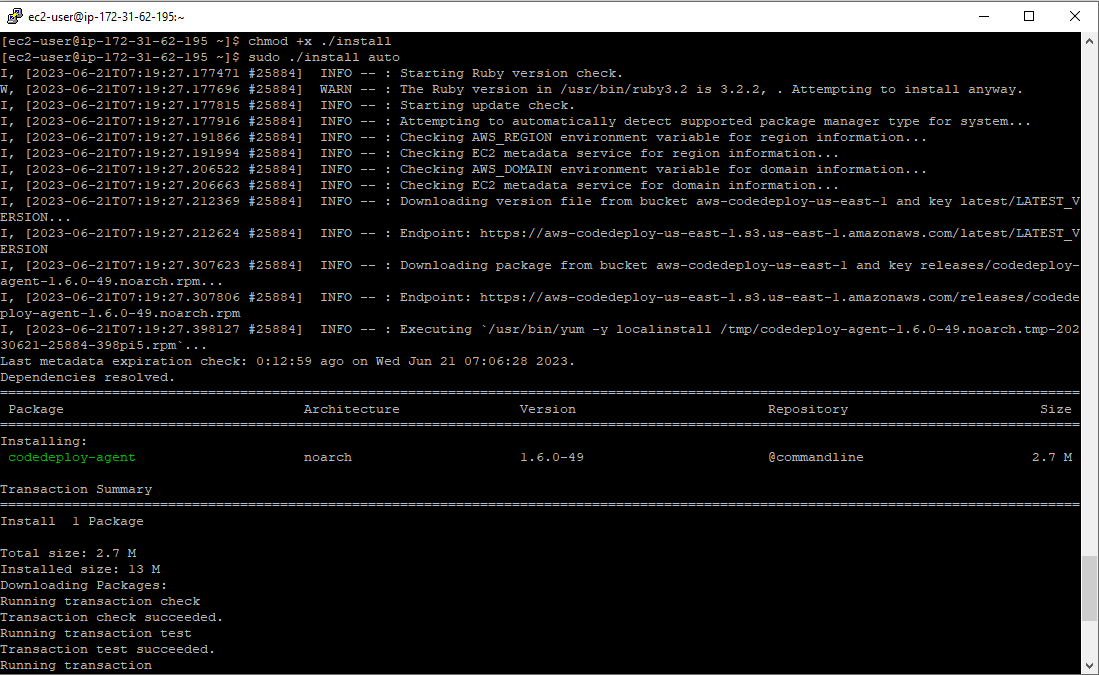
Granting executable permissions to the installer script with chmod +x ./install.
Running the CodeDeploy agent installer script in automatic mode with sudo ./install auto.
By following these instructions, you will set up your EC2 instance to be ready for deploying and managing Java Spring Boot applications using CodeDeploy.
Auto Pilot, upon reboot, keeps coming as a normal screen. Not entering into the autopilot screen.
Reason 1 – It could be Home Edition
Reason 2 – It could be Conditional Access Causing the issue like Compliant Devices or Unknown devices rule is blocking (intune company portal and extension pack should be excluded)
Reason 3 – Azure AD registered device should be deleted and should be imported again . as the old device causing the issue.
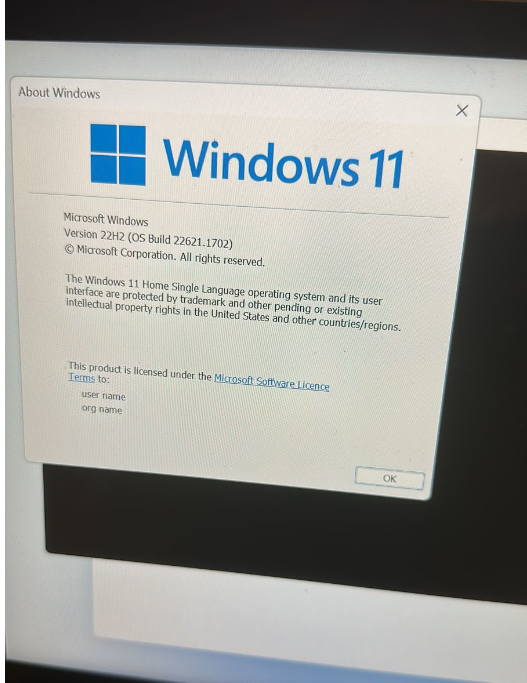
Type Win + R – Win Ver –
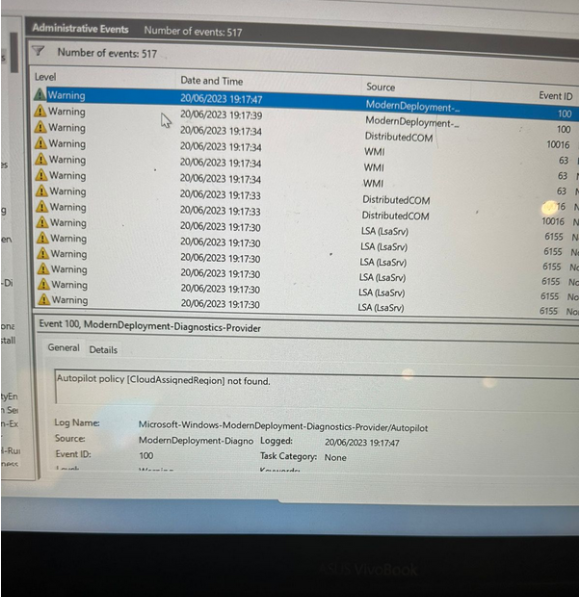
If it shows Windows 11 Home Single Language Operating System. Auto Pilot will never work until you convert this to Pro or EnterpriseAs Home Edition is not supported with Windows Auto Pilot.
For Home Edition, you will see an event viewer error as Event ID 100 – Autopilot Policy [CloudAssignedRegion] not found
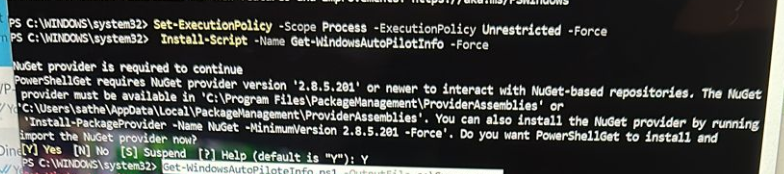
Set-Executionpolicy -scope process -Executionpolicy unrestricted -force
Install-script -name Get-WindowsAutoPilotinfo -force
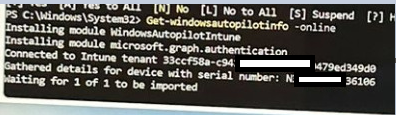
Convert to pro and simply run below to auto import the serial number.